u-he are makers of award-winning software synthesisers and effects including Diva, Repro-1, Zebra2, Hive, Bazille, Presswerk and Satin.
Visit U-he
Technique » Synth Secrets »
Programming A Punchy Piano With Additive Synthesis Using SynthMaster 2
This channel is sponsored by

Additive synthesis isn’t as well-known as subtractive or FM but it’s perfect for harmonically rich sounds. In this tutorial, we will use KV331 Audio’s SynthMaster 2 to show you how it works and how to make a house piano sound.
Synthesizing solid pianos can be a daunting task. Subtractive synthesis isn’t up to the task. FM is pretty good but you run the risk of sounding like an ‘80s ballad. Most piano patches are in fact sampled. From the famous M1 piano on up to world-class grands, sampling will give you the most bang for your buck.
That’s all well and good but this is Synth Secrets, not Sample Secrets. There has to be a way to get something punchy and unique without resorting to sample packs. There is, and it’s called additive synthesis.
In this tutorial, we’ll be using the additive oscillator in KV331 Audio’s SynthMaster 2 to put together a ravey piano that will cut through the mix.
Here’s what we’re going for:
N.B: We recommend following along with headphones or studio monitors as some of these results can be subtle. As ever, click any image to see a larger version.
What Is Additive Synthesis?
Before we jump into the tutorial, it may be helpful to define what we mean by additive synthesis. Where subtractive synthesis starts with a harmonically rich oscillator and then takes frequencies and volume away with filters and envelopes, additive synthesis starts by building up a number of frequency partials, usually sine waves.
The more of these partials there are, the more full and rich the sound. At its most basic, this is how the stops on an organ work. At a more complex level, with enough partials you can create essentially any sound. To hear this in action, check out Native Instruments’ Razor.
An Overview of SynthMaster 2’s Additive Oscillator

How does SynthMaster 2 handle additive? Let’s look at that next. (We covered the basics of SynthMaster 2 in a previous tutorial so be sure and check that out before proceeding if you’re new to the instrument.)
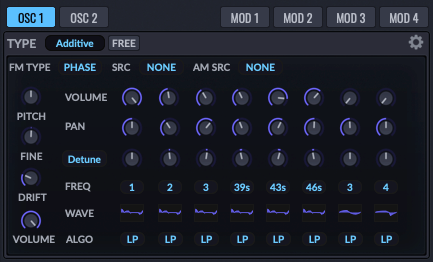
SynthMaster 2’s Additive Oscillator is essentially a bank of eight independent oscillators that can be combined to build up harmonically complex sounds. Each basic oscillator has its own volume, pan, detune and frequency. This latter parameter allows you to create chord-like clusters of sound. You’re not limited to sine waves, either. You can choose from among a large number of waveforms as well as synthesis algorithms. Finally, there are global controls for pitch, fine-tune, pitch drift and volume.
Step 1: Setup
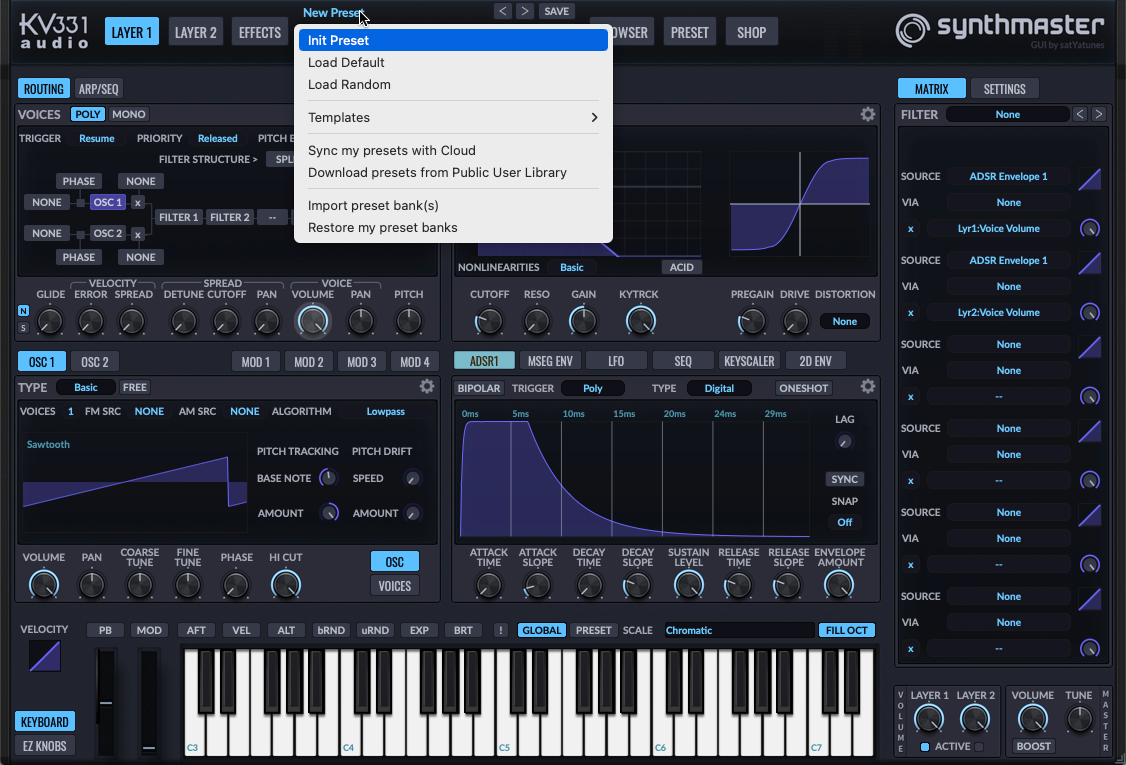
Start by creating a new MIDI track in your DAW of choice. We’re using Ableton Live but the same techniques apply to any DAW. Open KV331 Audio SynthMaster 2 on the MIDI track, initialize the patch by clicking in the preset window and choosing Init Preset, and play in some chords. We used the MIDI file ‘FF_RUKH_synth_loop_classic_Amin’ from Splice.
Here’s what that sounds like:
Step 2: Oscillator 1
Let’s tackle the additive oscillator next. We’ll set that up as Oscillator 1 and reserve Oscillator 2 for something else.
In Osc 1, set the Type to Additive. Next, we’re going to use six of the eight oscillators to build up a piano sound. In the Wave column, change each of the oscillators from a basic sine waveform to a single-cycle piano one. Follow the patch and choose Single Cycle Waveforms > OtherSampled > Fr4 – RMI Piano. This is not a true piano—it’s an electric piano—but it’s close enough for our purposes.
Let’s set the frequency next. We can choose between integers (oscillators above the basic frequency) or semitones. Set up the six oscillators like this: 1, 2, 3, 39s (semitones), 43s, 46s. This gives us the original pitch at 1, one and two octaves up, a third, a seventh, and a tenth, the last for a little bit of edge.
Next, adjust the volume of each oscillator until you get a harmonically pleasing mix. You can also adjust the panning and detune amount of each. Finally, in the global section, bring up the Drift knob a little to add some slight pitch variation to the notes for a more natural feel.
The sound so far:

Step 3: Oscillator 2
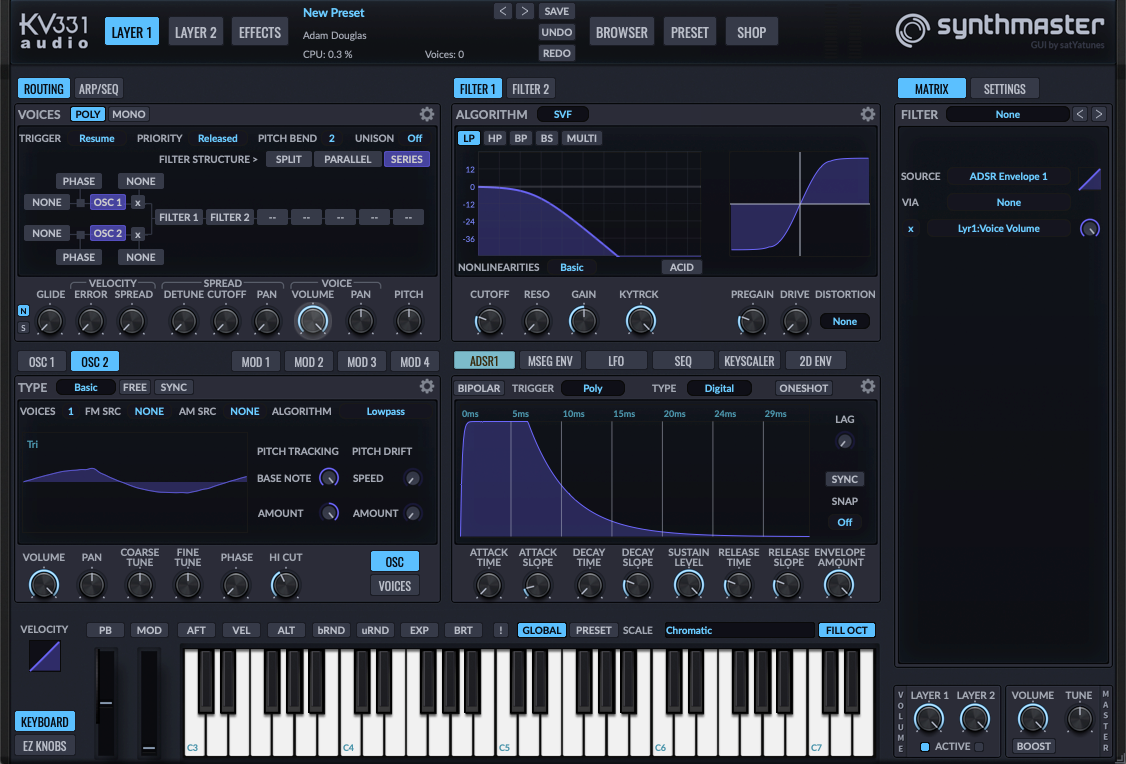
Our sound has lots of highs but not much body. Let’s address this by bringing in Oscillator 2.
Turn on Oscillator 2 in the signal flow diagram at the top. Next, in Osc 2, stay in the Basic oscillator type and change the sine wave to a triangle wave. This will give us some low-end weight and add some additional harmonics, although not too many. We lowered the Hi Cut knob to roll off some of the highs as well.
Here’s our sound now with a triangle wave:
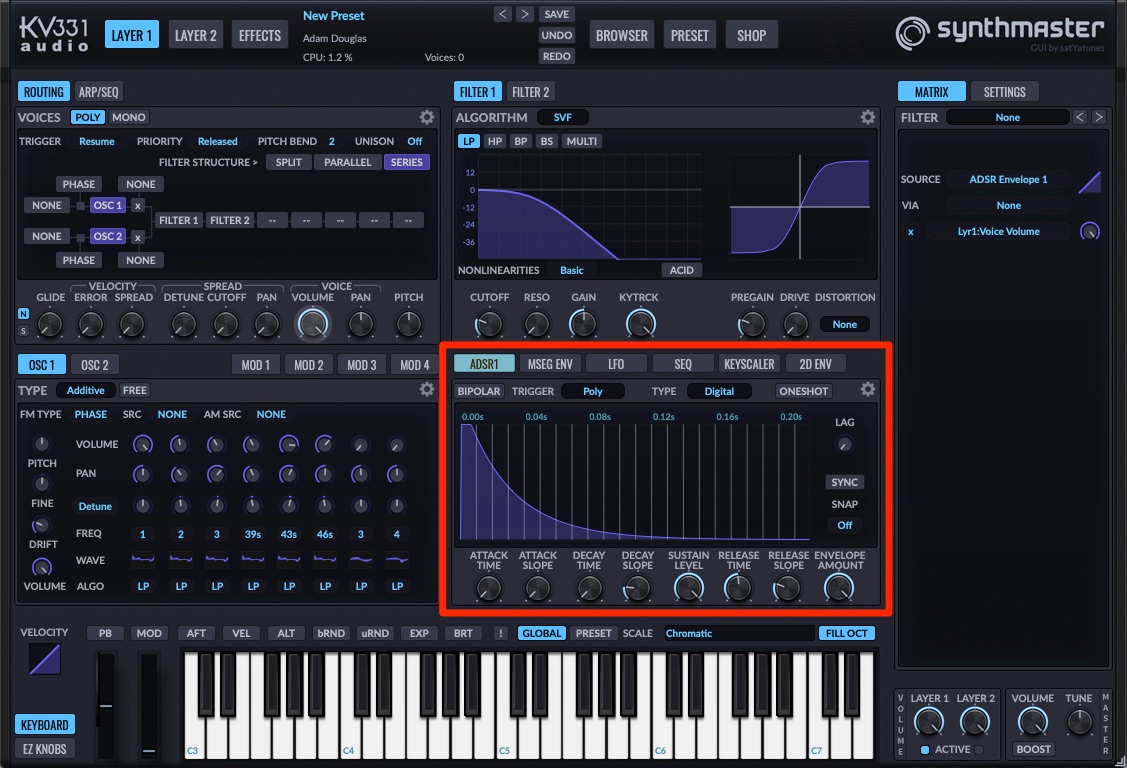
Step 4: ADSR Envelope
So far so good. It’s time to get the envelope involved and shape the sound into something a little more piano-like.
First, make sure the envelope is set to ADSR. It should be there automatically. It needs the shortest Attack possible so there’s a strong transient on it.
We don’t need any Decay so turn that down all the way. Also, make sure that Sustain is all the way up. Finally, adjust the Release Time and Release Slope until you get something that sounds good. We’ve gone for a 50% Release Time as it works rhythmically with the rest of the track.
With ADSR engaged:
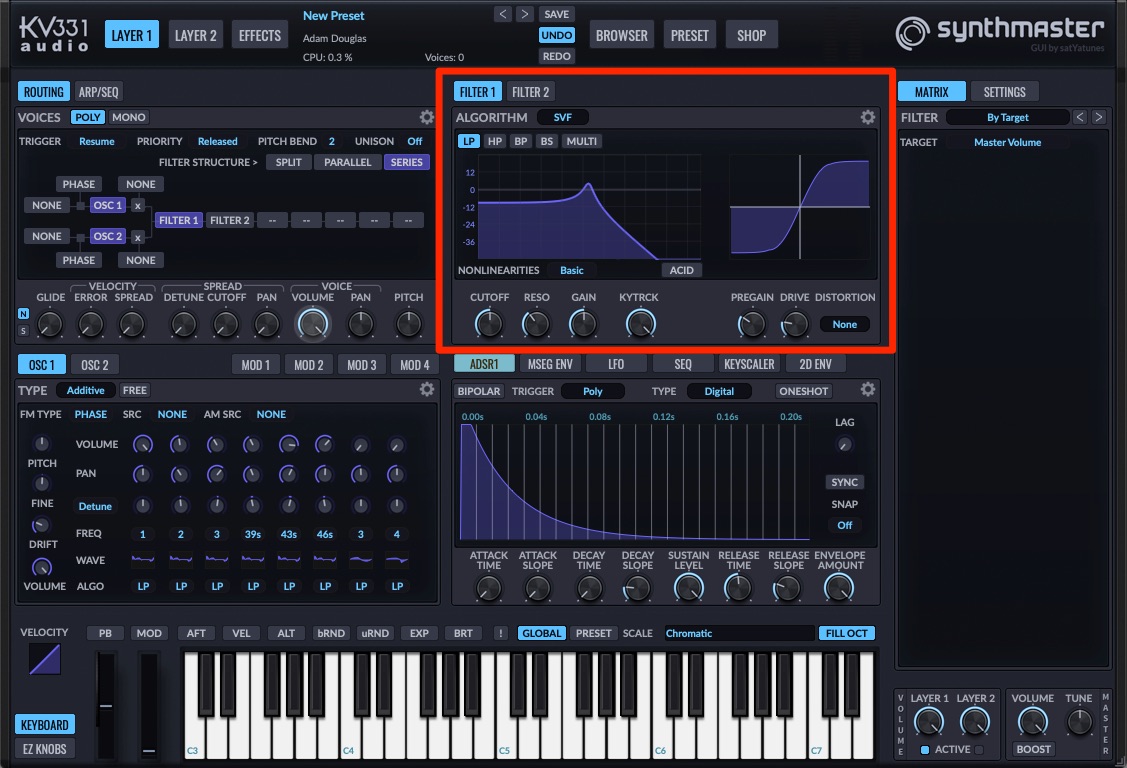
Step 5: Filter
Let’s do some shaping with the filter. First, select the Oberheim SEM-style SVF (State Variable Filter) from the Algorithm menu and make sure it’s on LP, or lowpass. Reduce the Cutoff to halfway to tame the highs.
Increase Resonance to about 10 o’clock on the knob. This will introduce a frequency bump and help the piano sound cut through the mix. Finally, we can use the Drive circuit to add some oomph to the sound. Bring up Pregain to 10 o’clock and turn up Drive to about 9 o’clock. That’s saturated the signal and made it a little meatier.
Meaty filter:
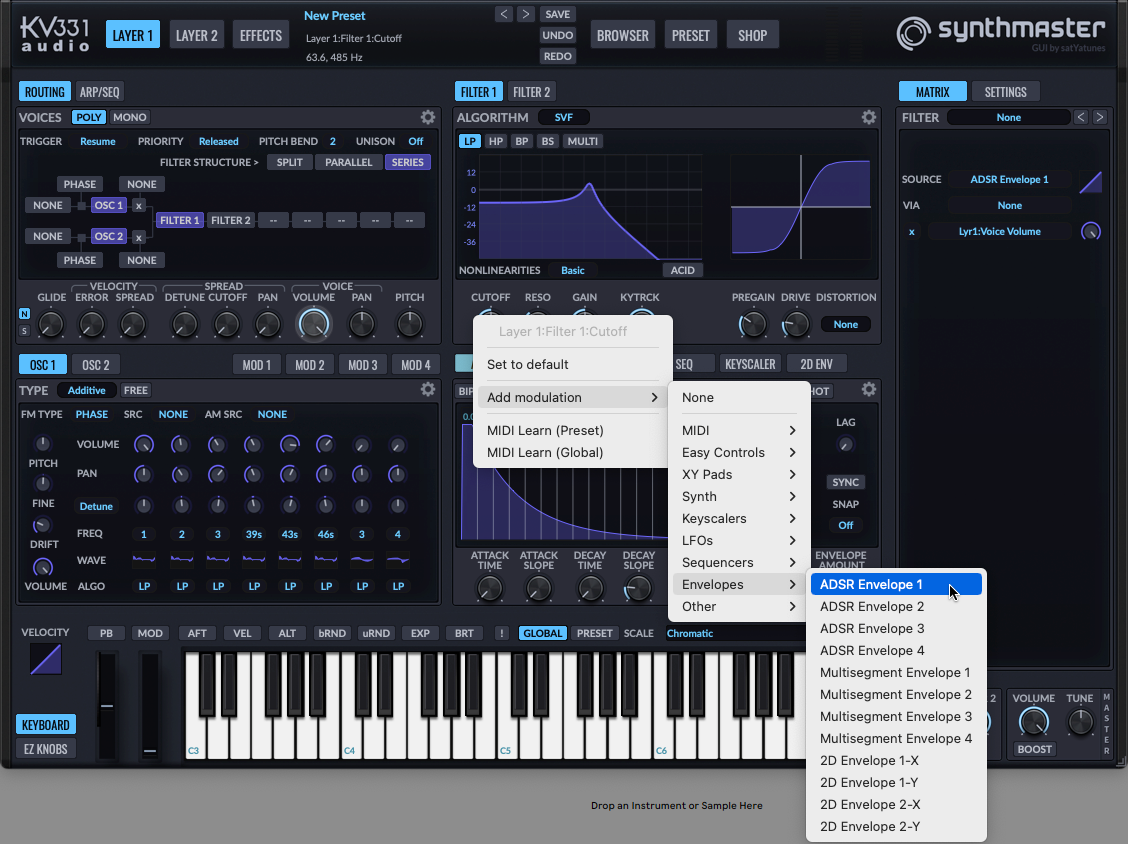
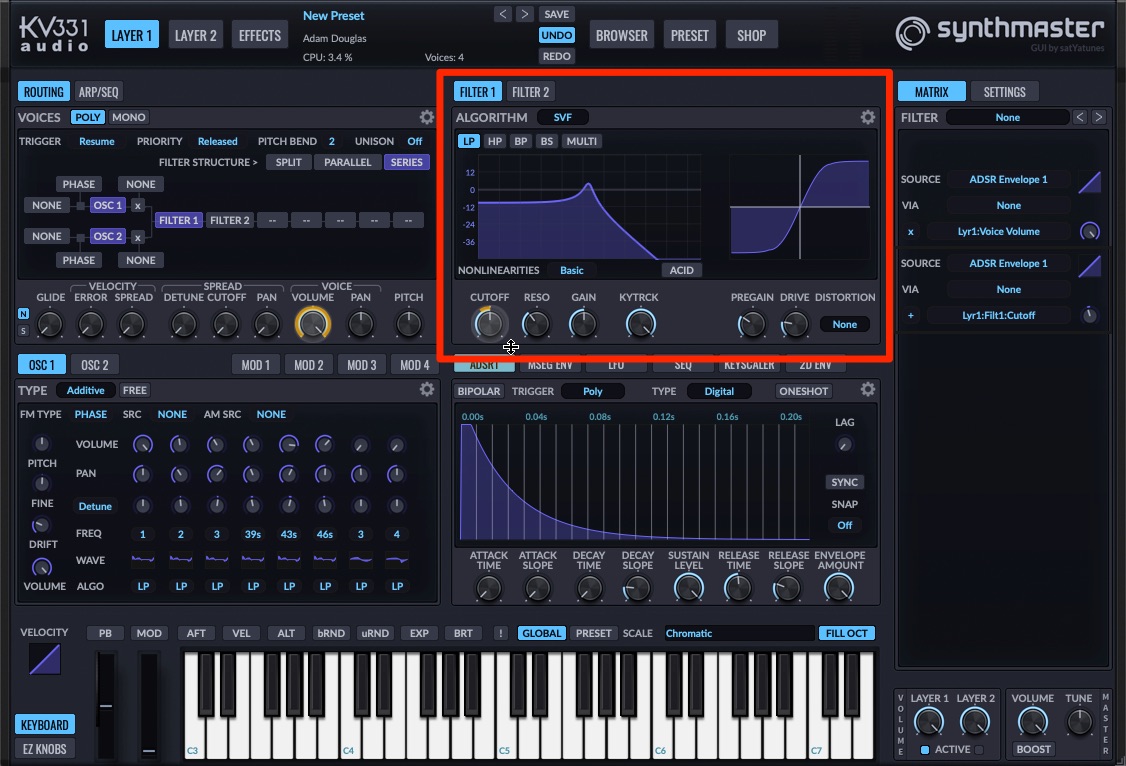
Step 6: Filter Envelope
Although not strictly necessary, modulating the filter with the ADSR to duck with every note can give the sound some movement and added realism.
Right-click on the Cutoff knob and choose Add modulation > Envelopes > ADSR Envelope 1. Drag down on the mouse to bring the modulation ring below the cutoff point just a little. Now the cutoff should duck with every note.
With filter modulation:
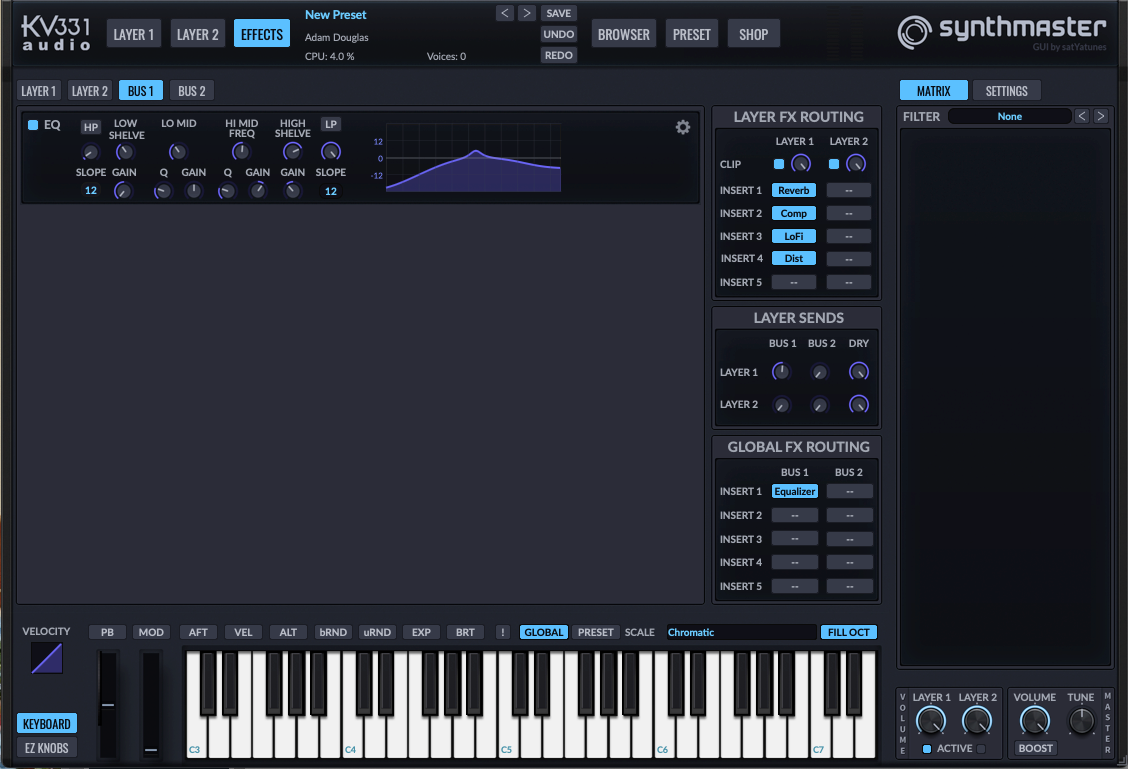
Step 7: Layer Effects
SynthMaster 2 has a number of built-in effects that we can use to add the finishing touches to our sound. Click on the Effects button at the top and then add the following effects modules in this order to the Layer 1 column in the Layer FX Routing section: Reverb, Compressor, Lo-Fi and Distortion. Do this by right-clicking in open spaces. Be sure and bring up the Bus 1 Layer Send as well. We’ve gone for halfway for a good, solid blend with the Dry signal.
First, we add a decent amount of reverb. Don’t worry if it’s swamping the sound, as that’s what the compressor is for. Compress the reverb until you get a nice, squashed reverb bloom around the main sound.
We can give our piano sound an ’80s sampled vibe with the Lo-Fi effect module, next. Lowering the bit rate to around 6 sounds good. You can bring down the Cutoff a little too to simulate a low sample rate. Adjust the mix amount to taste. Finally, a little distortion roughs it all up. We’ve gone for a subtle effect with a low mix amount and made sure to cut the lows from the Pre and Post EQ so it doesn’t decimate our lower triangle wave frequencies.
With layer effects:

Step 8: Bus Equalizer
For the final step, let’s shape the tone with an equalizer into something more piano appropriate. First, in the Global FX Routing section, add an Equalizer to Insert 1 by right-clicking on an empty space. We want to create a frequency curve like a mountain, with a 6dB boost at around 7kHz. We can roll off the lows and highs to taste.
Top Tip: Boost the top end for a brighter, M1-style piano.
With EQ shaping:
Here’s the finished sound with additional loops from Splice packs Terrace House and Piano House:
FOLLOW ATTACK MAGAZINE
Synth Secrets is sponsored by
u-he are makers of award-winning software synthesisers and effects including Diva, Repro-1, Zebra2, Hive, Bazille, Presswerk and Satin.
Download the demos and try them for yourself at www.u-he.com