
This channel is sponsored by
 Roland Cloud is your creative hub for Roland hardware and software. Access legendary recreations of Roland Classics, find new sounds for your favorite products, and download updates and companion apps to make music fast and easy. Visit Roland Cloud
We use KV331 Audio’s ambitiously named SynthMaster 2 to create an unorthodox acid bassline complete with effects – and all within the single plugin. The SynthMaster 2 is not a new plugin but evolved over many years into a huge jack of all trades capable of handling analogue emulation, wave scanning and vector synthesis, phase modulation, additive synthesis, sample playback and FM. We use it to run an acid techno bassline.
Acid: it’s the sound that won’t quit. And why should it? Born from Roland’s TB-303 bassline synth and used and abused by countless house and techno producers over the decades, it has a distinctive, hair-raising power that works a treat on the dancefloor. However, don’t feel like you have to confine yourself to the TB or a TB emulation for acid techno. Just as there are many ways to skin a cat, there are many ways to brew up an acid bassline. In this Synth Secrets, we employ KV331 Audio’s SynthMaster 2 plugin to craft an acid techno bassline, using it for everything from the basic waves through effects and even sequencing.
Here’s what we’re going for:
N.B: We recommend following along with headphones or studio monitors as some of these results can be subtle. As ever, click any image to see a larger version.
A Quick Overview of KV331 Audio SynthMaster 2
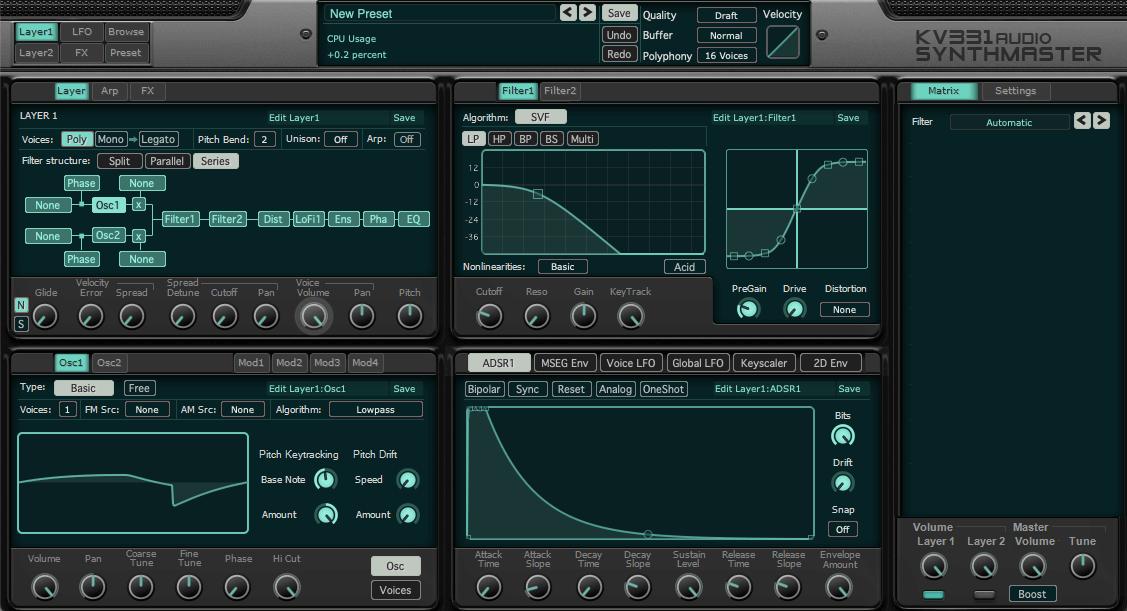
SynthMaster 2 is a modern, all-in-one synth plugin with a number of different kinds of oscillators, filter types, envelopes, LFOs, effects, a programmable arpeggiator, and more. It’s rather deep so we don’t have time to go into everything here but while it may look complex, the layout is fairly straightforward. There’s even a handy routing guide with clickable modules to show you the signal path.
We’ll be making an acid line today so we’ll be keeping things simple with a single oscillator, filter, ADSR envelope, and some effects, plus the arpeggiator to sequence it. Let’s look at each of these sections in turn. Note that SynthMaster 2 has two separate layers. We’ll only be using one.
The oscillator section features multiple oscillator types, from basic waveforms to wavetables to more esoteric things like additive synthesis. Click on the Type button to select the one you want. Specific parameters change depending on the type selected.
SynthMaster 2 has two multimode filters which can be run in serial or parallel. We’ll be using only one filter today. It has multiple algorithms based on classic filter circuits from famous machines as well as the usual selections of lowpass, highpass, bandpass, and more.
The modulation section contains a number of envelope and LFO types. We’ll be using the classic ADSR envelope for this but be aware that there is also a multi-stage envelope for more complex synthesis.
In terms of effects, there are Layer Effects and top-level Bus Effects. These include things like distortion (which we’ll be abusing in this tutorial) plus modulation like chorus and phaser, as well as delay and reverb.
Finally, there’s the arpeggiator. This can act as a classic arpeggiator or as a step sequencer, complete with slides and holds.
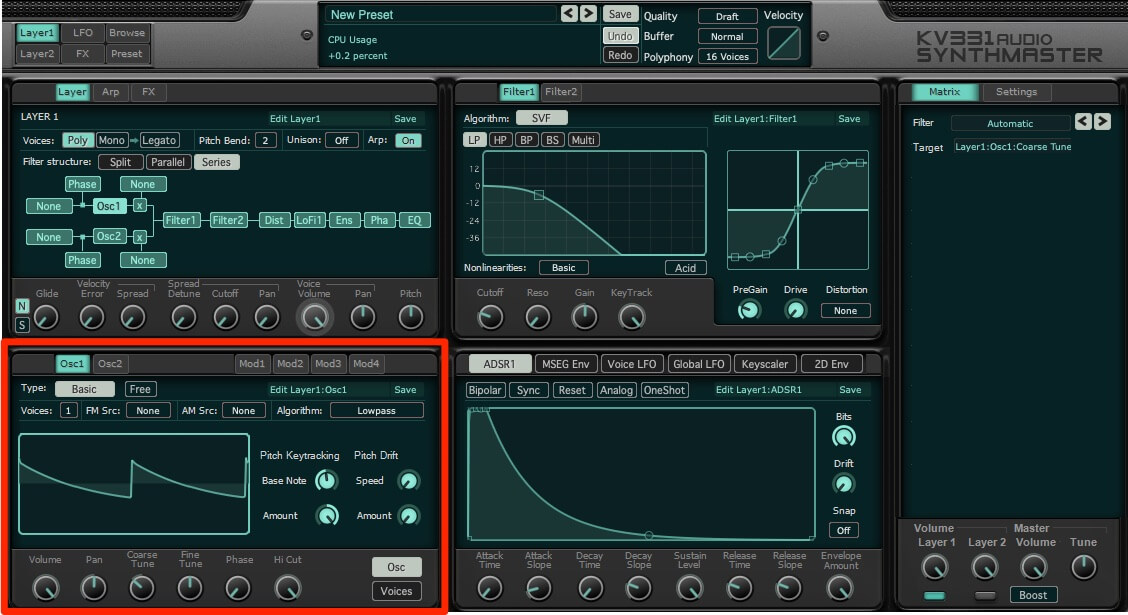
Step 1: Oscillator
Start by placing SynthMaster 2 on a new MIDI track. Initialize the patch and draw in a single long note. We’ll be doing all the sequencing from within the plugin with the arpeggiator but we need this note for a trigger.
In the Osc1 section, make sure it’s set to Basic (it should already be). Hover your cursor over the waveform and choose an appropriate single-cycle waveform from the extensive list of included samples. While a TB-303 sample seems the obvious choice, we ended up going with “Fr4 – Buchla Modular 1.” The sawtooth sample really takes well to distortion. Click the Free button so the sample isn’t retriggered with every note. This makes it feel more natural. We’ve also detuned the oscillator with the Course Tuning knob to help it fit in the song.
The sound so far:
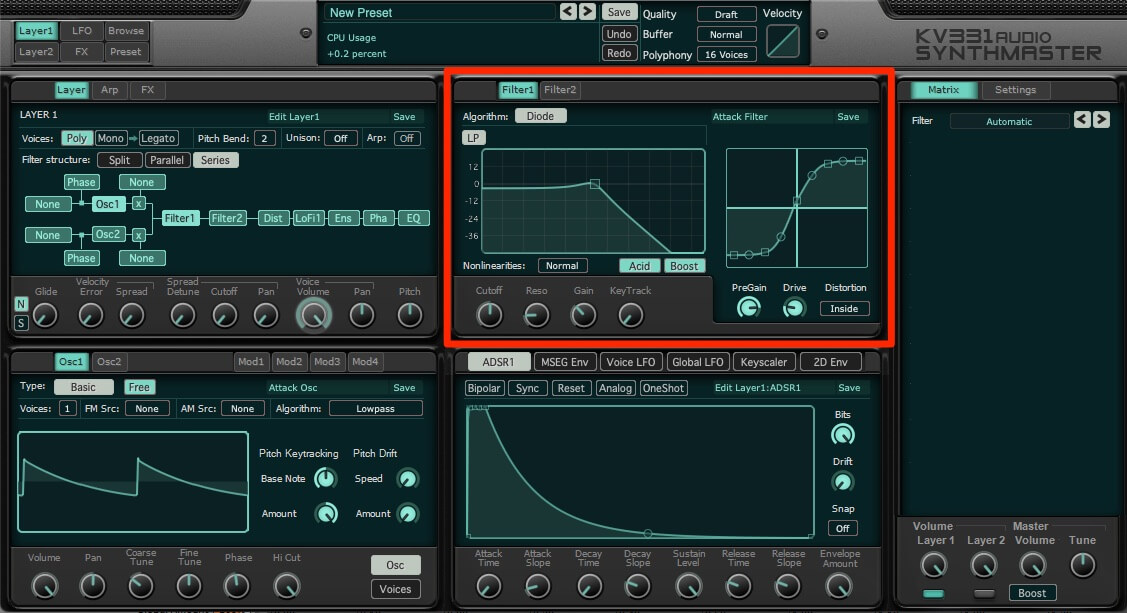
Step 2: Filter
The filter plays a huge part in creating a convincing acid line. Luckily, SynthMaster 2 has an emulation of the diode ladder filter, the source of the TB-303’s distinctive squelch. First, turn on Filter 1 in the Layer 1 diagram. Next, set the Algorithm to Diode, turn down the Cutoff to halfway, and add a little bit of Resonance. Nonlinearities are present in analog filters. Set this to Normal for a more authentic response. Also, hit the Acid and Boost buttons. Acid couples the resonance to the cutoff, increasing the squelch as the cutoff opens in much the same way that the original hardware does. Boost makes sure that there’s no loss in low frequencies when resonance increases.
Finally, let’s use the in-filter distortion to make things extra gnarly. Increase the PreGain to about 75% to push the signal hot into the filter, give it a little Drive, and set the Distortion type to Inside Filter. Filthy.
It’s getting hot in here:
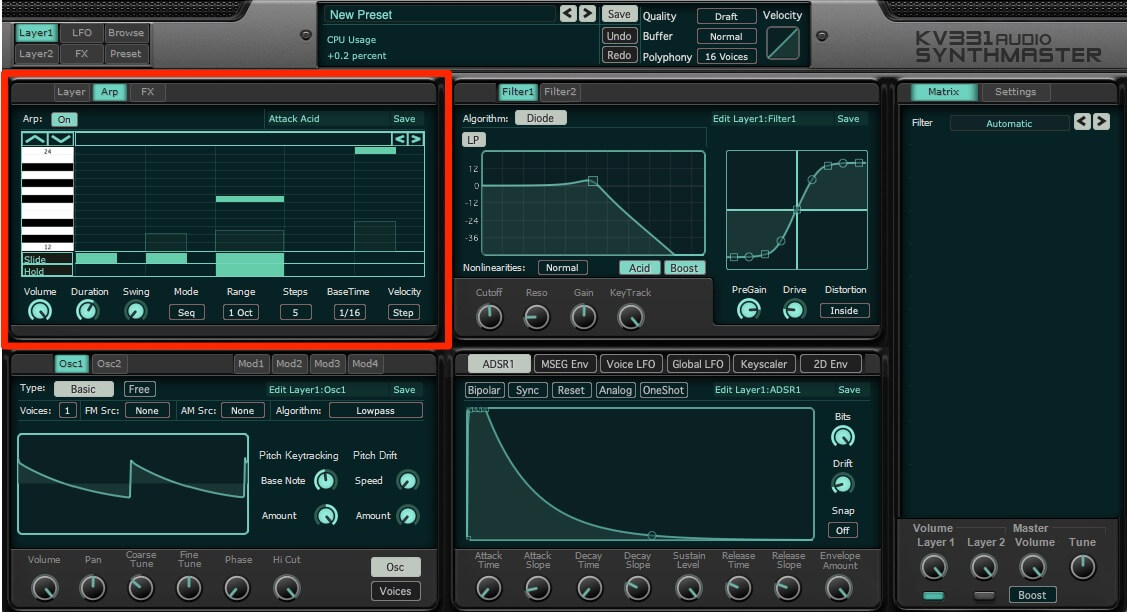
Step 3: Arpeggiator
Before we set the envelope, let’s get the arpeggiator up and running so we can hear what we’re working with. Start by clicking on the Arp button to reveal the Arpeggiator. Turn the Arp on and then set the Mode to Sequencer, Range to 1 octave, Steps to 5 for a lopsided acid groove, BaseTime to 1/16, and leave Velocity at Step.
Next, program in notes by clicking on the grid. Use the Duration knob to extend notes. Also, feel free to add Slides and Holds for a more acid-like bassline. Change the volume of each step either with your cursor or mouse wheel by dragging up or down.
With the arpeggiator up and running:
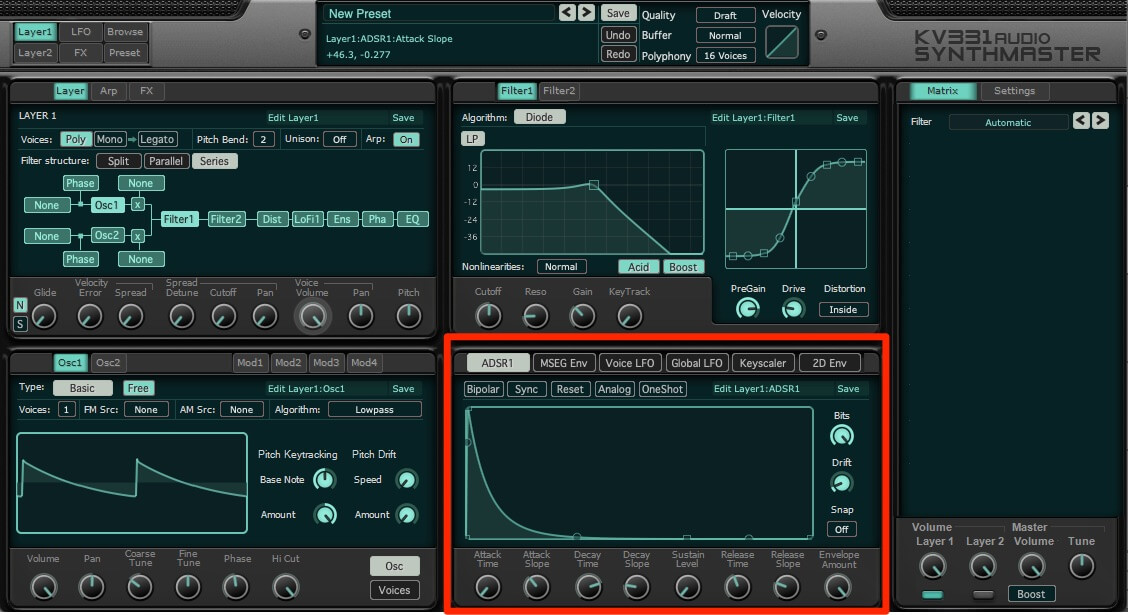
Step 4: ADSR
Let’s set the envelope now. We want a shape that is suitably short. Although the ADSR is basically a four-stage envelope, it still has a few extra controls that add flexibility.
First, make sure the Attack is set to zero. This will give us a snappy transient. Next is the Attack Slope. The slope controls alter the curves of the envelope. Turn it to around 10 o’clock for a slightly rounded feel. Move Decay Time to 2 o’clock and Decay Slope to 10 o’clock for a smooth decay. Make sure Sustain Level is all the way at zero. We’re after a staccato bass sound. You can adjust Release Time and Slope as you see fit. We prefer a shorter feel but long can have its merits too. Finally, turn the Envelope Amount all the way up.
Top Tip: Modulate the Envelope Amount while playing for 303-style ADSR variations.
The bass with envelope settings:
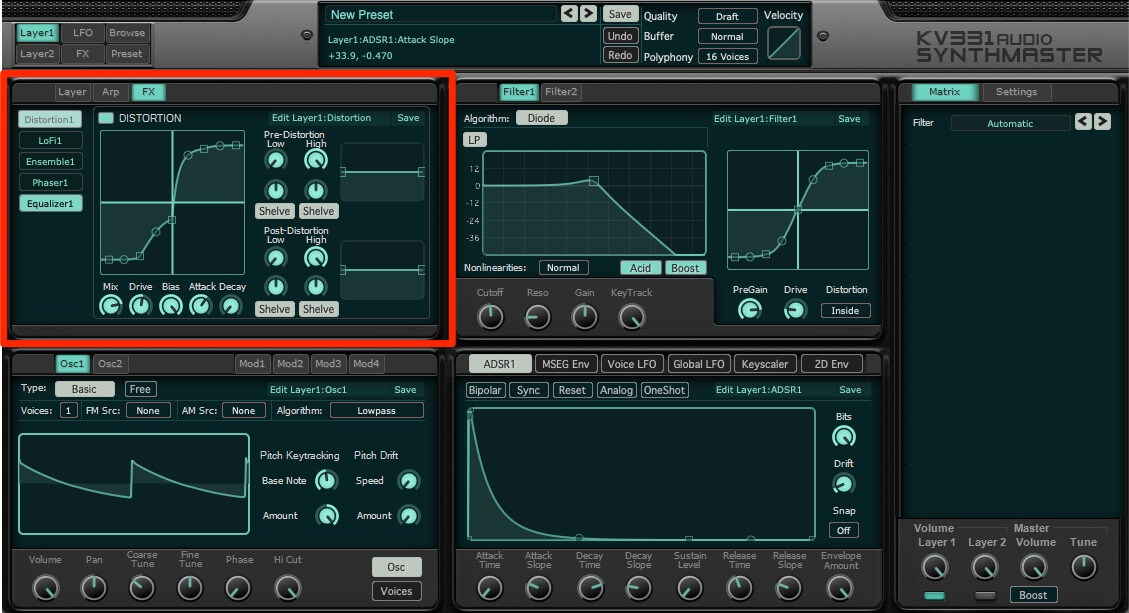
Step 5: Layer Effects
Let’s address the Layer-level effects next. You can access these one at a time in the Layer section or see them both at the same time by clicking on the FX button at the top. We prefer working at the Layer level as there are more controls.
First, turn on Distortion. This will be down to taste but we want something fairly aggressive. Accordingly, we crank up the Mix to 3 o’clock and the Drive to halfway. Next, we play around with the distortion curve by dragging the nodes until we get a sound we like. You can use the Bias knob to add an envelope follower to the distortion so it follows the output. Attack and decay settings further allow you to shape the envelope.
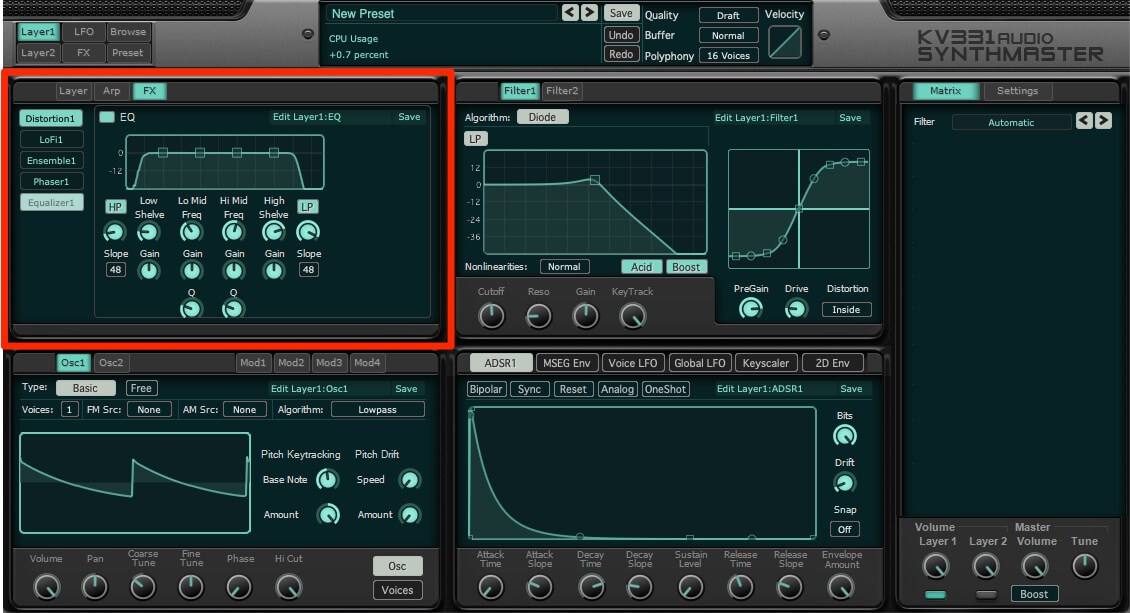
Next, let’s use the onboard EQ to fine-tune the overall tone. We’ve shelved off the extreme lows and highs to tame the sound and focus it on the mids. This frequency curve also works well with distortion.
Now with distortion and EQ:
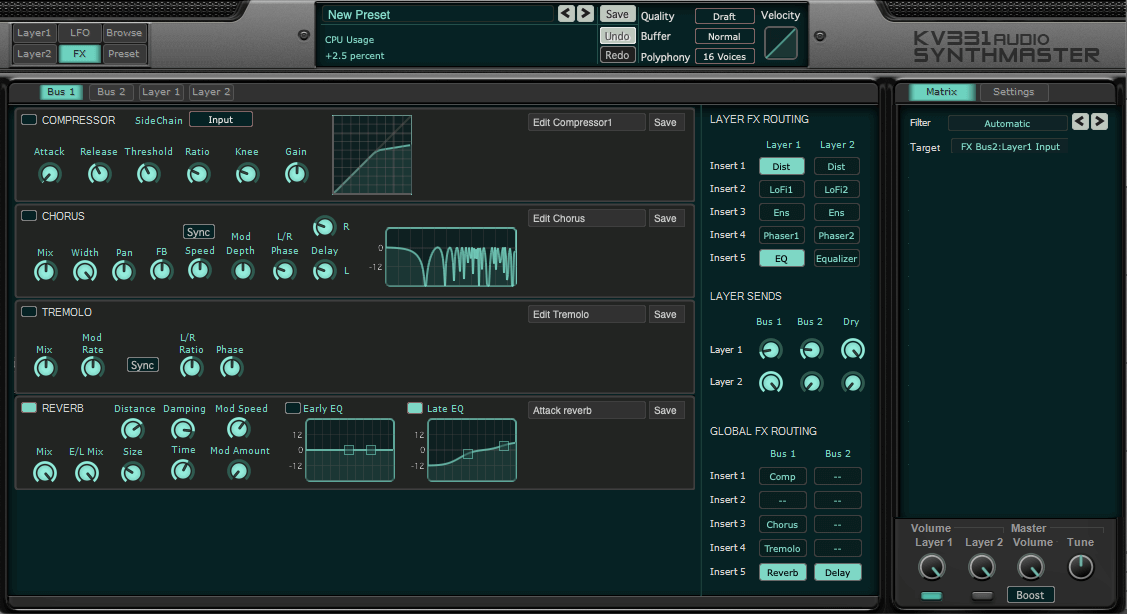
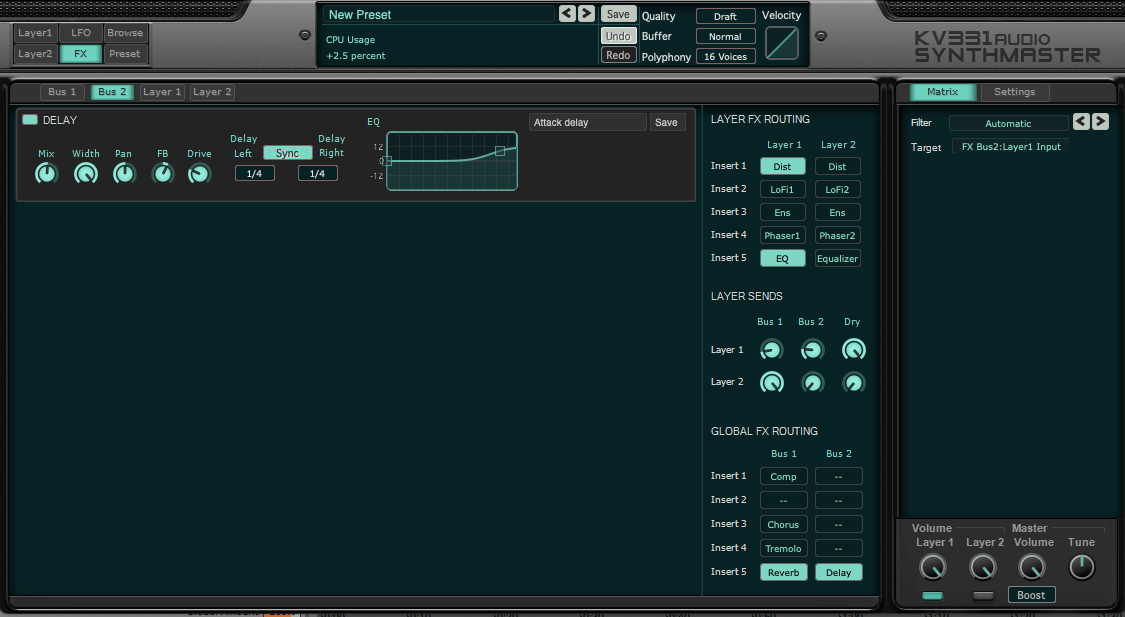
Step 6: Bus Effects
Go to the main FX page and make sure there’s a Reverb in Bus 1. If there isn’t, you can assign it to one of the slots in the Global FX Routing area by right-clicking on an empty box. We want a nice-sized reverb that will give a sense of space to the sound without overwhelming it. The Damping knob adds an almost gated effect. In the Late EQ box, we cut the lows and boost the highs to avoid muddying the bass.
Next, in Bus 2, we turn on the Delay, with 1/4-note delays synced to tempo. We also use the EQ to boost the highs. We set the other controls to taste.
Finally, we can adjust volumes in the layer Sends section. We send Layer 1 to Bus 1 and Bus 2, favoring the delay, and make sure that Dry is turned all the way up.
With bus effects:
Here’s the finished acid line with the Envelope Amount being automated and additional loops from Splice packs Acid Techno and Tech D&B:
*Attack Magazine is supported by its audience. When you purchase through links on our site, we may earn an affiliate commission. Learn more.
FOLLOW ATTACK MAGAZINE
Tutorials is sponsored by
Roland Cloud is your creative hub for Roland hardware and software. Access legendary recreations of Roland Classics, find new sounds for your favorite products, and download updates and companion apps to make music fast and easy.