A bonafide classic, we show you how to make the synth parts in ‘The Sky Was Pink – Holden Remix’ using FabFilter Twin 3.
The Sky Was Pink, Natahan Fake’s second EP on James Holden’s label Border Community, was and has remained a seminal release in the annals of electronic music.
The EP featured four versions of the titular track. Two from Fake himself (Original Live Take and Icelandic Version), and two dancier, reworked versions from Holden (Holden Remix and Holden Tool).
Each of the four versions of The Sky Was Pink is distinct and worthy of a listen. However, it was The Sky Was Pink – Holden Remix that would become the unlikely hit of the release. This nine-minute, laid-back idm and house-infused beauty has stood the test of time.
In this Synth Secrets, we will be showing you how to recreate the synth chord sound that runs throughout the track.
The repeating triplet rhythm, when combined with the four-to-the-floor drum pattern is alluring. It creates an endlessly evolving polyrhythm.
Here’s what we’ll be making today:
And here are the chords with more elements for context:
And here is the original version:
Don’t forget, to click any image to enlarge! And If you don’t wish to read, you can follow along in video, instead:
Step 1: MIDI
Firstly, set the tempo of your session to 124 BPM.
The chords in The Sky Was Pink consist of a call-and-response pattern of two slightly different synth patches. This requires us to work with two MIDI channels with an instance of Twin 3 loaded on each.
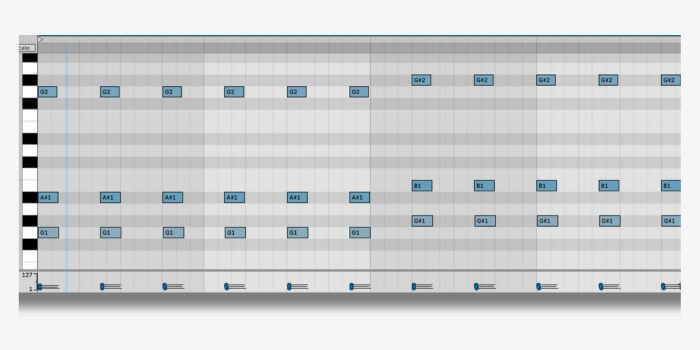
First up, program the below MIDI pattern on one of the MIDI channels – we will refer to this channel as MIDI channel one, and the instance of Twin 3 on this channel as Twin 3 one.
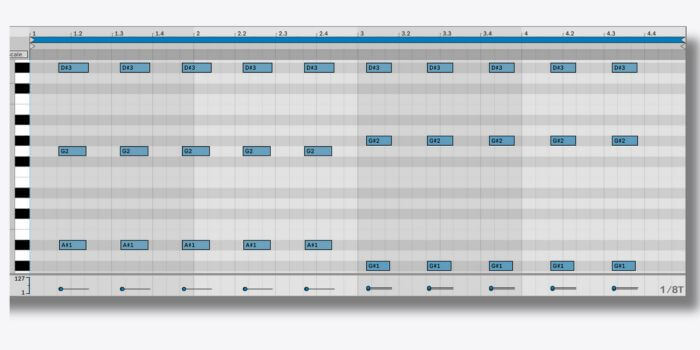
Then program the below MIDI pattern on the second MIDI channel – we will refer to this channel as MIDI channel two, and the instance of Twin 3 on this channel as Twin 3 two.
Step 2: Oscillators
TWIN 3 ONE
Each of our instances of Twin 3 requires different oscillator configurations.
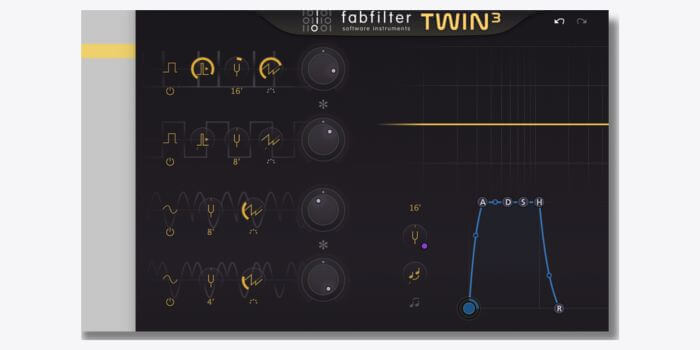
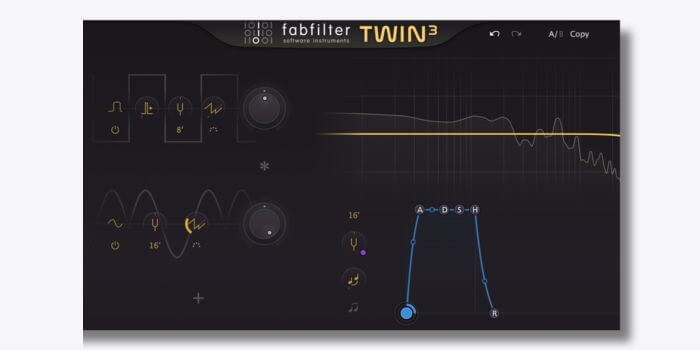
Set up Twin 3 one with four active oscillators.
Set oscillator one as a Square Pure waveshape with Pulse Width set to 0.9, a detune of 0.18 and Osc Sync to 2.75. Set the gain to -6dB.
Set oscillator two to Square Pure with a +1 octaves tuning. Set the gain to -13.3dB.
Set oscillator three to Sine with +1 octave tuning and 1.62 Osc Sync and Phase Sync toggled. Set the gain to -21.4dB.
Set oscillator four to Sine with +2 octave tuning and Osc Sync set to 1.44 with Phase Sync toggled. Set the gain to to 0dB.
TWIN 3 TWO
Set oscillator one to square with tuning at +1 octaves and gain at -17.7dB.
Ser oscillator two to sine with Osc Sync at 1.53 and gain at 0dB.
Here’s how the chords sound so far:
Step 3: Filters and Envelope
TWIN 3 ONE
Add a Hollow low pass filter at 424 Hz to with a slope of 24 dB/oct. Next, add a Classic high pass at 147 Hz with a slope of 12 dB/oct.
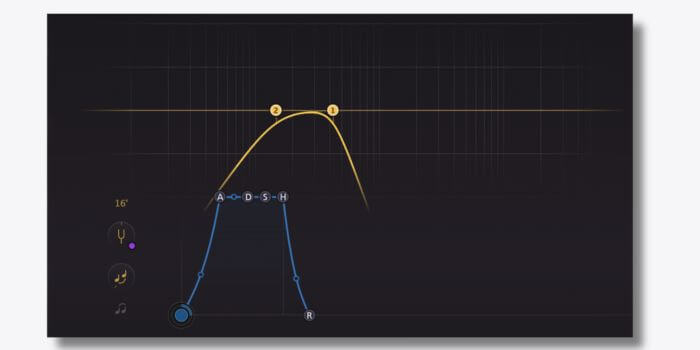
Move to the amp envelope section and set the attack to 19.5 ms with a slope of –0.41 with a release of 71.05 ms with a slope of 0.5.
TWIN 3 TWO
Set a Hard low pass filter at 532.6 Hz with a peak of 0.165 and a slope of 24 dB/oct. Next add a classic high pass with a 12 dB/oct slope at 124.8 Hz.
Move again to the amp envelope section. Set the attack of the amp envelope to 36.36 ms with a slope of -1. Make decay 337.8 ms with a slope of 0.948. For the sustain, bring it all the way down to -INF dB sustain (minus infinity decibels)
Here’s our progress so far:
Step 4: Modulation
To add some movement to the chord sequence modulation is required.
TWIN 3 ONE
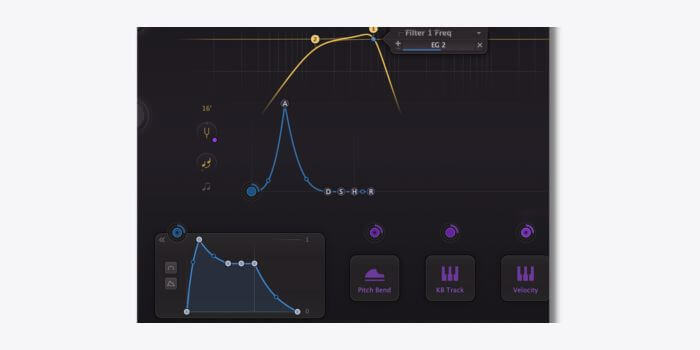
Add a new modulation source to Twin 3 one by clicking the + icon towards the bottom of the UI and selecting Envelope Generator from the drop-down menu.
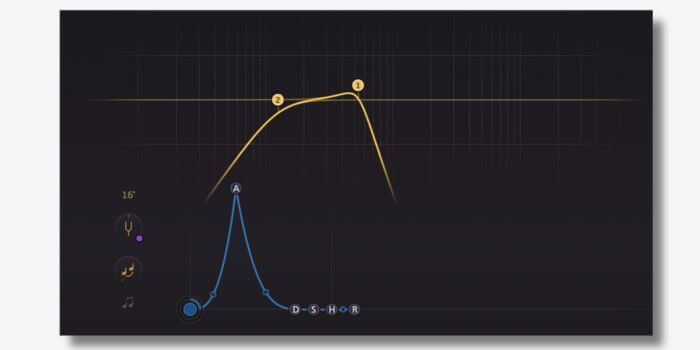
Set the attack to as quick as you can, the decay to 346 ms with a slope of -0.446, a sustain of -6.42 dB and a release of 175 ms.
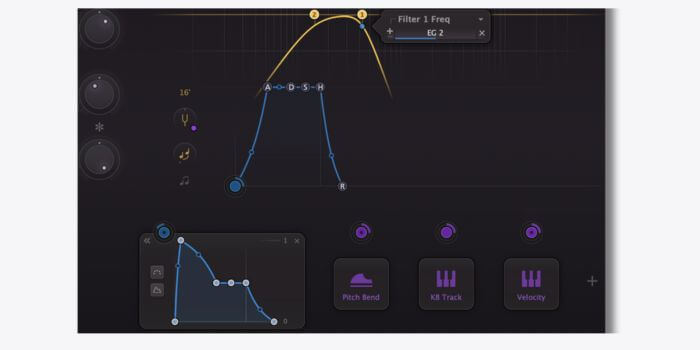
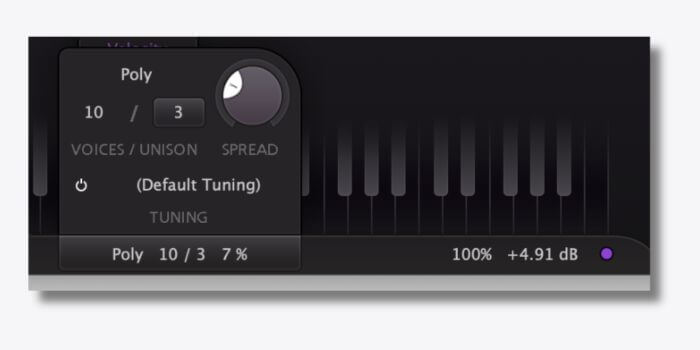
Moving on, route the envelope to modulate the cutoff of the low pass filter. Set the EG Level to -0.64 and the modulation level on filter one to 0.16. Lastly, boost the output by about 5 dB and set the unison to 3 voices.
TWIN 3 TWO
Add a new envelope generator to Twin 3 two. Set the attack to 4.85 ms with a slope of 0.5, decay to 301 ms with 0.5 slope, a sustain of -3.5 dB and a release of 401 ms. These are the default settings so you can leave it as is.
Route the envelope to modulate the low pass filter cutoff Set the EG level to 1 and the Modulation Level to 1.85.
Here’s our progress so far:
Step 5: Effects
To finalise the chords we will use a combination of Twin 3’s onboard effects and some external processors.
TWIN 3 ONE
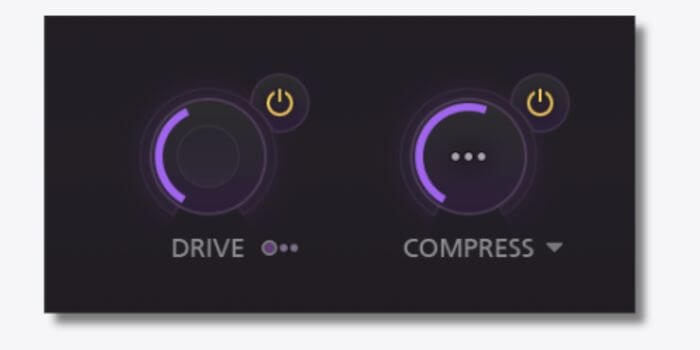
First up, turn on Drive, set the Drive amount to 17.5% and route it so the drive is Pre FX. Next, turn on the Compress knob and dial in 32%.
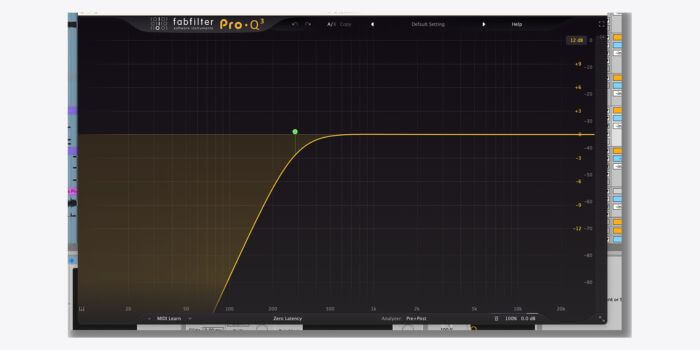
Place any EQ after your Twin 3 device and apply a high pass filter at 285 Hz with a slope of 12 dB/oct.
TWIN 3 TWO
Turn on the Compress knob and turn it to 13.5%. Next, we’re going to use Ableton Live’s Spectral Resonator to create a ringing metallic sound. Load it onto your channel.
Set Mode to MIDI and set the Twin 3 Two channel as the MIDI input. Make sure the effect is set to Poly mode with four voices of unison.
On your Spectral Resonator, set Decay to 360 ms, HF Damp to 23%, Harmonic to 128 and set the modulation mode to Wander. Finally set the Dry/Wet mix to 30%.
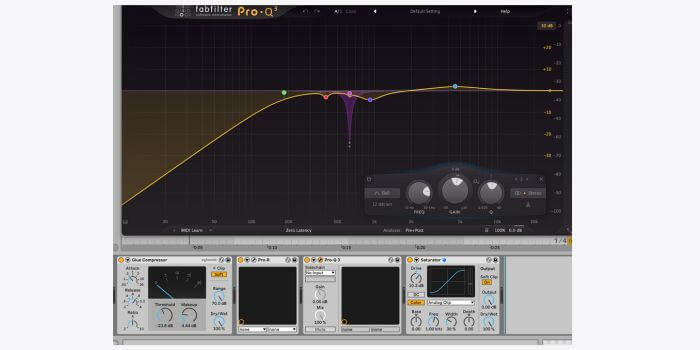
Lastly, let’s add saturation. We are using Saturator by FabFilter but you can use anything you have. Add Gentle Saturation above 550 Hz and follow it with a high pass filter at 290 Hz. Add a band split and Reduce the band one level to 12.36

Finally, group your two channels together in order to apply some group processing. But before you do, increase the gain of the Twin 3 one track by 5dB.
Next, on the group channel add Glue Compressor and set the threshold to achieve around 5 dB which is about -23bd of gain reduction with an attack of 0.3, a release of 0.8 a ratio of 4 and soft clipping activated.
Next, load Pro R by FabFilter or a different reverb. We have used the preset Coloured Room B with a Mix of 15.5% but you can use any bright-sounding reverb with a decay of around 1 second.
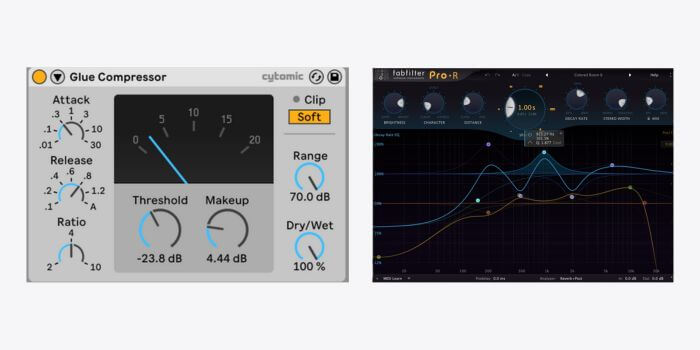
After the reverb add an EQ with precise bell cuts at 403 Hz and 629 Hz to remove harsh resonant frequencies, a wider cut at 928 Hz and a wide boost at 4543 Hz to brighten the sound.
Finally, load Ableton’s Saturator on Analog Clip mode with a Gain of 10dB.
Here’s our final sound:
And here it is with music for context:
If you like this Synth Secrets, be sure to check out the whole series on Attack.
Read our interview with James Holden from 2013.