In this new Passing Notes, we look at four ways to make chord stabs more melodic and dynamic.
Stabs are among the defining aspects of electronic music. They’re particularly at the forefront of many iconic house and techno tracks. A well-worked stab part can add both a rhythmic and harmonic layer to productions, but there are many different ways to implement it.
In this article, we’re going to move beyond the territory of over-used chord voicings and patterns in order to look at various ways to make chord stab progressions more unique.
Here’s an example that contains many of the stab parts we will be creating:
N.B: We recommend following along with headphones or studio monitors as some of these results can be subtle. As ever, click any image to see a larger version.
Download the Ableton session to follow along:
Please only input your email once and you will receive an email with a link to download. Enjoy!
Laying Down The Initial Chord Progression
We’re going to kick things off with a prepared backing track that features a classic 120 BPM, four-to-the-floor beat and an eight-bar bassline. The bass is playing root notes, thus determining our chord progression.
Here’s how it sounds:
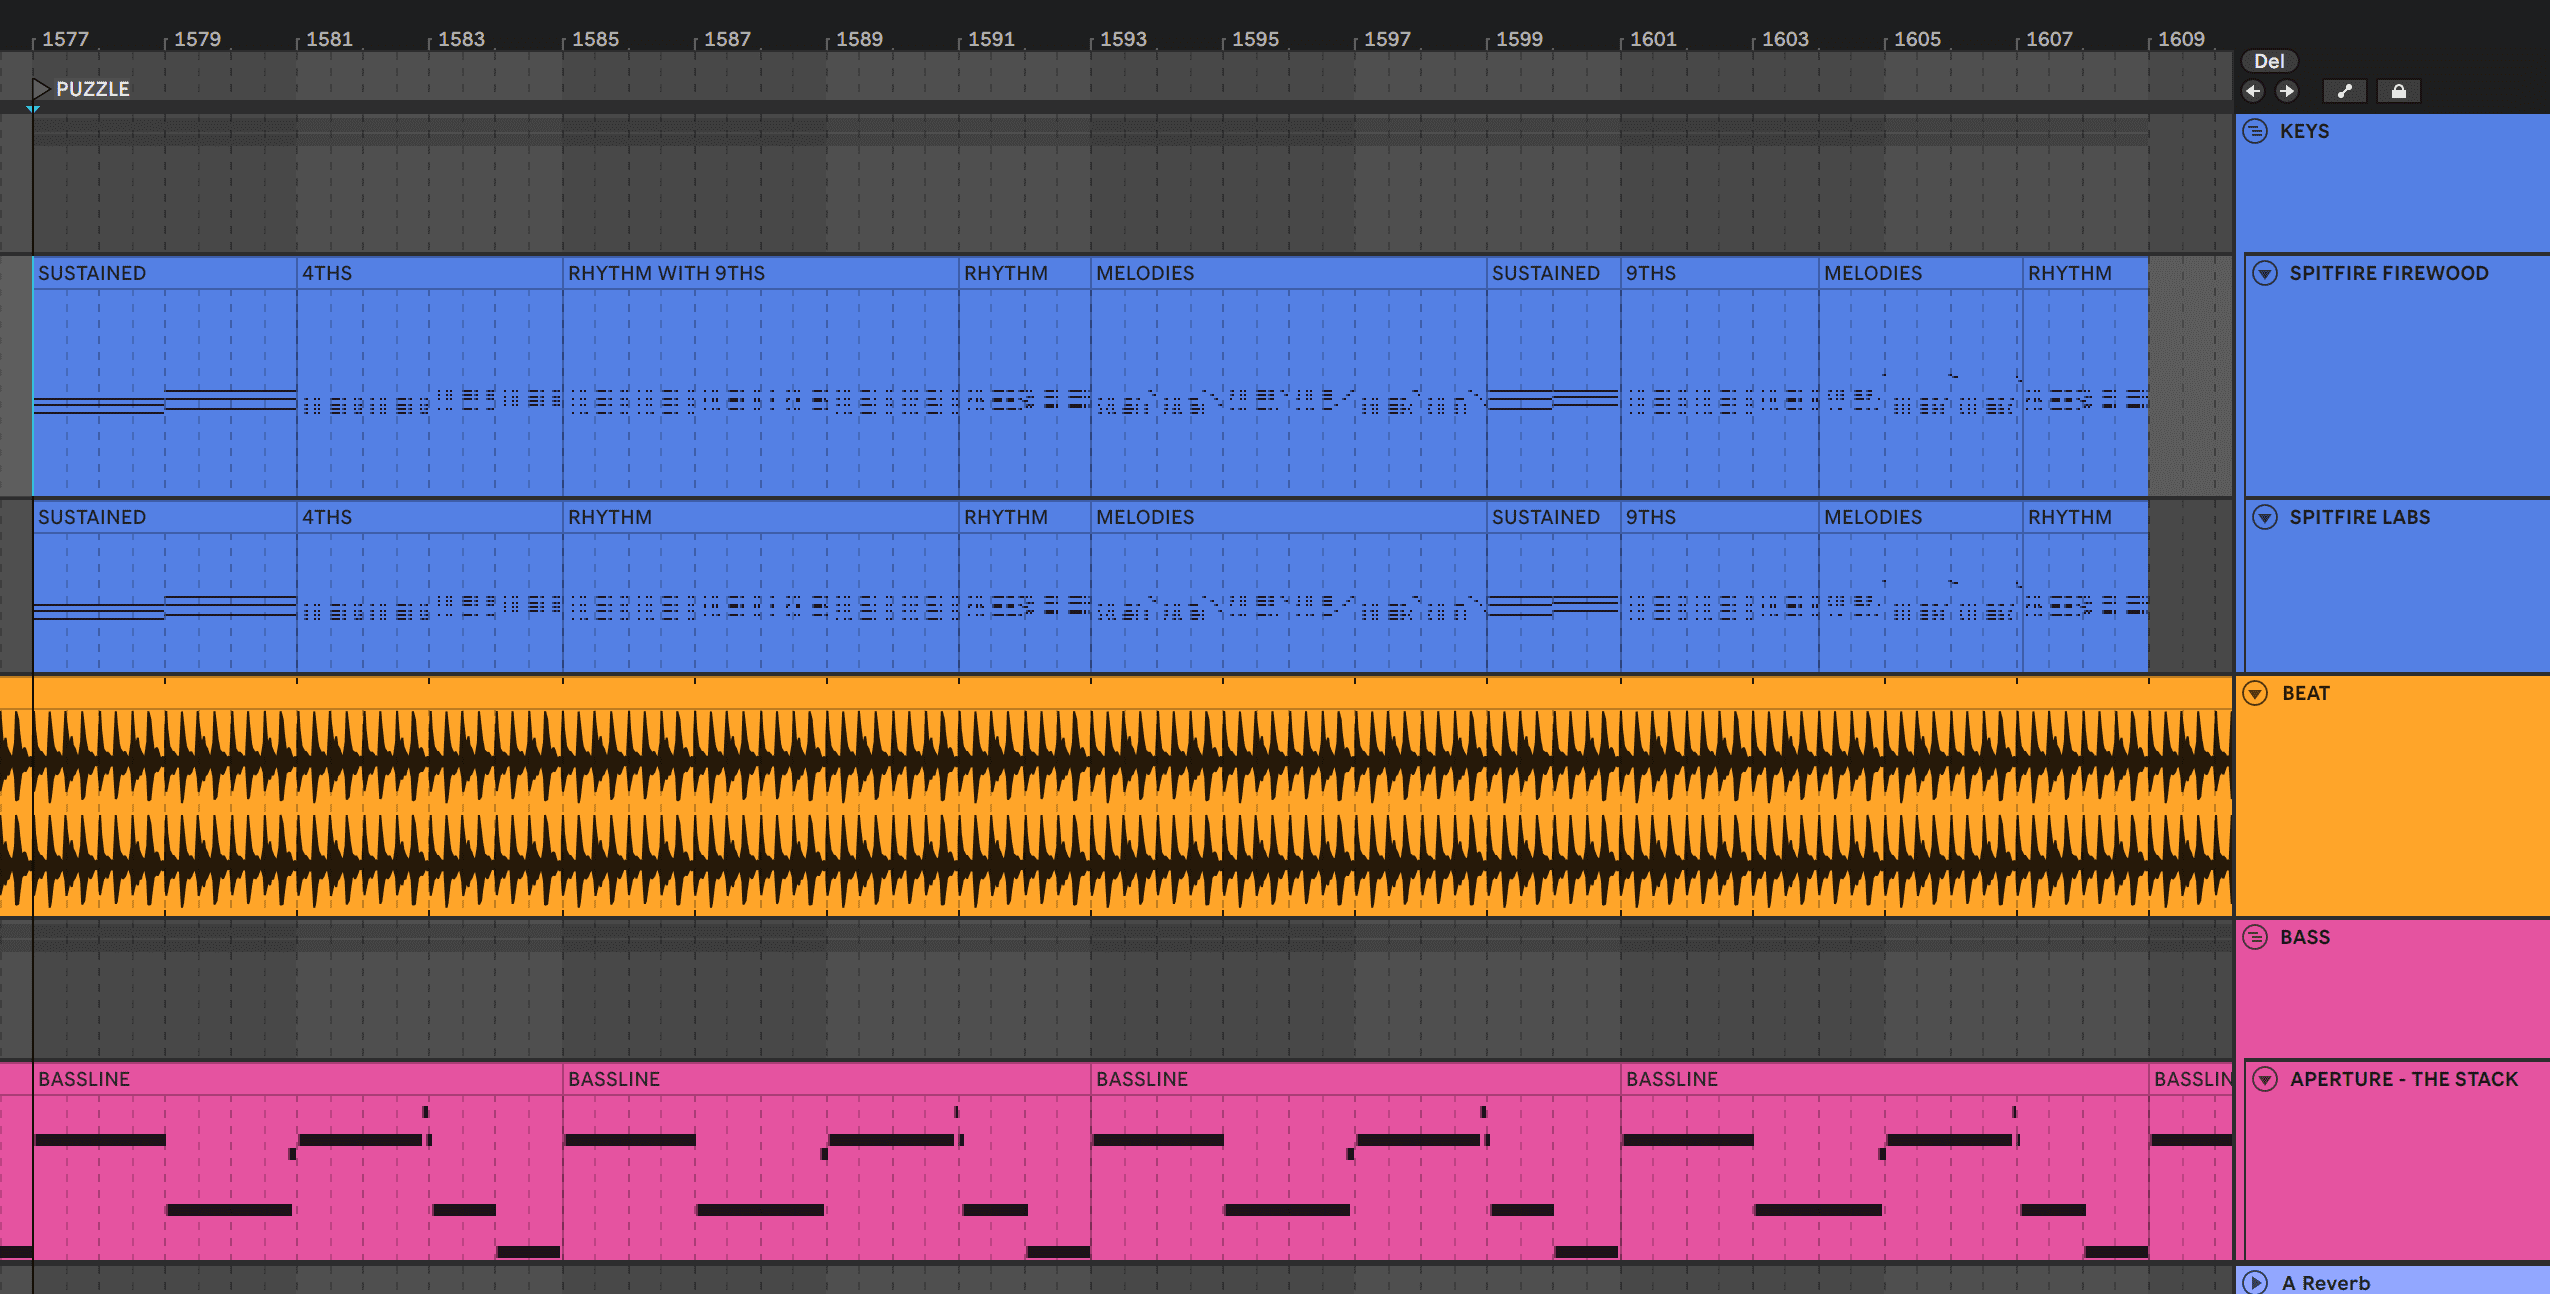
For the sound, we’re using a sub-bass sample, widened with a chorus, and layered with a Spitfire Audio’s Aperture – The Stack’s Dave: Longs preset.
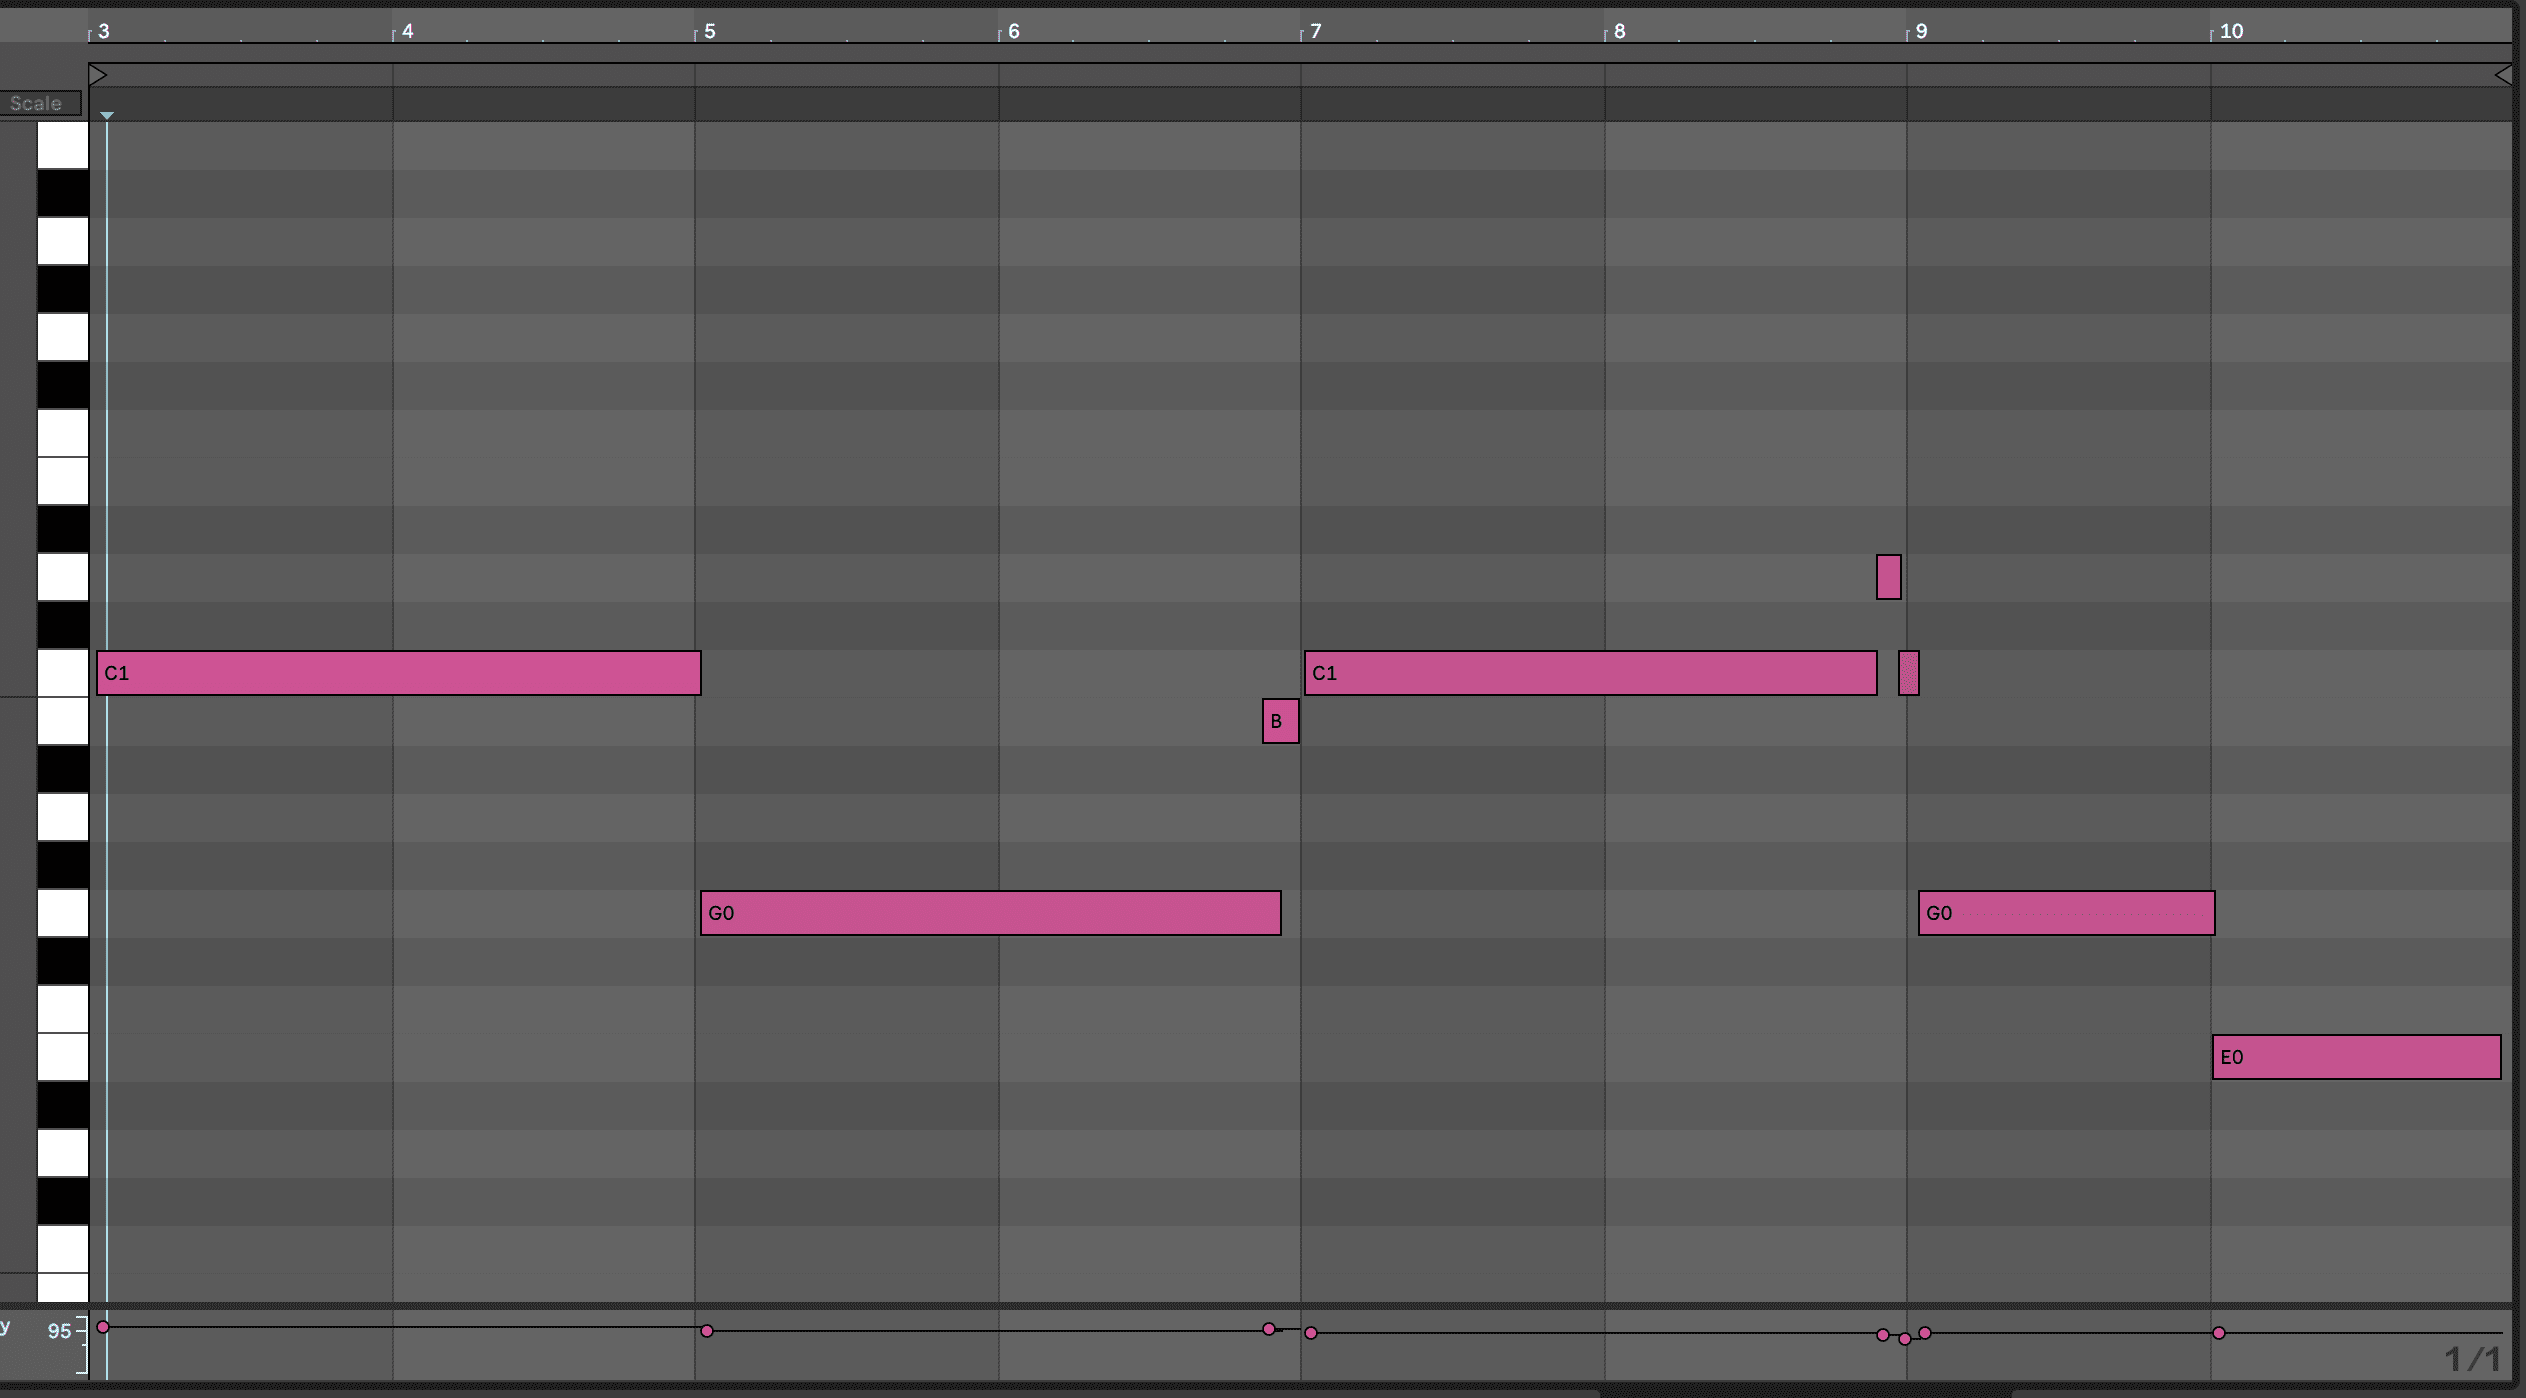

The progression goes: C Minor for 2 bars, G Minor for 2 bars, C Minor for 2 more bars, then one more bar of G minor and a final bar of E Minor.
Cm7 / Cm7 / Gm7 / Gm7 / Cm7 / Cm7 / Gm7 / Em7
Adding a different chord in the eighth bar is a great trick to instantly make a progression more catchy!
Before writing or playing in the stabs, we’re going to write in sustained chords, with basic Minor 7 voicings.
We’ll use Spitfire Audio’s Originals Firewood Piano layered with their free Labs instrument’s Electric Piano: Chorus preset for the keys’ sound.
Here’s how it sounds:

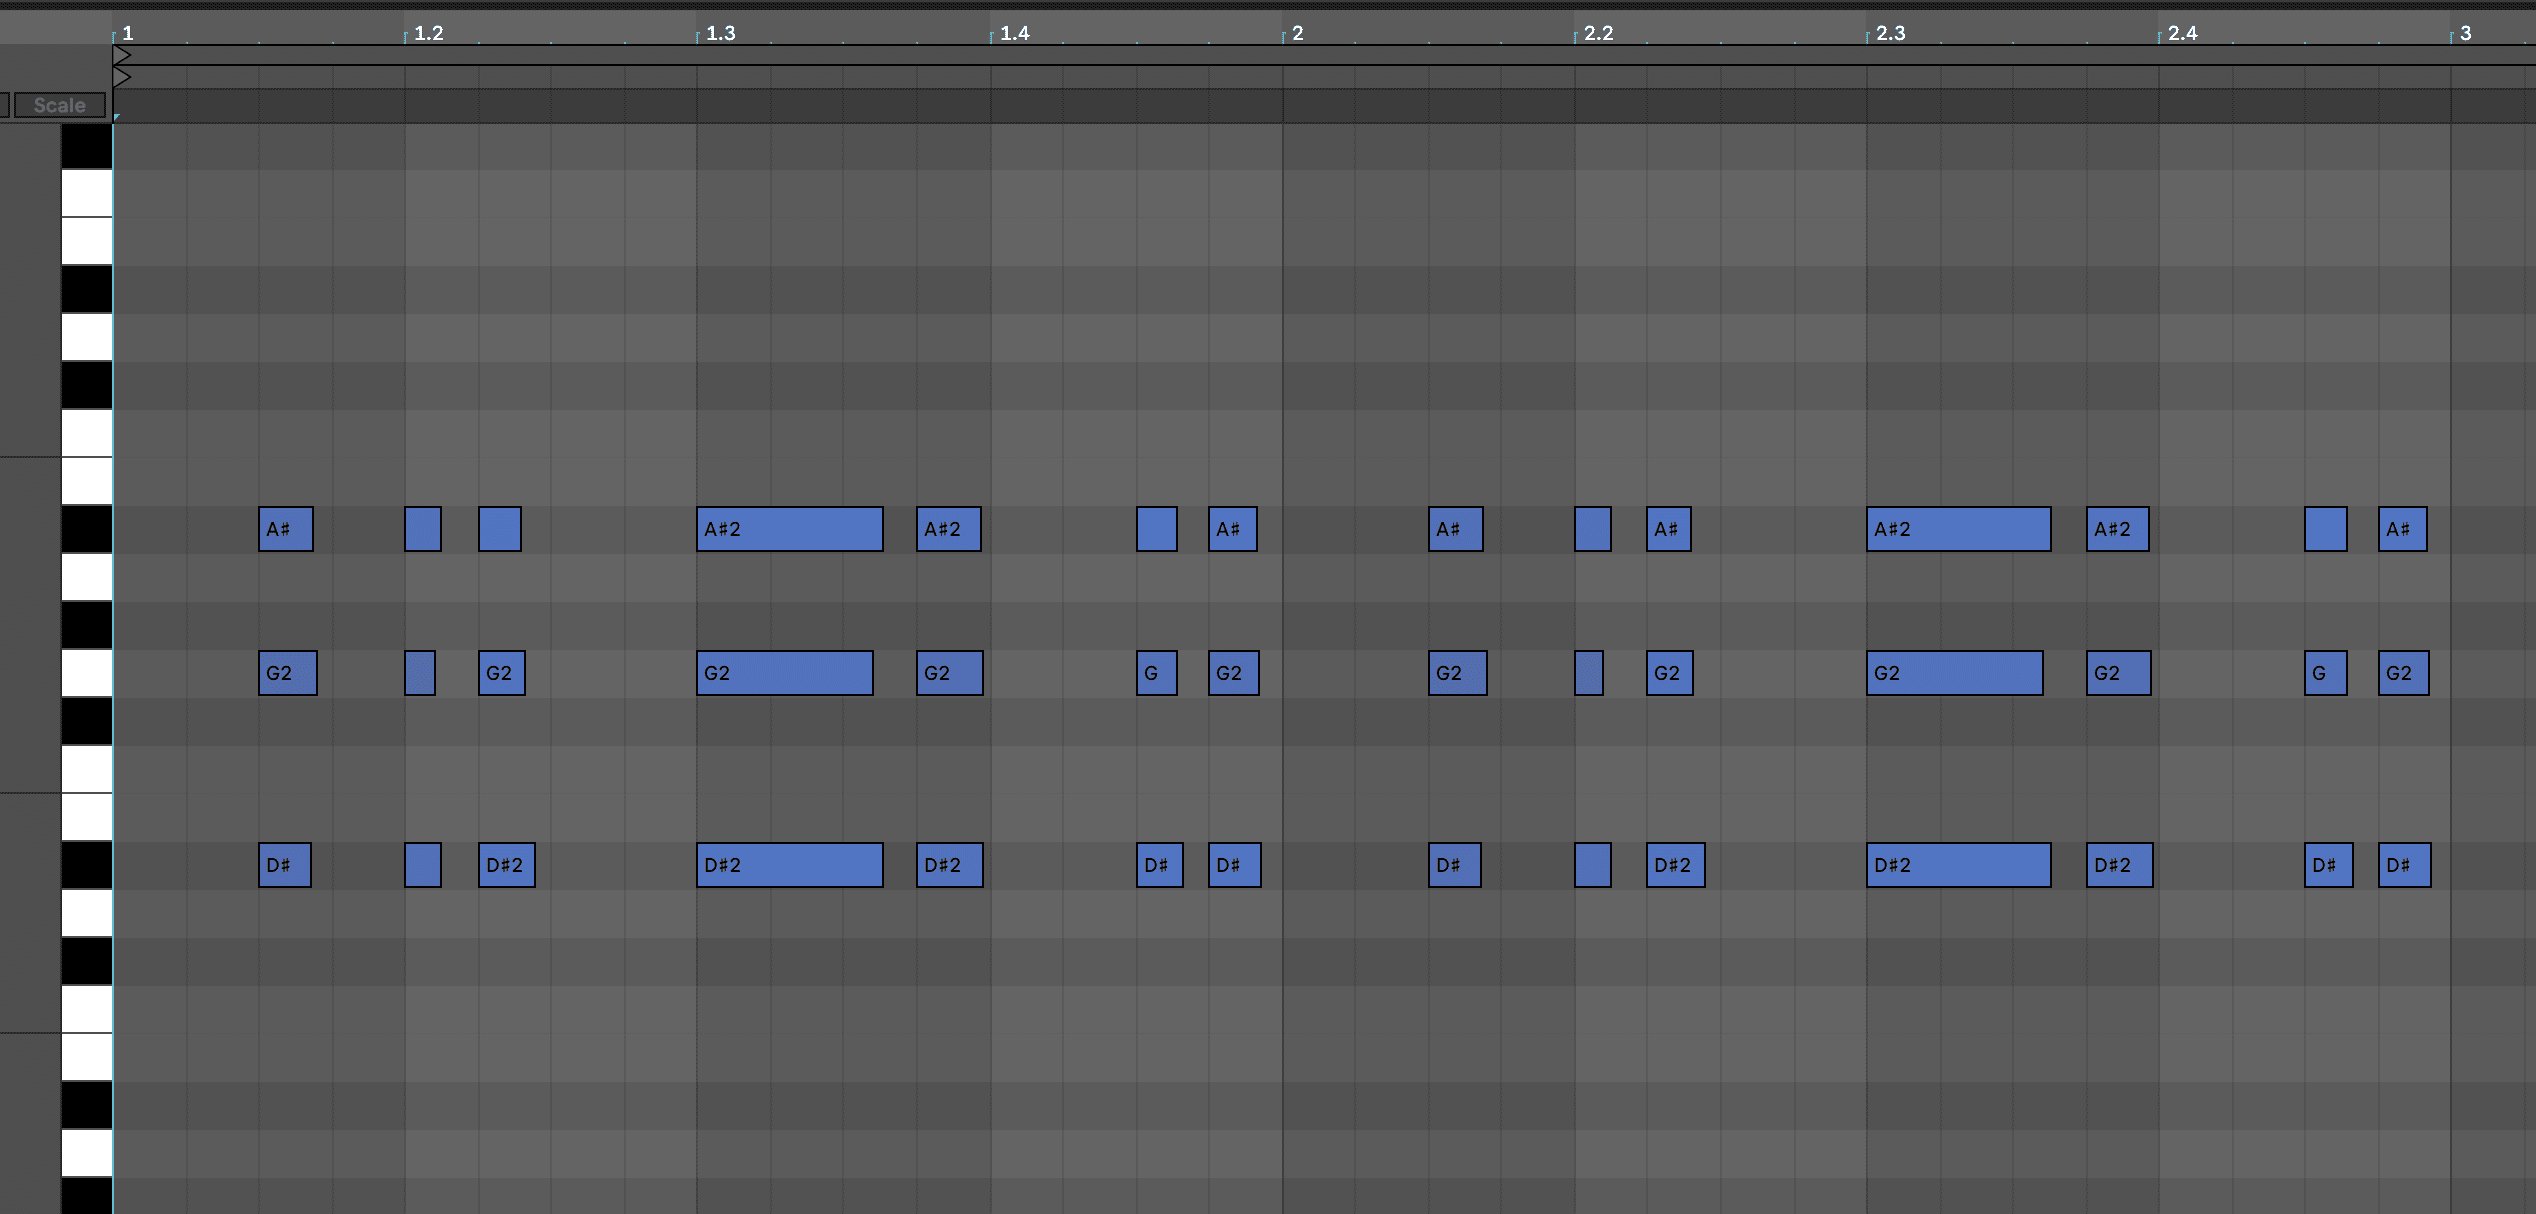
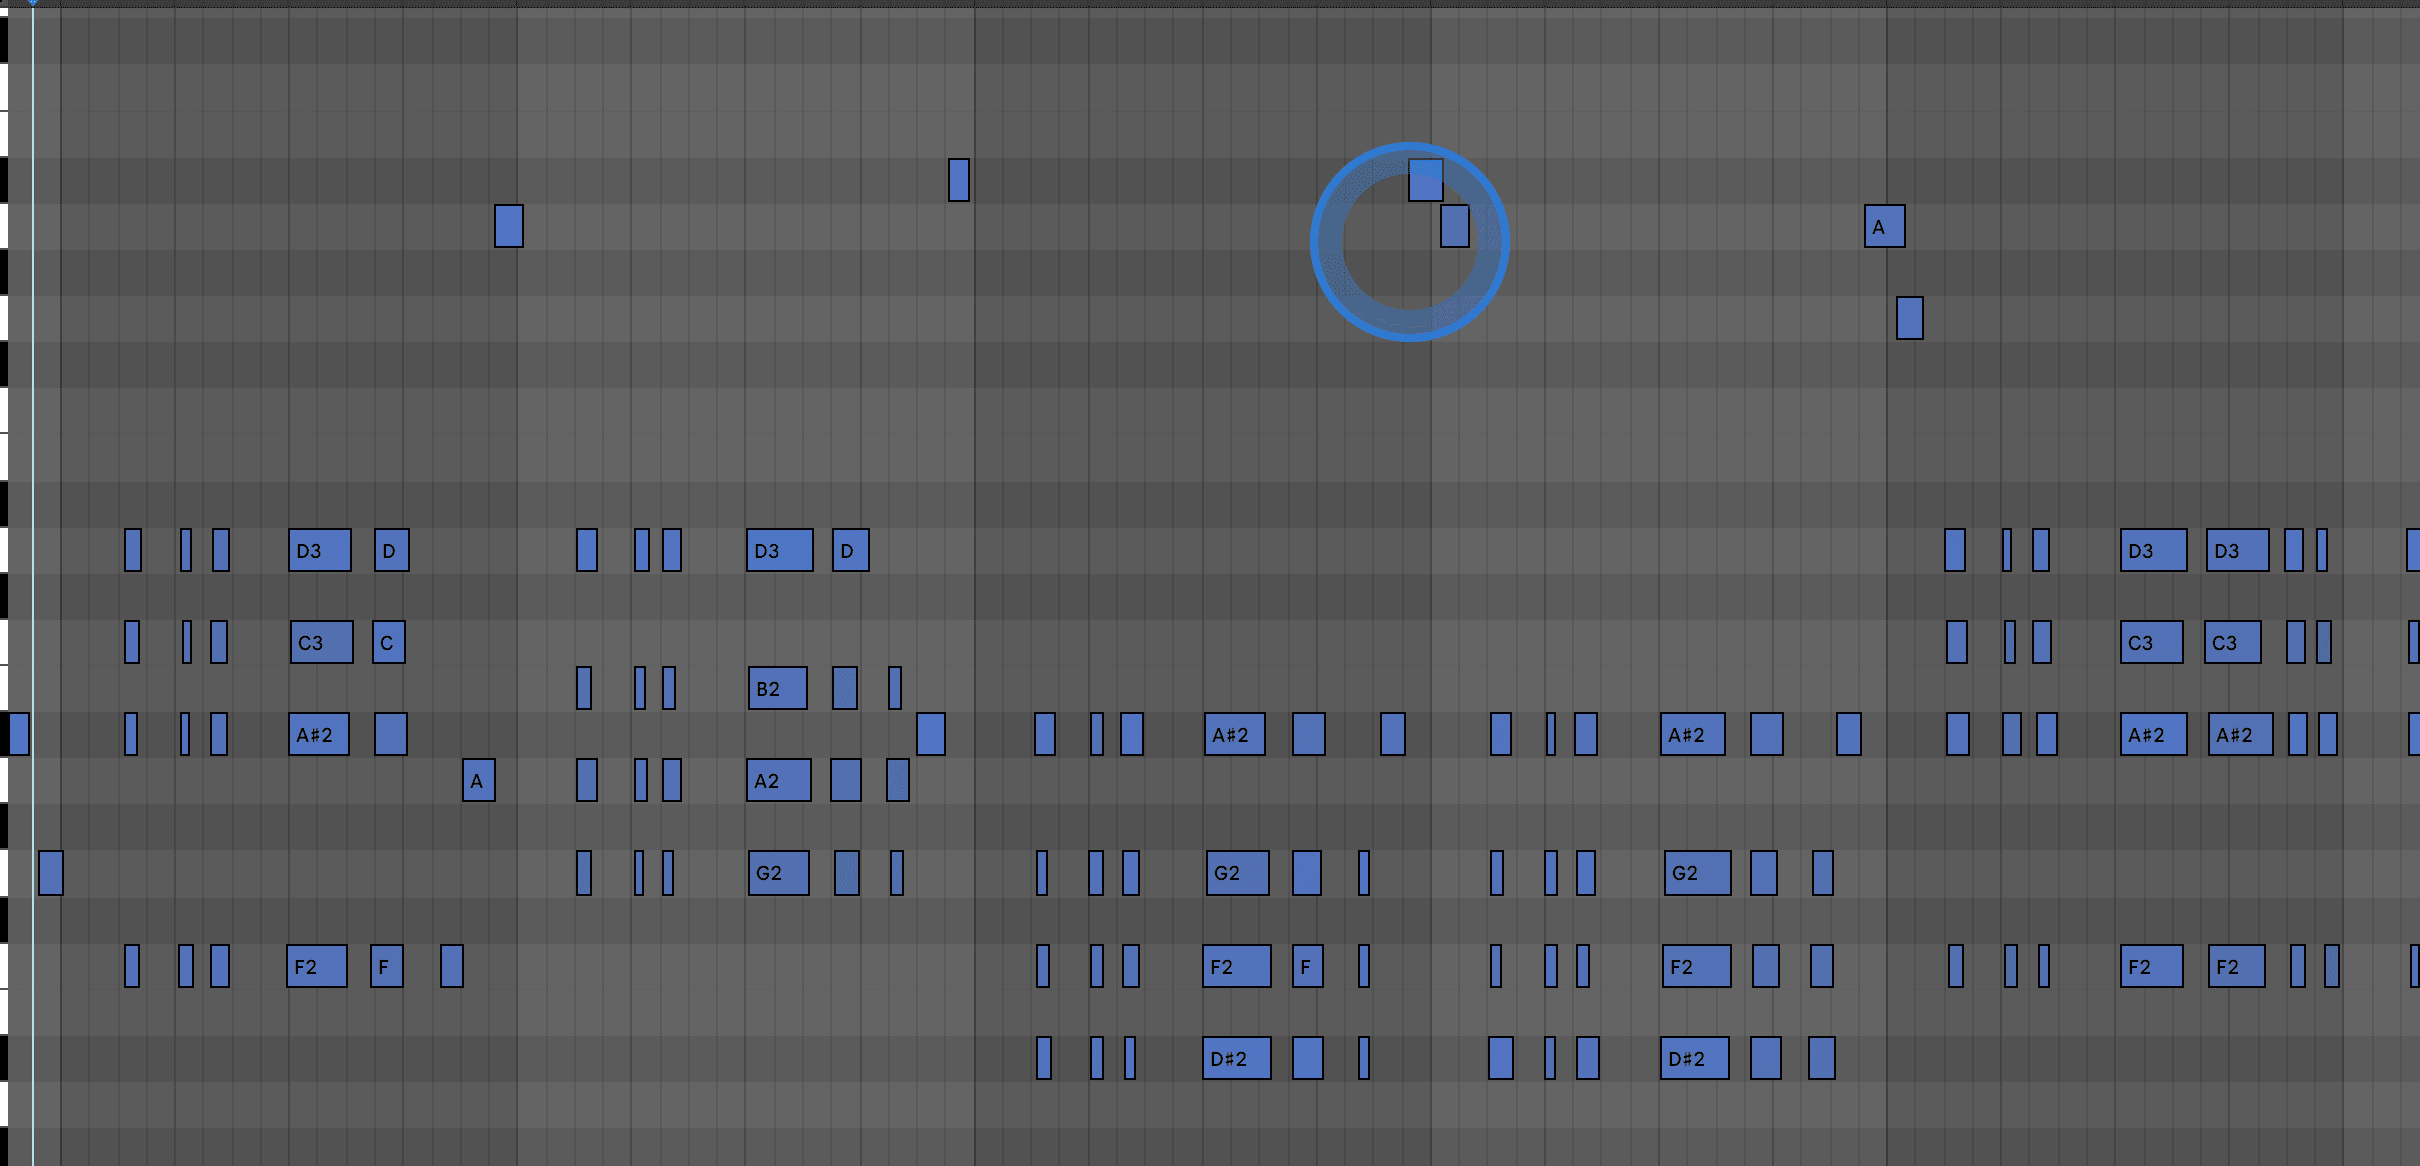
For the C Minor, our notes are D# (Minor 3rd), G (5th) and A# (Minor 7th). This sequence of notes is the root position voicing of C Minor 7, as it as the root (C), 3rd, 5th and Minor 7th consecutively.
For the G Minor, we’re using the 3rd inversion pattern, used frequently by Kerri Chandler, and our notes go F (Minor 7th), G# (Minor 3rd) and D (5th).
For the E Minor in the last bar, the notes are G (Minor 3rd), B (5th) and D (Minor 7th). As with the notes in C Minor, these notes also form the Minor 7th root position voicing.
As you can see in the MIDI above, the keys are not playing the root note, they leave that job to the bass.
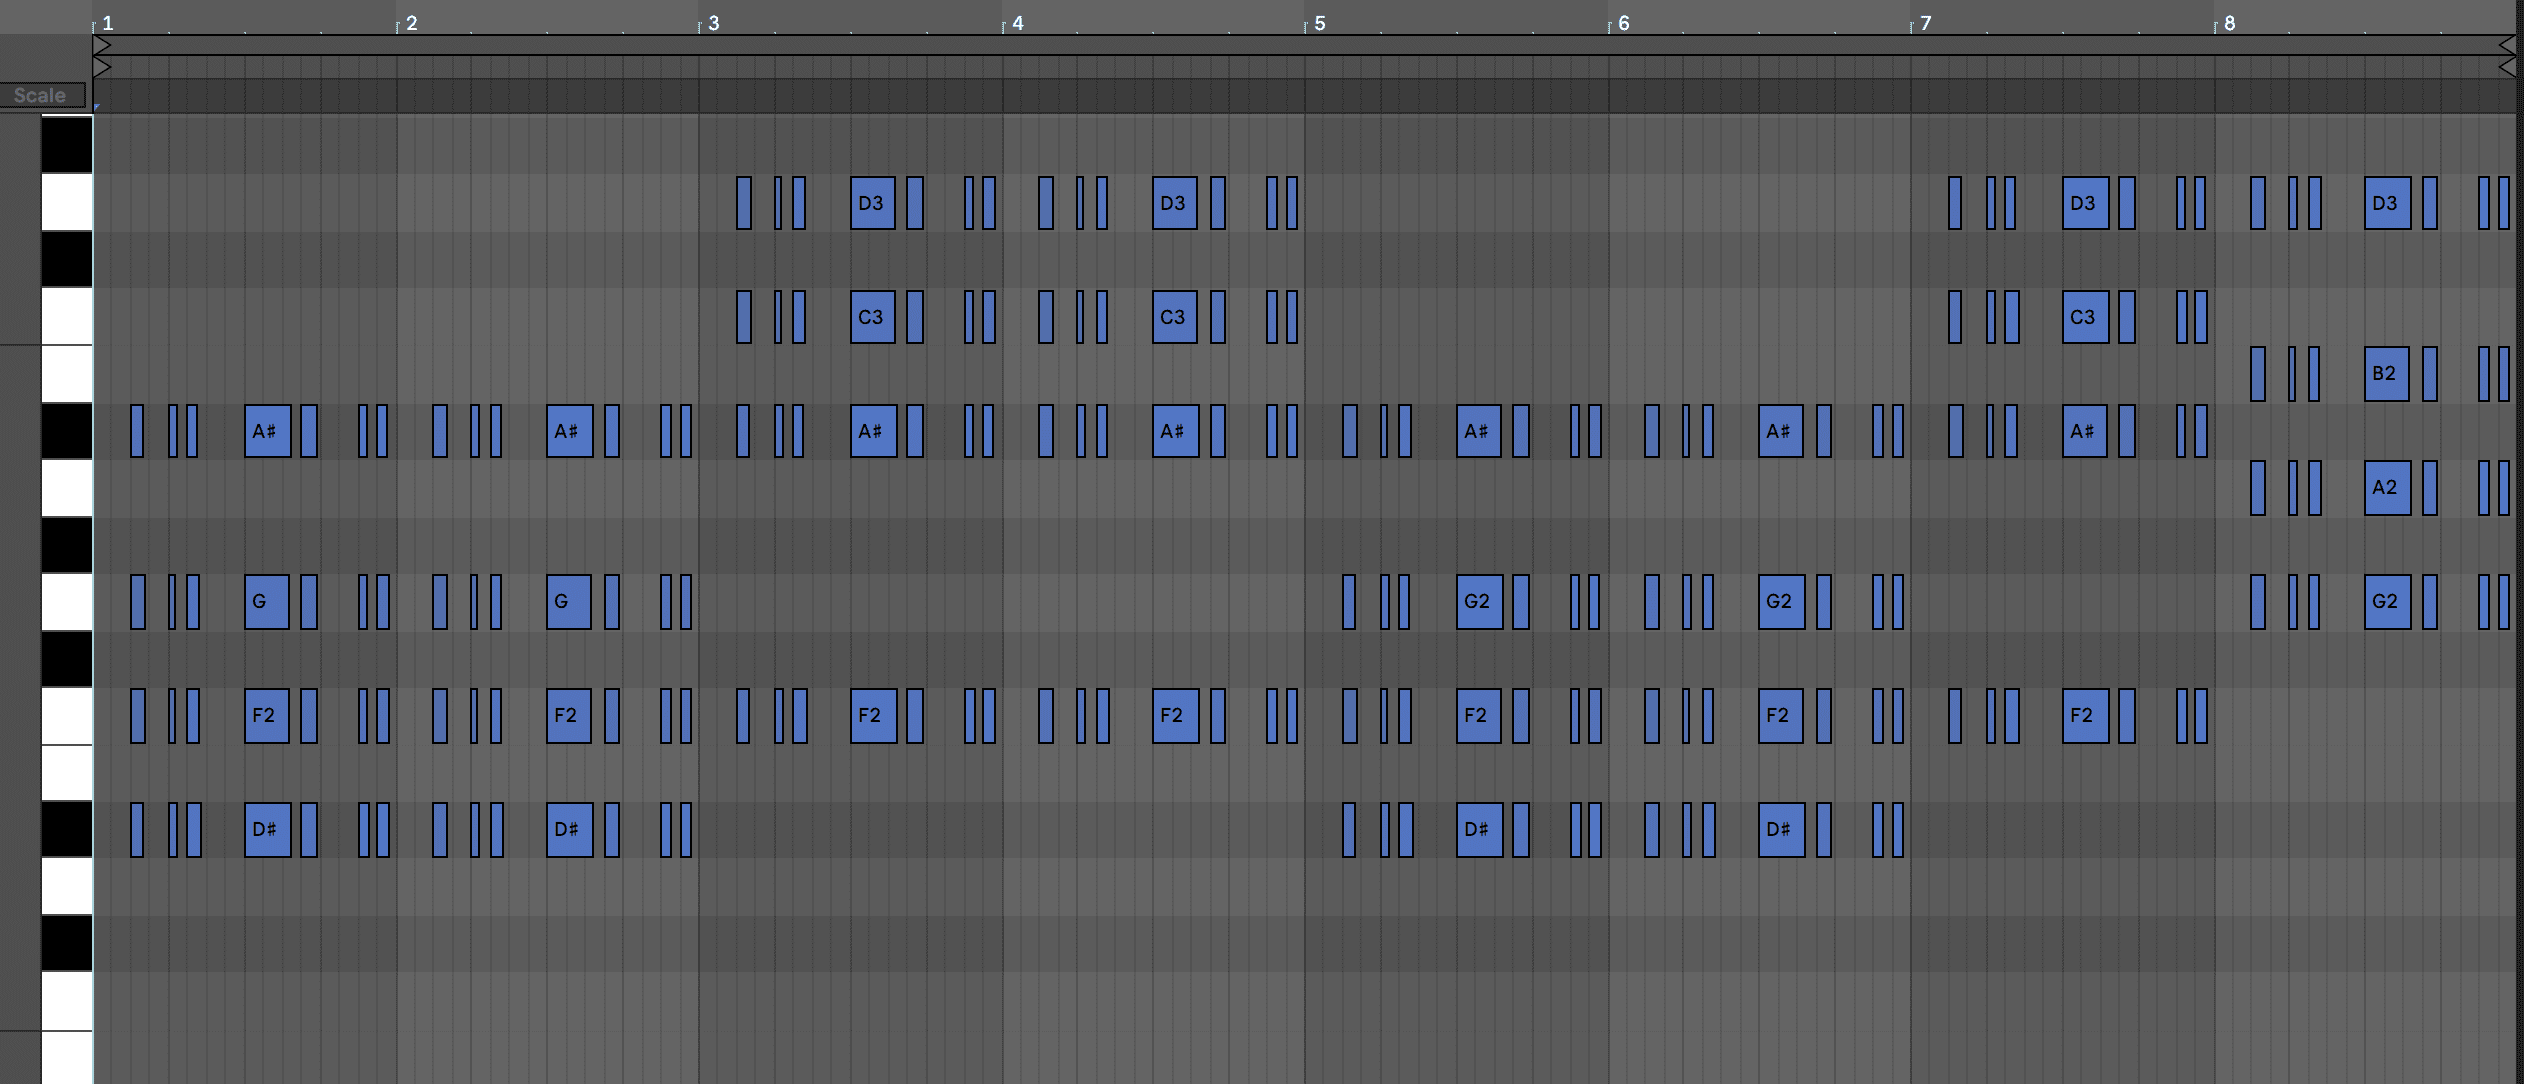
With the chords decided, we can now program or play in a syncopated rhythm for movement.
Here’s the rhythm that we’ll use for all of the chords:
The pattern adds syncopation because it leaves out notes occupied by the main drum hits – such as the first and fourth downbeats – and emphasizes off-beat 16th-notes.
Another important point is that some of the hits are more sustained compared to the frequent short hits. This adds even more rhythm by creating a call-and-response relationship between the stabs.
TIP 1: USING 4TH DEGREE NOTES
Our first tip is creating a cluster texture, which means adding in the notes next to our original chord tones (the Minor 3rd, 5th and Minor 7th notes). The 4th degree of chords – also referred to as 11th notes – are a good choice for this additional note.
In C Minor 7’s case, this is the note F and we’ll add it in between Eb and G. We’ll also add G Minor’s 4th-degree note C to the G Minor chord, and E Minor’s 4th-degree note A to the E Minor chord.
Here’s how it sounds:
The effect of more notes being played in close proximity creates a dark and blurry atmosphere, which sounds more mysterious and intense, compared to simple root position voicings.
TIP 2: USING 2ND DEGREE NOTES
For the second tip, an alternative way to add colour to the chords is adding 2nd Degree notes, also known as 9ths. In C’s case, it would be D, for G it’s A, and for E it’s the note F#.
Now let’s add these 9th notes to our chords. Note that they don’t always have to be in the same octave! In C Minor, our 9th will be the very highest note in the chord, while in G Minor and E Minor, the 9ths will be in the middle.
Here’s how it sounds:

TIP 3: ADDING RHYTHMIC VARIATION
Our third tip is introducing changes to the stabs’ rhythm at certain points throughout the progression.
Up until now, we’ve been playing every chord using the exact same rhythm in every bar. To mix things up, we’ll add two variations.
The first variation is slightly altering the rhythm in bar four, while still keeping the starting point of the rhythm upbeat. The second variation occurs on bar eight, emphasizing the first two 16th-note of the bar. This adds a contrasting rhythm that leads nicely back to the beginning of the progression.
Here’s how it sounds:

TIP 4: WRITING MELODIES BETWEEN THE HITS
Our fourth tip is adding small melodies throughout the progression. The melodies can be very simple and short, as they have to fit in the small gaps between the chords.
We’ll put together a first melody using just the notes C, D, G and A#, these are notes that work with both the C Minor and G Minor chords. You can use both ascending and descending patterns for contrast.
Here’s how this sounds:

For a second melody, we can use octave patterns to emphasize higher notes. We’ll start this melody during the first loop’s final two bars and then continue the theme for the whole second loop.
Here’s the pattern looped twice with the full melody:
Combining All Parts
The final step is taking moments from each variation and editing them. Combining all of the techniques we’ve gone through can make it easy to create a unique and evolving chord progression.
Think of it as doing a long automation take with different parameters on a synth, you experiment and use the best moments. Working with stabs like this can also help you create an overall framework for your track arrangement.
Here’s an example using the progression we’ve looked at in this article:
Follow Along With Our YouTube Video
SUBSCRIBE TO ATTACK’S YOUTUBE CHANNEL