
In this edition of Beat Dissected we’re remaking the drum pattern from JamesJamesJames’s nostalgic track ‘It’s Not You, It’s Me’.
‘James2007‘ was one of Shall Not Fade’s stand-out releases of 2021. It might be best described as a fusion of Hello Kitty couture, lo-fi house and rave pads designed to squeeze every last drop of serotonin from your Tamagotchi-addled mind. Got it? Good.
The Australian producer has a distinctive drum sound which has its roots in lo-fi house but adds a clean, rave-oriented twist.
In this tutorial, we will be recreating the drum beat of ‘It’s Not You, It’s Me’ the opening track of ‘James2007’.
Here’s the beat that we’re making today:
And here it is with a JamesJamesJames style reese bass under it:
Want to follow along? Download the session below:
Spec
Tempo
135 BPMSwing
50%Sounds
Ableton & Amen BreakSTEP 1: AMEN BREAK
Though at its core the beat in ‘It’s Not You, It’s Me’ is a lo-fi house pattern, underlying it at all times is a drum break. And no ordinary drum break, but, the legendary Amen Break.
To get your amen sounding right we need to use the correct bits of the break. The amen break is a four-bar loop – take the first and fourth bar of the amen break.
Place the first bar on your timeline [yellow], then the first half of the first bar [blue] and then the second half of the fourth bar [red]. Quantize the first beat of each bar, and any other rogue drum hits, using Ableton’s warp markers. Be careful not to over-quantize as we want to maintain the classic amen feel.

Consolidate the loop with the key command “Cmd + J” and pitch up the consolidated file by two semitones with the Complex Pro algorithm. Decrease the Formant value to 0 so we get that classic repitched texture.
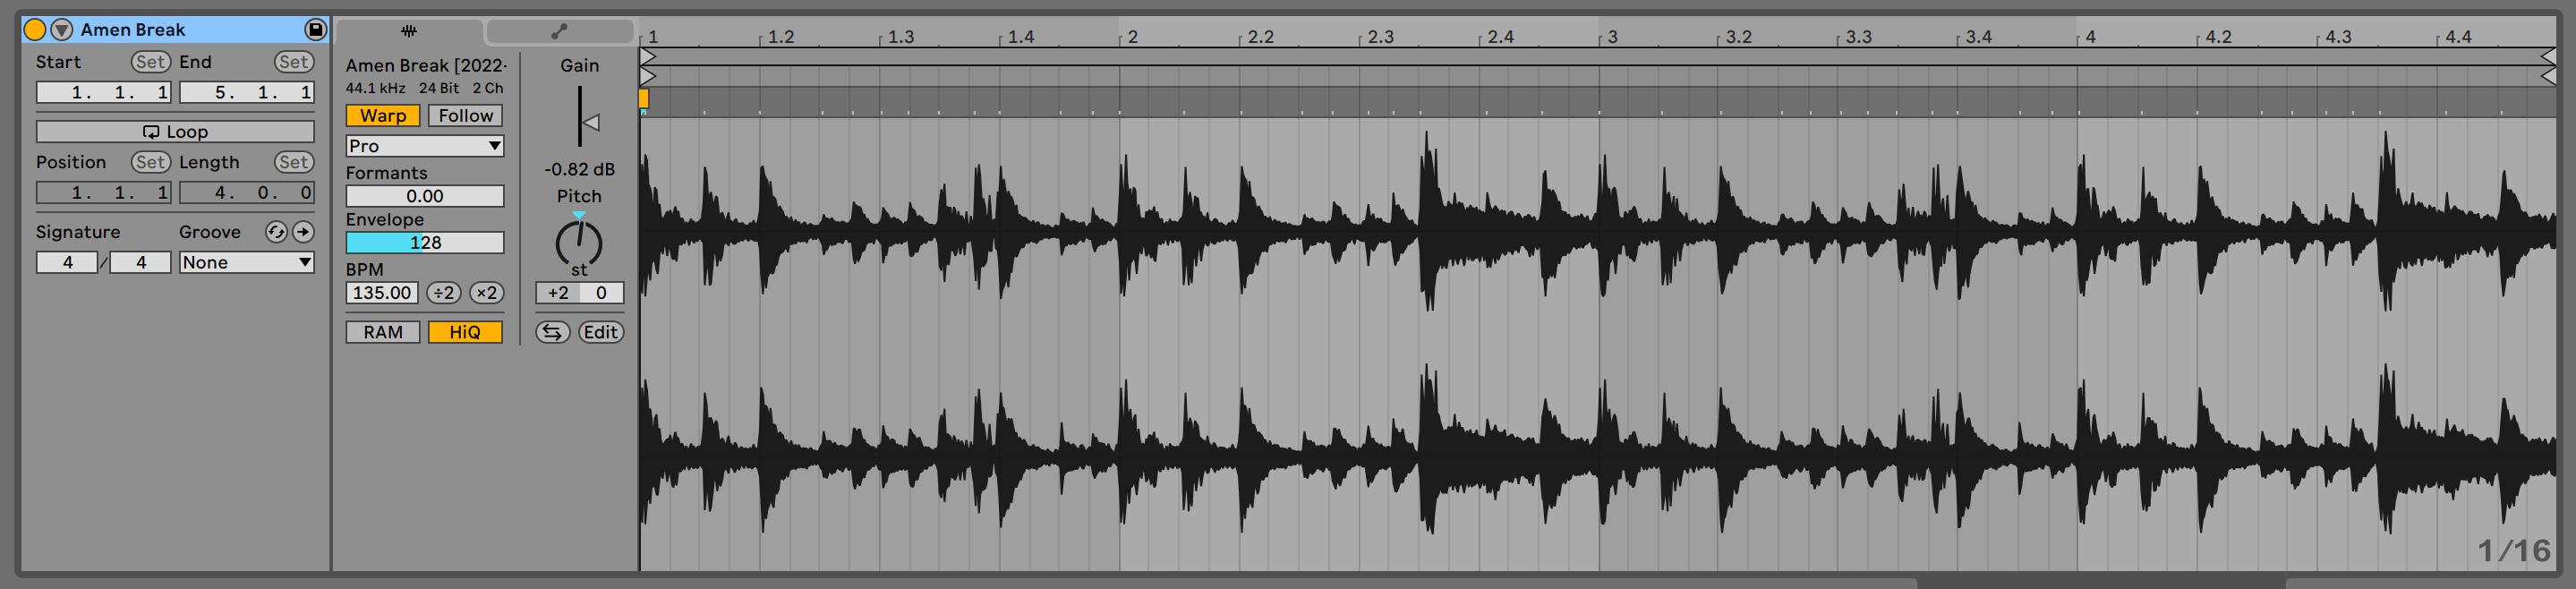
Finally, filter out the lowest and highest frequencies with an EQ.

Step 2: The Kick
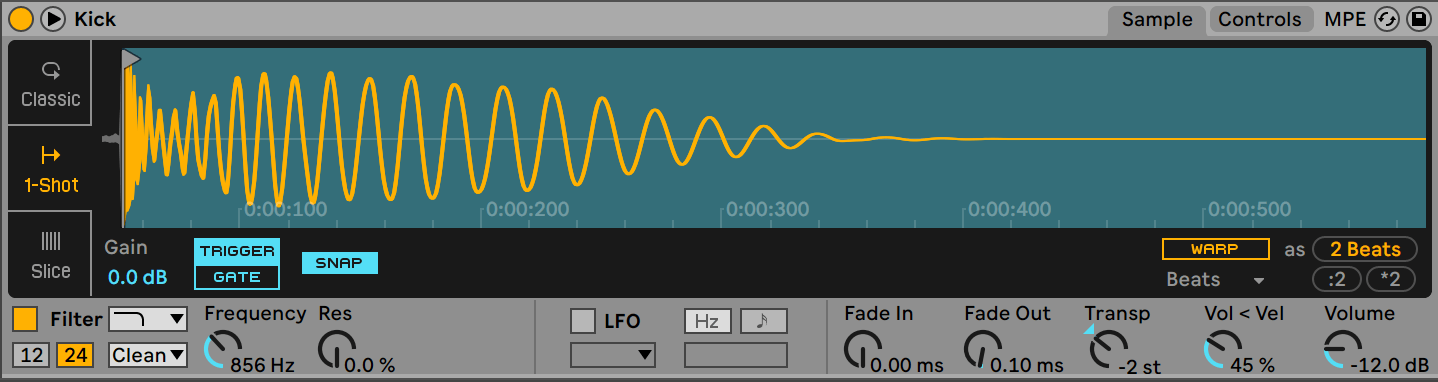
The vast majority of JamesJamesJames tracks have a beefy, sub-heavy four-to-the-floor kick driving the track forward. ‘It’s Not You, It’s Me’ is no different.
Load an appropriate kick in a Drum Rack. The kick we’re using has a prominent click in the transient which we’ve tamed by filtering out some of the high frequencies with the built-in filter in the drum rack slot.
Tune your kick so that it sits well alongside the melodic elements. To that point, we’ve brought it down two semitones.
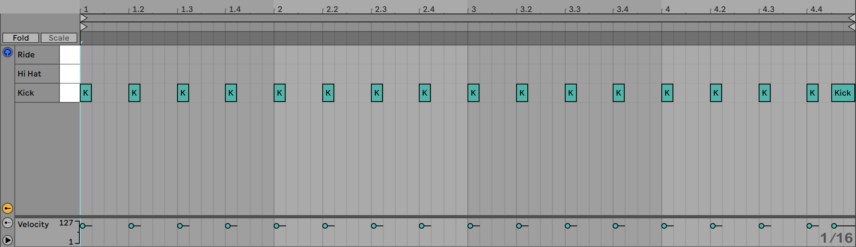
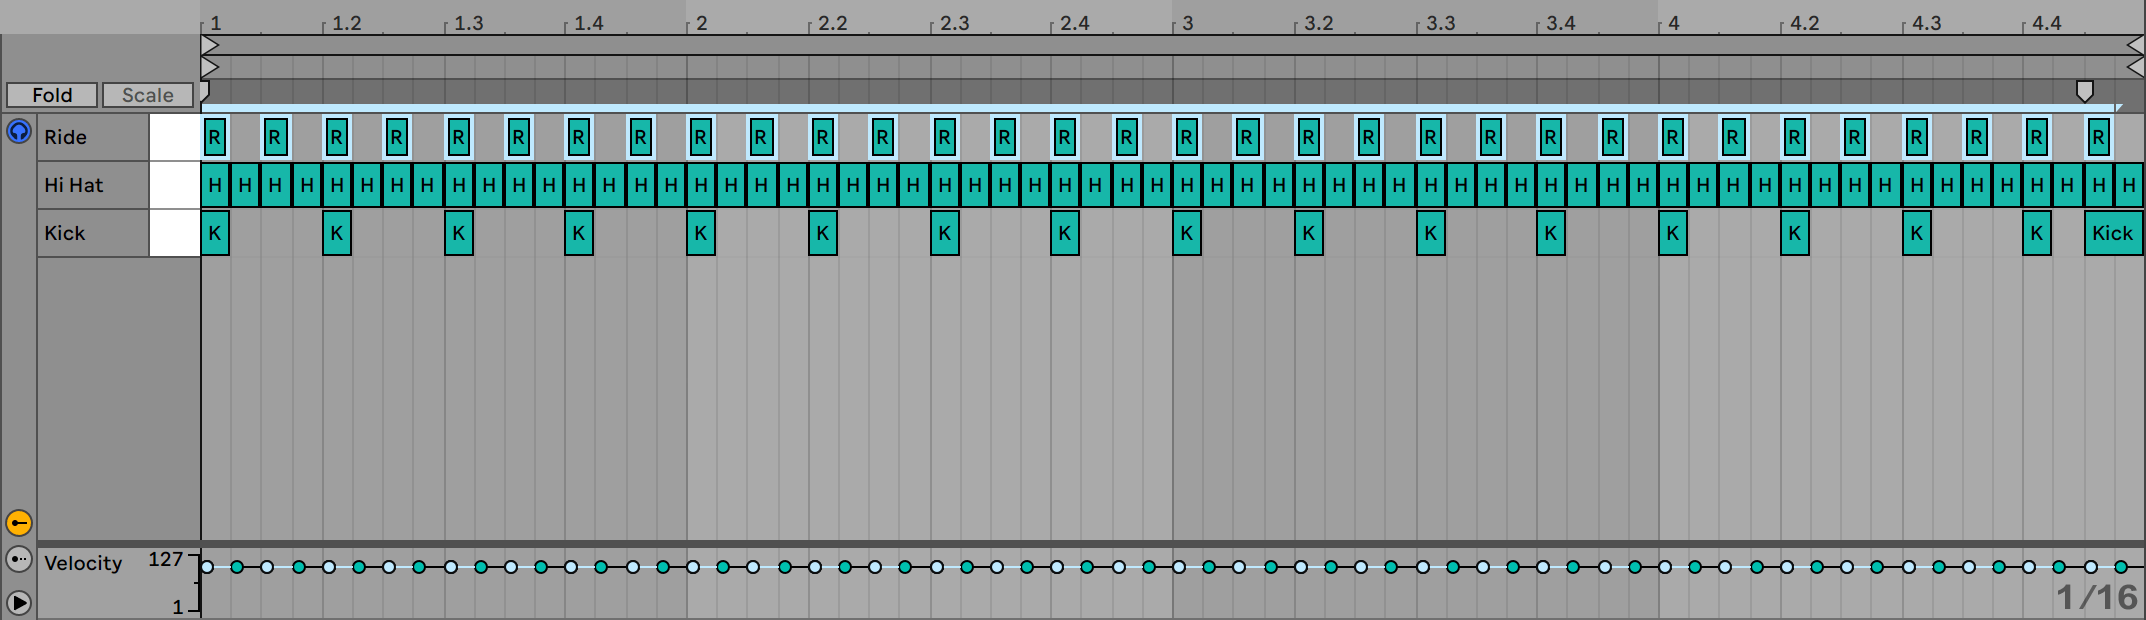
Create a four-bar MIDI clip and lay down a classic four-on-the-floor pattern. Add an extra kick on the very note of the fourth bar. This is a turnaround that JamesJamesJames uses a lot and is a staple of lo-fi house.
STEP 3: HI-HATS AND RIDE
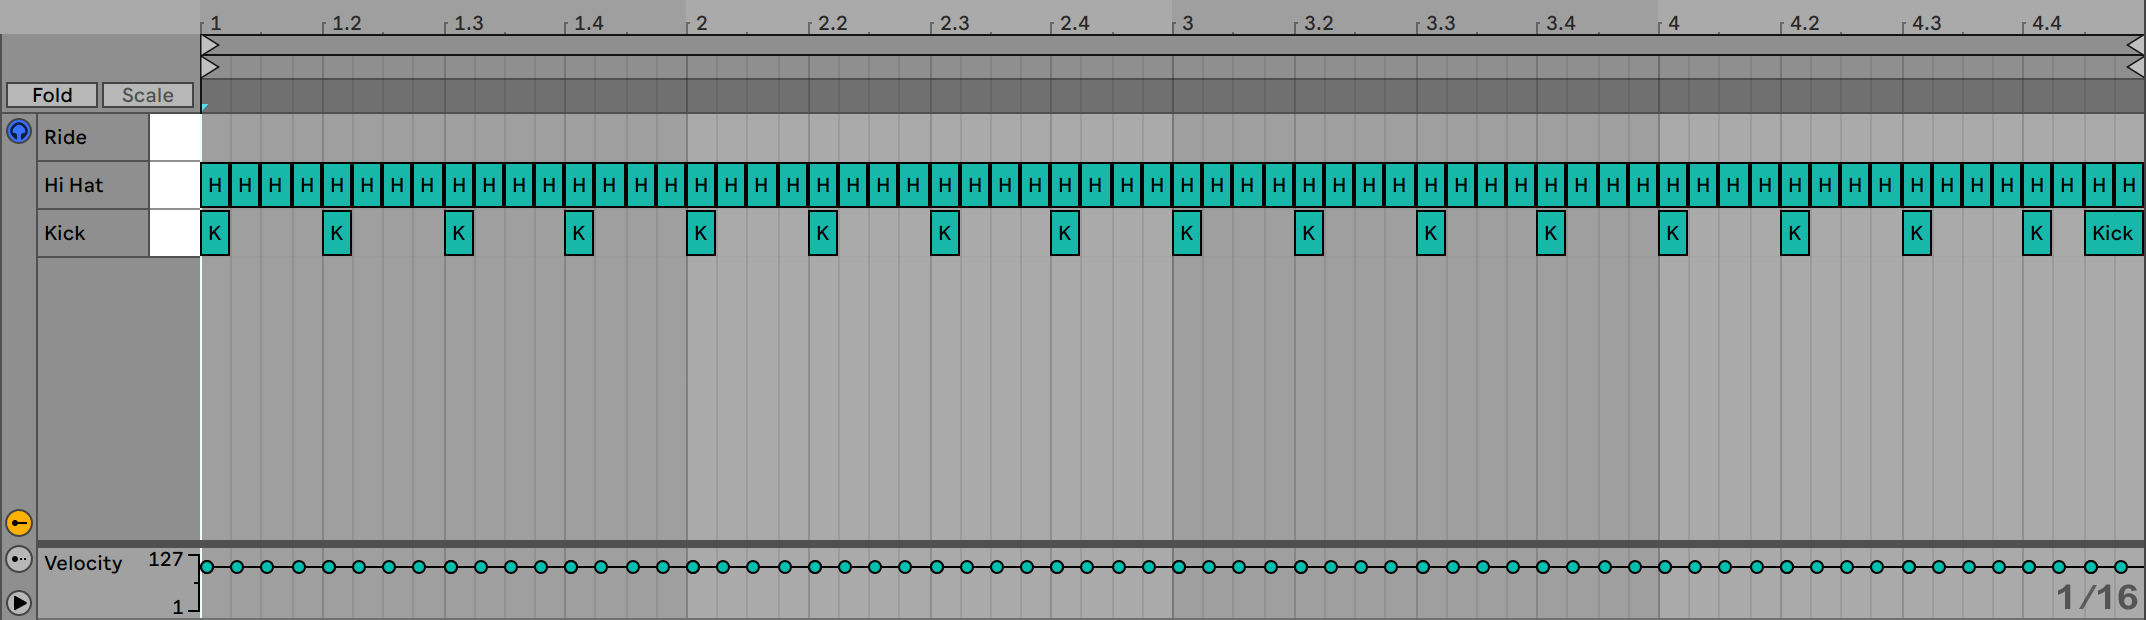
Drag a closed 909 hi-hat sample from Ableton’s stock samples into your drum rack. Program the below pattern with the closed hat playing on every 16th note.
The closed hat sounds a little harsh. To combat that, bring down the volume, pitch it down by one semitone and introduce a fade-in of 1.33ms at the start of the sample.
In addition, filter out some of the lower and higher frequencies with Simpler’s band pass filter.
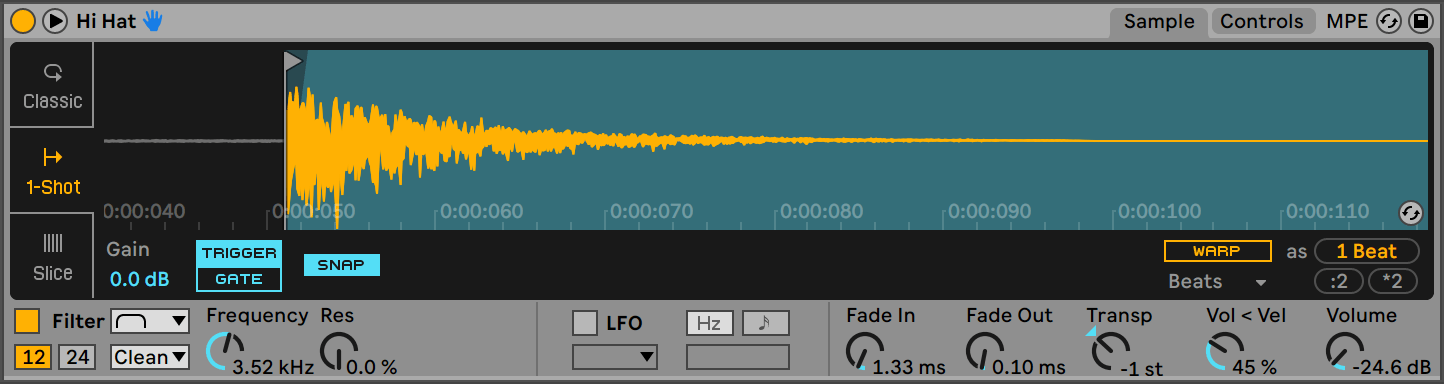
Next add a 909 ride to your drum rack. Trim the sample to just the middle of the ride, pitch it down one octave and add a hit on every eighth note. Filter the highs and lows out of the ride with a -12dB per octave band pass filter.

If you find that the ride is masking the hi-hat, try panning the hi-hat slightly to the left to give it some more space.
Step 4: Processing
Time to glue the beat together with a few of Ableton’s stock audio effects.
Group the Drum Rack and Amen Break tracks together so we can process them simultaneously. Load an instance of Drum Buss on the group channel. Select the medium drive mode, add 44% crunch, and boost the transients slightly for a crisp, full sound.
This will also help to sonically fuse the different drum elements together into a cohesive single rhythm.
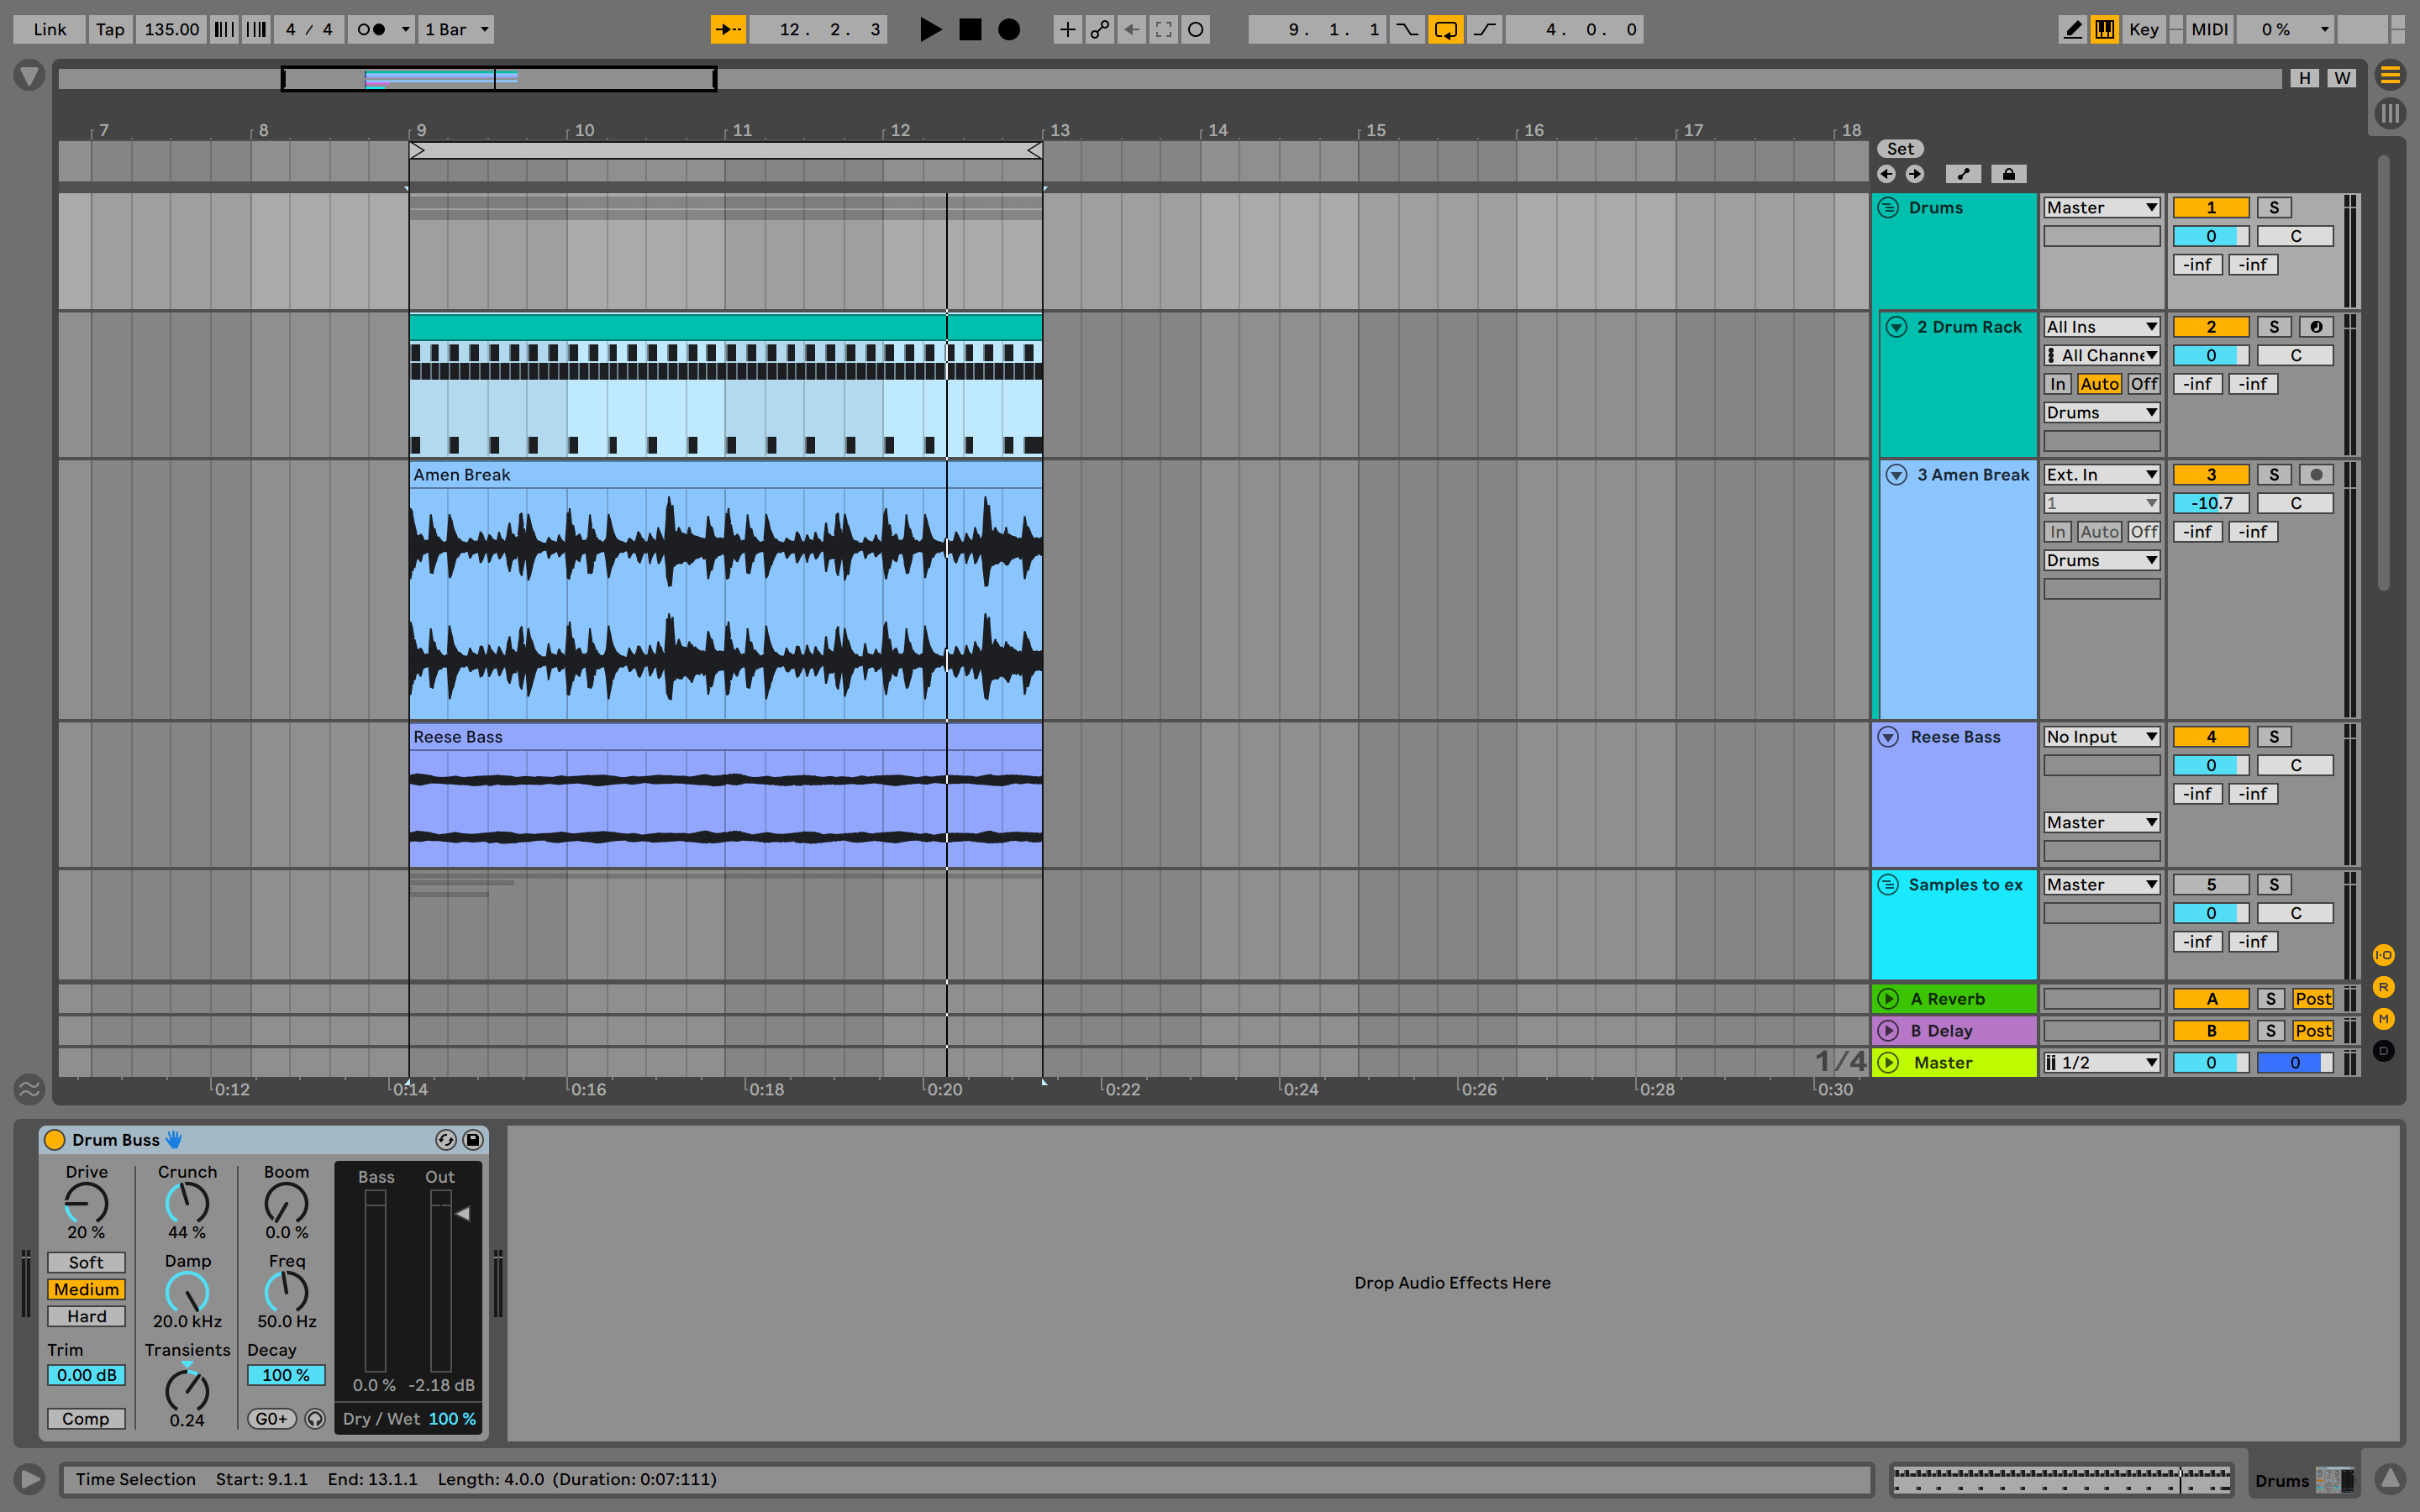
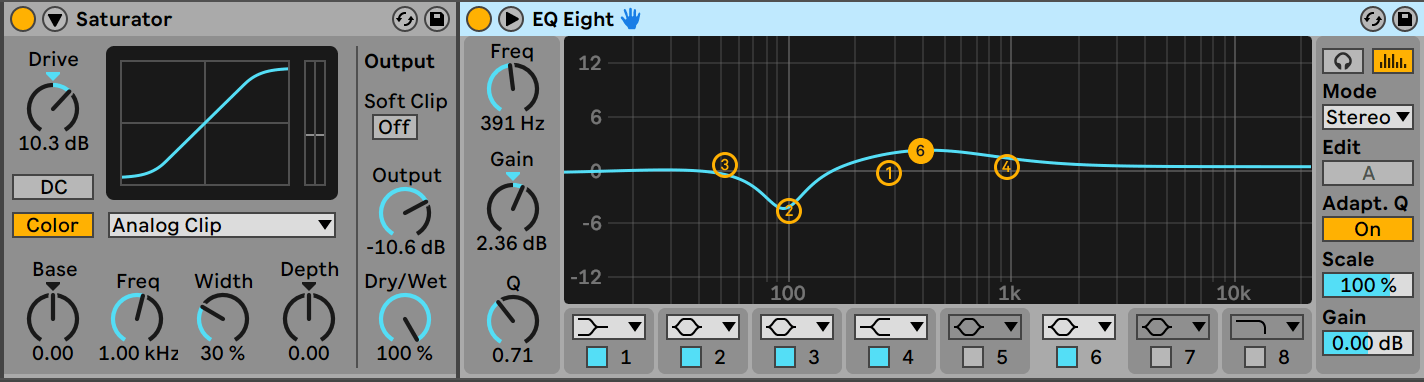
To give the kick a bit more impact and life, load Ableton’s Saturator and add about 10dB of drive making sure to reduce the output by the same amount. Analog Clip mode sounds great here.
After Saturator, load EQ Eight, subtly boost the lower mids, and cut some of the muddiness out at around 100Hz.
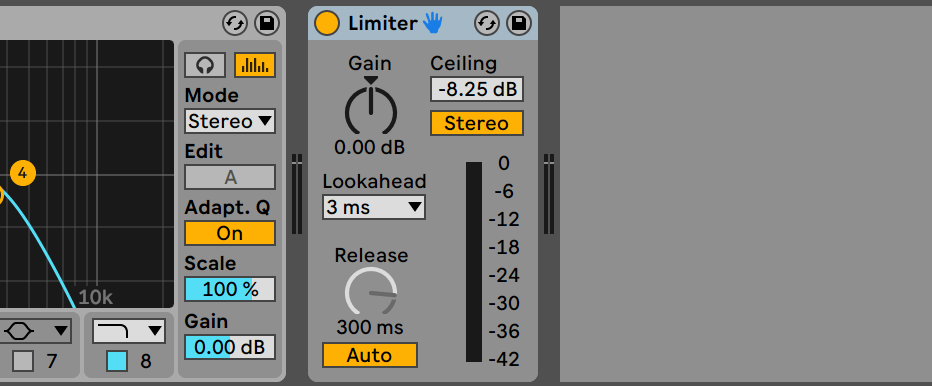
Load a limiter with a -8.25dB ceiling on the Amen Break to smooth out the loudest peaks in the sample.
Finally, add the velocity MIDI Effect to the hi-hat slot in Drum Rack. Set Out Hi to 90, Out Low to 78 and, and the Random dial to 13. This will humanize the hi-hat slightly.

And now with a reese bass just for context:


