u-he are makers of award-winning software synthesisers and effects including Diva, Repro-1, Zebra2, Hive, Bazille, Presswerk and Satin.
Visit U-he
Technique » Synth Secrets »
Synthesizing Bass For 3 Different Genres With Moog Minitaur
This channel is sponsored by

In this tutorial, we use Moog’s limited edition Minitaur to make basslines for techno, house and bass music tracks.
Moog Music’s Minitaur is a dedicated analog bass synthesizer with a surprisingly long pedigree. It’s the fourth incarnation in a series of low-end-only instruments that began with the Taurus in 1975. This was a synthesizer with pedals that you played with your feet, it was meant to sit on the floor, freeing up your hands. The Taurus II followed in 1981 and a third, limited edition one, in 2010. The Minitaur (get it?) does away with the pedals and houses everything in a desktop box.
Today we’re going to use this little powerhouse to synthesize bass sounds for three genres of music: techno, house and hardcore rave.
online pharmacy purchase champix without prescription with best prices today in the USA
Here are the finished examples:
N.B: We recommend following along with headphones or studio monitors. As ever, click any image to see a larger version.
online pharmacy fluoxetine with best prices today in the USA
Why Use A Hardware Synthesizer?
Before we go any further, let’s address the elephant in the room. Why bother with a hardware synth when you already have a computer full of plugins? Doesn’t it do the same thing?
The short answer is no, and so is the long answer. If you have to ask why you might want a Moog rather than a VST, you’ve clearly never heard a Moog in action. It’s like asking “why have a steak instead of a Big Mac”. The tone is solid and full, with a palpable amount of weight. You may be able to get a similar sound with a plugin and a lot of processing but a Moog will always sound gorgeous right out of the box.
Hardware synths can also bring a sense of uniqueness to your productions – everyone is using Serum but how many people are working with a Minitaur? Finally, it can be useful to have a wide palette of sounds available to you in your studio. Analog poly, FM poly, wavetable, modular, and bass synth – they all bring something different to the table.
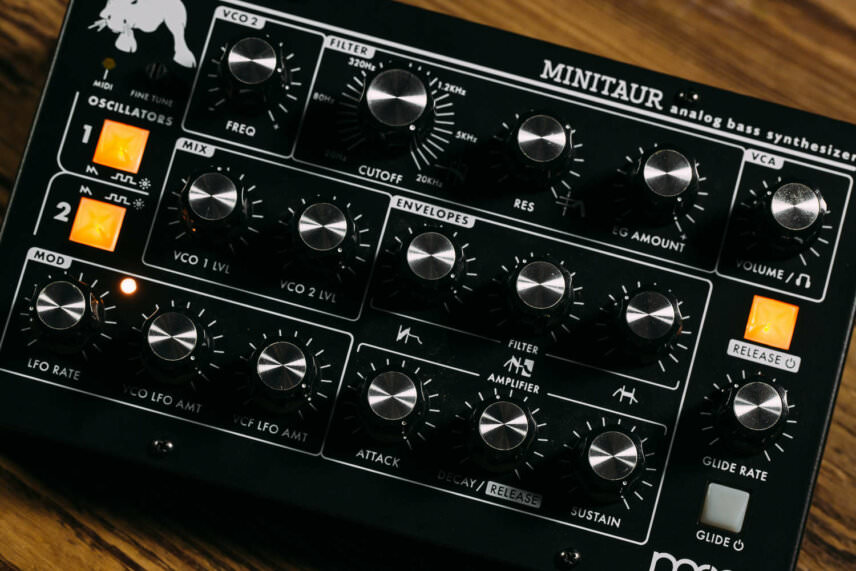
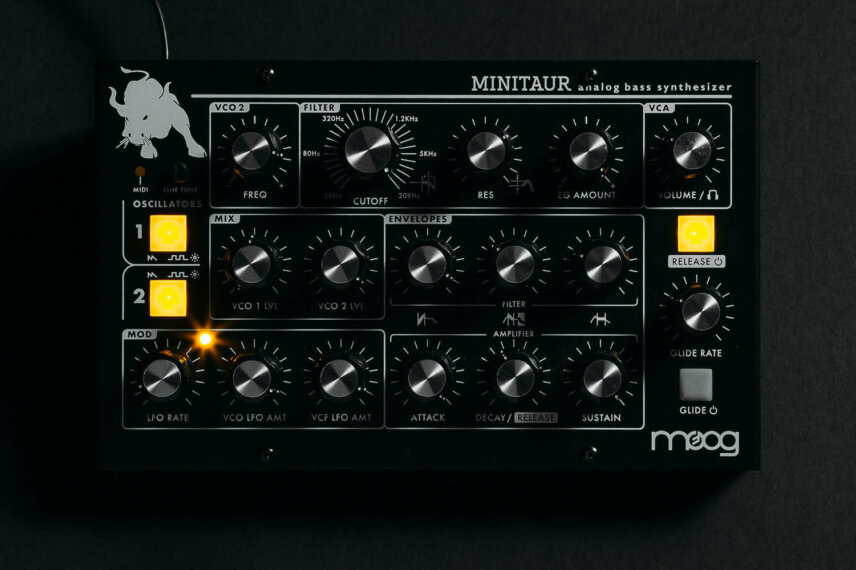
A Quick Overview Of The Moog Minitaur
Moog’s Minitaur is a two-oscillator monophonic bass synthesizer. Each oscillator has two waveforms, sawtooth and square, and Oscillator 2 can be detuned against the first. It has the classic Moog Ladder filter with cutoff and self-oscillating resonance.
There are two envelopes, one for amplitude and one for cutoff. Like the Minimoog, the envelopes are restricted to attack, decay and sustain, with release tied to the length of the decay. Finally, it has an LFO that can affect the pitch and filter cutoff as well as glide (portamento).
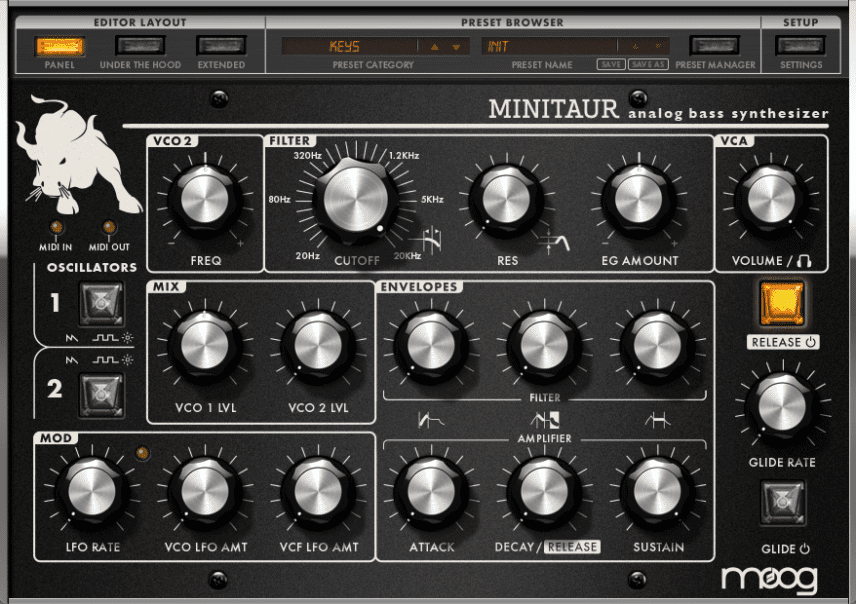
It’s a fairly basic synth in terms of parameters, which makes it easy to use. However, there are a number of hidden additional parameters that can be accessed with a few button pushes or via the editor. We’ll be using the editor to demonstrate today’s patches for the sake of clarity.
Rolling Techno Sub
For our first genre exercise, let’s create rolling sub-bass to sit under the kick in a techno track.
Step 1: Set Up
Start by creating a new audio track in your DAW. We’re using Ableton Live but any DAW will work. Open the Minitaur editor plugin on the track and then create a separate MIDI lane with the External Instrument plugin pointed at the Minitaur. See the Moog site for more information on how to do this.
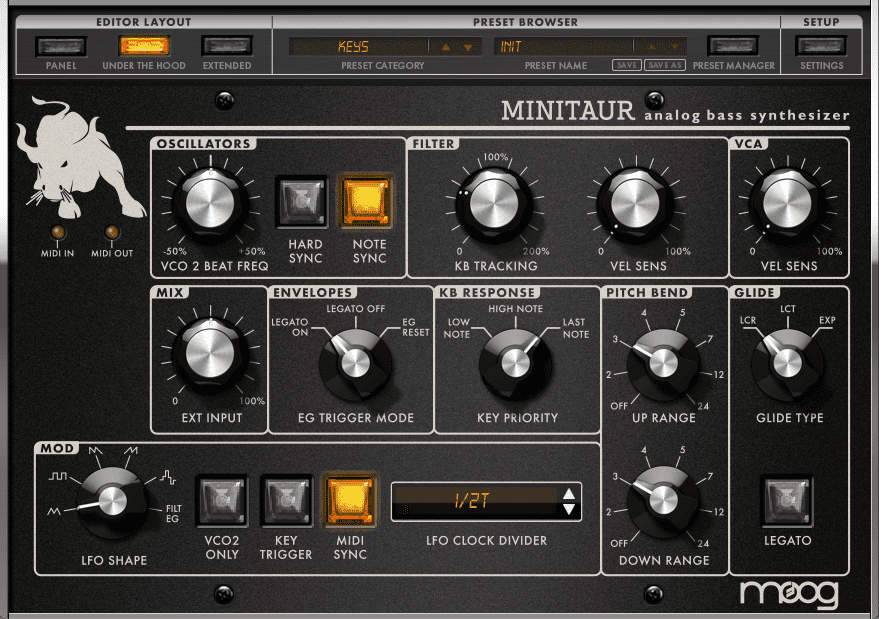
Choose an initialized patch (Init) and draw in some notes in your DAW. Finally, go to the Under The Hood section in the editor and click on the NOTE SYNC button in the Oscillators section. This will reset the phase of the oscillators with every new note played, making sure that each note has plenty of punch at its onset.
The bass sequence in default mode:
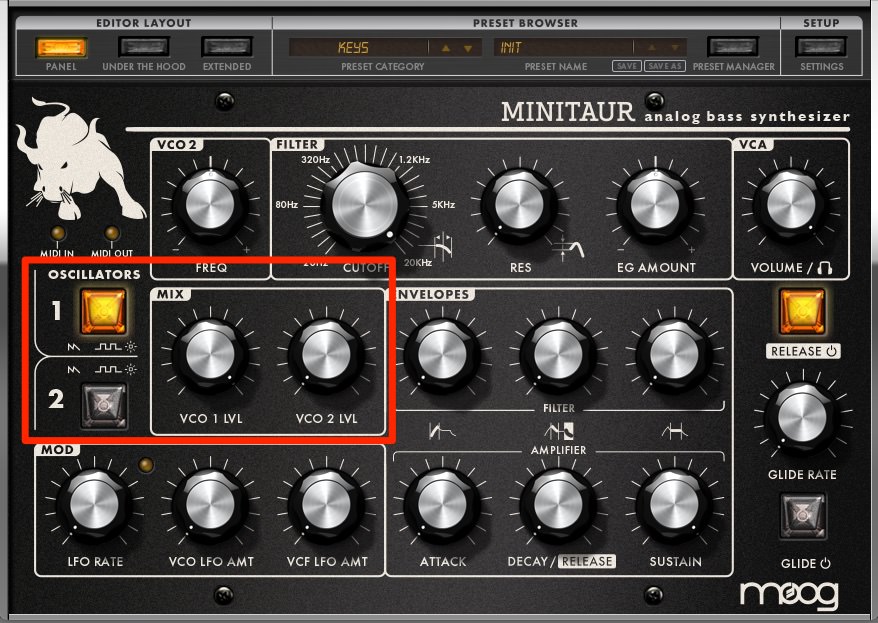
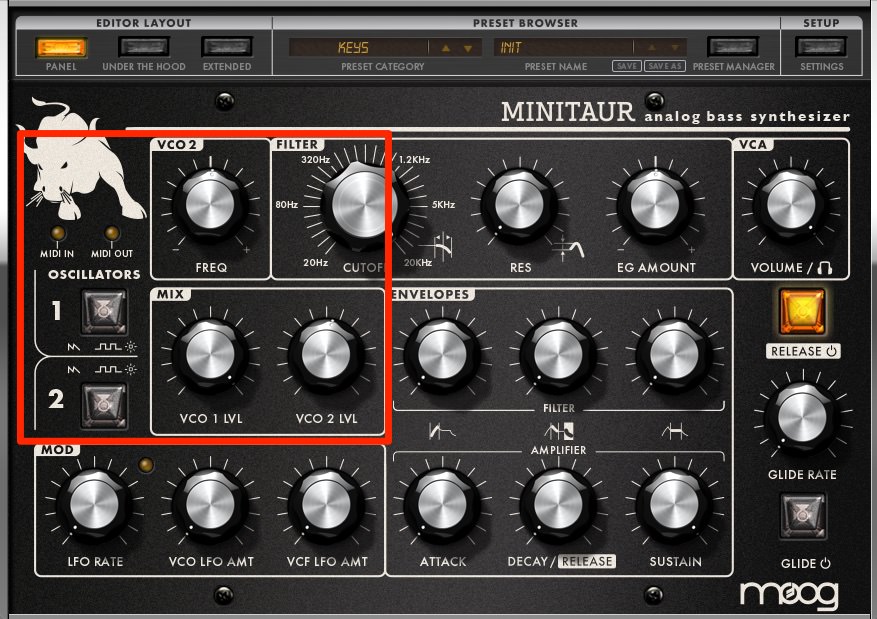
Step 2: Oscillator
Let’s set up the oscillators next. We’re going to use a single oscillator for a clean sound, so make sure VCO 2 is turned down in the Mix section. The volume of VCO 1 is currently set at halfway – let’s bring it up to full power. Lastly, press the number 1 waveform button to change it from sine to square.
Now with a square wave:
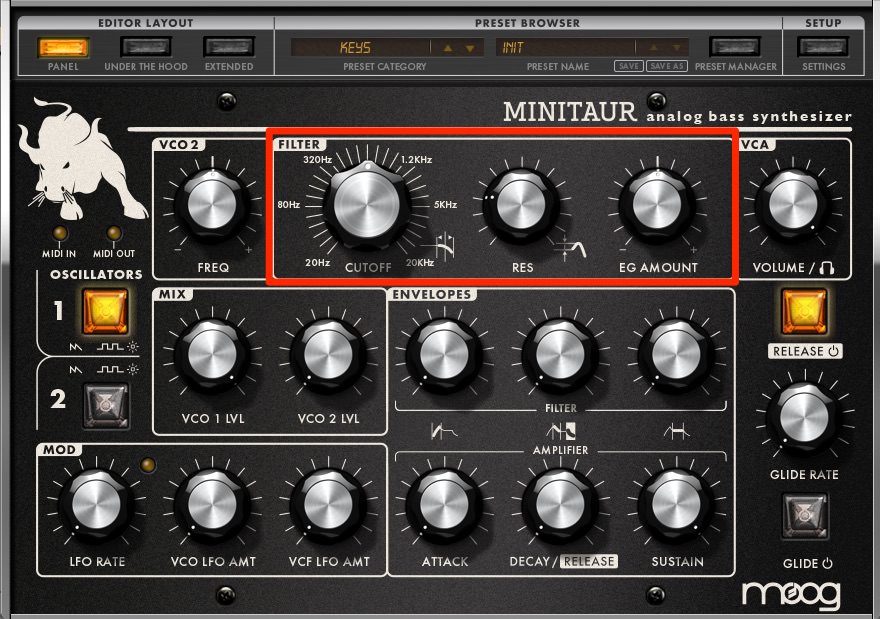
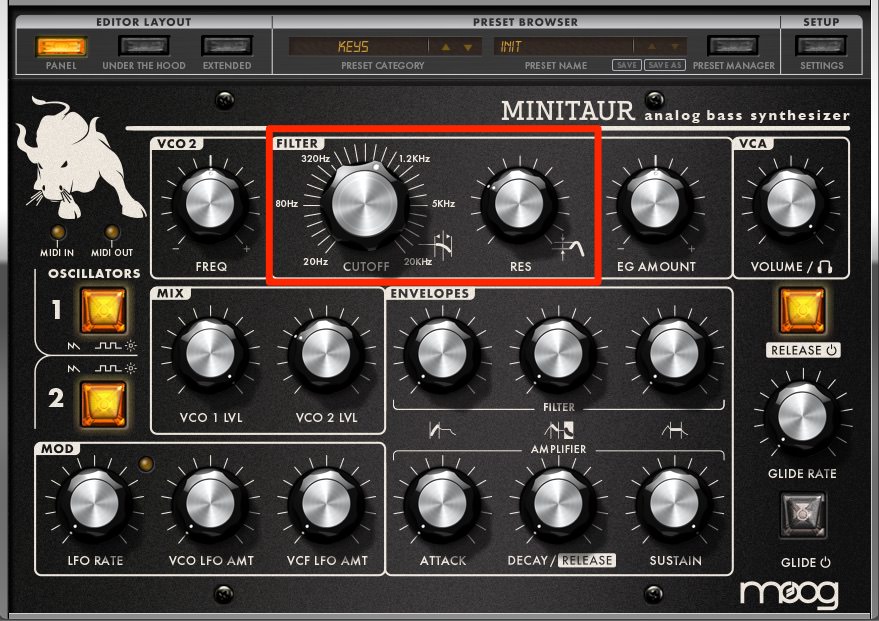
Step 3: Filter
That’s really bright. Bring the Filter Cutoff down to about halfway. We can add a little resonance as well. A setting of 9 o’clock sounds good.
With lowered cutoff:
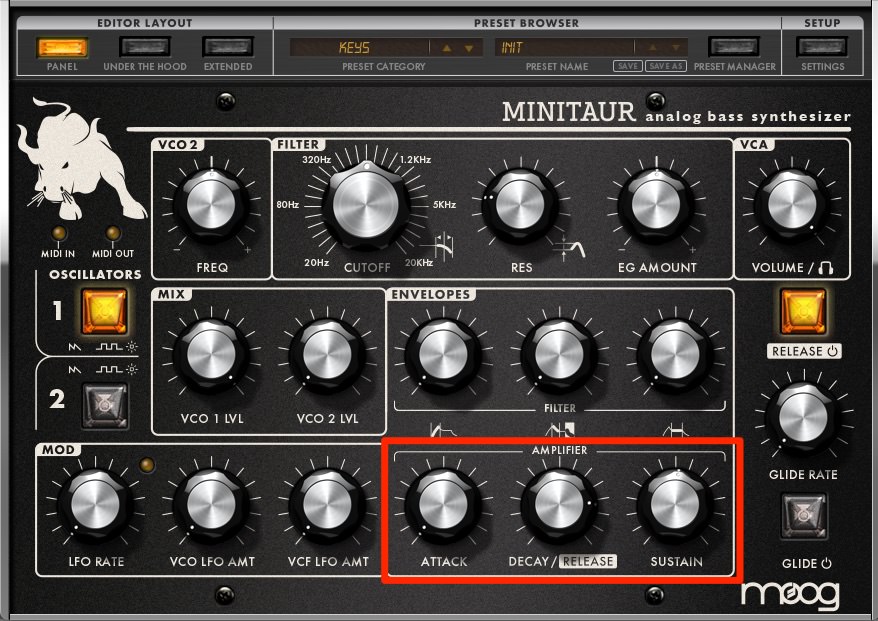
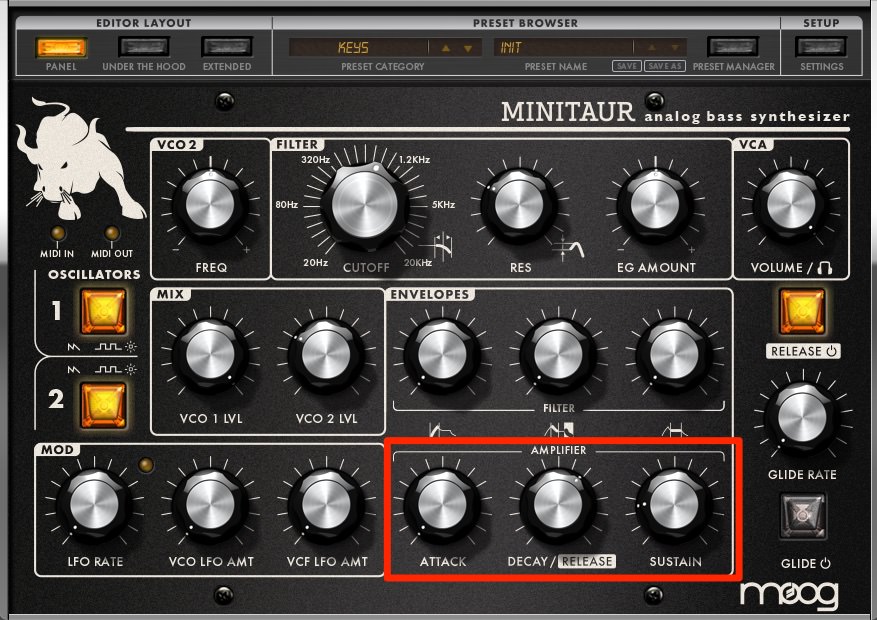
Step 4: Amplifier Envelope
Our bass sound is much too short. Let’s shape it with the envelope. In the Amplifier section, raise the Decay/Release knob to around 3 o’clock for a long, boomy sub. We can lower Sustain to around half way as well.
With VCA envelope:
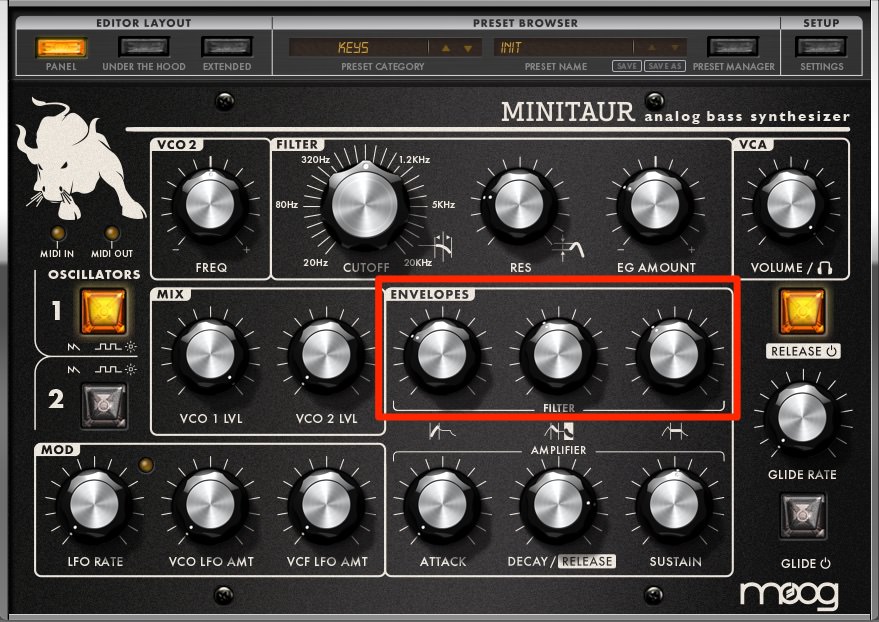
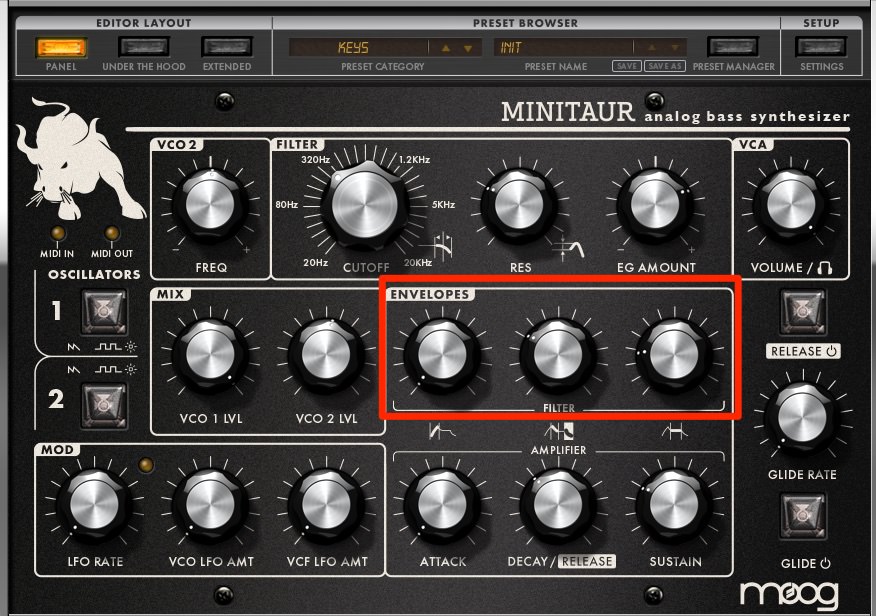
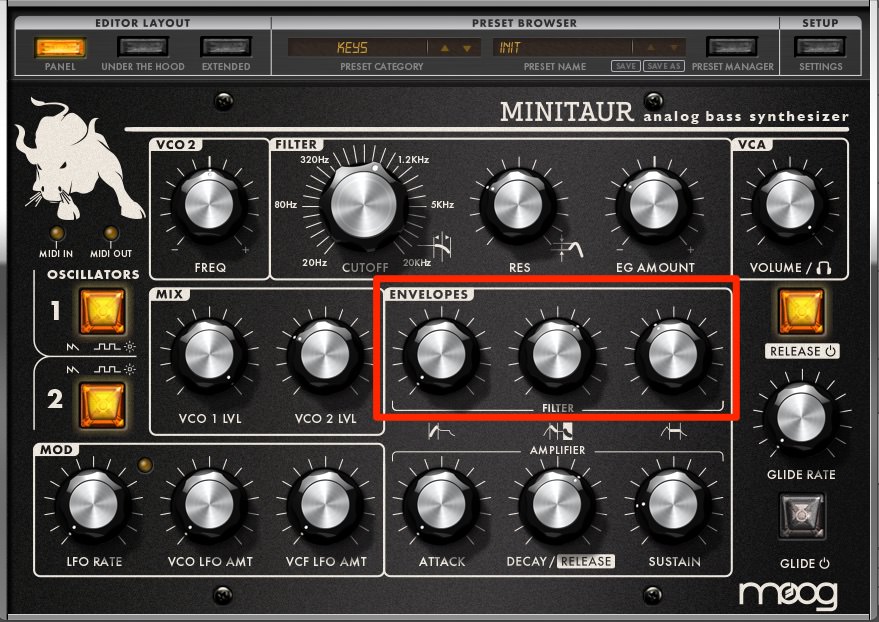
Step 5: Filter Envelope
We want the bass to pump around the kick. We can achieve this with the filter envelope. First, in the Filter Envelope section, raise the Attack to around 10 o’clock, Decay/Release to 11 o’clock, and Sustain to the same position as the Decay. In the Filter section, turn the EG Amount knob to the left. This will reverse the polarity of the envelope shape and cause the filter to pump in and out. Fine-tune the pumping to the beat. A setting of 10 o’clock sounds good.
The bassline now with the Filter Envelope applied:
Here is our finished bassline in the context of a track with compression and EQ plus samples from Splice’s Tension – Techno pack:
Classic House Bass
Next, let’s dial in some classic Moog bass for a house track.
Step 1: Set Up and Oscillator
First, set up the Minitaur as we did in the techno section above, with a default patch and NOTE SYNC on. Draw in some notes for a bassline.
We want a sharp, buzzy sound so we go with a sawtooth wave for both oscillators. We bring up VCO 1 LVL to full and VCO 2 LVL to halfway. Finally, we adjust the tuning of VCO 2 until we hear just a small amount of movement in the interplay between the two oscillators.
The bassline so far:
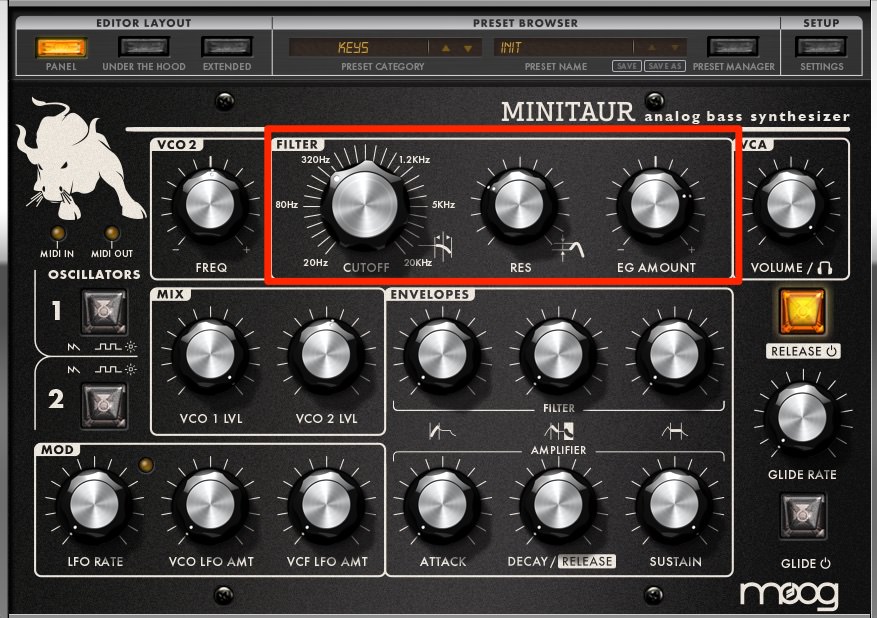
Step 2: Filter
Let’s add some of that Ladder filter mojo. Turn the Cutoff down to around 320Hz, bring up the resonance to 10 o’clock for some good squelch, and up the EG Amount to 2 o’clock as well so the Filter Envelope will affect the Cutoff.
Now with filter changes:
Step 3: Amplitude Envelope
We’re after a short and punchy bass sound this time. Leave the Attack at zero for a snappy onset, Decay at around 10 o’clock and Sustain just a hair below that. Be sure and turn off the Release for a staccato sound.
The bass so far:

Step 4: Filter Envelope
Finally, let’s use the filter’s envelope to push some squelch into the bass. Keep Attack at zero and raise Decay and Sustain to 9 o’clock. There’s that Moog magic.
The finished bassline:
Here it is with compression and EQ in a track with samples from Splice’s Basement House and Terrace House selections:
Dread Bass
For the last bassline, let’s recreate a classic, the dread bass from Dead Dred’s ‘Dred Bass’, and use it in a 160bpm hardcore track.
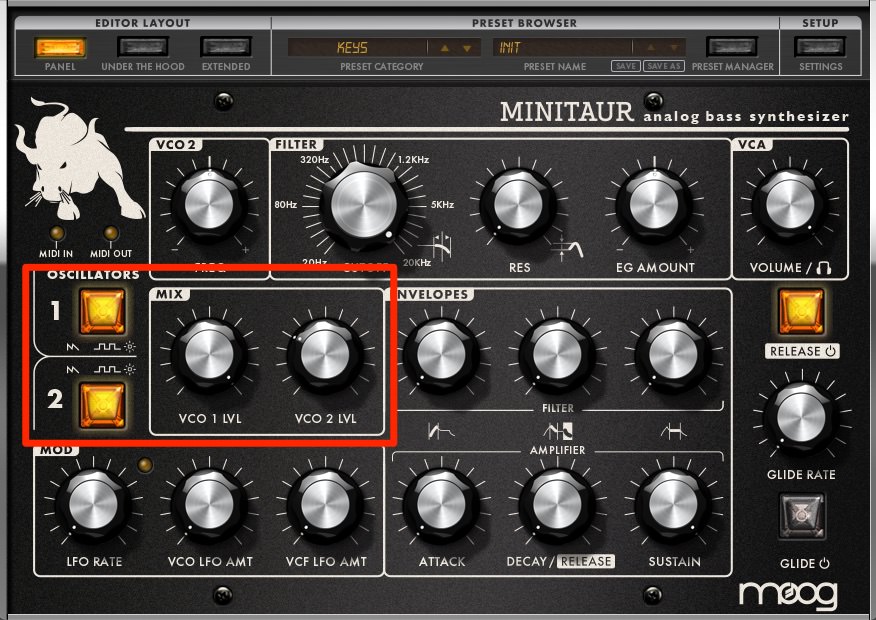
Step 1: Set Up and Oscillators
Set up your DAW as before, play in a bassline, call up a default Init patch and select NOTE SYNC.
Change both oscillators to square waves for smooth bass sound. Turn up the level of VCO 1 all the way in the Mix section, and blend in VCO 2 until you hear the two oscillators begin to phase against each other. Around 10 o’clock sounds good to us.
Square wave bass:
Step 2: Filter
That’s extremely bright. Bring the Cutoff down to around 1000Hz and add some resonance as well. Not too much – just enough to give it some colour.
Top Tip: Moog filter resonance attenuates the low-end. You can use this as a kind of highpass filter to help balance the amount of bass in your track.
Now with filter adjustments:
Step 3: Amplitude Envelope
Let’s set up the VCA envelope next. We want a nice, full sound. Leave Attack at zero, set Decay to around 1 o’clock, and Sustain at 3 o’clock. Make sure the Release button is turned on.
With envelope adjustments:
Step 4: Filter Envelope
The final stage is the filter envelope. The original dread bass was made by reversing a bass sample. We can mimic this with the Filter Envelope set to reverse polarity. In the Filter Envelope section, put Attack at zero, Decay at 1 o’clock, and Sustain around 12 o’clock.
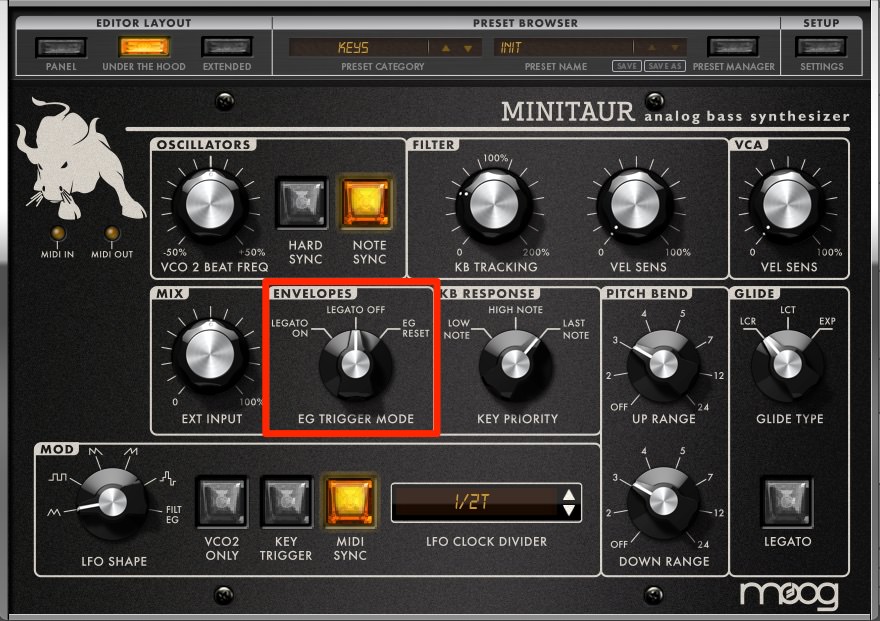
Next, turn the Filter EG Amount dial counterclockwise to create a fade-in effect. If the envelope is being affected by overlapping notes, head to the Under The Hood panel and set the EG Trigger Mode to Legato Off.
The finished dread bass:
And in the context of a song with compression and EQ and break loops from Splice’s Classic Jungle and Warehouse Rave packs:
FOLLOW ATTACK MAGAZINE
Synth Secrets is sponsored by
u-he are makers of award-winning software synthesisers and effects including Diva, Repro-1, Zebra2, Hive, Bazille, Presswerk and Satin.
Download the demos and try them for yourself at www.u-he.com