This channel is sponsored by
 Roland Cloud is your creative hub for Roland hardware and software. Access legendary recreations of Roland Classics, find new sounds for your favorite products, and download updates and companion apps to make music fast and easy. Visit Roland Cloud
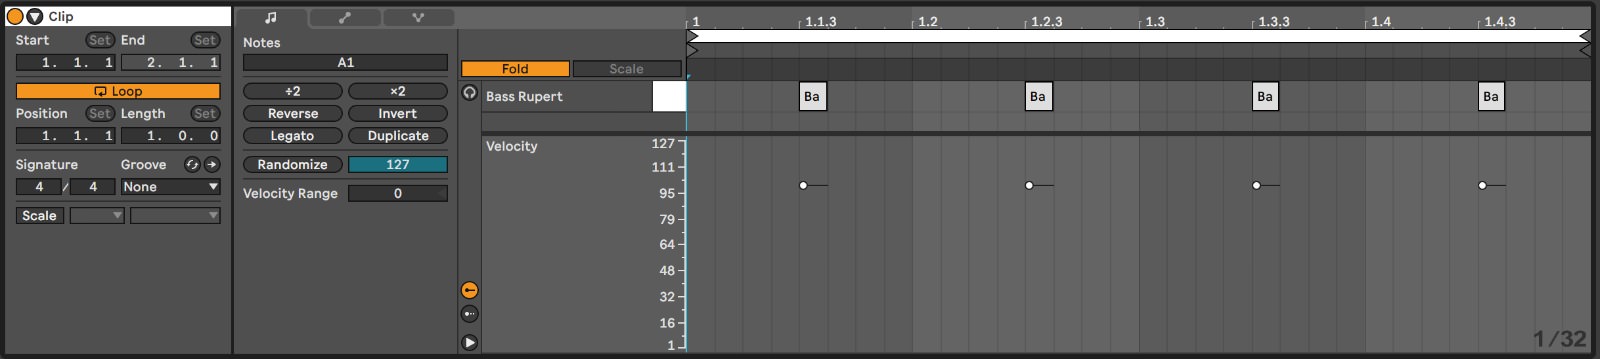
In this article, we are using a bass hit one shot in Ableton Live and applying modulating filters plus bi-polar distortion with Minimal Audio’s Rift.
Powerful distortion tools are in high demand! This is particularly true in techno where certain sub-genres of techno have become increasingly more distorted. Think I Hate Models, Rebekah, Rudosa etc. Some even call it ‘rage techno’.
There is therefore an ever-increasing complexity being delivered to the market. Companies are providing more intelligent AI processing, cleaner user interfaces, more novel workflows and improved emulation of vintage processors. Things have come a long way since the Sausage Fattener…!
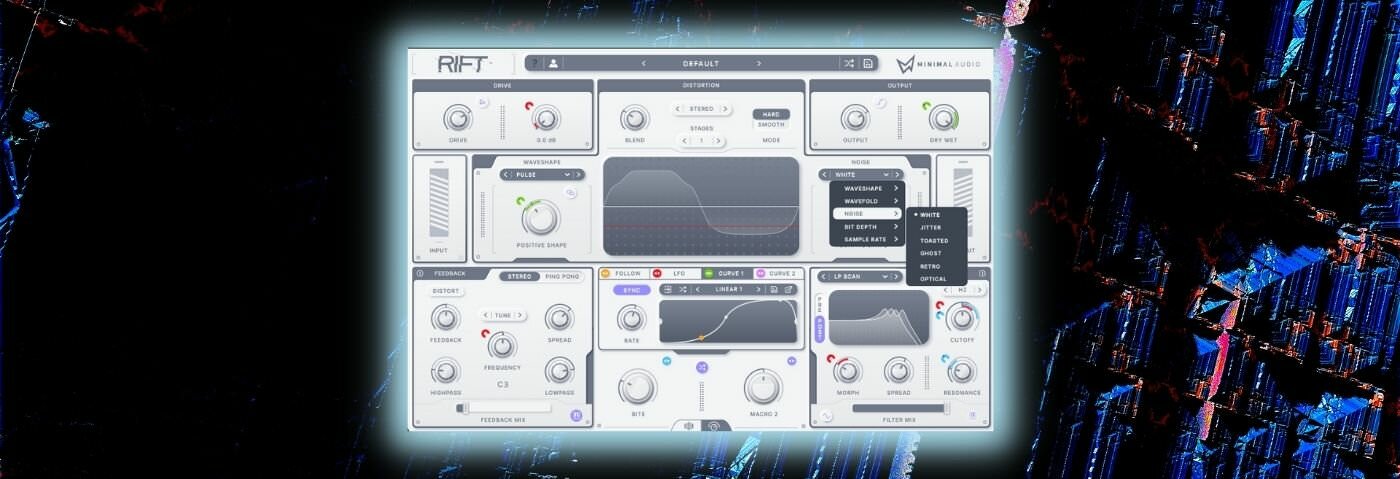
With a growing number of options on the market, where should you start? One such place is Minimal Audio’s Rift. We recently received it at the Attack HQ and we have been impressed. It’s both a good looking and good sounding device that “creates massive distortion effects and animated harmonic movements with unprecedented control”. Rift’s well-informed design takes the concept of bi-polar waveshaping to the next level, placing it at the very core of its design.
In this article, we’re going to run through Rift and apply it to a one-shot bass line. If you wish to follow along set the BPM to 130. The one-shot we are using, ‘Bass Rupert’ is from the Wah Soul Kit in Ableton Live.
Don’t forget your can click any image to enlarge. Here’s what we are making today:
N.B Some changes are subtle so be sure to use headphones or good monitor speakers!
Let’s get into it!
Step 1: Pick And Shape Distortion One
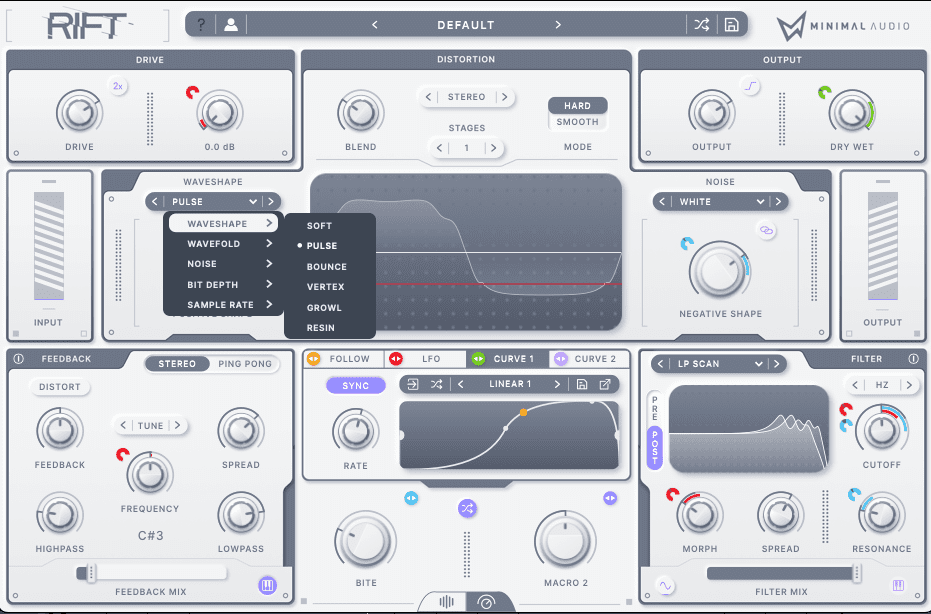
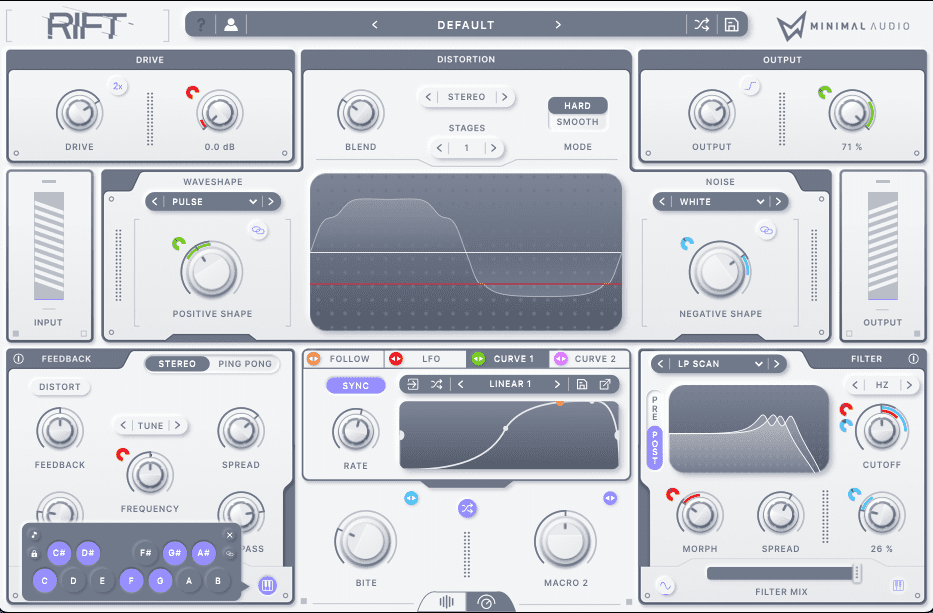
One brilliant quality about Rift is how 30 types of distortion can be manipulated on the positive and negative portions of the waveform individually. Just toggle through the menu using the forward and backward arrow keys.
For the positive signal, we’re using PULSE which is part of the WAVESHAPE category. It gives a saturated or overdriven sound.
At a depth of 0.40 (or 40%), the sound has a slight crunch and warmth. You can also play around with the DEPTH INDICATOR as even when pushed further it gives you steady and controlled results. Now there’s a nice algorithm..!
Step 2: Pick And Shape Distortion 2
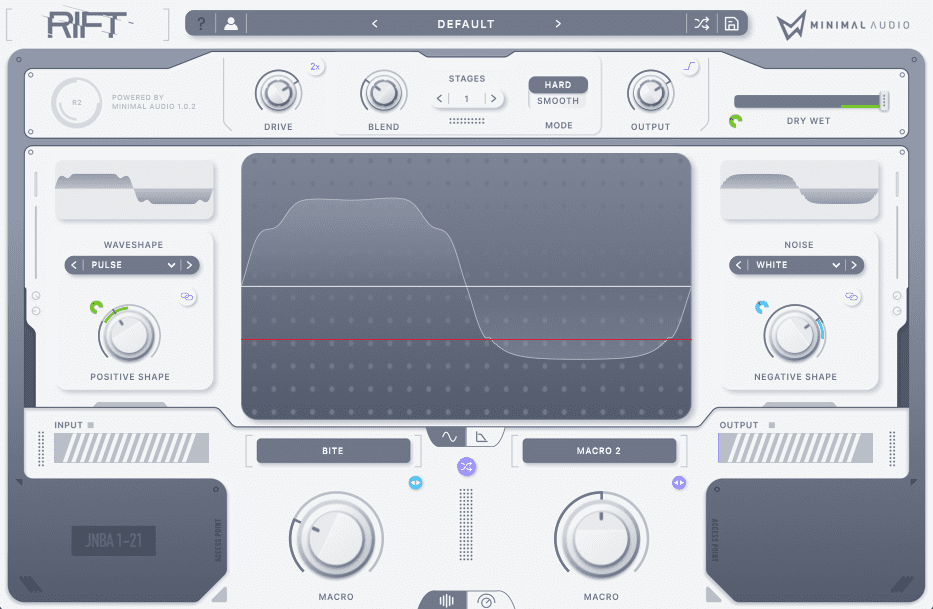
When you open Rift plugin it’s easy to see the strong focus on the multi-polar processing engine immediately. It’s in “Play View” or ‘Simple Mode’.
A dominant visual display in the centre will be familiar to users of Clip Distortion in Logic Pro or Saturator in Ableton Live. We are also presented with an active oscilloscope overlay and an animated representation of the modulating wave shapes. This implementation makes it easier to navigate the plethora of distortion types available as you work on the sound.
For the negative signal, we’re using WHITE which sits under the NOISE category in the tree menu. It gives us a dusty vintage sound akin to analogue style emulations.
Set the DEPTH INDICATOR to 0.60 which imitates something such as an old noisy tape saturation.

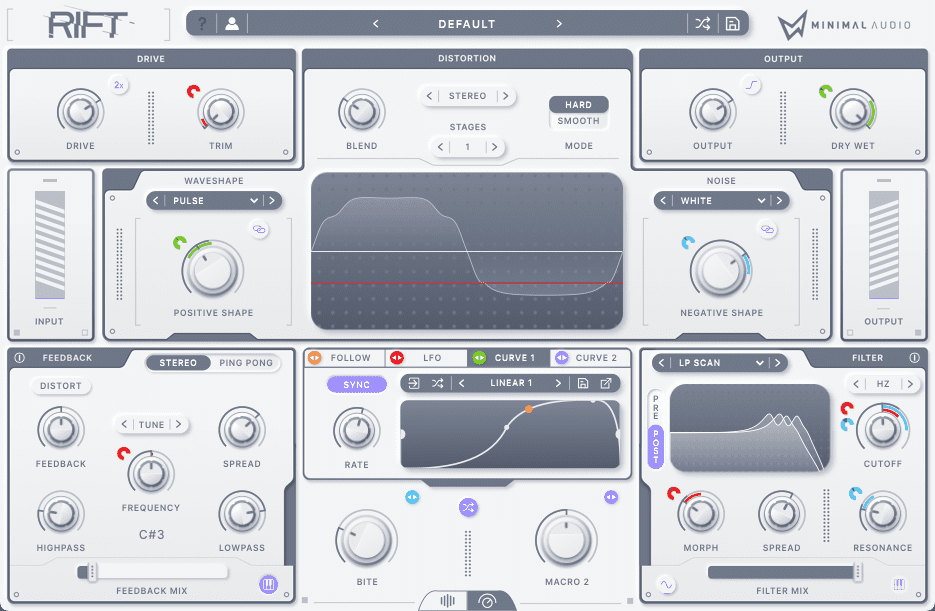
Step 3: Adjust Distortion Input, Blend, Stages And Output
At this stage, set the BLEND to find a good balance between the two signals chosen in Step 1 and Step 2.
Set the control at -0.40 which equates to a 40-60 % balance between positive and negative distortions respectively.
There are a number of ways to add more bite, presence or brightness to the distortion.
- Increasing the INPUT DRIVE.
- Activating the DRIVE BOOST (2x) toggle near the DRIVE control.
- Adjusting the number of DISTORTION STAGES (1-6, weak to strong)
- Adjust OUTPUT gain to drive the signal into the OUTPUT LIMITER.
It’s worth taking the time to experiment with each of these options. Furthermore, it’s also worth noting that they interrelate to one another. I.E whatever you do in one area may change the way the others will behave. This is true of most gain staging and processing applications.
Once you arrive at your optimal tone adjust the Dry/Wet balance to suit your desired aesthetic.
Note: Make use of the Output limiting/saturation/clipping by cycling the button next to the Output control.
Step 4: Add Feedback FX
So far, the workflow is similar to sound designing with synthesisers as we have started with tone and moved through the architecture towards FX, modulation and filtering.
The RIFT FX section is a time-based FX engine that produces a full range of doubling, comb, flange, echo and delay style effects.
The most interesting idea implemented in this section is the shorter delay times found under the TUNED category. These micro delays are capable of producing tonal effects that can be snapped to specific singular notes or multiple notes within a musical key. It’s then possible to modulate the frequency to produce quirky musical results which can be subtle or more intense depending on the amount of feedback applied. Pretty cool…!
We choose TUNE found under the TUNED category and open the pitch snap window. This window can be accessed by a mini keyboard button in the bottom right of the FEEDBACK section.
The frequency pitch snap section is set to F Minor since our sound modulates up the register to F. We find that C is a good place to set and leave the FREQUENCY control.
Most other controls are left at their defaults, but we increase the FEEDBACK SPREAD to 35% and FEEDBACK MIX to a subtle 10%. This gives a subtle stereo chorus-like effect.

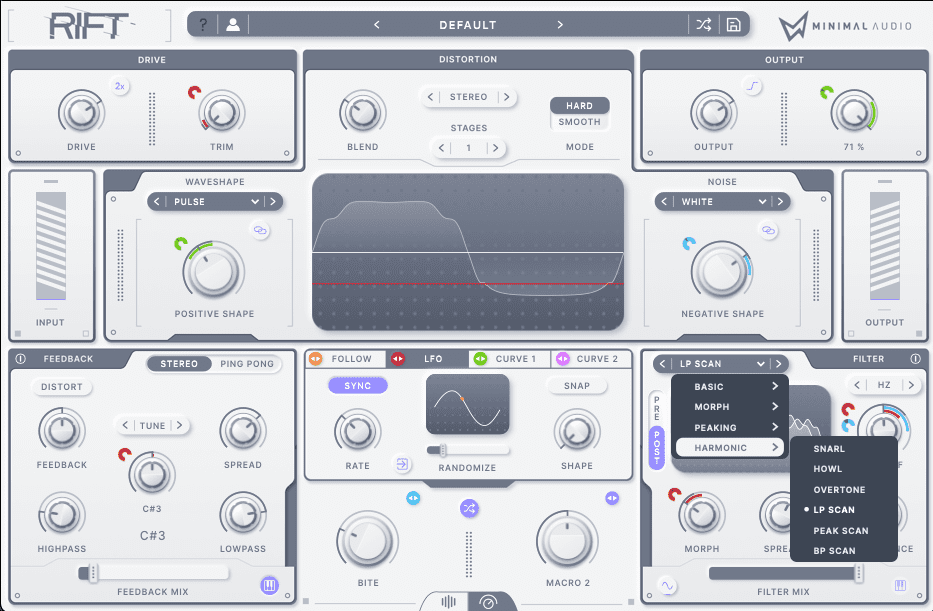
Step 5: Adjust The Filter Section
The FILTER section offers a diverse array of BASIC, MORPH, PEAKING and HARMONIC filters, all of which can be pitch snapped in the same way as the FEEDBACK section.
Minimal Audio says that Rift’s filter is the heart of every synthesiser. Those who believe in this notion won’t be disappointed here!
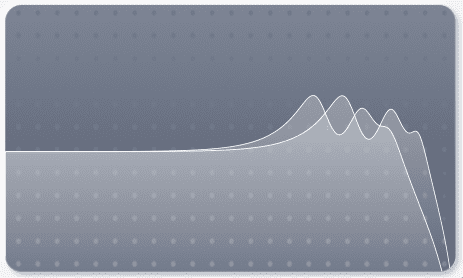
On our sound, we opted to use the LP SCAN preset. This resembles a low pass filter with a series of resonances that shift as the MORPH control is manipulated.
We set MORPH to 30% creating a lowpass filter with two distinct peaks. The SPREAD control is set to 20% for a subtle stereo feel and we open the CUTOFF to about 80% to let that noise through. A little resonance at 20% ensures that the noise and subtle chorus-like effects of the FEEDBACK section are heard.
Step 6: Add Movement Using The LFO
RIFT features envelope following, LFO, and custom sequence-based modulation. For the sake of this tutorial, we are bypassing envelop following and heading straight for the LFO.
At a cursory glance, the LFO is straightforward but the RANDOMIZE slider is something a lot of plugins do not offer.
We set the RANDOMIZE slider to 20%. It adjusts the shape of our sine wave slightly meaning it never repeats in the same way. If you watch it, changes in amplitude and harmonic content can be seen in the top and bottom half of the wave independently and lead to increased complex shapes.
The LFO can be set onto a target by dragging the modulator icon to the parameter or selecting the source modulation from the parameter. We drag the LFO onto the following:
- the TRIM control of the DISTORTION section at a max of 1dB
- the FREQUENCY control of the FEEDBACK section up to C#
- the MORPH control of the FILTER maxing at 50%
- and the filter CUTOFF at around a 20% positive span

Step 7: Add Further Movement Using CURVE VIEW
For further fun, let’s look at the curve section. The CURVE VIEW makes creating custom curves a breeze.
CURVE 1 (Green) and CURVE 2 (Purple) are sequencers that remind us slightly of Native Instruments Massive Performer.
We want to create a side-chain style shape that cycles every beat on the 1/4 Rate. This type of shape building really puts to the test the way in which the curves can precisely morph into a particular shape.
The side chain shape is attached to:
- The POSITIVE DISTORTION SHAPE, which swings between approximately 0.20 and 0.50 creating ‘spectral pumping
- The Dry/Wet parament which swings between 70% and 100%, adding to our ‘timbral pump’.
Bi-Polar Distortion
Step 8: Finish With A Macro
As the old adage goes, the show ain’t over till the macro sings……
Macro controls are always welcome at Attack HQ. Macros help you control multiple sounds at once giving you an enhanced level of control. They are excellent for creativity but also for performing live/jamming etc.
Note: The two macros stay visible in the simpler PLAY VIEW.
We attach MACRO 1 to the following:
- About 25% positive travel to the FILTER CUTOFF
- 15% positive travel to the FILTER RESONANCE
- 10% positive travel to the NEGATIVE SHAPE knob
Here is the final audio again but with a kick drum for context how it might sound in a track:
If you like the look and sound of Rift check out Minimal Audio.
*Attack Magazine is supported by its audience. When you purchase through links on our site, we may earn an affiliate commission. Learn more.
Tutorials is sponsored by
Roland Cloud is your creative hub for Roland hardware and software. Access legendary recreations of Roland Classics, find new sounds for your favorite products, and download updates and companion apps to make music fast and easy.