Technique » Tutorials » The Essential Guide To Levels »
The Essential Guide To Levels
This channel is sponsored by
 Roland Cloud is your creative hub for Roland hardware and software. Access legendary recreations of Roland Classics, find new sounds for your favorite products, and download updates and companion apps to make music fast and easy. Visit Roland Cloud
Metering and analysis
All this talk of levels, loudness and headroom is fine, but how can we really get a handle on what’s going on? After all, turning up the volume of your monitors only makes a track louder in your studio, not comparatively louder to other tracks. How do we know the best level reference to use?
Unfortunately, the answer is somewhat fuzzy, and depends on the environment in which you’re working. For example, there are even occasions when relative loudness is regulated, such as in broadcasting.
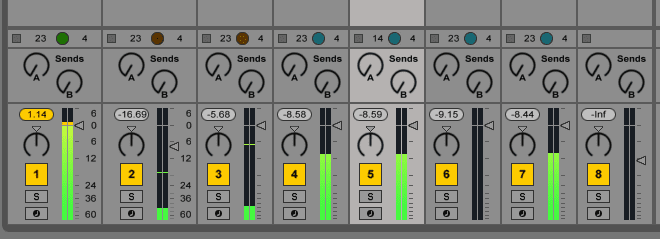
As music producers – and, for most of us, as DAW users – the most important initial step is to ensure that peaks don’t head past the all important 0dBFS mark, so the DAWs built-in meter and overload indicator can help us here. Secondly, some way of visualising loudness at the master output can help give us a sense of the degree to which we have ‘squashed’ our music. This will usually show some variation of the RMS or average level, with the difference between peak and average being all important.
More fully featured meters can switch between a range of scales and provide additional static numerical indications of peaks and averages as well as the ability to customise rise and fall-back times, emulate older analogue metering types such as VU and PPM, and newer digital scales like EBU Digital and K-12, K-14, etc.
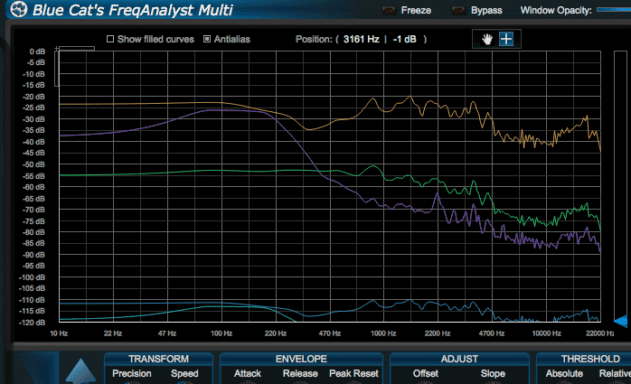
If you also need to get a handle on the relative level of different frequencies then a spectrum analyser can he very helpful, though using one with only broad frequency divisions is often of little use.
Similarly, 3D waterfall analysis tools plot frequency and level over time, although keeping tabs on what is going when using one in real-time can be an issue.
Spectrograms – a 2D version of the waterfall plots – are suitable for more specialist applications such as audio restoration and correction, as they allow you find audio anomalies relatively quickly.
The damping of meters is also important to bear in mind. A meter which tracked every change in level instantaneously would be very difficult to read. Intentionally making the meter slower to respond to increases or decreases in signal level might seem like it’s a less accurate approach, but the result is a more readable – and therefore more useful – meter.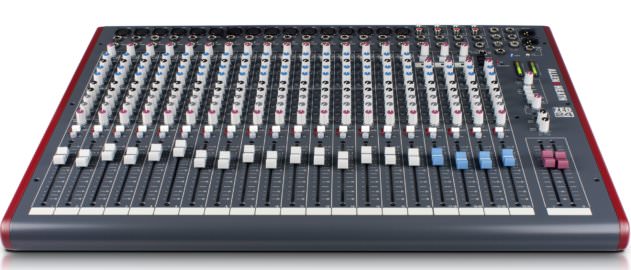
Mixer levels and gain structure
We’ve already looked at dynamic range and headroom, and these are key to optimising mixer levels in the analogue realm. We have two main priorities when working with analogue gear: avoiding distortion and maximising signal to noise ratio.
If you work with little available headroom, then you risk saturation or clipping (the most extreme form of distortion, where signal peaks are unceremoniously chopped off). In general, well-designed mixers incorporate plenty of internal headroom and will not clip easily, though it is certainly possible with extreme EQ boosts, poor attention to gain staging, or even poorly designed kit.
Optimising your signal path’s gain structure allows you to be confident that you’re making the most of your kit. When recording via a microphone, this means setting the mic preamp’s gain correctly to ensure a healthy signal level (with only occasional peak indications) and then maintaining correct signal levels for every subsequent stage. Remember that whenever you amplify a weak signal at any point, you’re also amplifying any noise that goes with it.
Hardware effect sends and returns, for example, are one area where it’s all too easy to introduce unnecessary noise, often because the signal being sent through them is relatively quiet. The best approach is usually to drive the inputs (from sends), and turn down the output (into returns) to ensure that you get a decent signal through the external gear without adding unwanted noise.
It’s worth bearing in mind that similar principles apply when DJing. Each input channel on a DJ mixer should be set up to use the full dynamic range (if you’re playing vinyl, fluctuations in pressing levels mean that this may need tweaking slightly for each record you play). If the input gain is set too low, not only will that channel’s fader have little effective range, but you may also be amplifying the noise as you try to boost the signal further down the chain. Admittedly, DJs are more often tempted to run signals too hot, so the opposite scenario is more common. Push the input gain too far and you get a distorted signal.
Tutorials is sponsored by
Roland Cloud is your creative hub for Roland hardware and software. Access legendary recreations of Roland Classics, find new sounds for your favorite products, and download updates and companion apps to make music fast and easy.
06.43 AM
Came expecting Avicii.
Jah bless.
07.09 AM
Wow, seriously in-depth introduction and then some. Thanks Attack. Blowing away the ‘competition’ again.
09.22 AM
Thanks for this attack! great read, as always. this gs-thread probably adds some interesting details, too: https://www.gearslutz.com/board/so-much-gear-so-little-time/463010-reason-most-itb-mixes-don-t-sound-good-analog-mixes-restored.html (the title is a bit misleading, there is an in-depth explanation of the technical process behind the summing in a daw, check out the posts by paul frindle and skip burrows) I’m not sure about it, but shouldn’t the gain on the individual tracks be about -20 dB rms / -10 to -6 dB peak? i think 0 dbfs on each track can overload most plugins, as there are inter-sample-peaks and probably peaks that are caused by the processing in the plugin. would be interesting to hear your opinion about that. anyway, thanks again, and keep up the good work!
09.42 AM
Rob – thanks for the link. Yes, that kind of range seems about right for a safety-first approach.
01.09 AM
Good article guys! Here’s another great read about gain staging in a digital environment: http://www.masteringmastering.co.uk/gainstructure.html
11.37 AM
great article!
12.42 AM
I’m learning so much from this Guide, this is good stuff thanx man…!!!
02.41 PM
That mastering engineers article explains it all really well. I love Attack mag keep up the good work.
03.10 PM
Highly educational, thanks!