This channel is sponsored by
 Roland Cloud is your creative hub for Roland hardware and software. Access legendary recreations of Roland Classics, find new sounds for your favorite products, and download updates and companion apps to make music fast and easy. Visit Roland Cloud
This tutorial is a shortened excerpt from our book, The Secrets of Dance Music Production, which is available to buy now from the Attack store.
When it comes to the mix, the treatment of samples mainly depends on whether the sound has already been processed.
If you’re using a commercial sample library – a string or drum library, say – or you’ve sampled a sound yourself – from a synth or using found sounds – you can usually treat it the same way you’d treat the original sound source. Compression, EQ and other effects are all fair game.
Things are different if the sample is lifted from an existing recording. Whether you’re taking a hit or a longer loop, the sound you’re sampling is likely to have already been compressed, EQd, mixed and mastered as part of the original mix. As such it is usually unnecessary to repeat the process. Indeed it can be counterproductive; compressing an already heavily compressed kick drum, for example, is likely to kill the dynamics in the sound.
compressing an already heavily compressed kick drum is likely to kill the dynamics in the sound
The same applies to commercial sample packs that typically offer polished, ready-to-use sounds which have already been heavily processed. That’s not to say you can’t tune a sample, shape its envelopes or remove frequencies that don’t fit your mix – indeed, you should be doing all of these – but avoid applying compression and/or EQ out of habit.
ISOLATING SAMPLES
Sampling from a commercial recording poses an additional problem: it is very difficult to isolate individual parts from a mix. One of the most asked questions online is: ‘How do I extract a vocal from a recording?’ Most of the time the results aren’t great unless you have an instrumental mix too, when phase inverting one of the tracks can be employed.
Non-vocal parts are even tougher. No matter how hard you try, you’re unlikely to get the part as clean as you want. That floor-rocking bassline you want to incorporate into a track, for example – even if it appears to occupy a distinct frequency range – will likely overlap with the kick in the low end and multiple synth and drum elements higher up the frequency range.
The only neat solution is to find a section of the track where the element you want to sample plays solo. But it’s not often you get that luxury.
In these cases, the usual techniques for semi-isolating a signal are to use EQ bracketing or bandwidth splitting to filter out frequencies above and below the target range. So if you just want the bass you might roll away signal around 200 Hz. But it’s a compromise, and you’ll almost always end up with material outside of the target area. Sometimes the best option is to embrace the bits you don’t want. Make them an integral part of the sonics of your track.
A good example is the breakbeat from ‘Think (About It)’ by Lyn Collins, sometimes known as the ‘Yeah! Woo!’ break due to the vocal overlapping the drum break (1:21, below). The intrusion of the vocal hasn’t stopped the break being sampled and used on hundreds of tracks by everyone from Venetian Snares and Squarepusher to Katy Perry and Miley Cyrus.
Prepping samples
You’ve scoured YouTube, dosed up on cult movies and listened to the funk output of the 1960s. Finally you’ve found the killer sample… There are now four steps to prepare the sample for use:
- Trim: Once you have the unedited source audio – as a recording into your DAW, an mp3, or any other kind of audio file – trim out the section you want. For basic editing purposes your DAW or the free Audacity (Mac, PC and Linux) is sufficient. For a one-shot sample, trimming the sound out of the recording is simple. Just set the trim points around the sample. If it’s a loop, ensure the end point is in time so that the sample loops cleanly. When trimming one-shots, particularly drum sounds, don’t trim too tight. There’s a lot of information in the first waveform cycles before the bulk of the sound hits. Equally, removing too much tail can leave you with an unpleasantly dry and snappy sound – sometimes the dusty, crackly tail is what a production calls for.
- Normalise: Normalise the sample to peak at 0 dBFS (find out more about why levels are important here).
- Fades: To avoid unwanted clicks, check the sample starts and ends on a ‘zero crossing’ (the point where the waveform crosses the zero axis). If you can’t find suitable zero crossing points, apply short fades to the start and end.
- Save (as WAV): Save your new sample in a suitable file format for your sampler. 24-bit WAV is often best – it’s the uncompressed audio file format compatible with just about all audio software.
Isolating a bassline
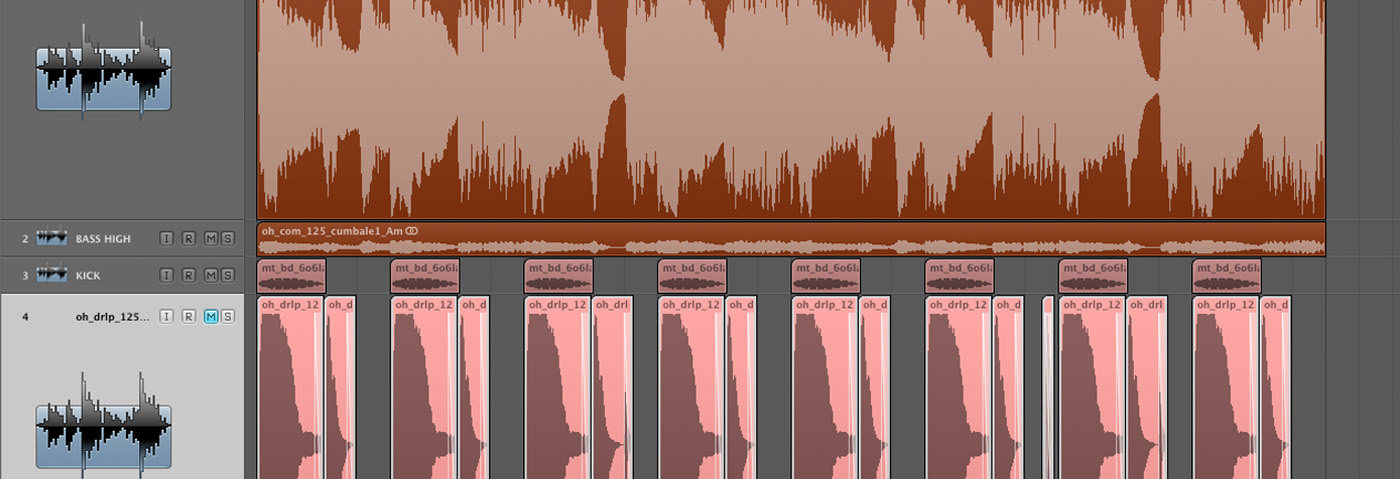
- When sampling a bassline, the best option is to find a part of the track where the bass is exposed. If that perfect scenario doesn’t exist it needn’t be a problem. Here’s the loop we’re starting out with: a fully mixed and trimmed loop, with bass, music and beat elements all present.
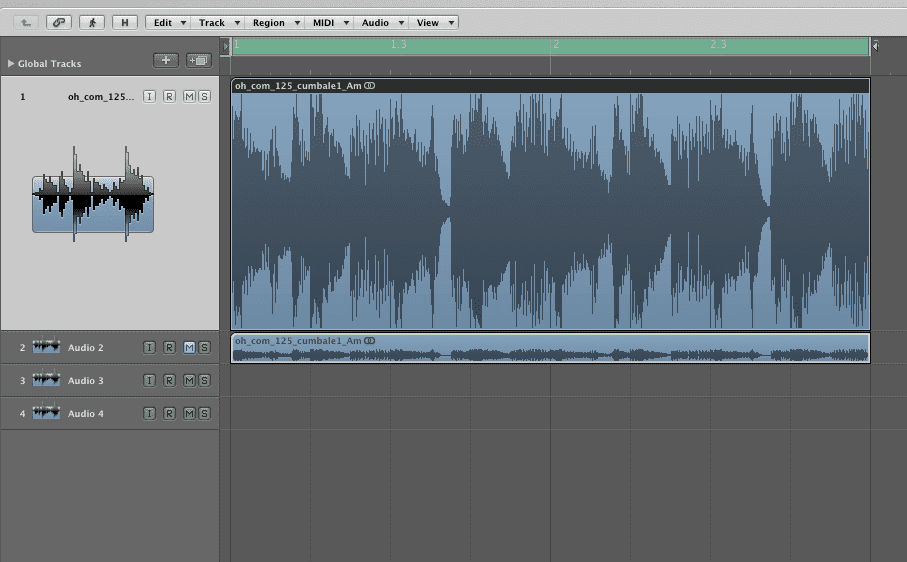
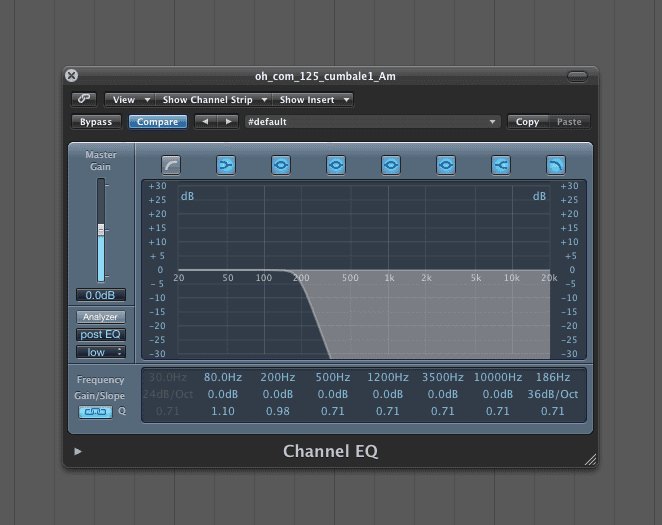
- We’re approaching the isolation job using a split frequency approach. Start by duplicating the mixed music loop onto a second DAW track. Next, use high cut EQ to remove all signal above the bass frequencies (we’ve chosen a cutoff point of 186 Hz with a 36 dB/Oct slope).
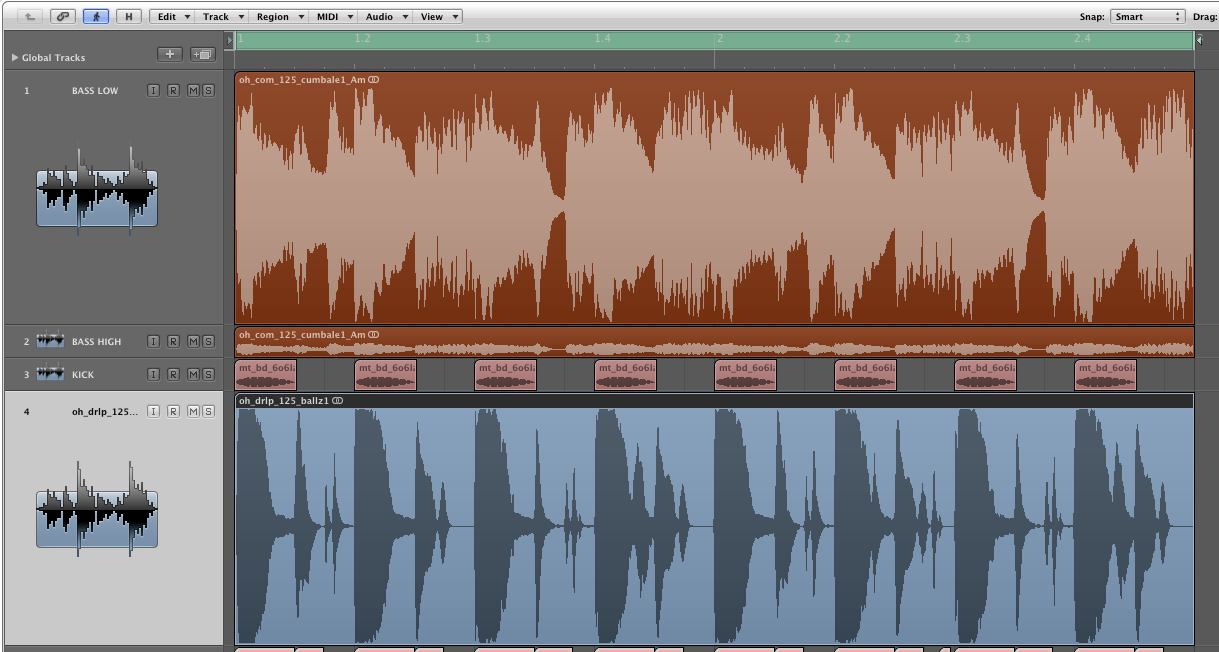
- On the second track cut out everything below a similar point – we’ve opted for 200 Hz with a relatively gentle 18 dB/Oct slope to avoid a ‘hollow middle’. A steeper cut is then also applied to frequencies slightly above the previous 186 Hz.
- Both tracks are then balanced to taste.

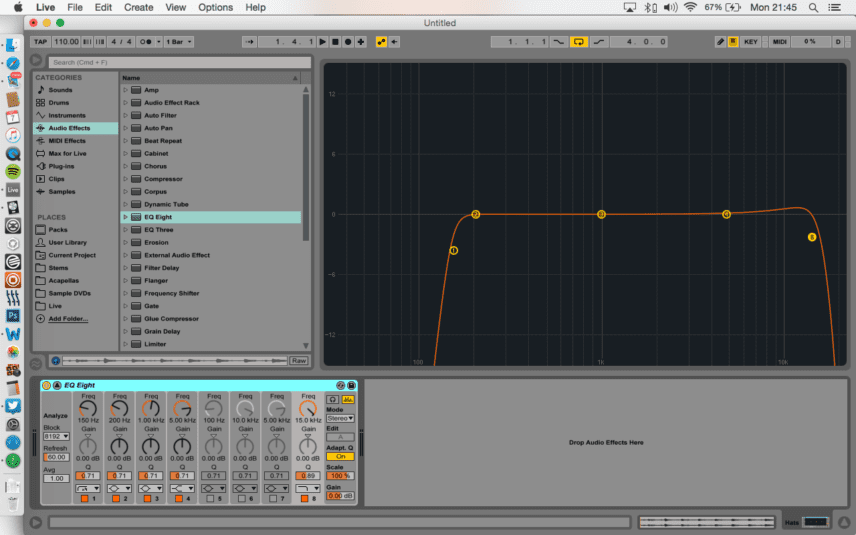
EQ treatment: hi-hats – EQ bracketing demonstrated
- Most hi-hats have few useful frequencies below around 150 Hz, so to keep a mix tight it is good practice to roll away up to this point. Even if you can’t hear low-end content, samples – especially from vinyl – often feature inaudible low frequencies that muddy the mix, as shown above.
- It’s not just the low end of hi-hats that can benefit from being cut. Too much high end can interfere with other parts and/or sound harsh. Here we’ve cut above 15 kHz and increased the Q at the cutoff point for a little resonant bump at the cutoff frequency that aids definition.
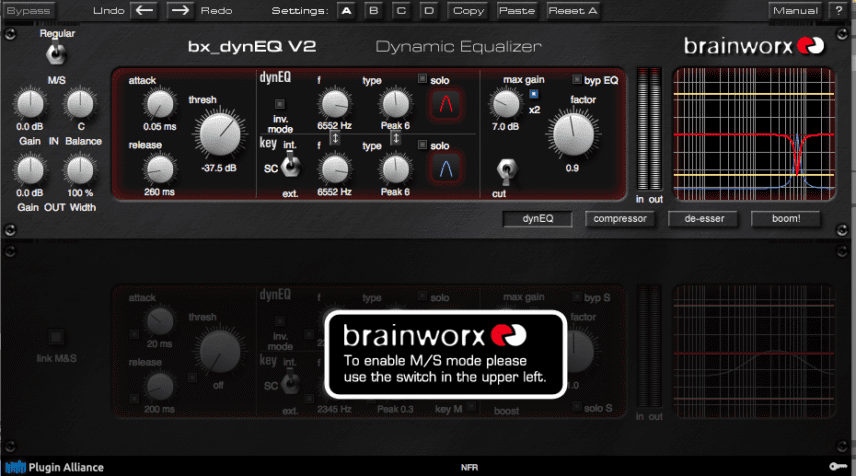
- If you’ve got a pre-mixed drum loop with a harsh cymbal and you don’t want to reduce the brightness of the snare, use dynamic EQ to trigger a dip in specific frequencies when the threshold is crossed. Here bx_dynamic is set to trigger at 6.5 kHz, reducing the harshness of the ride cymbal.

Tutorials is sponsored by
Roland Cloud is your creative hub for Roland hardware and software. Access legendary recreations of Roland Classics, find new sounds for your favorite products, and download updates and companion apps to make music fast and easy.
09.45 PM
I found it interesting how you advised people to avoid compressing any samples because they have already been altered enough usually. I love trying to make music and mixing it up. I’ll keep what you said in mind as I buy more samples and try to make something unique out of all of it.
https://treesound.com/product-category/one-shots/