
This channel is sponsored by
 Roland Cloud is your creative hub for Roland hardware and software. Access legendary recreations of Roland Classics, find new sounds for your favorite products, and download updates and companion apps to make music fast and easy. Visit Roland Cloud
In this new installment of our mixing series we mix a ’90s-style breakbeat track using Waves plug-ins in Ableton Live.
Mixing is a new series in which we mix tracks of various genres using stems provided to us by readers. If you’re interested in submitting a beat, we are looking for 8-16 bars of 24-bit bounces with the loudness level at no more than -15rms. We will not accept stems that already sound like a finished and mixed track. If you have included any samples, please let us know what they are. You can send your submission to editor@attackmagazine.com and make sure to also include a short artist bio, a few photos of you in your studio, and a SoundCloud link. Note that by sending in your music, you consent to allow Attack to electronically distribute your music and stems in the form of non-commercial downloads for the purposes of the article.
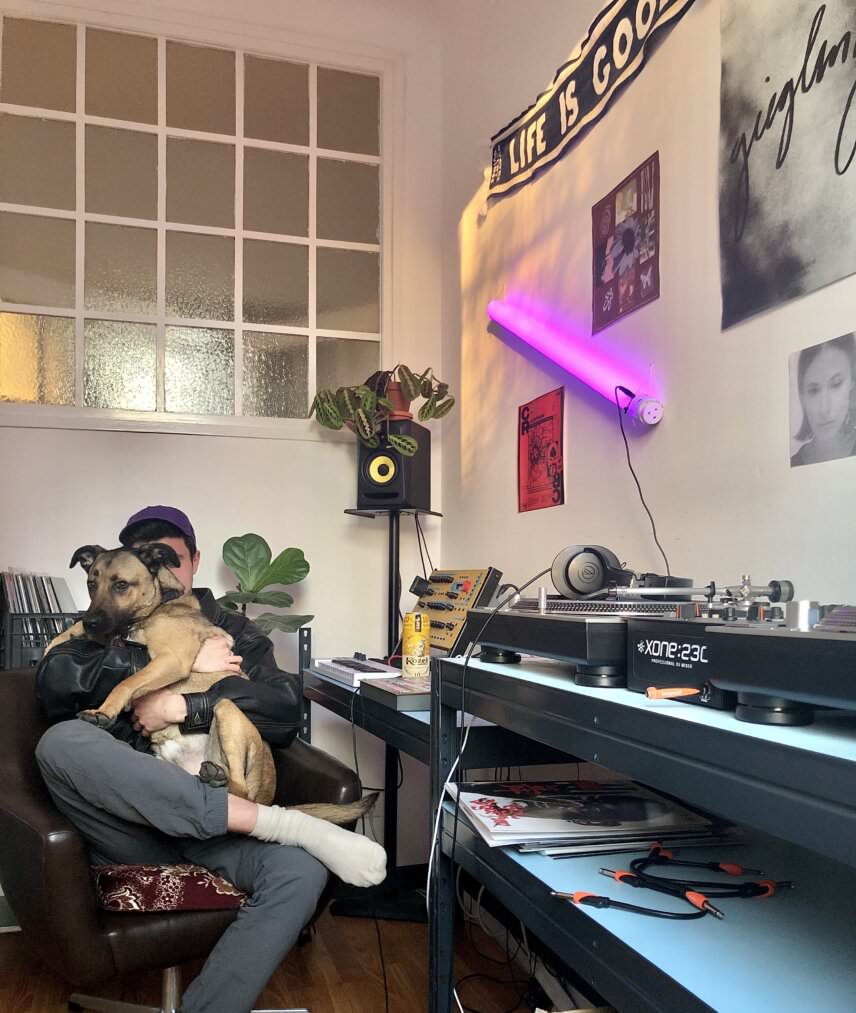
This installment’s stems have been provided by Prague-based producer phil in a maze. Before we move on to the stems, we asked Filip to briefly introduce himself:
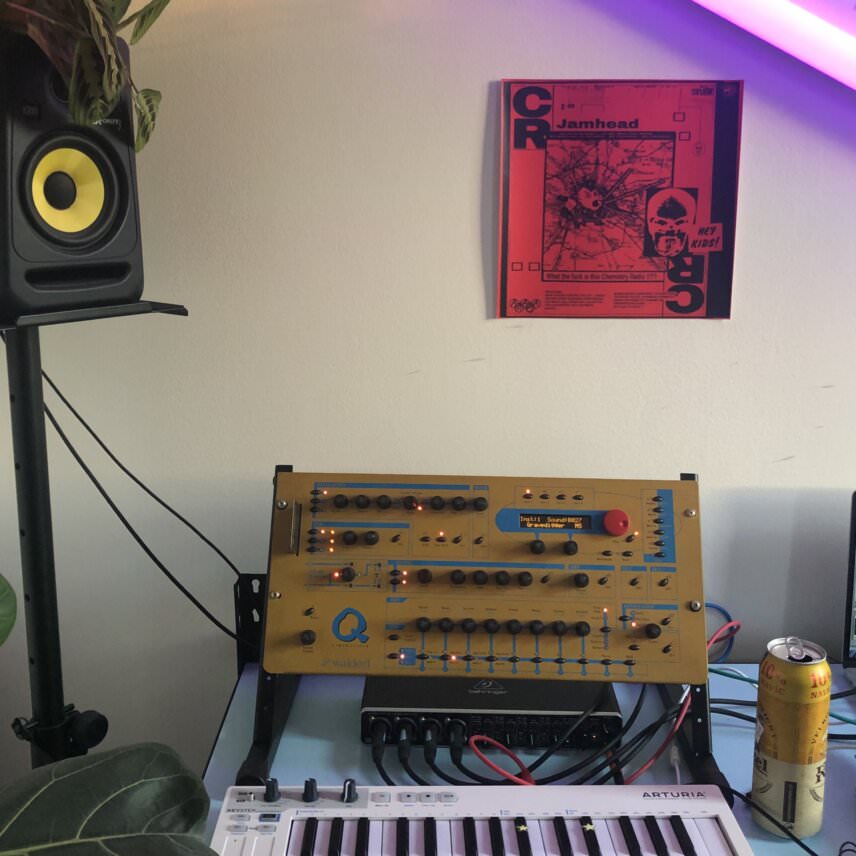
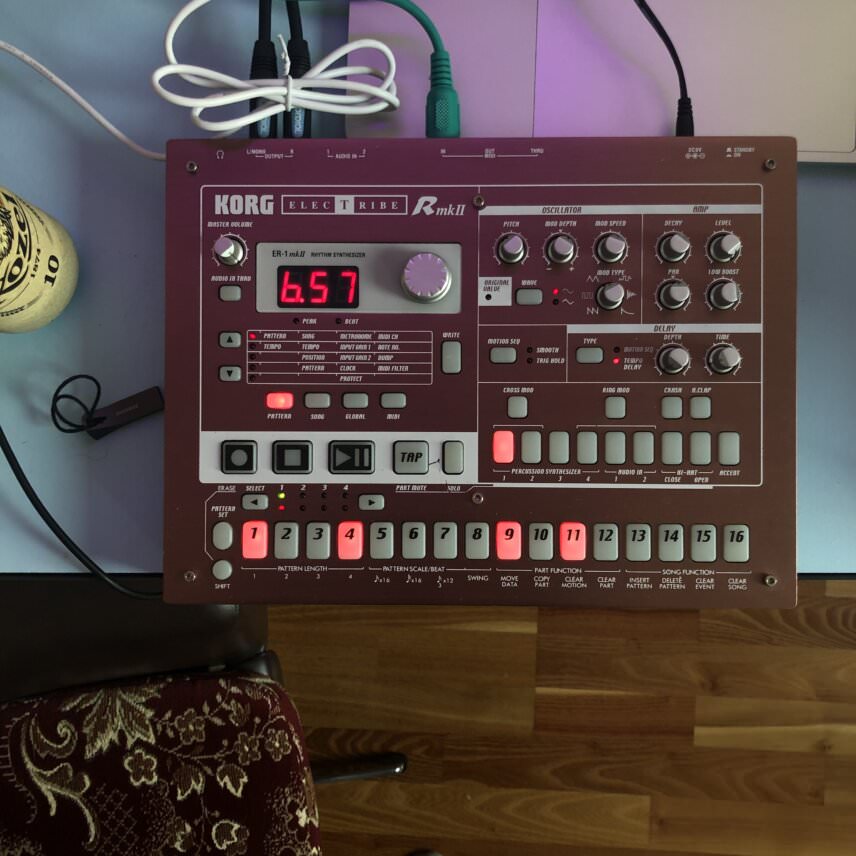
“I got into DJing and collecting dusty ’90s dance records two years ago, absolutely amazed by the whole era spanning from early ’90s subtle yet so powerful British and Italian prog house and prog trance (labels like Air Trance, Thunk, or Bonzai) all the way to the late ’90s goa, psy and choppy pumping breaks. I got into production not that long ago, mostly working with a combination of hardware (I love my oldie synths and drum machines – Novation KS rack, Waldorf Q rack and Korg ER-1) and software (Ableton Live).
“Attack has been a big inspiration for me. I got The Secrets of Dance Music Production for myself for Christmas and that was basically the starting point of my production journey. In my music, I like to combine what I love about ’90s dance music – ravey synths and stabs, glittery arps, growling acid bass lines, sampled breaks – with more modern production techniques”.
Here’s the unmixed beat we were provided:
And here’s our final mix. We will also look at some basic mastering so it is significantly louder:
Step 1: Preparation
We only have three stems for this beat:
- Kick and bass
- Breakbeats and effects
- Synth stabs
It might seem unfortunate that the kick and bass are in the same stem but we’re going to try to turn this into an advantage with multi-band processing.
As a reference track we decided to use Machinedrum’s 1000 Miles from his 2020 album A View of U, as it also features a similar breakbeat sound and has a small number of elements. We’re going to go back and forth with the reference while processing the whole mix at the end, just to make sure we have enough stereo width and shine in the higher frequencies.
Step 2: Kick and Bass
Here’s the dry kick and bass stem:
Right off the bat, it’s easy to tell that we need to get more punch from the kick and some more sustained low end from the sub. The synth bass also sounds very centred and could benefit from some widening, especially so it can be heard more clearly on sub-lacking systems like phones or laptop speakers. However, we don’t want to widen the kick because kicks have the most impact when mixed to be right at the centre.
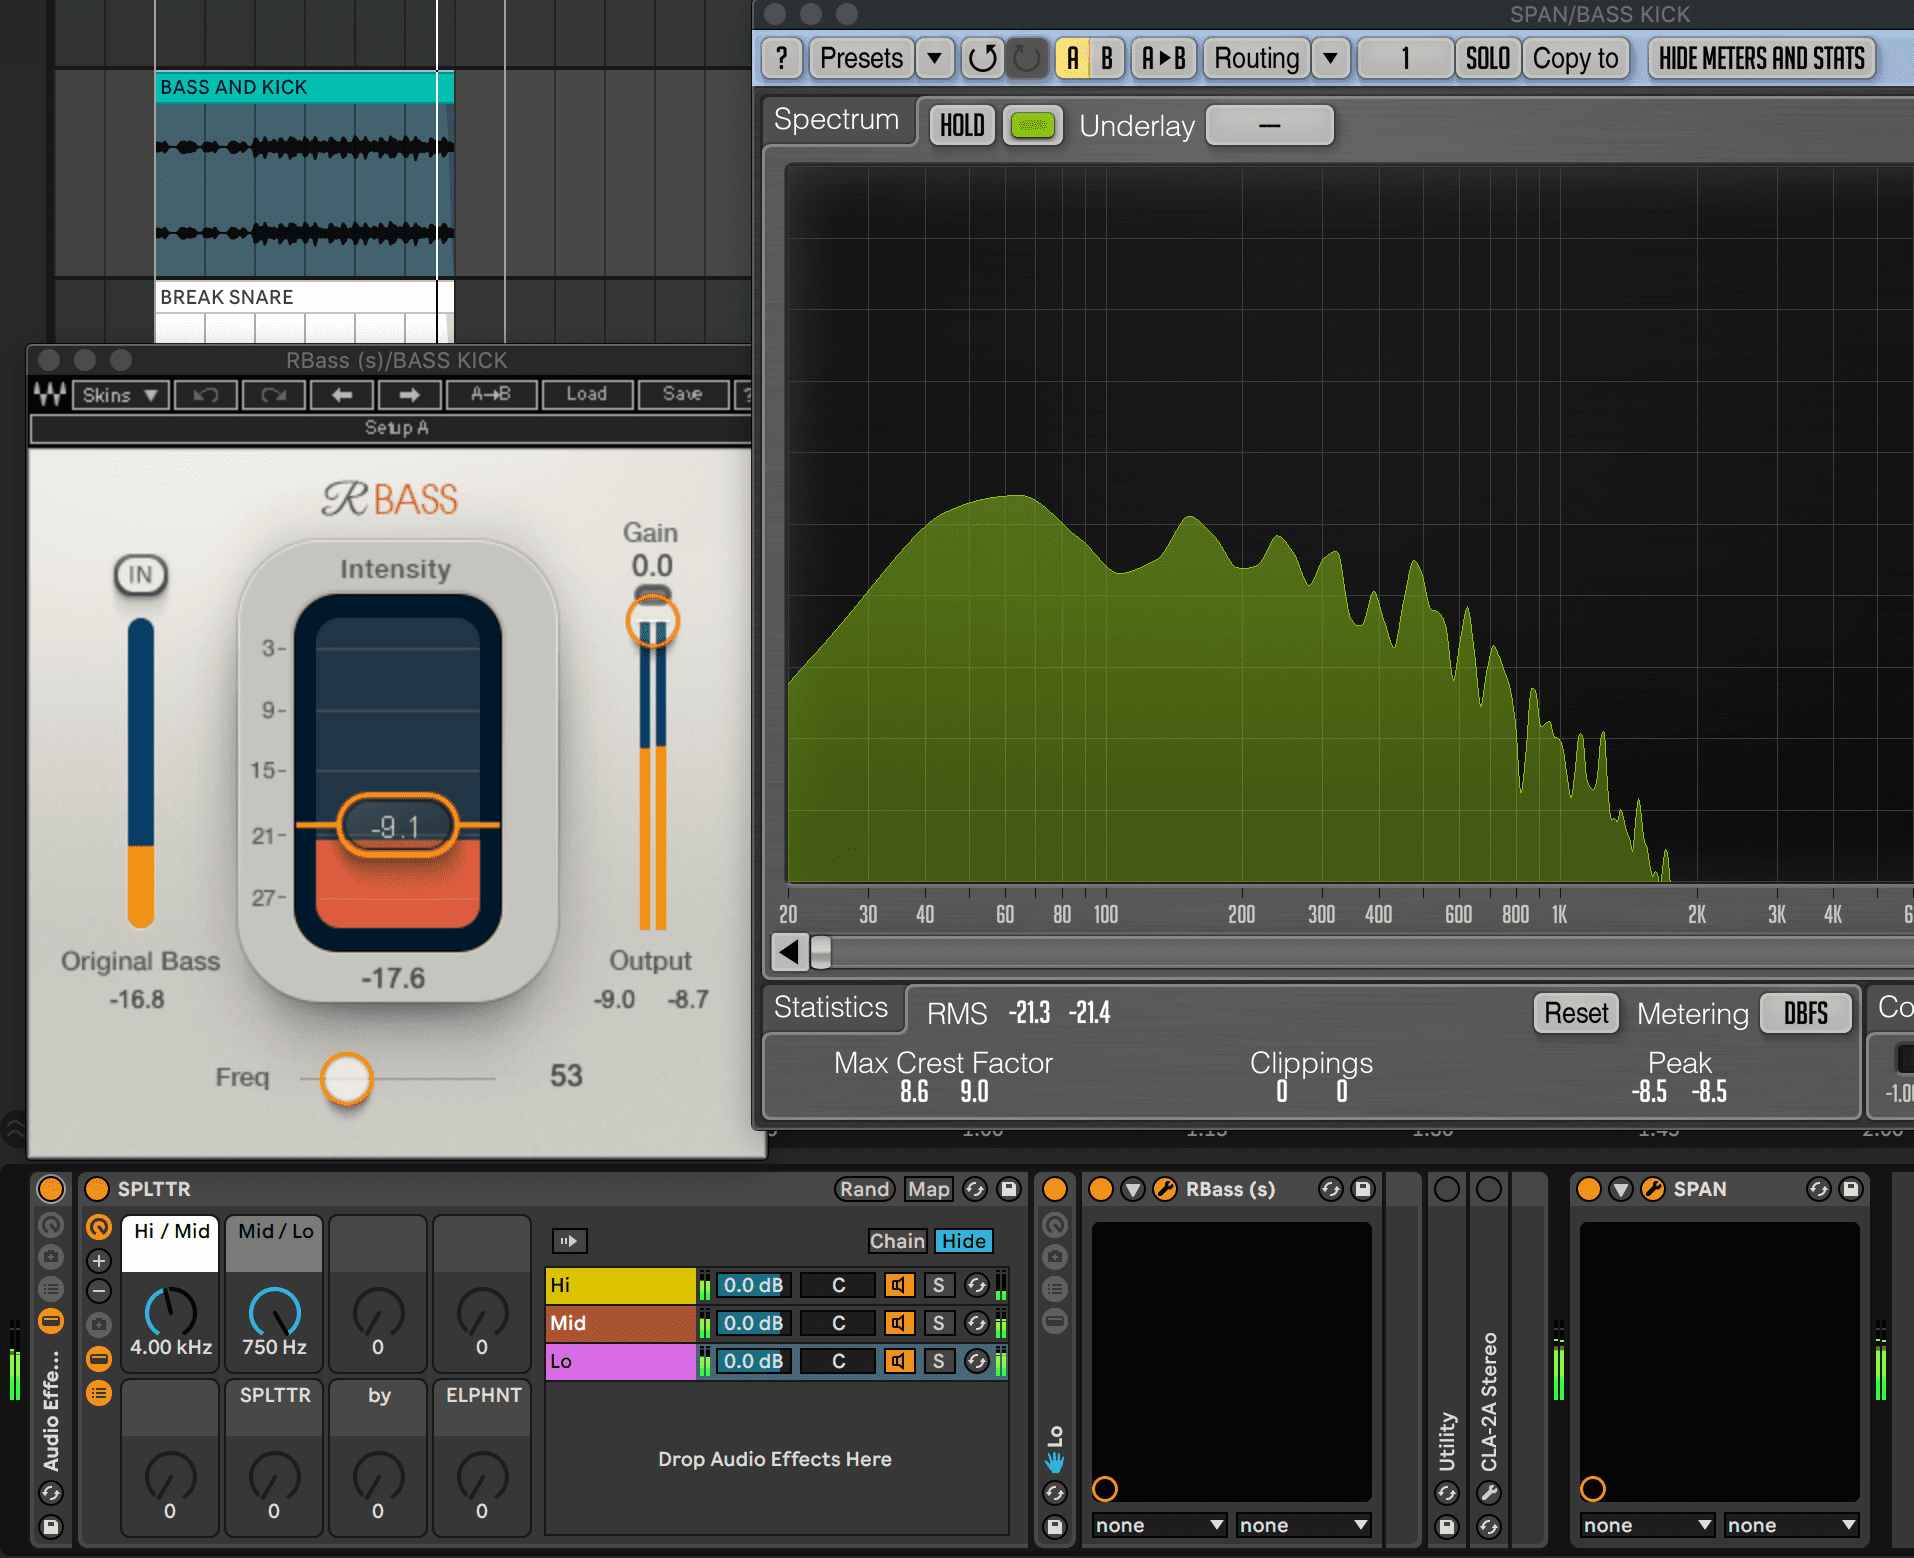
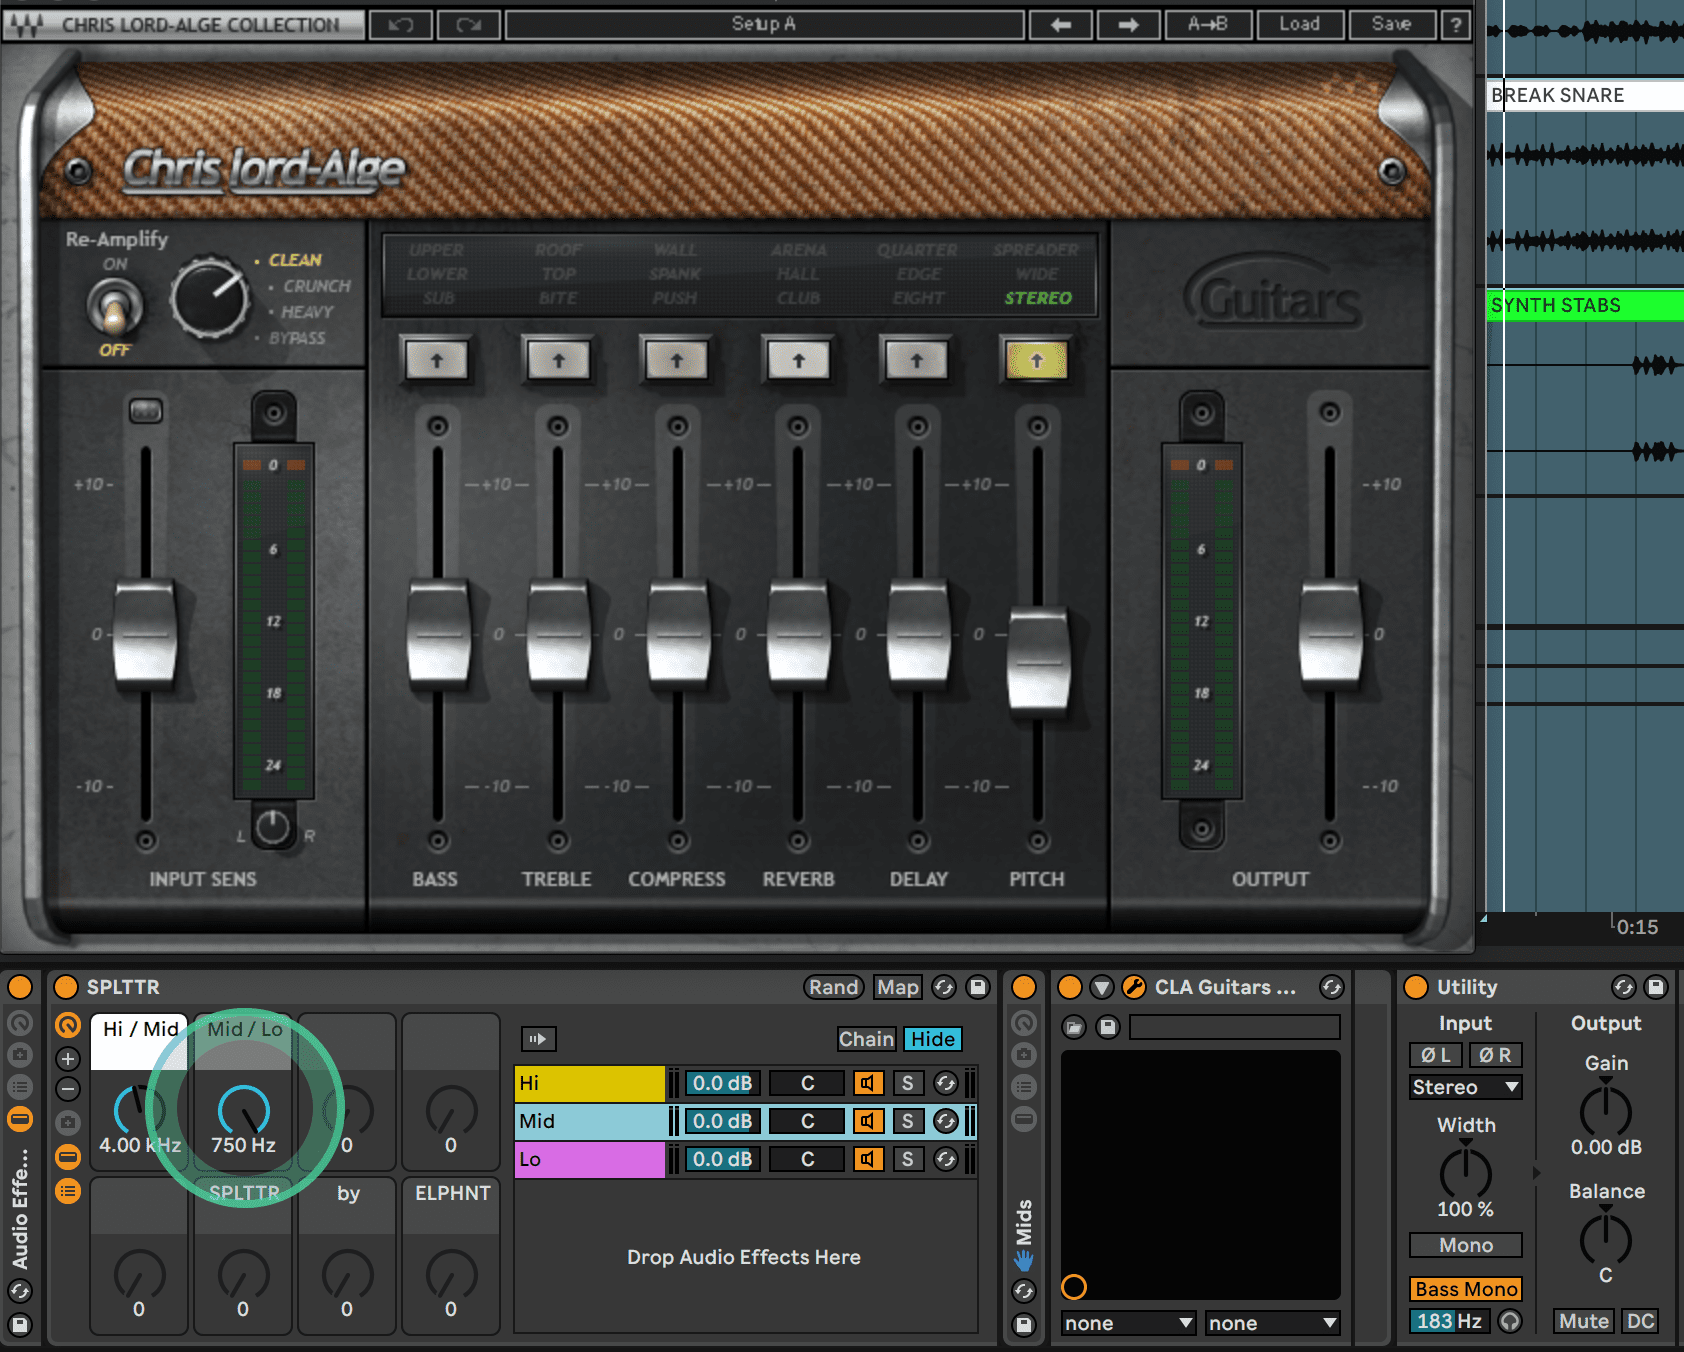
The solution is to split this stem into frequency bands that we can process separately! We need a low band for the kick and subs and then a mid band that mainly contains the bass notes. The easiest way to achieve this is using Ableton guru ELPHNT’s free SPLTTR device. This divides any audio signal into three frequency bands (low, mid and high), allowing you to add plug-ins or effects to each band separately. There are also two handy macro knobs that let you change the crossover points.
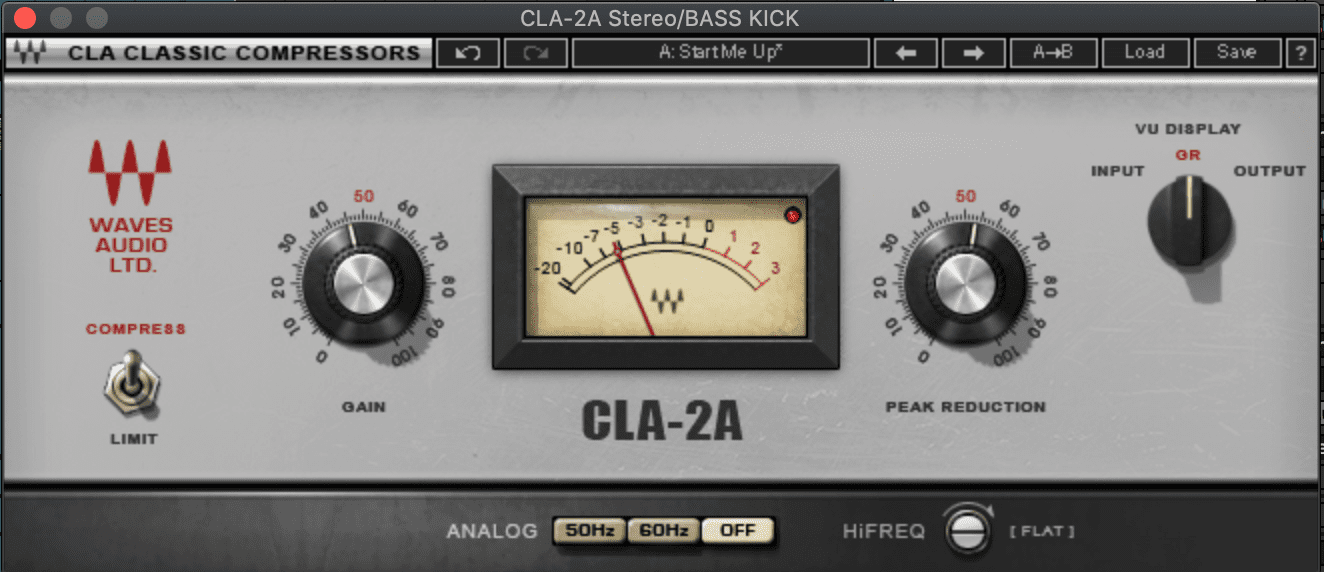
On the low band, insert an instance of Waves Renaissance Bass (RBass). This plug-in is great for adding that extra bit of sub and you can specifically control which frequency the boost is centred around. We used Voxengo’s free plug-in SPAN to see at which frequency the kick was hitting the hardest and this was 53Hz. As a result, set RBass to 53Hz and boost the intensity to around -9. Here’s how this sounds:
Let’s tackle the synth bass next. On to the mid band, insert the CLA Guitars plug-in and disable all of the controls except the Pitch Fader on the far right. Enable Stereo and leave the fader a little under halfway. This parameter contains legendary engineer Chris Lord-Alge’s signal chain for widening guitars in the mix but it also works great slightly mixed in with synth bass. You can also use any chorus plugin you have for a similar effect but make sure its dry/wet mix isn’t too high!
Next, insert Live’s Utility device after CLA Guitars and enable Bass Mono at the bottom. This control allows you to make all the frequencies below a certain threshold mono. When using stereo widening on bass, it’s a good idea to make sure anything under 150-200Hz remains in mono to keep the crux of the low end in the middle of the sound stage. Here’s how this sounds:
The last step with this stem is some compression to add punch to the kick and consistency to the subs. For this kind of task, you can’t go wrong with a 2A-style compressor so we reached for Waves’ CLA-2A. The trick with this compressor is pushing the signal hard to get seven to eight dB’s of gain reduction and then compensating for that with the gain knob. This makes it a great alternative to simply turning up the volume of your channel.
Step 3: Break Sample and Effects
Here’s the break sample stem without any processing:
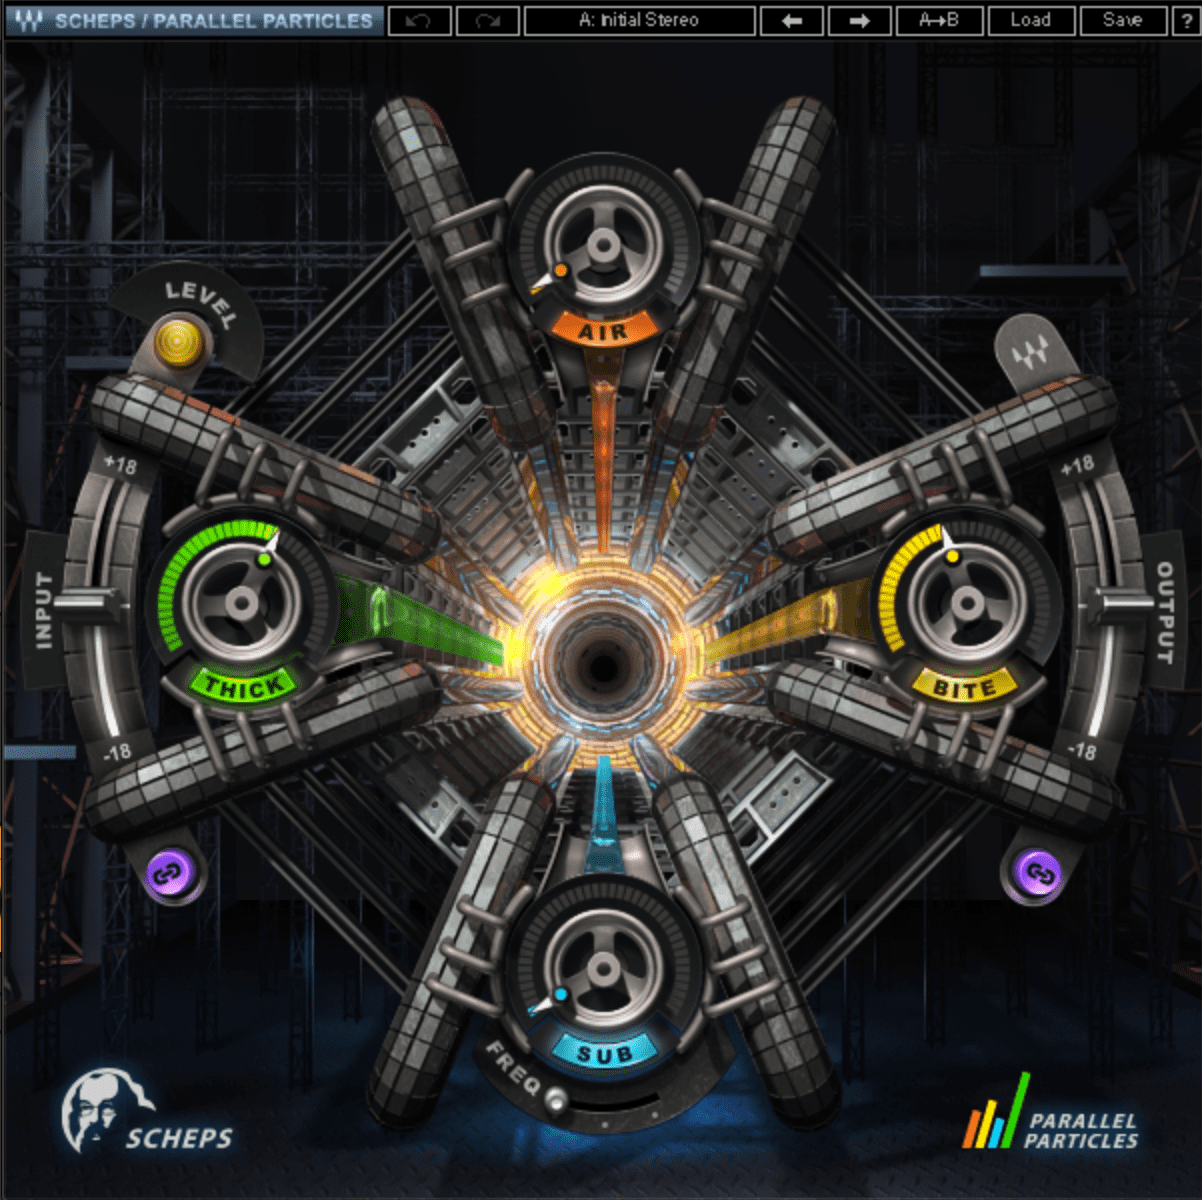
This is a great sample but it definitely needs some more body to cut through the mix. With breakbeats, it’s really important that the listener feels the snare hits as well as the shakers and hats. This track doesn’t contain much high-frequency information so all of the top end shine has to come from these. A shortcut to add body and shine at the same time is the Thick and Bite parameters in Wave’s Scheps Parallel Particles plug-in. Simply increase these to taste.
The sample also contains some cool percussion, for example between the fourth and seventh seconds. To ensure these are heard more we can add some stereo widening. Insert the SPLTTR device and add the Waves MondoMod plugin to the high band. As in the previous step, any chorus plugin you have would also work.
MondoMod is a bit more creative because it has presets that move a sound around the stereo field in 3D. We used the HISTIBE Surround Synths preset at 30% wet just to give the highs some movement. A higher dry/wet value would start to enter production territory because the effect would be clearly heard in the mix.
Here’s how the high band sounds in solo with MondoMod activated, followed by the whole break stem:

Step 4: Synth Stabs
Here are the synth stabs in solo:
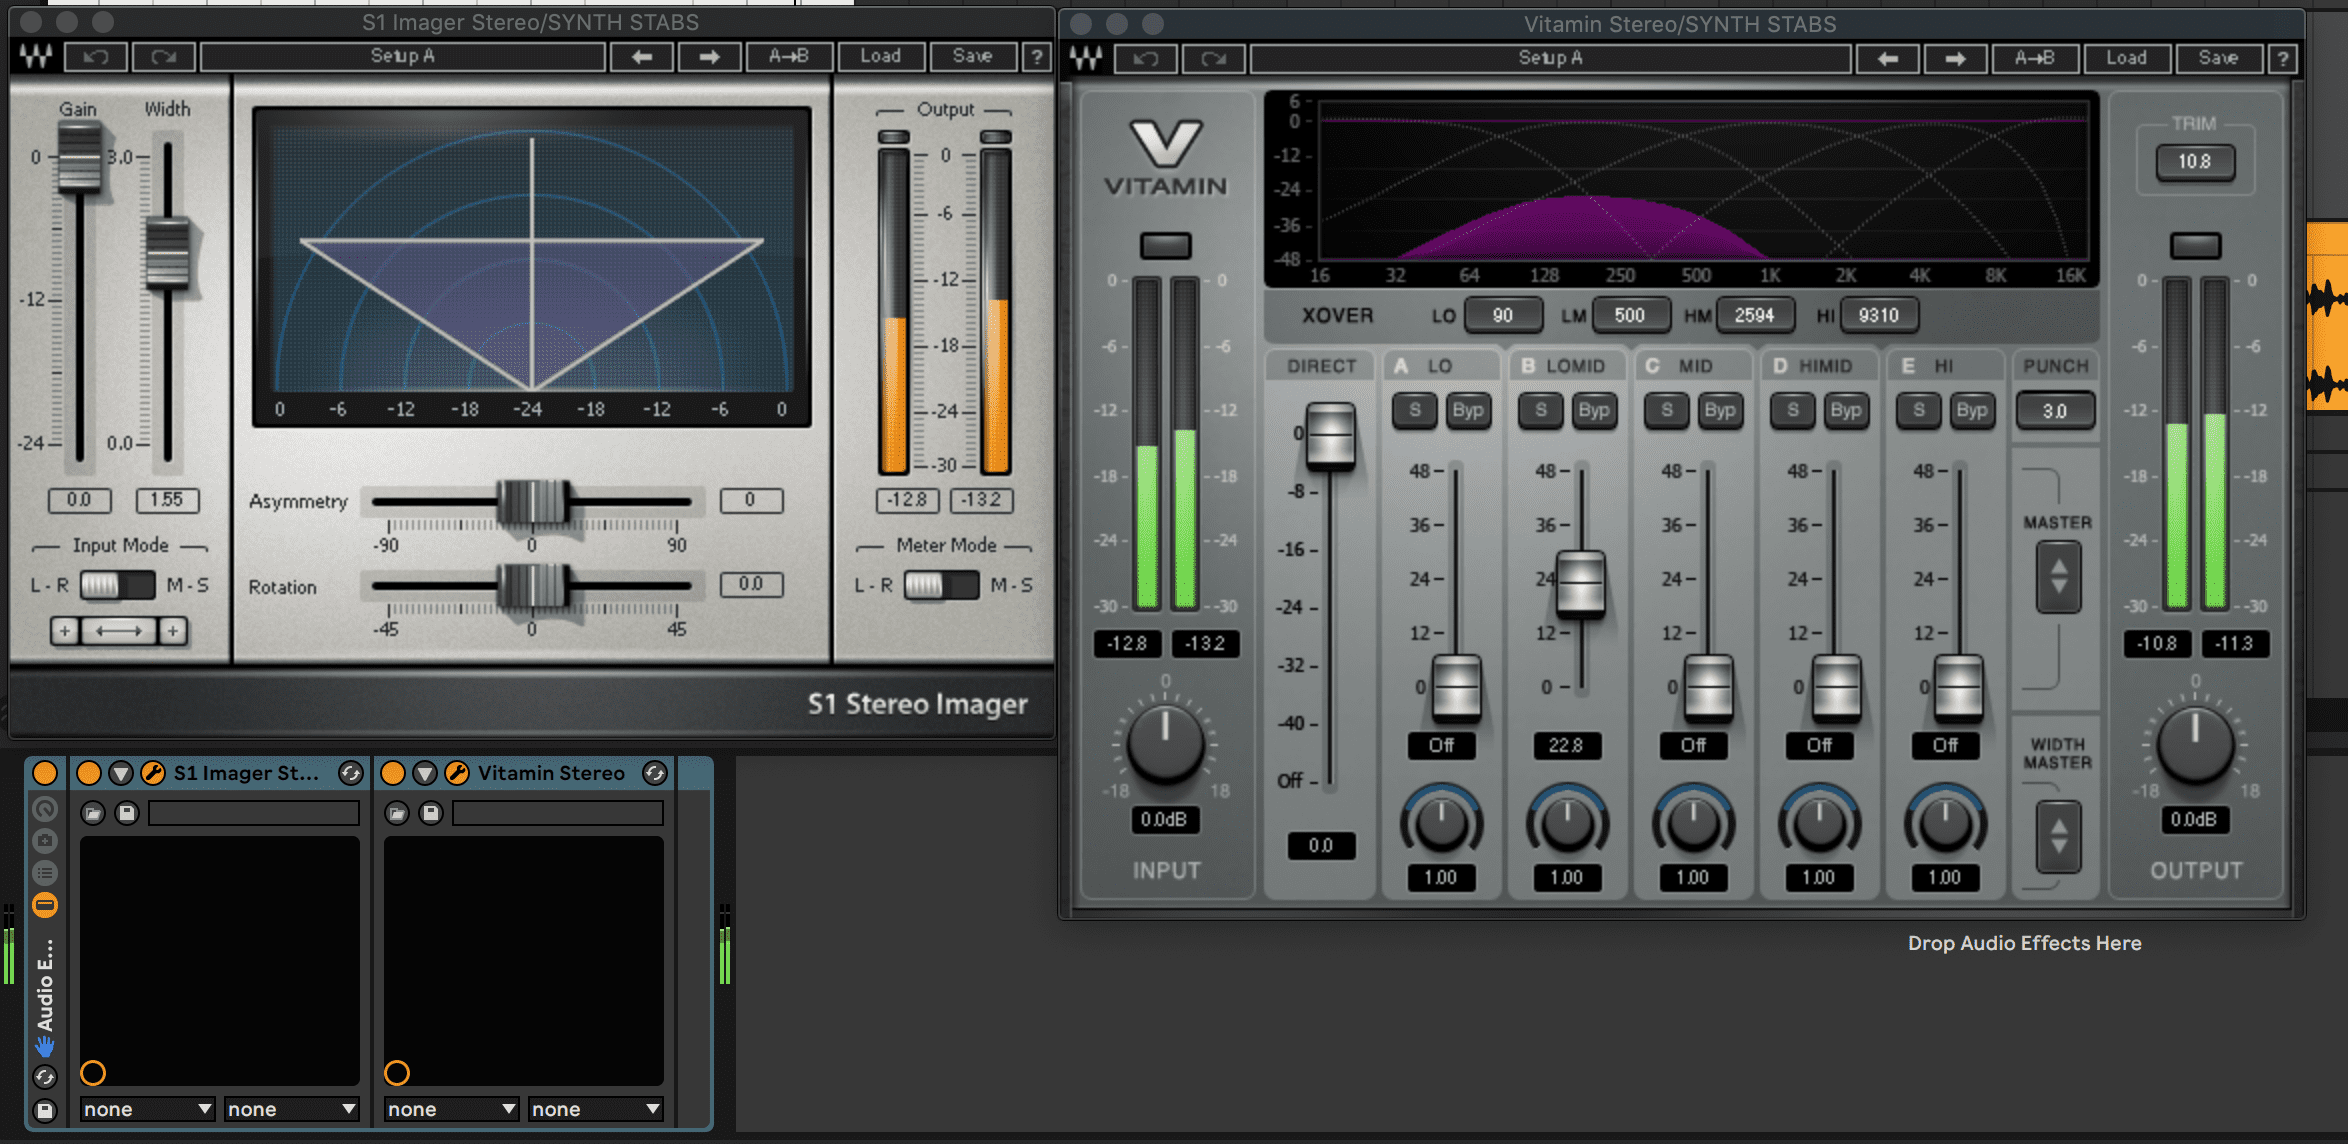
The stabs are a little bit harsh and one solution for this is using a spreader to move the stabs out of the center of the mix and more toward the sides. Waves S1 Imager should do the trick so insert this plug-in and set the fader to around 1.50. This will decrease the body of the sound but you can compensate for this with a frequency enhancer. We used Waves’ Vitamin’s LOMID knob and increased it to 24.
When enhancing low-mid frequencies with normal EQs the result will almost always be a muddy mix, which is why boosting this area with enhancers is a common trick employed by many engineers.
Here’s how the stabs sound after processing:
The difference is subtle, but you’ll definitely hear it if you’re wearing headphones!
Our progress so far:
Step 5: Bus Processing
Some producers would stop the process here and send the track straight to a mastering engineer, and there’s nothing wrong with that! We’re going to try to go that extra mile by doing some very basic mastering using only the Abbey Road TG Mastering Chain and L2 Limiter plug-ins.
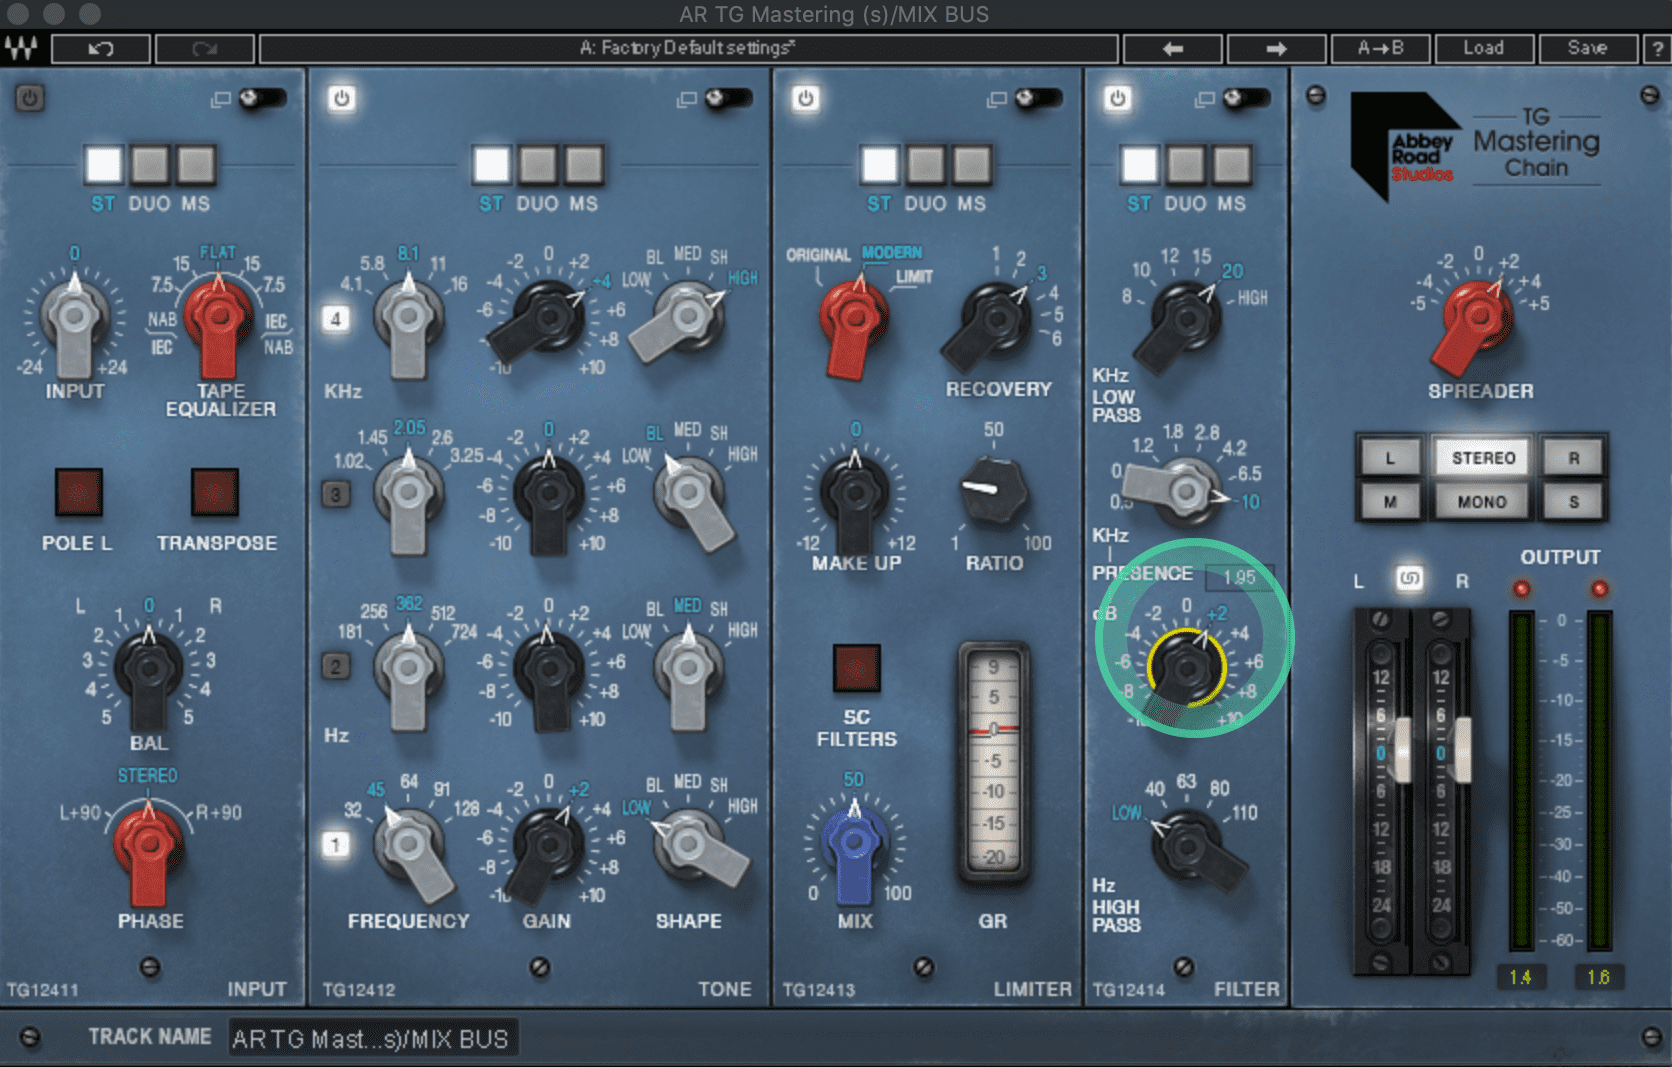
The TG Chain has five sections going from left to right: a preamp, an EQ, a compressor, a filter, and the output section that also has a stereo spreader knob.
First power on the EQ and, only using bands 1 and 4, boost 8.1k by +4 and boost 45Hz by +2. The low boost will add weight to the mix, while the boost at 8k will help the snare cut through more. Turn up the Spreader knob at the top right to add a last bit of width to enhance the stereo field. Here’s how this sounds:
Next, enable the compressor section and bring the ratio down to around 20 so your gain reduction is less than 5dB – too much of this and the mix will sound very pumpy! Keep the mix at 50% so that we’re getting parallel compression as opposed to traditional compression.
Parallel compression is a great way to add consistency and life to a mix, as it means you have a dynamic version of your track playing at the same time as a very compressed and tighter version. Sometimes it works and sometimes it doesn’t so it’s always worth experimenting with it.
Going back and forth between this track and the Machinedrum reference, we noticed that his hi-hats and snare still have more shine than ours. Here’s a section from the reference:
One of our favourite aspects of the TG Mastering Chain is the presence enhancer in the Filter section. Set a 2dB boost at its default position of 10k to get that last hint of top-end to bring us closer to the reference.
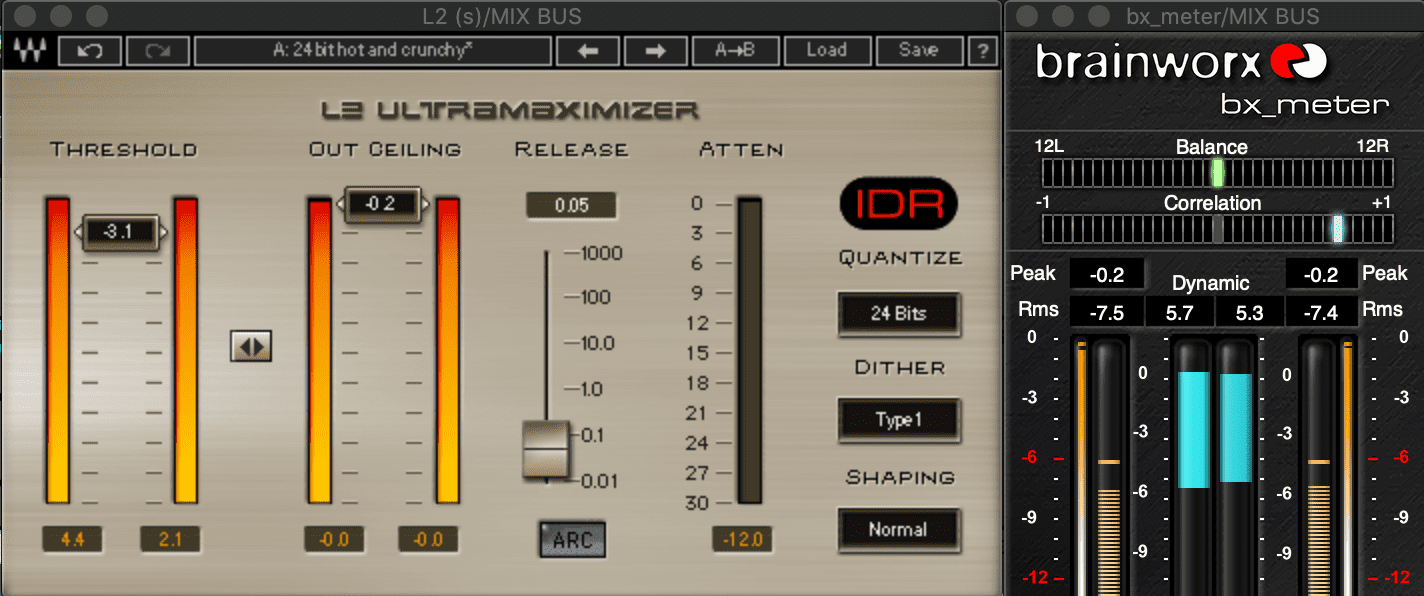
The final step is a limiter and we used the Waves L2. All you have to do is bring down the output ceiling to -0.2 or -0.3 to prevent peaks going over 0 and then lower the Threshold until you reach the desired loudness level. We were going for around -7 RMS and we monitored this using Brainworx’s bx_meter plugin. Here’s the end result:
*Attack Magazine is supported by its audience. When you purchase through links on our site, we may earn an affiliate commission. Learn more.
Tutorials is sponsored by
Roland Cloud is your creative hub for Roland hardware and software. Access legendary recreations of Roland Classics, find new sounds for your favorite products, and download updates and companion apps to make music fast and easy.