In this tutorial we’re going to use Pastels, a brand new CUBE expansion pack, to make lo-fi house inspired by Ross From Friends, DJ Boring et al. If you like it, Pastels is on sale until May 8th.
How do you define lo-fi? To me, it’s a sense of production characterized by an unpolished or rough sound quality. And it’s really popular, especially in hip-hop.
One of the trends of the past few years is insane views on lo-fi hip hop mixes on YouTube with some people even citing the channels as improving their study time.
Closer to home, lo-fi signals a range of sounds from Ross From Friends to DJ Boring to Chaos In The CBD. Distorted and rough around the edges. Love it.
In this tutorial, we will keep it Attack and show you how to make the musical elements of a lo-fi house track using Pastels for CUBE. We covered this interesting plugin by Lunacy Audio last year but we’ve just installed the Pastels pack and it’s billed as “for lo-fi”. How could we not put it to the test?
Chapters
Click to jump to the desired section:
Step 1 Rhodes
Step 2 Rhodes to Pastels
Step 3 Ethereal Lead
Step 4 Bass
Step 5 Magic Maker
Step 6 Final Sound
Parting thoughts
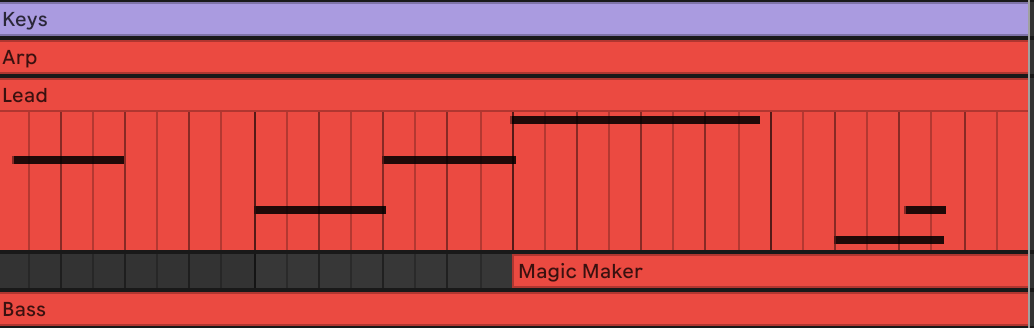
Here’s what we’re making today:
Want to follow along and recreate each step? Download the session here:
As ever click any image to enlarge!
STEP 1: ALL RHODES LEAD TO RHODES
We’re going to start by not using Pastels at all! We want to solid foundations and for the sound we’re going for we’re going to load up a basic electric piano. Load up ‘E-Piano Basic’ from the Core Library in Live.
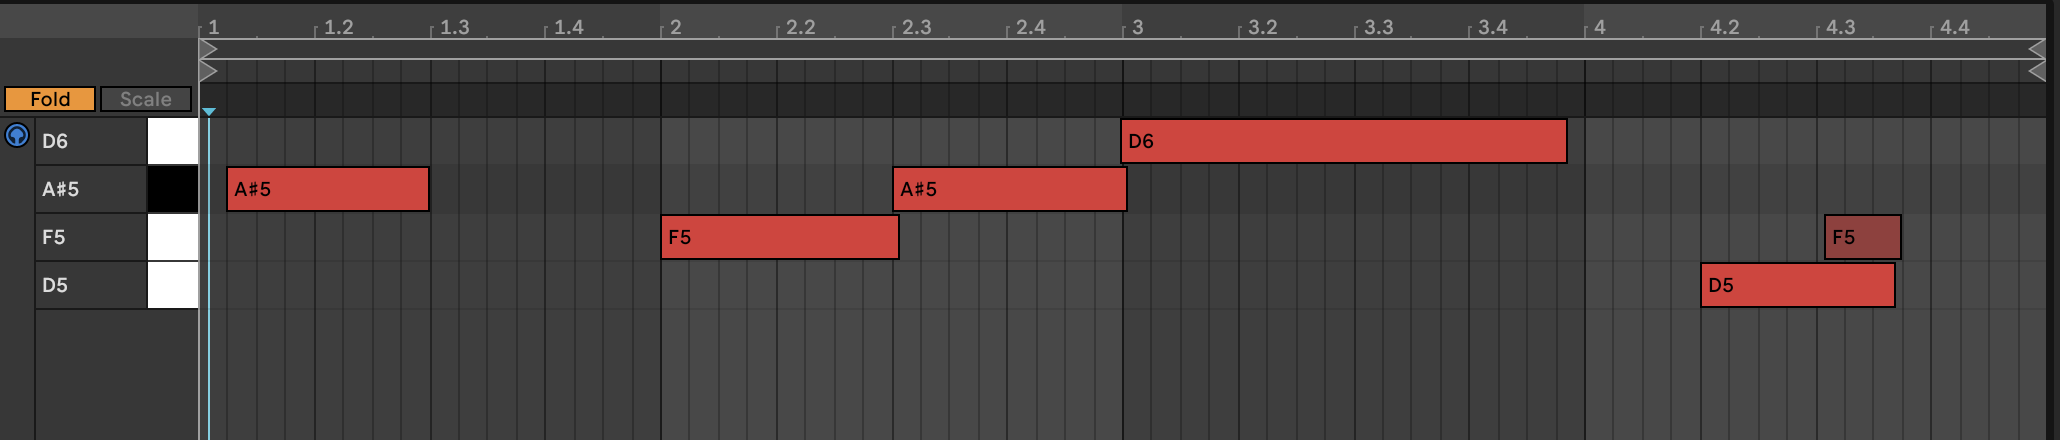
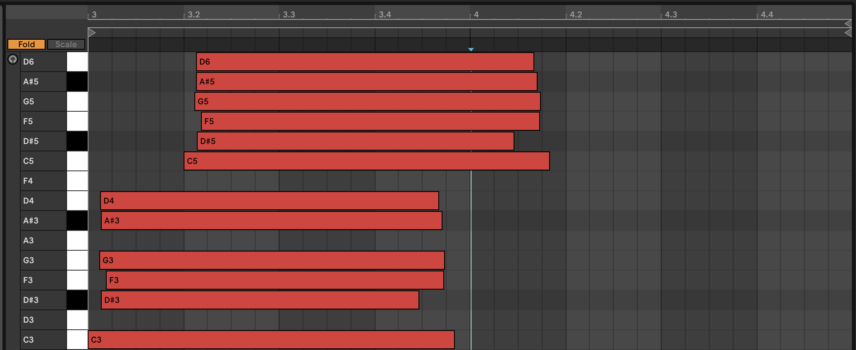
Any electric piano will do and if you like the MIDI part we pencilled in, you can download it above. If you want to program it yourself the part is below. It’s Cmin / Dmin7. Nothing too fancy but the key is sound selection and space. And as ever – don’t quantize! We played it in and shifted it slightly. You want this loose!


We’ve applied some FX but nothing too fancy. An Auto Filter to add hiss to the high-end frequencies (helps make it sound rough), a reverb (any will do but we went with Little Plate), Redux to reduce its quality and a little EQ.
We may take the keys out later but for now, they give us the bed to play from.
Here’s how it sounds in context:
STEP 2: RHODES TO PASTELS
Right, let’s get into Pastels to add the lo-fi “je ne sais quoi” 😘
Pastels makes it so easy – it’s not even funny. Jump to the Presets by clicking on the sound in the light pink toolbar. Navigate to Pastels and using the suggested categories, select Synth and Pluck. Underneath you’ll find “Fractal Arps” – that’s the ticket. Load it up.
Now drop your electric piano part onto the track and it should sound immediately awesome.
Like this:
It’s super tempting to leave that as is, but let’s see where we can take it.
Firstly, let’s automate the Global Release. Configure it first (set it up for automation) and then automate it in the session window. We drew this to add release to the second chord – Dmin.

Next, let’s explore the powerful features within Cube. Click on Sounds and it opens the samplers being used.
In Fractal Arps there are 4 in Slots A, B, C, D. Select Slot B by double-clicking on it. Next click Reverse above the waveform. We want to work on the reverse effect so it gives that suction, push and pull feel to the arp. Next, add HP, Color and LP to taste and bump up the volume. We want it to shine through at the top of the frequencies.

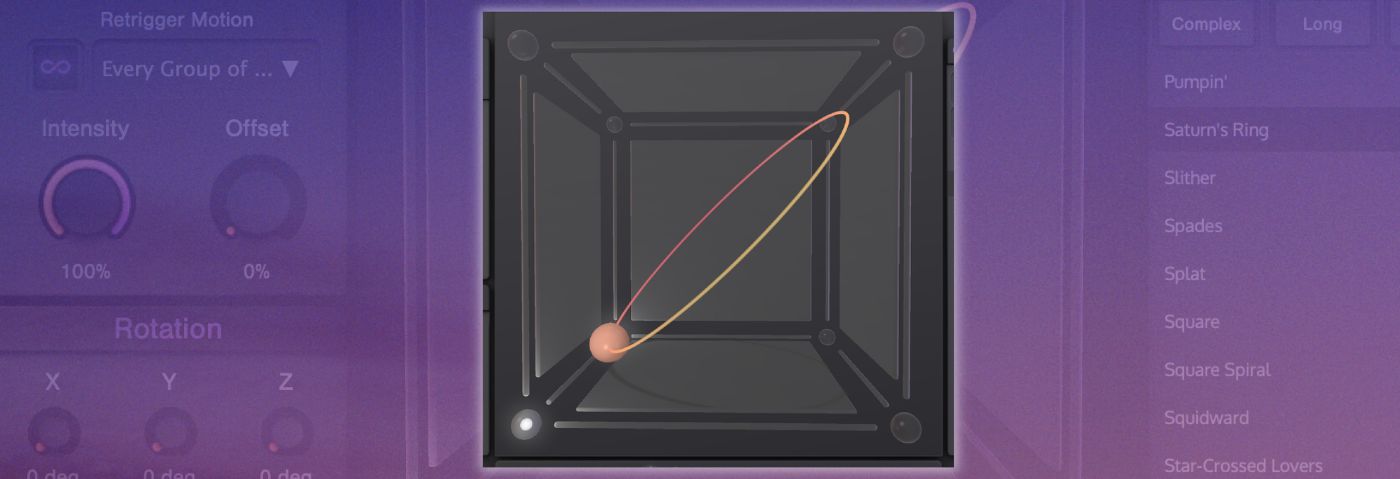
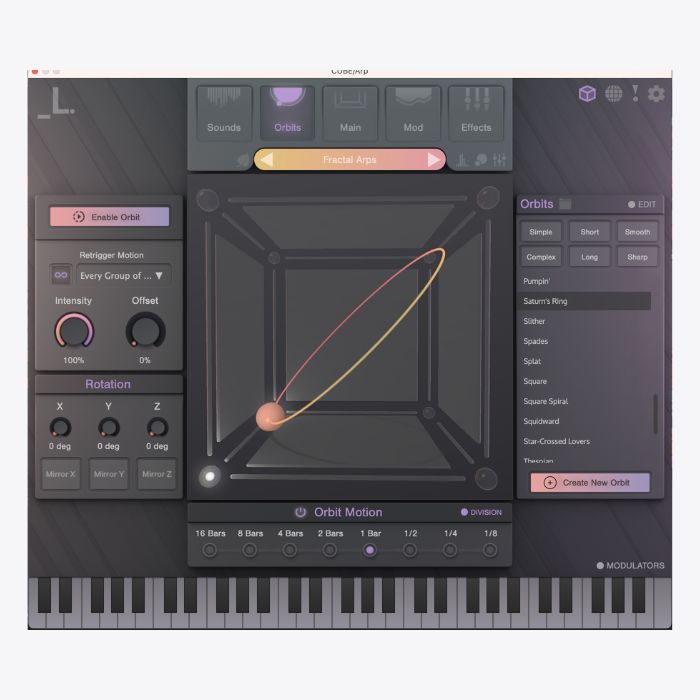
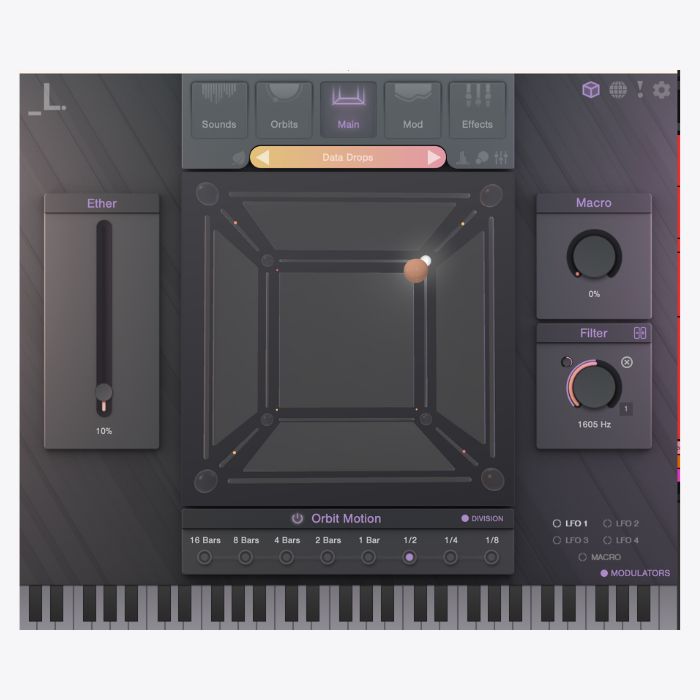
Next head to the coup de grace of CUBE and let’s fiddle with Orbits. It’s set to a basic Circle right now but let’s go for Saturn Ring, change the Orbits speed to 1 Bar and dial the Intensity to 100%.
Lastly for this sound, play about with the Reverb under the Effects section. We dialled in more of the mi while also tweaking the Dyn (dynamics) to make it louder by boosting a little Saturation.
Here’s where we are:
STEP 3: ETHERAL LEAD
For the ethereal lead, program this part (or something similar). We want to complement the parts we have already.
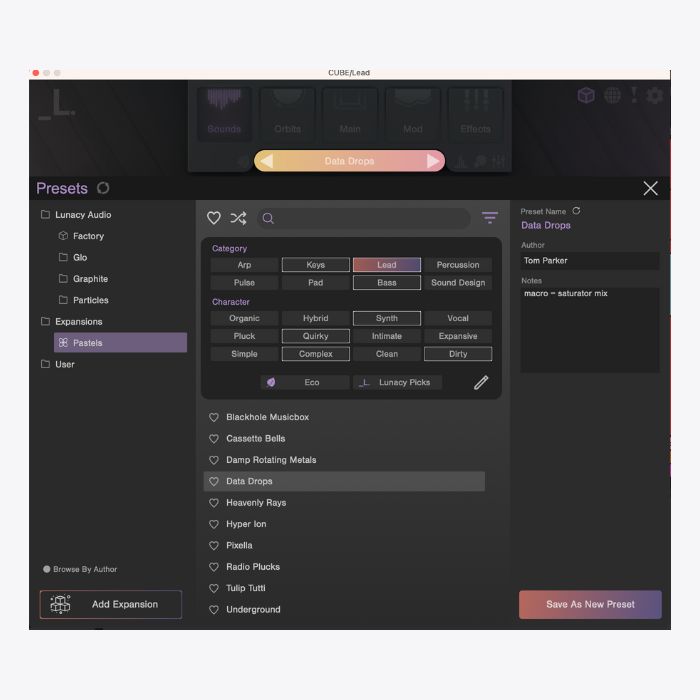
Now, you know the drill. Jump to the Pastels Presets section, select Lead and Data Drops. Sounds good straight off!
Now head to the Mod section and set the LFO 1 to the Filet Freq and the Global Filter. Put them on full intensity.
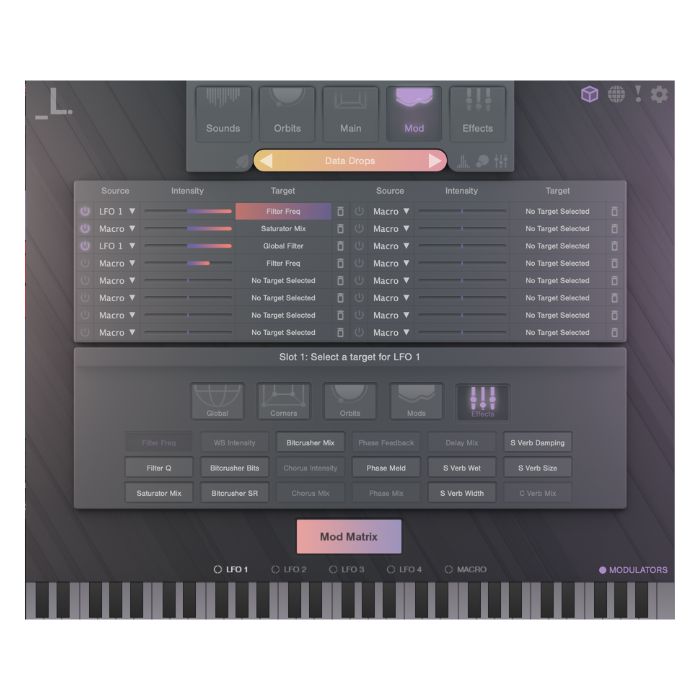
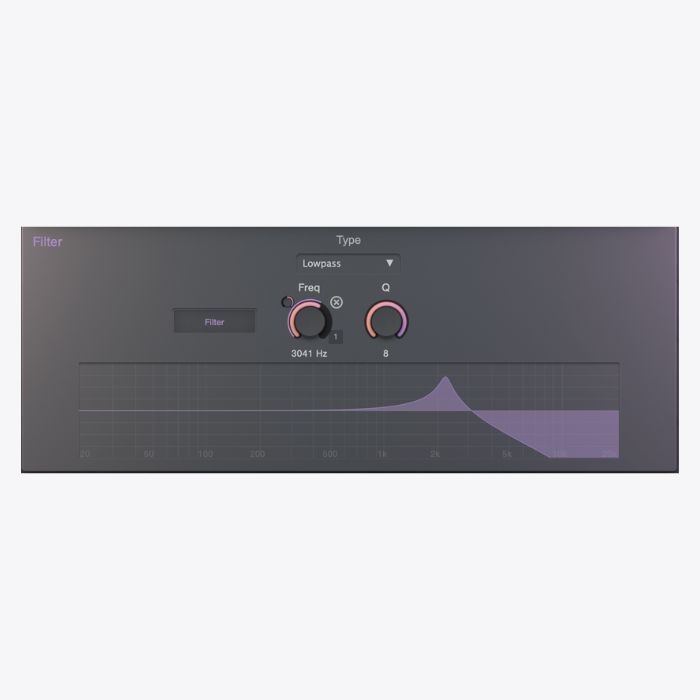
Next, simply set the filters where you think they sound good. We’ve gone for the below:
All that’s left to do here is set the LFO! Square is a cool setting, on full intensity as it drops in and out but mess about with a few till you find something that sounds good.
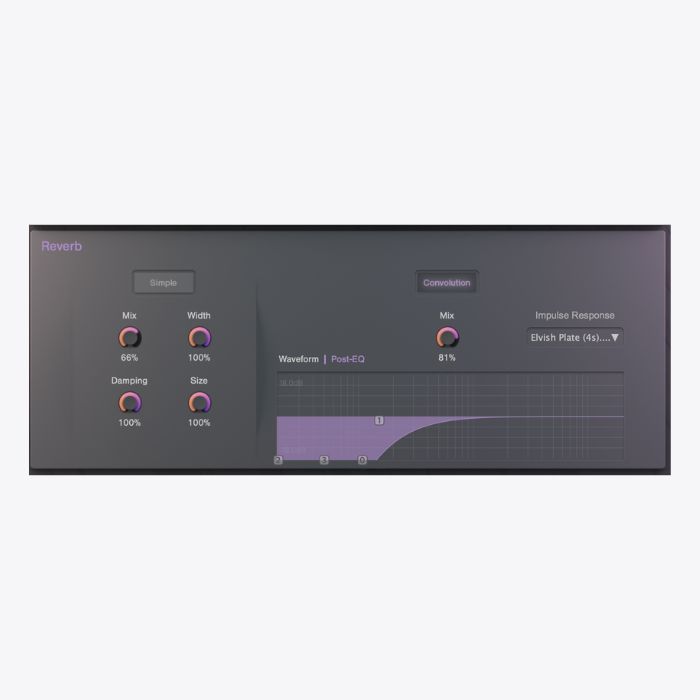
Drive the Global Volume as the filter will be making it too subtle and if you like add a huge dash of reverb. CUBE has some pretty sweet reverbs and we’ve drenched it in Elvish Plate and rolled off all the low end.
Here’s where we are now:
STEP 4: Bass
Pastels is really well geared to polyphonic sounds. The kalimbas, pianos, pads and so on are the forte. Fortunately, the factory sounds have more bass options and we’ve returned to the factory sounds (we used them last year) and opened up Wonky Upright. This is Gary Peacock or Charlie Haden after a few jars…
Load it up. You should have this
We’re going to turn off 3 of the 4 samples. So head to the Sounds and only leave C playing. Double-click on C and bring the Pan knob back into the middle. We want the bass coming out of the middle.
Next head to Effects, roll off a load of high-end with the filter, boost some saturation and dial in a little bit of chorus to taste.
Lastly, head to the MACRO on the main page and dial it in. It’s set to the Orbits Intenstiy and whilst it might be a bit crazy to apply it to the bass, it kinda sounds great. And you know the rule, if it sounds good yadi yada yada…..
Once done, increase or decrease the Global Volume to taste.
STEP 5: MAGIC MAKER
It’s confession time. I had made a beautiful sound for the purpose of this tutorial but accidentally hit the Radomise button on the homepage. That is a very powerful function except it has no undo! So tread carefully if you love the sound you’ve made!
To that end I started again.
Now, remember when I said the electric piano chords would come in handy, well, here they are again. We’ve taken the electric piano, and duplicated the first chord, the Cm, up an octave immediately after the first time it plays. This part appears in the second half of our four-bar loop.
Like this:
If we choose from the presets Queen of Hearts (how could you go wrong with that name), it blends in like this:
It sounds good but perhaps a little Queen of Clubs and needs reining in slightly. Firstly, drop the volume as it’s killing everything else.
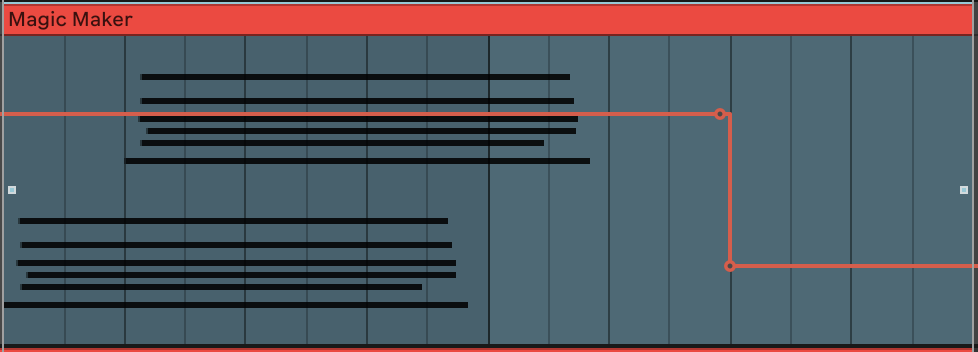
Next, automate the Speaker On, or Device On to cut the last two beats. The sudden drop is interesting and unexpected. It should look like this.
Next head to the Sounds and reverse samples B,D,F & H.
Next, go to Main, click on Orbits Motion and Division. Next click on Modulator > Macro (it’s to the right of Division) and drop Macro on Division. What we want is to automate the Orbits Motion speed.
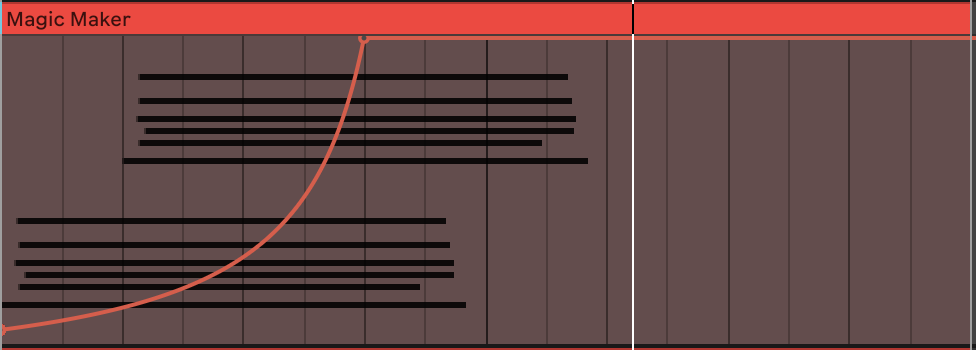
Configure the MACRO to automate like, or similar to the above and it should now sound like this:
STEP 6: FINAL SOUND
The final part is a very light mix. Remember this is not a mixing tutorial!
All we did for the demo is group all the musical elements together but left out the bass.
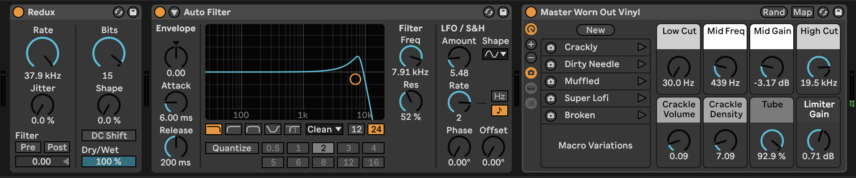
We’ve put our effects applied below. A further instance of Redux, an Auto Filter and Vinyl to really drive home that lo-fi sound!
And all together now:
Parting Thoughts 🤓
CUBE is one of the most extensive pieces of kit in its sampler/ rompler category. The price reflects the amount you can do with it. We’ve really barely scratched the surface. For example, you can have your own arps, upload your own samples and design your own Orbits. At least, this guide to CUBE should help you to get going.
CUBE works with all DAWs! No additional software is required. You can also use CUBE standalone outside of your DAW for preset designing or live performance.
Enjoy!
If you like this tutorial, you can download the session at the top of this page.
You can click here to go there.
*Attack Magazine is supported by its audience. When you purchase through links on our site, we may earn an affiliate commission. Learn more.