
This channel is sponsored by
 Roland Cloud is your creative hub for Roland hardware and software. Access legendary recreations of Roland Classics, find new sounds for your favorite products, and download updates and companion apps to make music fast and easy. Visit Roland Cloud
We take a deep dive into the combination compressor and saturator, TiCo by Mathew Lane and use it to add shine and presence to a house track.
There are many different applications for compression, from dynamics control to effects processing. TiCo, by plugin company Mathew Lane, may feature compression as one of its main features but it isn’t limited to just dynamics. Mathew Lane calls TiCo a signal processor and this is actually closer to the mark. With its combination of multiple compression algorithms and tone-shaping options, it’s meant for more than just reining in unwieldy signals (although it can do that too). We find it works well as a sonic finisher, so we’ll be using it in this capacity to help mix a house track.
We’ll use it to go from this:
To this more polished mix:
N.B: Note that some of the changes in this tutorial are rather subtle so we recommend listening on headphones. Click any image to see a larger version.
Quick Overview Of TiCo
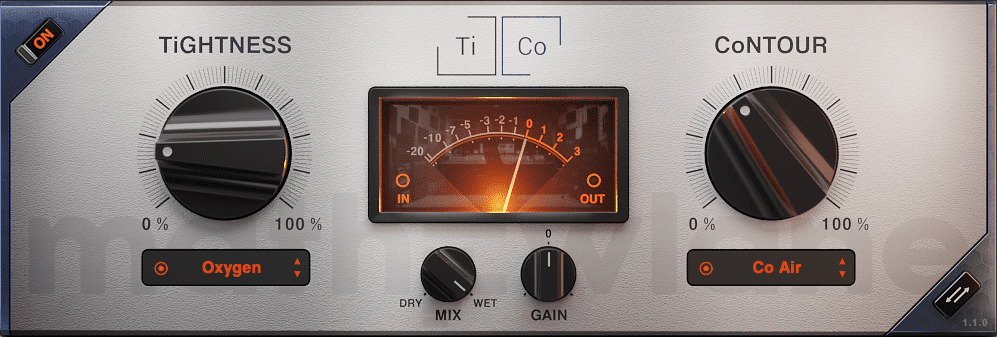
Before we get into it, let’s take a look at TiCo’s features. The plugin is meant to be easy to use and that’s reflected in the uncluttered GUI.
There are two main controls, TiGHTNESS (or compression) and CoNTOUR (saturation and EQ). In between, there’s a dry/wet Mix knob for creating parallel compression and a gain control. Finally, there’s a button to switch the process order and place the colouring before the compression.
Each of the two main sections has seven different algorithms, and it’s worth looking at these in turn, as this is where things get interesting.
TiGHTNESS (compression)
- Titanium: a classic tight compressor geared towards any source type
- Ti Gentle: a less aggressive version of Titanium recommended for mix busses and mastering
- Ti Bold: a heavy version of Titanium aimed at drums
- Ti Smash: intended to be used with the Mix knob for New York (parallel) compression
- Oxygen: an airy compressor made with vocals in mind
- Hydrogen: a transparent algorithm
- Nitrogen: imparts a warm and vintage feel
CoNTOUR (colour)
- Cobalt: strong lows and present highs
- Co Air: adds additional sparkle to the air band
- Co Fire: for extra presence
- Co Wood: for ‘woody’ sounds with impact
- Carbon: adds harmonics to bass sounds
- Rhodium: opens up the mix for keys and other instruments
- Mercury: adds richness to a mix or master
Clearly, the key to getting the most out of TiCo is how you combine the two sections. Let’s now use it on a number of channels in a mix.
Step One: Kick
For our kick, we’re using a TR-909 sample from Live’s 909 Core Kit drum rack. We’ve added a little drive and tone and also used EQ Eight to boost the lows and take a bit out of the low mids. We’d like a little more presence though and we also want it to stand out against the bassline.
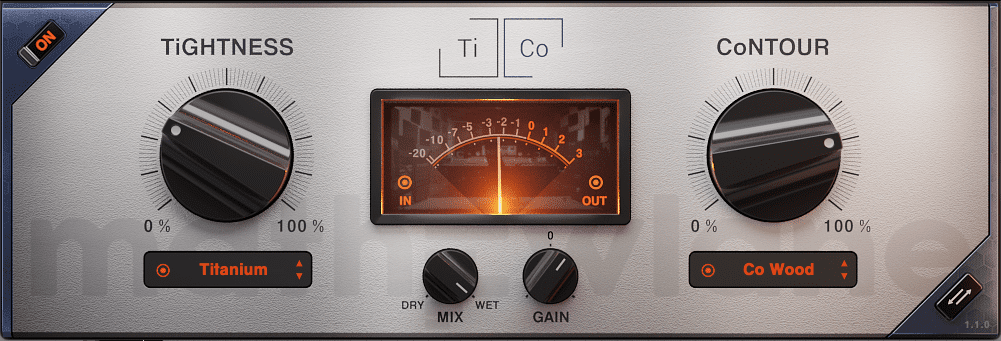
We add a copy of TiCo to the audio channel after the EQ. We use the Titanium compression type to tighten the kick up. TiCo’s compression algorithms are pretty strong so we find that a little goes a long way. We bring the dial up to around 30%.
Our bassline is pretty full on and we’re losing the kick in the mix. Instead of reaching for another EQ, we can use the CoNTOUR section to help it stand out. Using Co Wood, we can add a click to the front of the kick. A setting of 80% works well.
Here is the kick before TiCO:
And after:
With the bassline for context:
Step Two: Drum Bus
Compression and saturation are two ways to help all the elements of a drum bus congeal together. TiCo can do this in one shot.
First, we group all of our drum sounds together. We’re using loops from Splice’s House Nation pack, including ‘hn_top125_romp.wav’, ‘hn_prc125_styles.wav’, and ‘hn_prc125_tribez.wav’. We’ve also included our kick in the group.
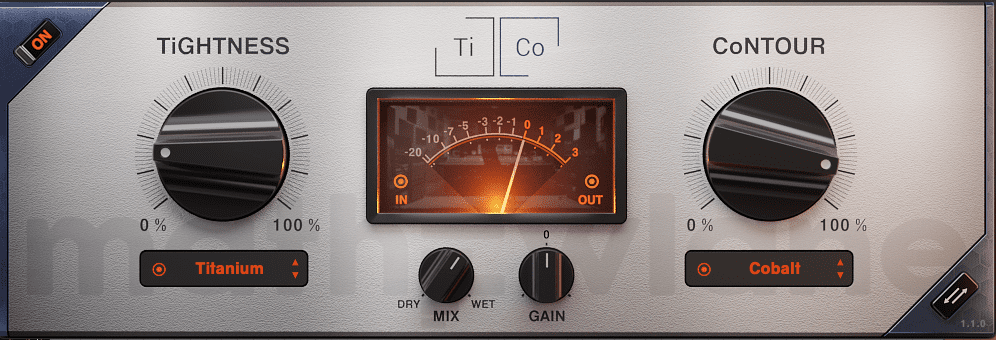
Next, we add a new instance of TiCo to the drum channel. We want to use a little compression to help the sounds all sit together. Again, we call up Titanium. We don’t need as much compression as the kick, though. A little less than 20% does the trick.
For the CoNTOUR, we want to add some highs to the drum mix as well. Cobalt gives us added presence in the upper frequencies while helping the low elements sit together too.
The effect is a little strong so we use the Mix knob to dial back the wet amount to around 60%. Now we get the best of both worlds: Transients from the original signal plus compression and colour.
Here is the drum bus without processing:
And with:
Step Three: Bass
For our bassline, we’re using the sample ‘hn_bs125_slider_Am.wav’ from the same Splice pack. It’s already nicely produced but we’d like it to have more presence in our track, as it’s fairly minimal. Let’s use TiCo to achieve this.
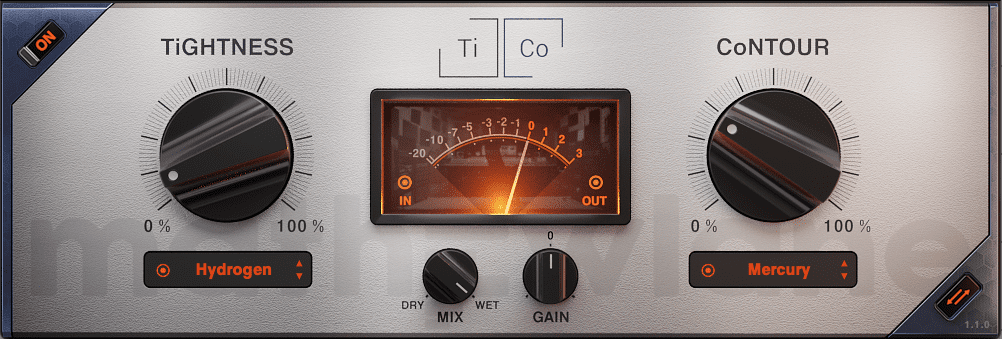
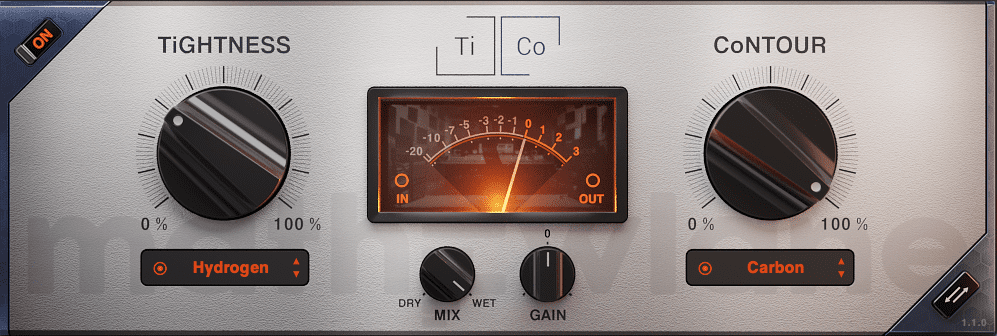
We add TiCo to the bass channel and choose the Hydrogen TiGHTNESS setting. Hydrogen is a transparent compression style. The sample sounds good but we’d like it even tighter to help sit in our mix, so we go with a setting of 30%.
Next comes CoNTOUR. We select Carbon, which is perfect for adding presence to bass. We dial in a generous 100% to bring out the harmonics in the 500-1000Hz mids and help it fill out the mix.
The bassline before processing:
And after (note that the difference is rather subtle):
Step Four: Vocals
We start with the vocal sample ‘GIO_AFRO_120_vocals_riff_yeah_vibes_Emin.wav’ from the Splice pack, Muses. We add Ableton Live’s Phaser-Flanger to the channel to give it some movement and also send the vocal to Live’s stock Reverb and Delay effects via sends. However, the vocals could use more air and breathiness.
Again, we call up TiCo to the audio channel. For the compression section, we go with Oxygen as it’s custom-made for vocals. The sample has already been produced so we don’t need to overdo it – around 18% is enough to open up the top end.
We can also use the colouring side of TiCo to add air. Under CoNTOUR, we select Co Air, which – as we would expect with a name like that – boosts the air region of the frequency band. Overdoing it can make vocals sound brittle so we don’t need to slam it. Just under 50% sounds good.
The original vocals:
And with air processing:
Step Five: Master Bus
Finally, let’s use TiCo to add some finishing polish to the master bus and help our mix gel together. Note that we’ve added a chord loop, ‘hn_mus125_don2_Am.wav’, to the song.
We place a copy of TiCo on the master channel. When doing any compression on the master bus or when mastering, to avoid over-cooking things it’s always a good idea to start small and then gradually increase. Accordingly, we start with TiGHTNESS at zero and then bring it up until things start to glue together. Around 8% seems to be the sweet spot.
For CoNTOUR, we go with Mercury, which Mathew Lane recommends for mixing and mastering. It adds overall weight and presence without hyping the highs. A setting of 30% yields good results.
Finally, we try switching the processing order with the arrow button in the lower right corner. Although the difference is subtle, we prefer it with the CoNTOUR first. We like the way the saturation hits when going through the TiGHTNESS compressor.
Here is our final mix without any master bus processing:
And here it is with:
This content is supported by Mathew Lane. If you want to read more about content funding on Attack Magazine and how we can continue to provide content to you for free, visit our content funding page for a breakdown of our editorial policy.
*Attack Magazine is supported by its audience. When you purchase through links on our site, we may earn an affiliate commission. Learn more.
Tutorials is sponsored by
Roland Cloud is your creative hub for Roland hardware and software. Access legendary recreations of Roland Classics, find new sounds for your favorite products, and download updates and companion apps to make music fast and easy.