u-he are makers of award-winning software synthesisers and effects including Diva, Repro-1, Zebra2, Hive, Bazille, Presswerk and Satin.
Visit U-he
Technique » Synth Secrets »
Subby Garage Bass
This channel is sponsored by

In this Synth Secrets, we dig deep into analogue synthesis to make some dirty, subby garage bass in the style of Interplanetary Criminal.
With his mix of garage, breakbeat, and jungle, Manchester’s Interplanetary Criminal has been consistently knocking it out of the park lately. We’re particularly big fans of ‘Killah Kam’ on the Nobody EP. In this Synth Secrets, we’ll be using it as a jumping-off point to whip up some speaker-rattling sub-heavy bass.
We’ll be using Repro-1, the Sequential Circuits Pro-One emulation in U-He’s Repro to craft our bass. The Pro-One is famous for its ability to crank out some serious bass tones, and Repro-1 is just as capable. We’ll also be using some distortion and saturation courtesy of Waves’ MultiMod Rack to dirty it up. These exact instruments are not required to achieve similar results, so if you don’t have them in your arsenal grab something similar at hand. As always, click on any image to see a larger version.
Here’s the end result in action with a breakstep beat and Reese bass thrown in for good measure:
Let’s get to it, and watch yer bassbins.
Step One
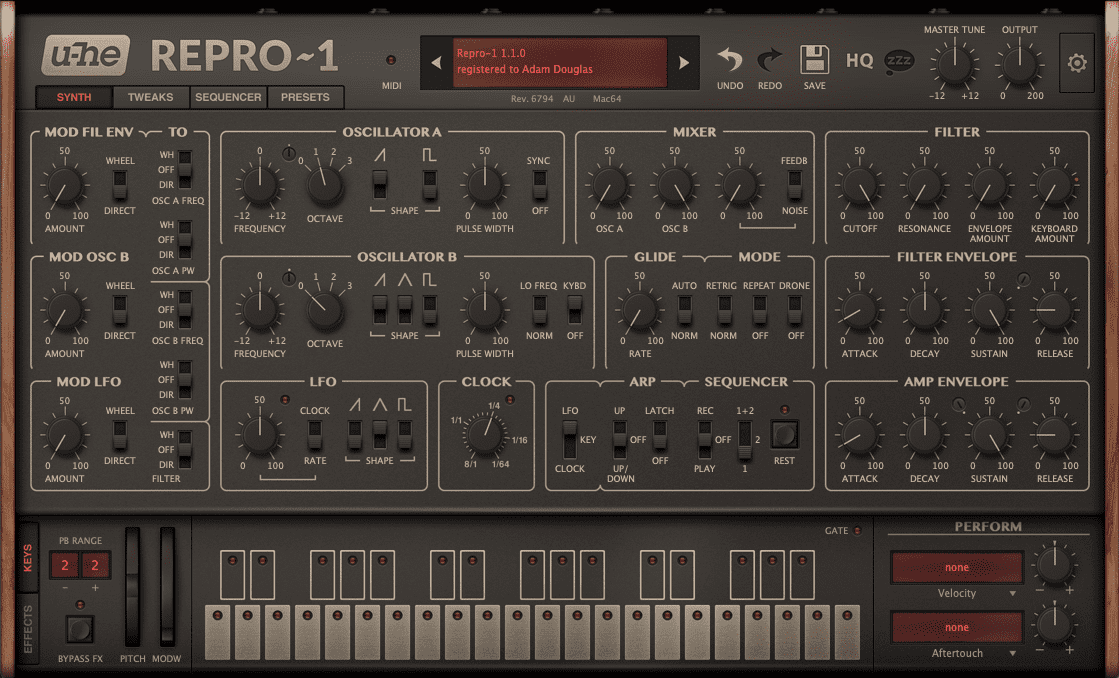
Create a new MIDI track in Ableton Live (or your DAW of choice) and call up Repro-1. Make sure it’s set to an initialized patch. If it’s not, click on the Presets tab and hit Initialize.
Repro-1 is a two-oscillator monosynth. We only need one oscillator but we will be using the triangle waveform for extra sub weight, which can only be found in Oscillator B. In the mixer section, turn Oscillator A’s volume down to zero and Oscillator B’s up to 100. Next, in Oscillator B, add the triangle wave to the mix (sawtooth should already be engaged). Lastly, turn the Octave knob down to 0 to make it good and low.
Try playing a low C. It should sound something like this:
Step Two
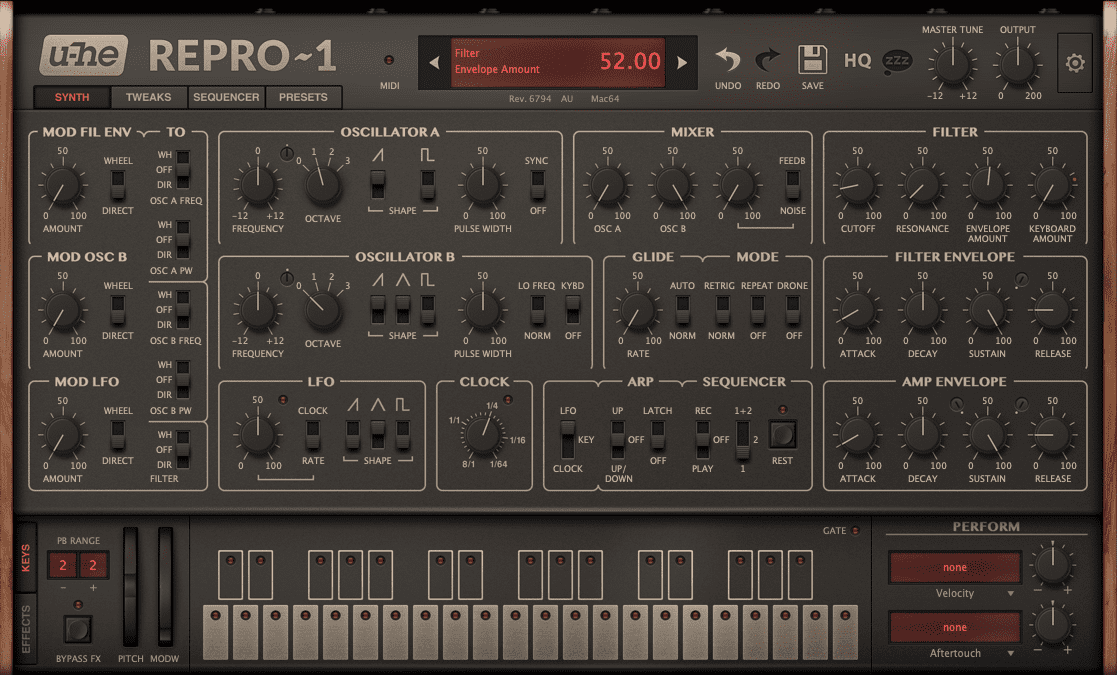
That’s very bright and not at all moody. Let’s bring in the filter to darken things up.
Turn the Cutoff down to around 17. Now we’re getting somewhere. Next, bring up the Resonance just a touch. We want a little bite but not too much whistle. Finally, bring the Envelope Amount up to around halfway. The Filter Envelope will play a big part in getting the sound just right. Let’s tackle that next.
With filter on board:
Step 3
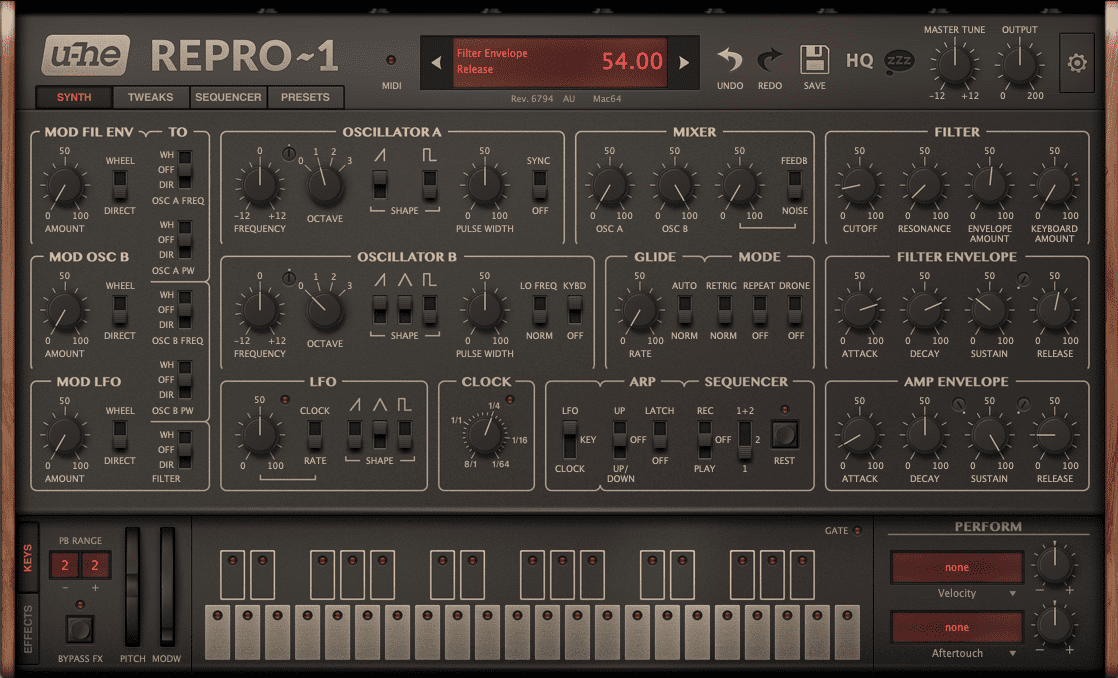
This bass sound has a slow filter fade-in. We can achieve that with the Filter Envelope. Raise the Attack on the Filter Envelope to about 75, bring up the Decay to around 70, the Sustain down to 30 or so, and the Release to 55. When done right, the filter should open and close in a kind of swell.
With envelope envelope dialed in:
Step 4
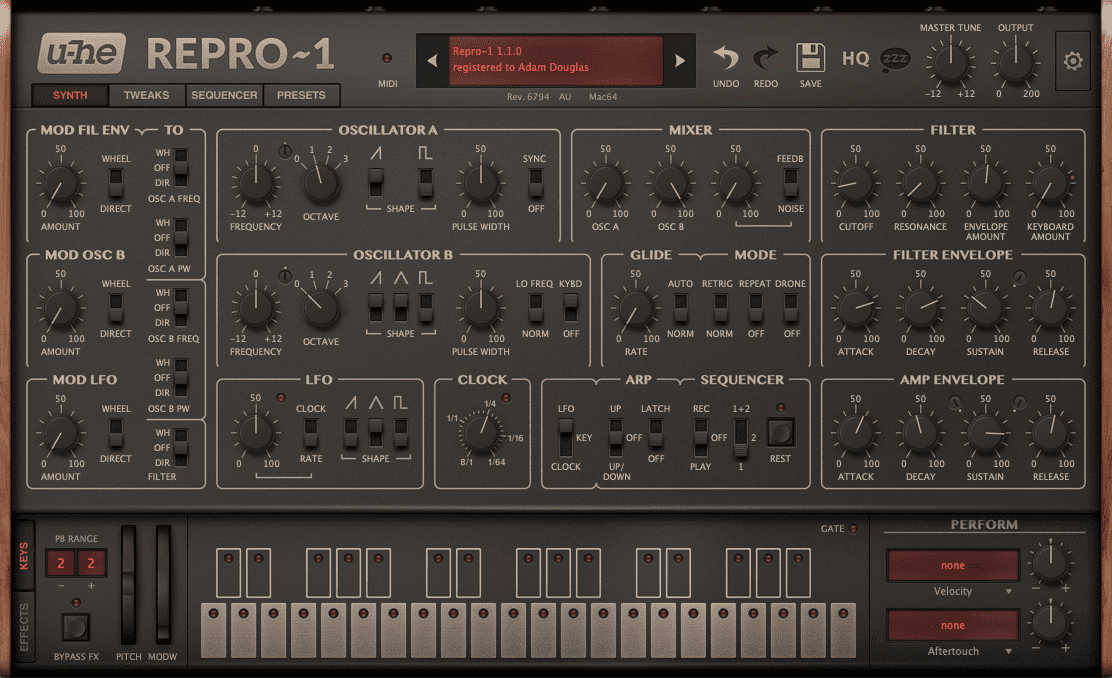
Next, let’s shape the volume of our bass with the Amp Envelope. Where most bass sounds make use of a tight attack, this one has a moody, slow fade in. To get this, dial the Attack back to about 57. Turn the Decay down just a touch from its default position at 50. Bring the Sustain down to 80, and push the Release up to around 50. This way, it won’t shut off suddenly when we lift our fingers from the keys.
Our progress so far:
Step 5
That’s it for the analogue synthesis portion of the sound. Next, let’s grunge things up even more with saturation and distortion.
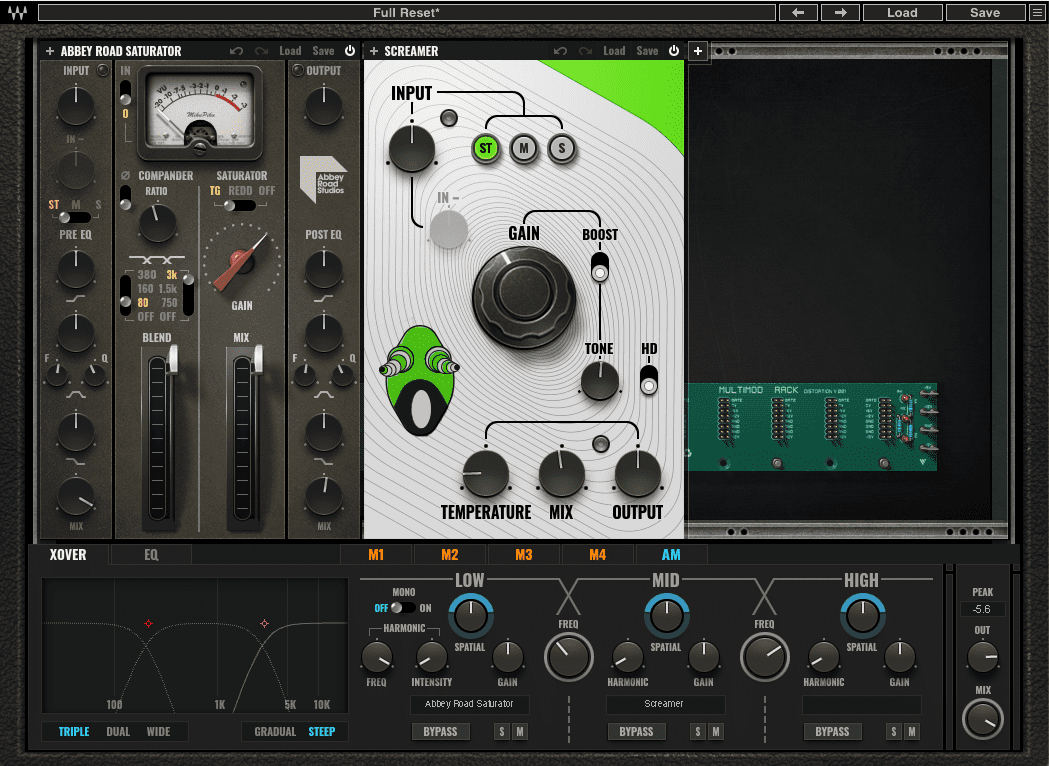
Add a copy of Waves MultiMod Rack to the channel. This is a multiband distortion plugin host that’s great for rubbing dirt into sounds. Call up Abbey Road Saturator in the low-frequency slot and Screamer from the MDMX Distortion Modules pack for the mids. Play around with the settings until you have something that’s suitably aggressive without going overboard. We’ve added a heaping helping of saturation gain to the lows and just a touch of distortion to the mids.
Lastly, we throw on Ableton’s stock Compressor for some tonal shaping. We’ve gone with the Brute Compression preset but dialled back the Dry/Wet.
Our bass with saturation boost and compression. The upper mids are benefitting from the added harmonics:
Step 6
You could always stop here but we’ve decided to go the extra mile and bring in a sampler for some old-school authenticity. We love TAL Software’s TAL-Sampler for this very reason. Let’s see what it can bring to the table.
First, we bounce out the bass sound from the end of Step 5. Then, we create a new MIDI track and add an instance of TAL-Sampler. Adding our sample is as easy as clicking on the Layer A tab in the upper left and dragging and dropping.
Once in, turn off looping and adjust your start and end points to taste.
Lastly, head over to the Resampler section. Choose the S 1000 option from the DAC menu. This will make it sound like it’s coming from a classic Akai sampler. We cranked up the hiss and saturation as well, as Interplanetary Criminal makes great use of lo-fi noise in his tracks.
Here’s our bass sound as run through TAL-Sampler.

Finally, here’s our bass sample in a track, with a Reese bass similarly processed and sampled:
*Attack Magazine is supported by its audience. When you purchase through links on our site, we may earn an affiliate commission. Learn more.
Synth Secrets is sponsored by
u-he are makers of award-winning software synthesisers and effects including Diva, Repro-1, Zebra2, Hive, Bazille, Presswerk and Satin.
Download the demos and try them for yourself at www.u-he.com