u-he are makers of award-winning software synthesisers and effects including Diva, Repro-1, Zebra2, Hive, Bazille, Presswerk and Satin.
Visit U-he
Technique » Synth Secrets »
808-Style Booms
This channel is sponsored by

In this Synth Secrets, we explore how to synthesize your own booms for techno, jungle and other kinds of bass music.
The boom on the Roland TR-808 is legendary. First released in 1980, the drum machine went on to influence countless genres of music, from hip-hop to jungle to trap. The key to the 808’s popularity is the kick, whose decay can be extended out to ridiculously long lengths. This results in the famous boom, a sub-bass explosion that can felt as much as heard. This boom has been exploited by producers for decades, underpinning standard kicks for extra oomph and even being sampled and used as a bassline.
There are plenty of high-quality 808-style boom samples out there but there’s nothing like making your own. For starters, it’s dead easy to do. All you really need is a synth plugin with a pitch envelope. Having your own synthesized booms can also make your life much easier. You can easily tune them, for one. You also have precise control over the length of the decay as well as the shape of the pitch envelope, allowing you to customize your booms for each song. Lastly, your booms will be entirely your own and will set you apart from all the other producers using the same sample packs.
To make our booms, we’ll be using Waves’ virtual analogue synthesizer, Element 2.0. As mentioned before, most any synth with a pitch envelope will get the job done. As always, click any image to see a larger version.
Here’s what we’re going for.
Ready to drop the boom?
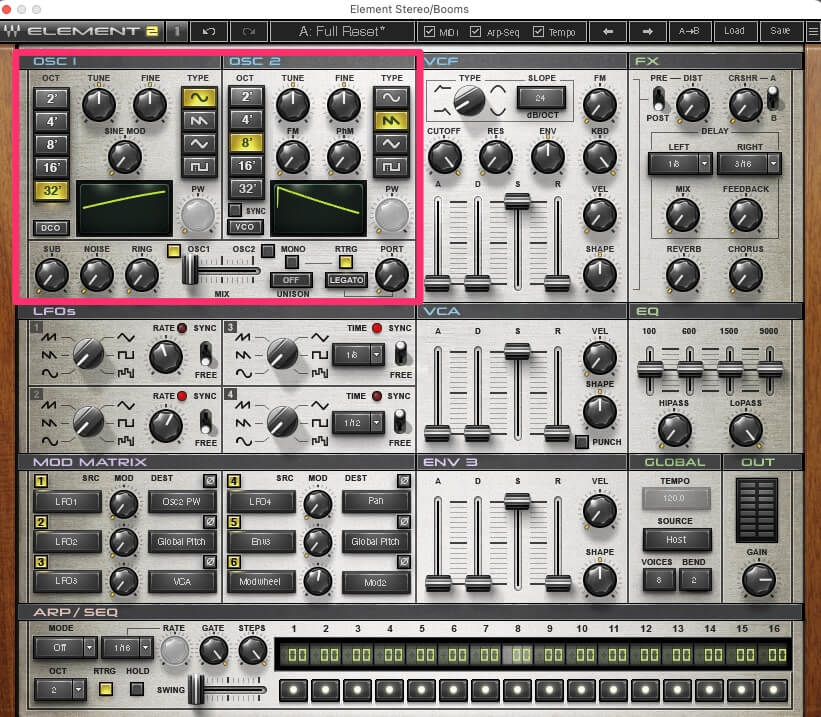
Step 1
Create an instance of Waves Elements 2.0 on a MIDI track and make sure it’s initialized. We’re only going to use one oscillator so turn oscillator 2 off. Set Osc1 to a sine wave at the lowest footage, 32’. Try pressing C2. It’s super low but don’t worry, once we get the pitch envelope involved it will sound a little better. Note that we don’t need to get the sub-oscillator involved, as things are low enough already and any additional harmonics will just muddy things up.
Here’s our boom so far. Note that you won’t be able to hear it without headphones as it’s very low indeed.
Step 2
Next, let’s shape the volume with the VCA envelope. The key to good synthesized percussion is avoiding sustain. With that in mind, let’s set the attack to the fastest setting, decay fully open and release about halfway. Turn the sustain all the way down.
We have a very low sub sound but it still doesn’t sound like an 808 boom, does it? We’ll rectify that in the next step.

Step 3
It’s time to modulate pitch. By doing this, we’ll be able to emulate the sound of the skin on a drum being struck.
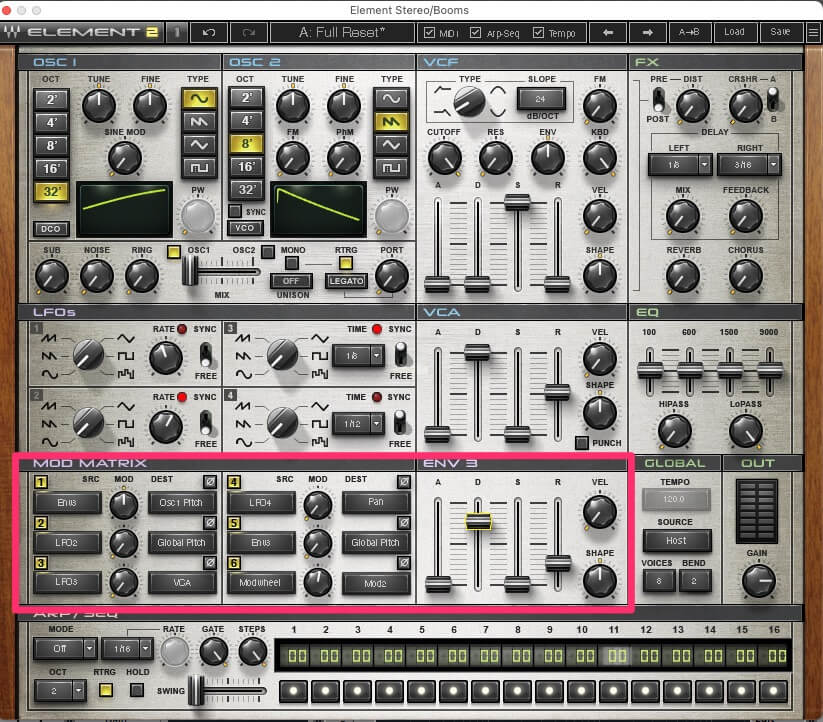
Start by turning your attention to the Mod Matrix. Assign envelope three (Env3) to the pitch of the first oscillator (Osc1 Pitch). Turn up the modulation amount about halfway. We don’t want to overdo it and end up with zaps.
Next, in Env 3, start by lowering sustain all the way down. We don’t need it at all. Keep attack at the fastest setting, bring sustain up just a little (10 is a good position), and then play with the decay amount until you get a satisfying, boom-like bass drop. Longer decays result in longer booms. Shorter decays will give you kicks. We’ve chosen a setting of 1160 but feel free to adjust your boom as you see fit. That’s the beauty of synthesizing your own percussion – you can adjust it for the song at hand.
Step 4
As genres and production techniques have evolved over the years, so have the use of 808 sounds. It’s very rare to hear an 808 boom used as-is in a track. It’s likely been processed to make it even heavier and fatter. With that in mind, let’s see how we can make our bespoke booms more production-ready.
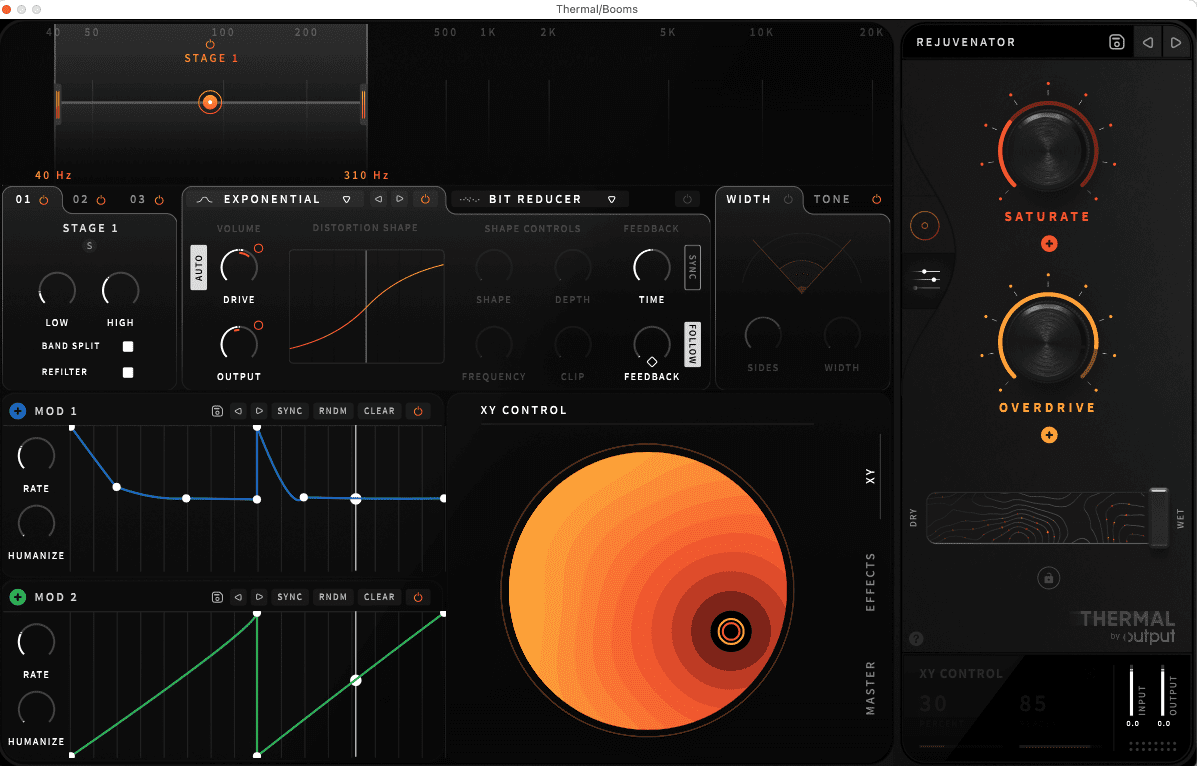
The sinewave in our boom but that doesn’t give us very many harmonics. For anyone listening on something other than a club sound system or headphones, the bass will likely be lost. Let’s use a distortion plugin to add some harmonics then. The Rejuvenator preset in Output’s Thermal is just the thing to flesh it out and make it sound more alive.
Step 5
Lastly, let’s add a bit of polish to make it mix ready.
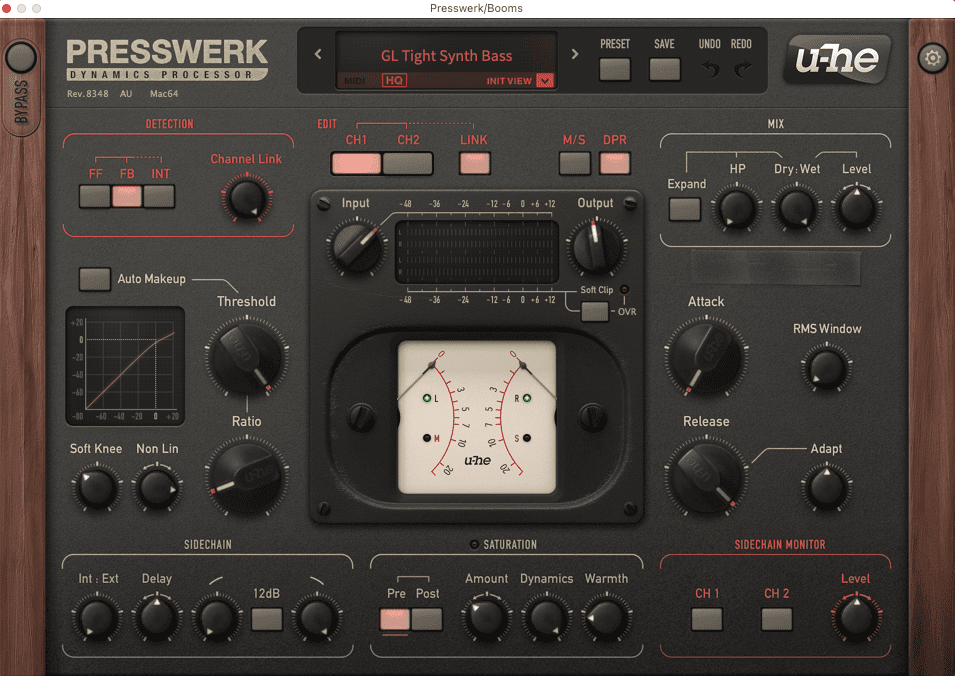
We throw a utility plugin on the track after Thermal and set it to mono just to keep things nice and centred. U-he’s Presswerk compressor comes next to beef it up, and lastly, Ableton Live’s EQ Eight helps keep the extreme sub frequencies under control. We’ve shelved things off below about 60Hz.
Top tip: If you’re making old-school jungle or dance music, for an authentic sound try exporting a single note and then triggering it from a sampler.

Here’s our finished boom, as used in a ‘90s-style jungle track.
Synth Secrets is sponsored by
u-he are makers of award-winning software synthesisers and effects including Diva, Repro-1, Zebra2, Hive, Bazille, Presswerk and Satin.
Download the demos and try them for yourself at www.u-he.com