u-he are makers of award-winning software synthesisers and effects including Diva, Repro-1, Zebra2, Hive, Bazille, Presswerk and Satin.
Visit U-he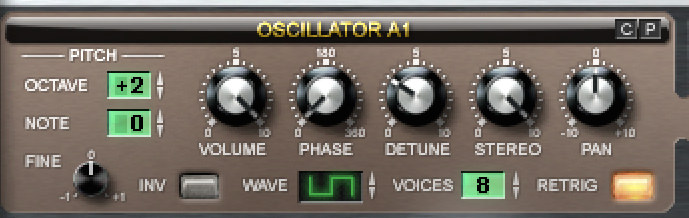
Technique » Synth Secrets »
Pitched Percussion
This channel is sponsored by

Synth Secrets is a series of programming tutorials in which we show how to make a range of classic and new synth sounds using plugins such as Massive, Sylenth and Diva.
This month we show you how to make an EDM pitched percussive synth hook.
Here’s an example of the sound we’ll be making:
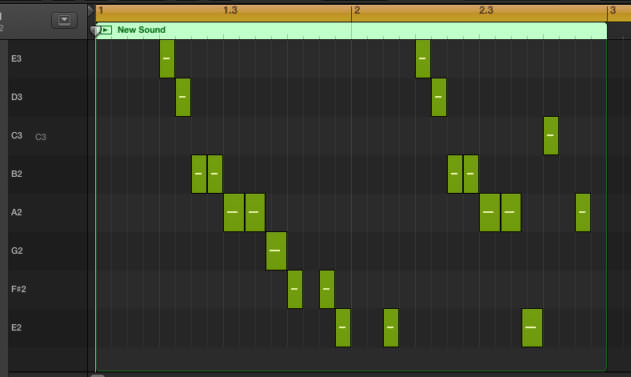
The short, almost staccato, nature of the sound makes it perfect for busy hooks. Here’s a screengrab of the MIDI we’re using, with the triplets in beats 3 and 7 giving the hook its distinctive feel:
We’re using Sylenth1 by Lennar Digital for this walkthrough, but any soft synth that offers square waves, filters, envelopes and voice stacking will do the job.
Step 1:
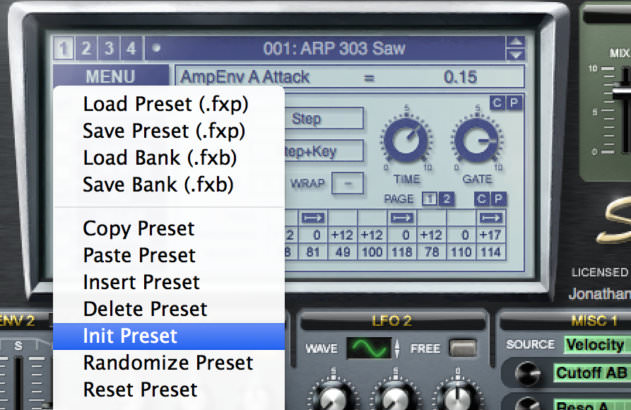
Open Sylenth, navigate to the Menu dropdown (found in the centre panel) and select Init Preset to start a new sound.
Start by shifting Oscillator A1 (top left) up by two octaves by clicking and dragging up in the green backlit box next to Octave, then change the raw waveform to a Pulse wave by clicking and dragging the box alongside Wave (note that Sylenth’s centre panel gives you numerical/descriptive feedback when you tweak parameters).
To thicken up the sound, increase the number of voices to 8 by clicking and dragging up again in the box next to voices. Now detune those voices by turning the Osc A1 Detune knob (just above the Voices box) to the 2.90-2.95 point.
Step 2:
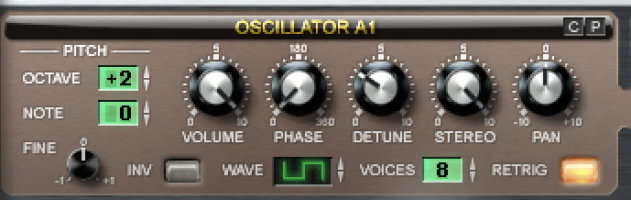
Adding another oscillator at a lower pitch will add body to the sound. You can copy and paste the settings from Oscillator A1 using the little C and P buttons in the top right hand corner of the oscillator.
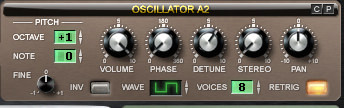
Copy and paste the settings from Oscillator A1 to Oscillator A2 then reduce the pitch of Osc A2 by 1 octave to +1. Next, increase the detune value to around 1 o’clock (6.24-ish).
Step 3:
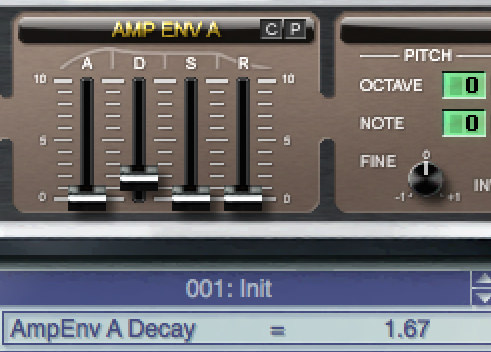
Giving the sound its percussive feel is as simple as editing the amp envelope. In the Amp Env A box, set attack (A) to 0.00, decay (D) to 1.67, sustain (S) to 0.00 and release (R) to 0.00. Experiment with shorter or longer decay times to get the feel that you’re after – the tempo of your track and other melodic and rhythmic elements will all affect the desired value.
Step 4:
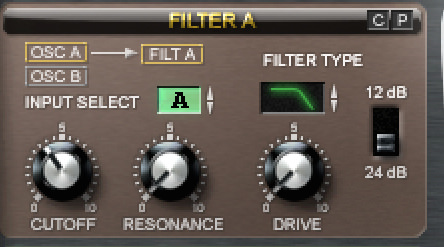
Filtering can be used to remove some of the brittle top end. In the Filter A panel, click and drag in the box underneath Filter Type and select a low pass filter (it’s shown with a diagram, but remember you can check you’ve got the right one in the central info panel). Reduce the cutoff frequency to around 40 Hz (11 o’clock position). Leave the other filter parameters as they are.
Step 5:
We’re going to use a modulation envelope to control the cutoff frequency of the filter.
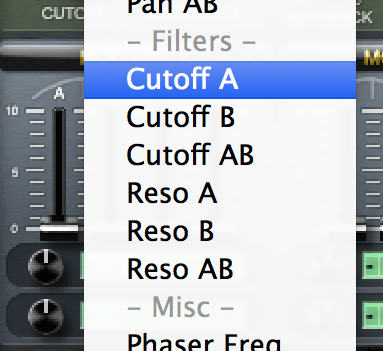
In the upper of the green boxes underneath Mod Env 1’s ADSR parameters, click and hold until the list of target destinations opens. Select Cutoff A (found under the Filters section).
Increase the modulation amount to 4.00 using the dial to the left of the modulation box, then set the Decay (D) of Mod Env 1 to around 1.60.
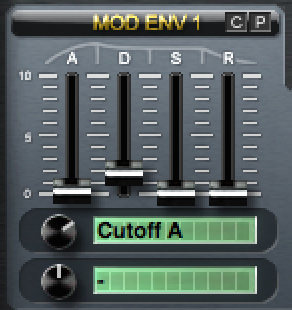
You might also want to increase the Attack (A) envelope a fraction (0.11 or thereabouts) to slightly soften the front transient. You’ll barely hear the difference, but it can help solidify the sound further down the line, particularly when run through a compressor.
Step 6:
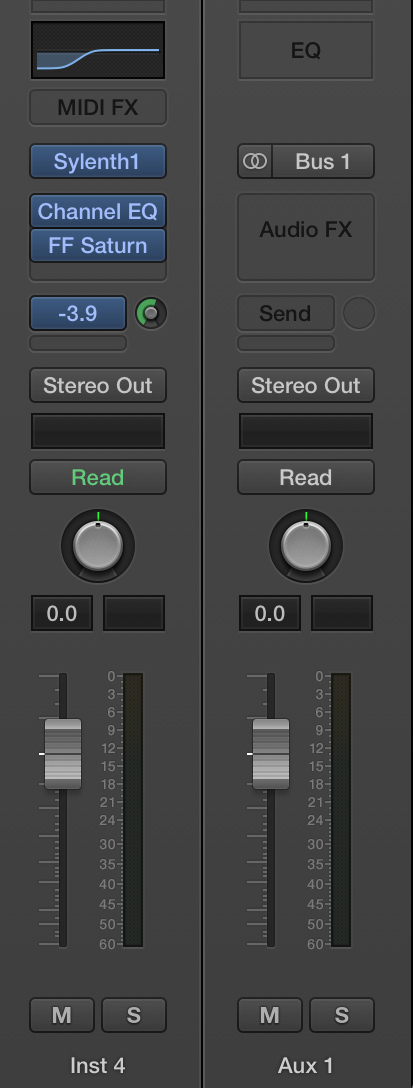
With the raw patch set up, you can now use external effects to bring the sound to life.
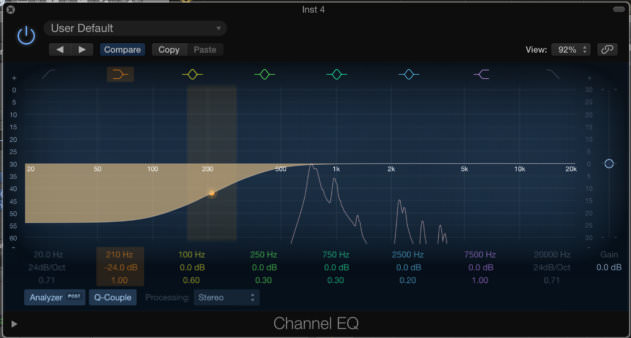
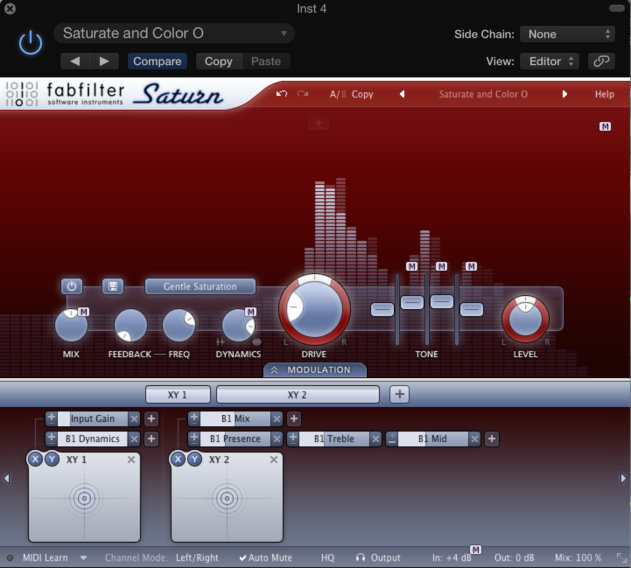
In this instance we’ve used Logic’s native EQ to shelve away low frequencies below around 200 Hz (this leaves space in the low end for the kick and bass) and applied some saturation courtesy of Fabfilter’s Saturn plugin to add a dusting of grit (any other saturation or even bit-crusher on subtle settings will do a similar job).
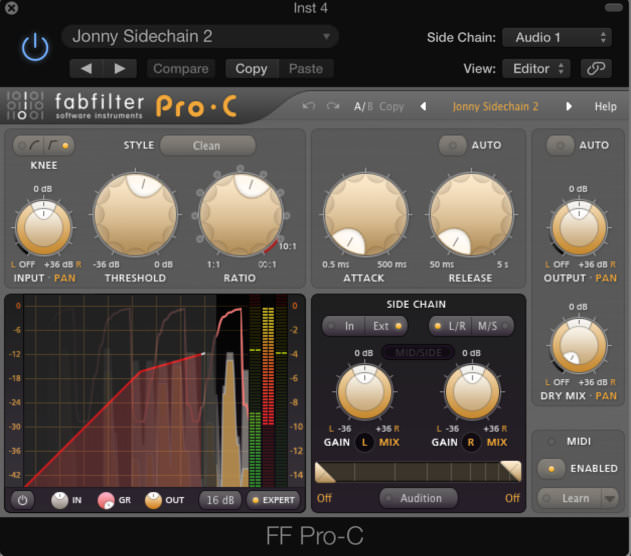
Last in line is a compressor, sidechained to the kick drum, used to duck the synth volume when the kick hits. This has the effect of freeing up headroom in the mix, allowing the all-important kick to stay at the front of the mix, even when the riff is playing.
The compressor has a fast attack and release, a ratio of 4:1 and it is shaving off around 8-9 dB of gain.
Step 7:
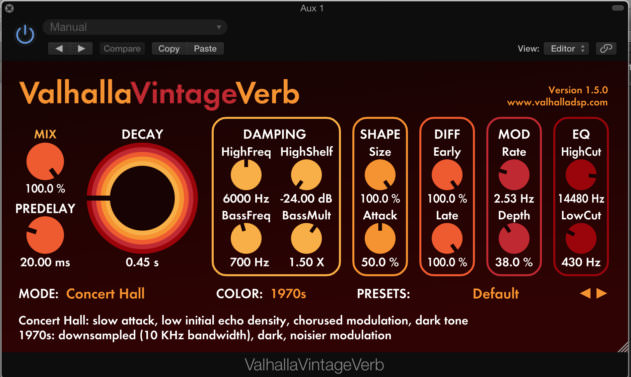
The missing ingredient is the trademark ‘big-room’ reverb.
We’re using a bus send instead of inserting the reverb directly onto the track. Setting up reverb as a send effect gives you more control over the reverb, as well as the ability to process the reverb independently from the synth sound.
For the reverb we’ve chosen Valhalla’s Vintage Verb, with a short decay time that gives an obvious splash of effect without clogging the mix by bleeding between sounds.
Synth Secrets is sponsored by
u-he are makers of award-winning software synthesisers and effects including Diva, Repro-1, Zebra2, Hive, Bazille, Presswerk and Satin.
Download the demos and try them for yourself at www.u-he.com
12.12 PM
Nice, simple and effective. I like it 🙂