u-he are makers of award-winning software synthesisers and effects including Diva, Repro-1, Zebra2, Hive, Bazille, Presswerk and Satin.
Visit U-he
Technique » Synth Secrets »
Modulating Vocal Textures With Wavetable Synthesis
This channel is sponsored by

In this installment of Synth Secrets, we’ll be layering a pad with slow and melodic vocal textures in Ableton’s powerful Wavetable synth. This is a great way to add movement, life and even a new underlying melody to pad or chord parts.
We’ll start by programming a simple sine pad in Wavetable and then layering it with a modulating vocal one shot. The idea is to use slow wave-scanning to turn the fast one shot into an extended pad-like texture.
online pharmacy buy cialis-soft online cheap pharmacy
Here’s our final pad and vocal texture with a beat and bassline:
online pharmacy https://rootsandwingspsychology.ca/wp-content/uploads/2020/03/lexapro.html no prescription pharmacy
STEP 1
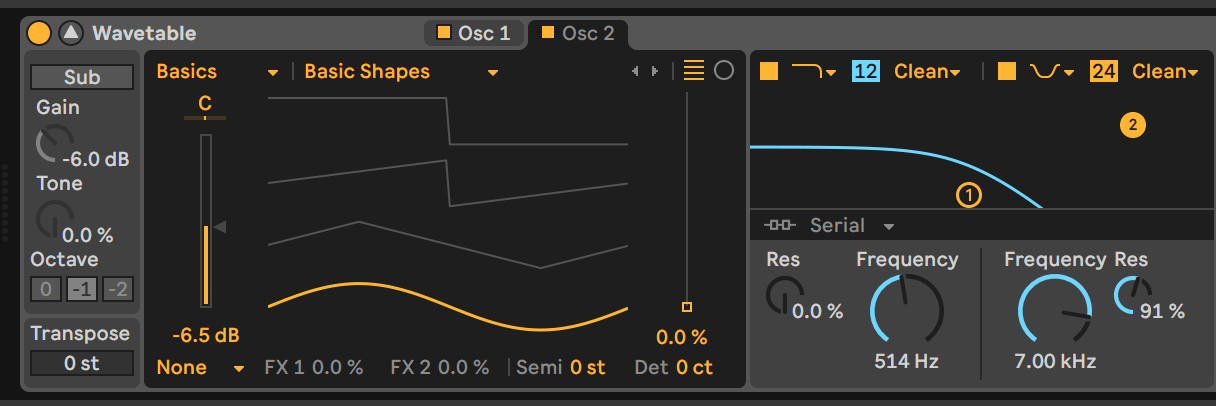
Set your BPM to between 70 and 80 and create a new MIDI channel. Load up an instance of Wavetable, enable Osc 2 and lower its volume to -6.5. We’ll be leaving Oscillator 2’s wavetable at its default setting, Basic Shapes.
Program a basic sustained chord—we used an E minor/D slash chord.
online pharmacy buy kamagra-polo no insurance with best prices today in the USA
In the filter section, set Filter 1, the lowpass filter, to 514Hz. You’d think that this would be enough to cut the harsh high frequencies resulting from wavetable modulation, but things can get very screechy very quickly with this type of synthesis.
To be on the safe side enable Filter 2 and select the “U” shaped bandpass mode.
Bring the cutoff to 7kHZ and the resonance to 91% and set the slope to 24. Because the filter is in a downward “U” shaped direction, a high resonance will cut upper frequencies instead of boosting them.

STEP 2
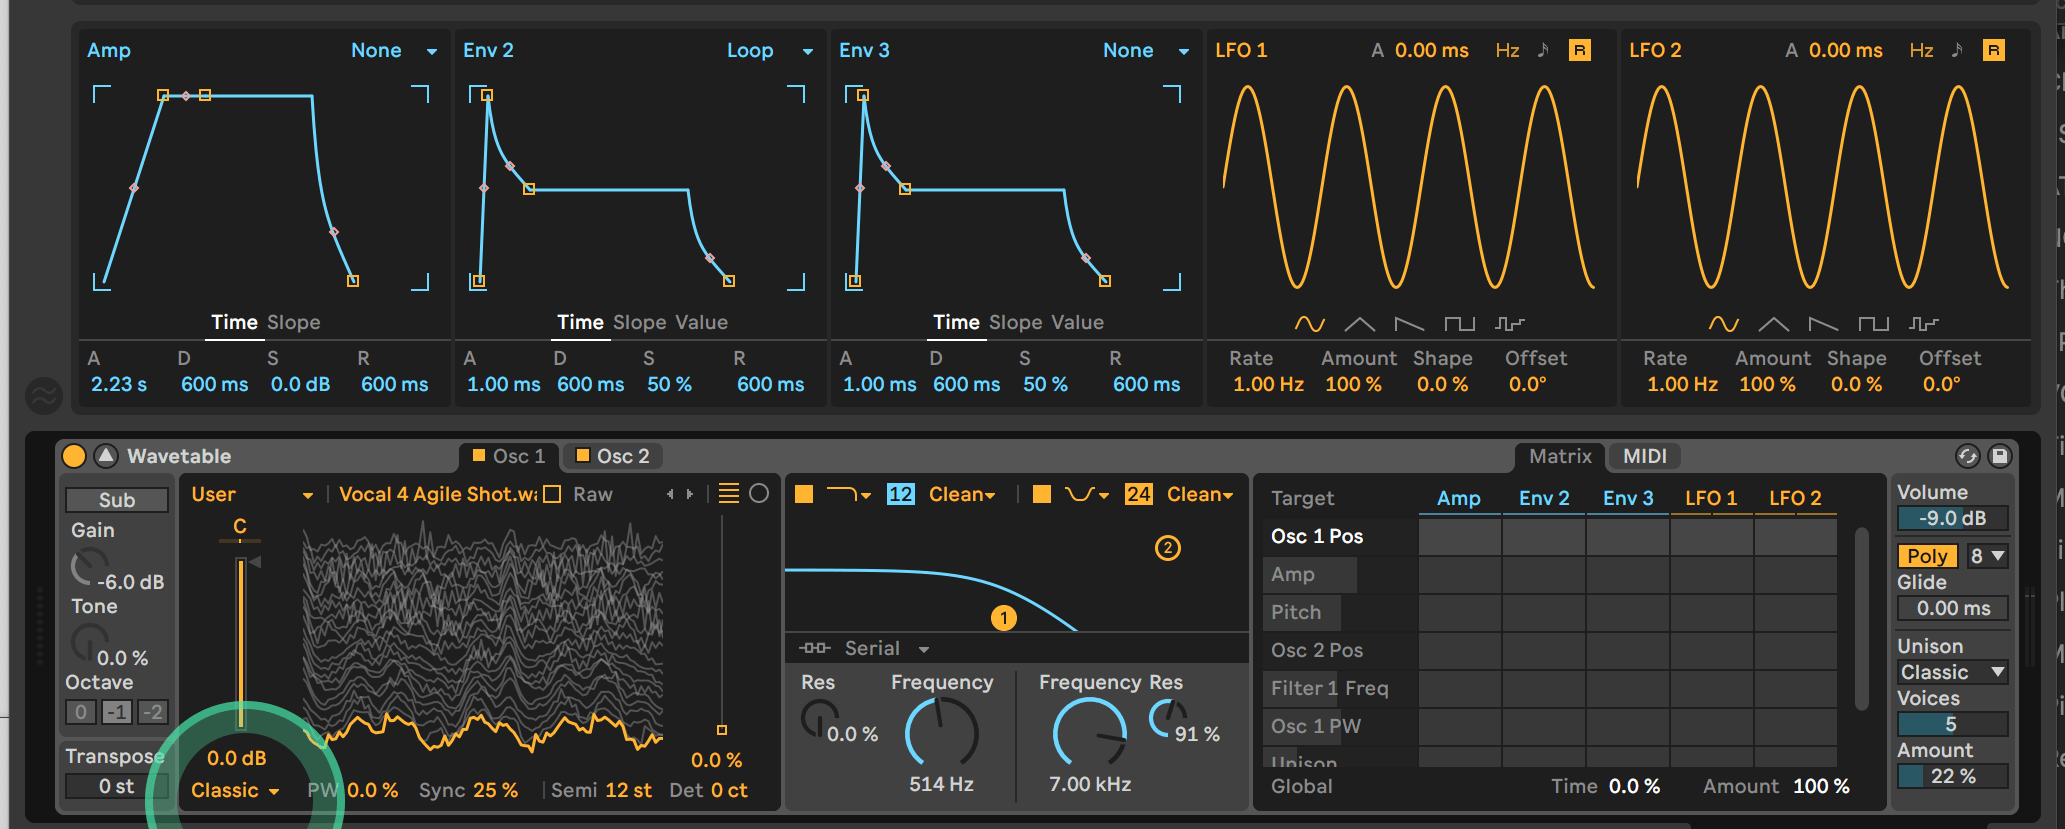
Import Live’s “Vocal 4 Agile Shot” from Live’s Beat Tools Factory Pack to Oscillator 1 by dragging it in. Here’s how it sounds in solo:
You’ll get very different results depending on what kind of sample you use so it’s well worth experimenting with different ones, including non-vocal samples as well. We particularly enjoy turning snares into pads for example!
Select the “Classic” Oscillator Effect and bring the Sync to 25%. The type of oscillator effect you choose can drastically change the timbre and each one has two dedicated parameters used to morph the wavetable. Classic’s Sync parameter essentially bends and speeds up the waves, resulting in more harmonics and distortion.
Raise the Semi tuning knob to 12t to transpose the sample up one octave.
In the Amp envelope tab, set the Attack time to 2.23 seconds and the sustain to 0.0db.
At the very right of Wavetable, select “Classic” mode under Unison. Set the Voices to 5 and the amount to 22%. This will result in a silky chorus that we will modulate in the next step.
STEP 3
So far our sound is pretty dull. Don’t worry, that will all change now with some modulation in Wavetable’s Matrix.
To get a parameter to appear in the matrix all you have to do is click on the parameter or tweak it.
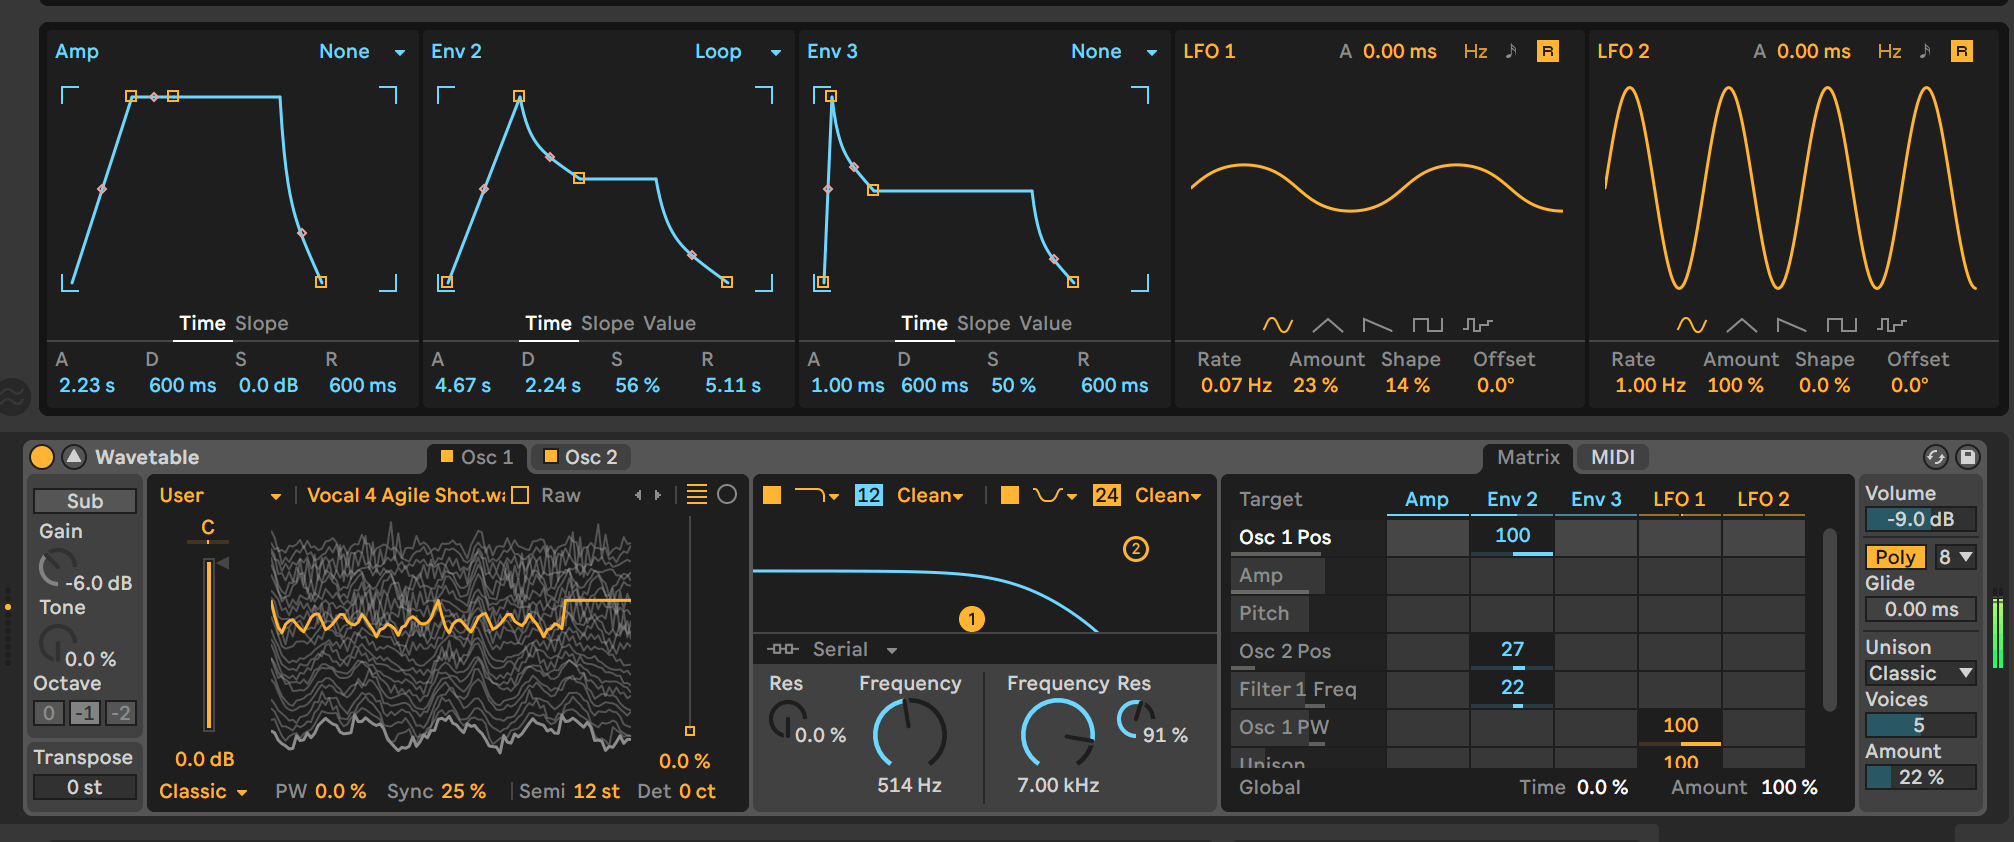
Map Envelope 2 to the Osc 1 Position (by 100), Osc 2 Position (by 27) and the Filter 1 Frequency (by 22).
Next, map LFO 1 to Osc 1’s PW effect (by 100) and the general Unison Amount (by 100).
Set Envelope 2 to “Loop” mode (in the top-right corner of its box) so that the envelope keeps repeating while the notes are pressed.
In Envelope 2 set the attack to 4.67s, the decay to 2.24s, the sustain to 56% and the release to 5.11s.
With the attack and release times set so high, the synth will scan through the wavetables in oscillator one and two very slowly, bringing out all of their textures in slow motion—similar to warping!
Next, map LFO 1 to Oscillator 1’s PW (Pulse-Width) effect by 100 and the general Unison Amount by 100.
The LFO will use slow modulation to add even more movement to the vocal sample’s wavetable, while also giving the unison chorus effect more character.
In LFO 1, set the rate to 0.07Hz, the amount to 23% and the shape to 14%.
STEP 4
The final step involves adding some simple effects processing.
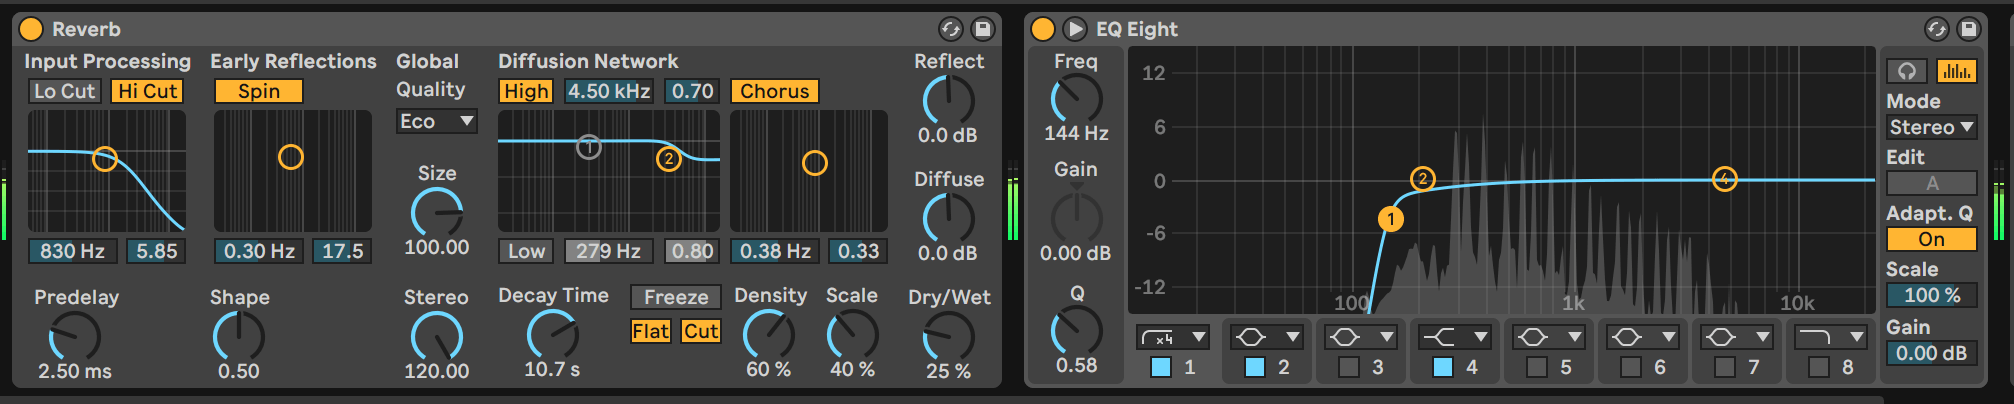
Insert Live’s Reverb effect, increase the decay time to 10s, bring the chorus modulation up and lower the dry/wet amount to 25%. The reverb definitely gives the vocal waves’ movement a choir-type feel.
Finally, add an EQ with a steep low cut at 150Hz to reduce unnecessary rumble.
Here’s the end result in solo:
And here it is again with a beat and bassline:
Synth Secrets is sponsored by
u-he are makers of award-winning software synthesisers and effects including Diva, Repro-1, Zebra2, Hive, Bazille, Presswerk and Satin.
Download the demos and try them for yourself at www.u-he.com