In this quick tutorial, we use Waves’ new slap delay and plate reverb hybrid plug-in to give life to a dry acapella sample.
Waves’ newest collaboration with Chris Lord-Alge is the CLA EchoSphere, which aims to emulate the legendary engineer’s favourite vocal reverb and delay hardware. The plug-in introduces a unique means of blending slap delay with plate reverb and Waves are giving it away for Black Friday.
In this tutorial, we’re going to take EchoSphere for a test drive by using it on not one, not two, not three, but four return channels simultaneously! The acapella we will use is one we found on the creative commons website CCMixter.
Here’s the dry acapella that we chopped up:
And here’s how it sounds run through four separate instances of CLA EchoSphere:
This is how it sounds with a beat and bassline:
STEP 1
Create an audio channel and drag in a vocal sample or any other part you want to use.
Now create four return channels in Ableton and load up CLA EchoSphere on each one. One thing that we really enjoyed about this plug-in is that multiple instances can work at the same time without muddying the mix.
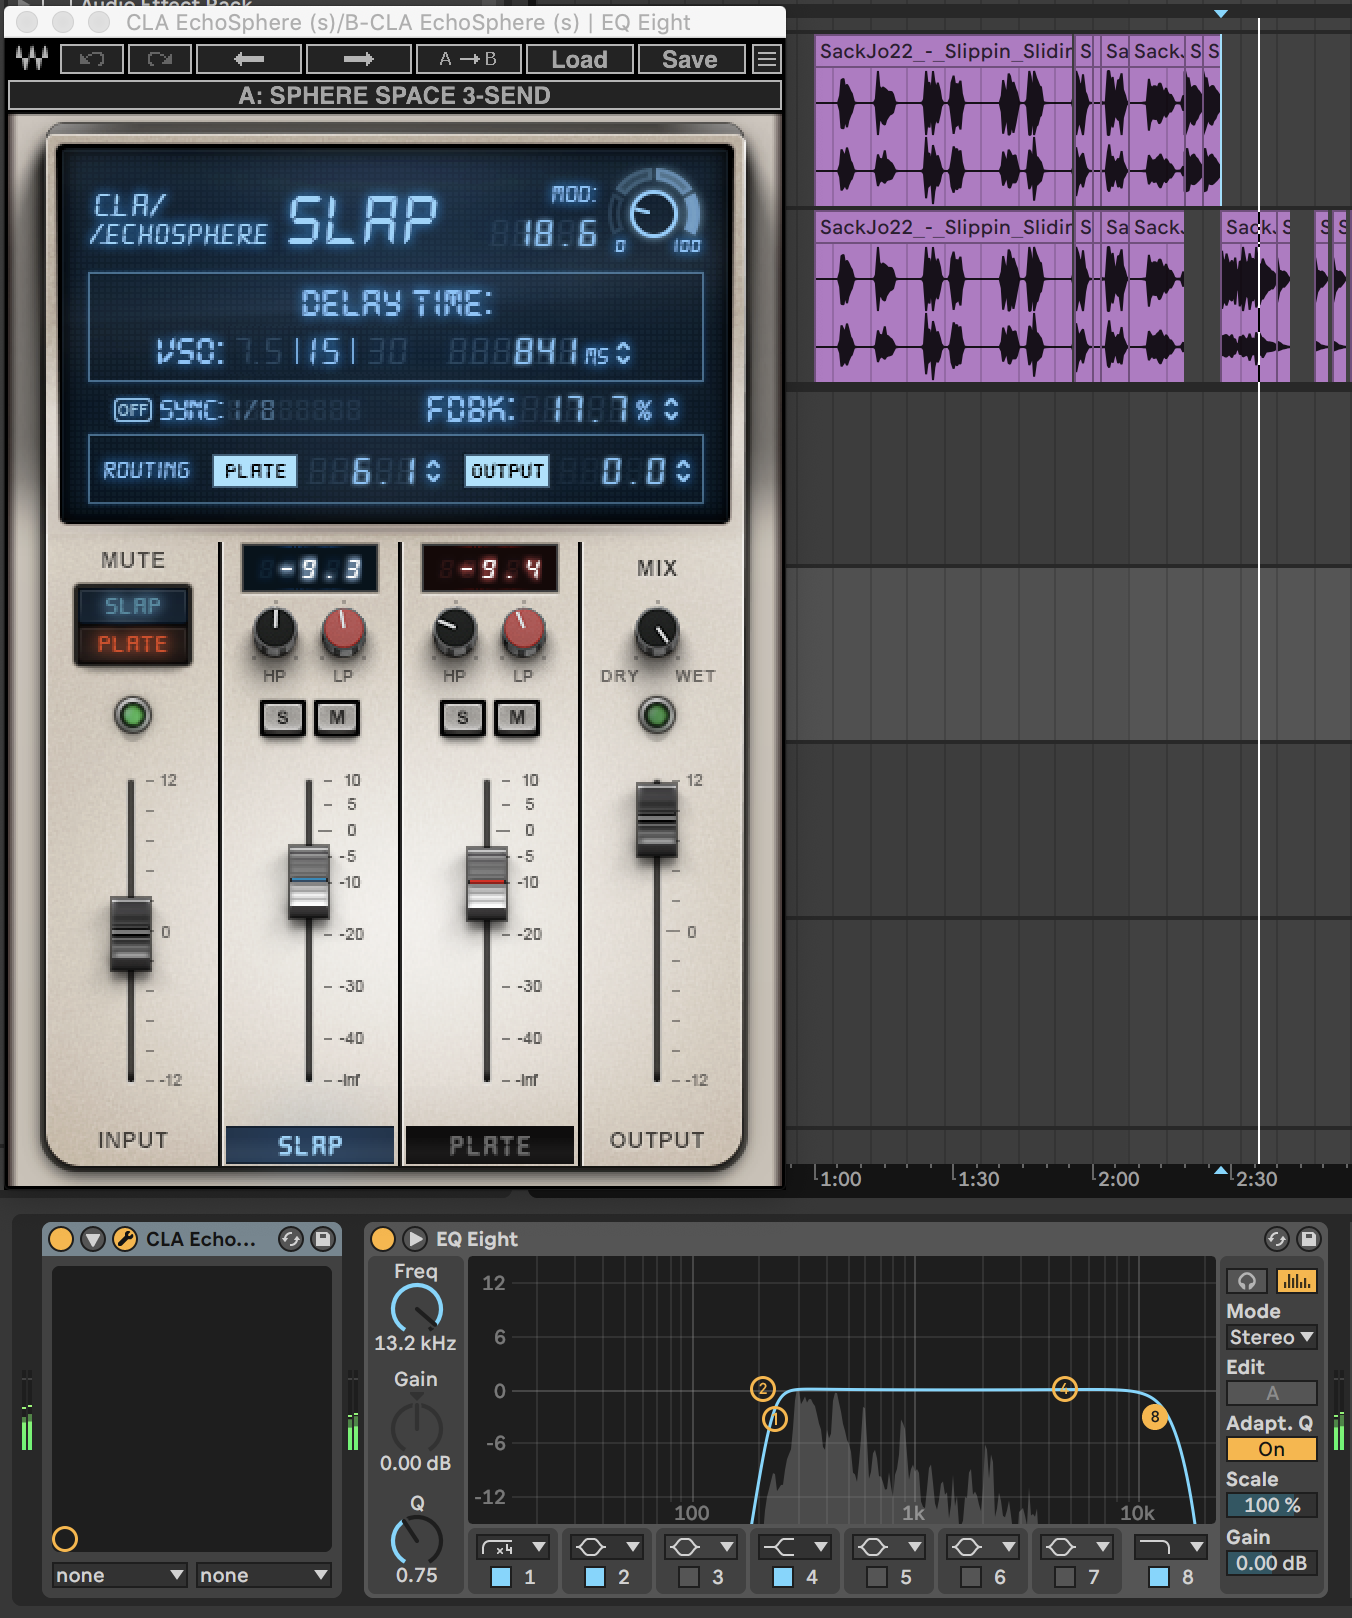
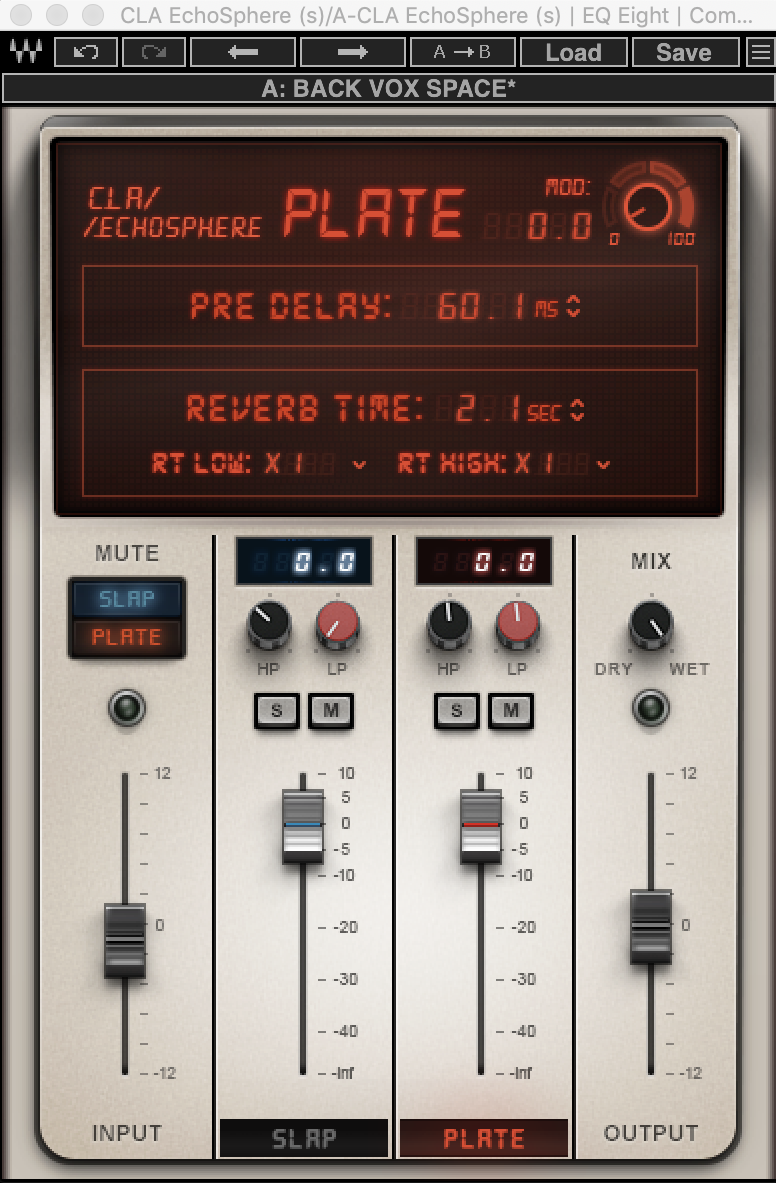
We’re going to be using presets but let’s first take a quick look at how the plug-in works. The GUI is pretty straightforward. It has two channels, one each for slap delay and plate reverb. The controls at the top change depending on whichever channel is selected, with the slap delay also offering a button to route its signal through the plate channel.
Another highlight is the modulation knob at the top right that introduces different textures as well as some stereo width.
The presets all sound great, especially on return channels, which they are intended for as most of them have a default Dry/Wet value of 100%.
Load up the presets Back Vox Space, Sphere Space 3-Send, Slap and Plate Series Parallel and V Sync 8 Lans in your four return channels and make sure they are set to 100% wet.
Here is a quick example of how the four effects sound one after the other, with the same short vocal sample.
STEP 2
Add an EQ Eight to each return channel to cut the low rumble and screechy high frequencies—we don’t need these for reverb.
For the channels with the V Sync and Back Vox Space presets, it is a good idea to also add a compressor with sidechaining capabilities so that we can slightly duck the effects when the main vocal is louder. These effects have an echo effect due to a higher feedback setting.
Enable sidechain in the compressor and select your main vocal track in the sidechain dropdown list. Set a low attack and release so that the compression clamps down quickly. Set your threshold to taste. You shouldn’t need more than 4-5dB of gain reduction.
If you want to learn more about using sidechain compression on reverb, we specifically cover this technique in another recent tutorial.
Now that your effects are ready to go, hit play and find a good balance for the send amounts in your main vocal channel. You can also edit the return channels’ volume directly. We set all of them to -1dB except for the one with the Sphere Space 3-Send preset, which we increased to 4dB.
Here’s the final result in solo:
And here it is with a beat and bassline: