We use AI and limiting to help bring a house track up to Spotify’s target loudness level with Sonible smart:limit.
Knowing how loud to master a track for streaming can be tricky business. As of now, there’s no cross-platform standard. Spotify, Apple Music, YouTube—they’re all different. So how do you know how loud to make it? Go over the streaming platform’s threshold and they’ll turn it down to match other tracks. That’s OK. But get it too quiet and your track will be subjected to normalization, which can introduce distortion and other artifacts.
To make this process easier for non-mastering engineers, software engineers have helpfully been introducing AI into the equation. Sonible have been bringing AI to a number of different mixing areas, like EQ and compression, and now they’ve done it with limiting. smart:limit is a mastering-focussed true peak limiter that includes the company’s AI assistant. It also has a number of helpful extras to help get your final master up to commercial streaming standards.
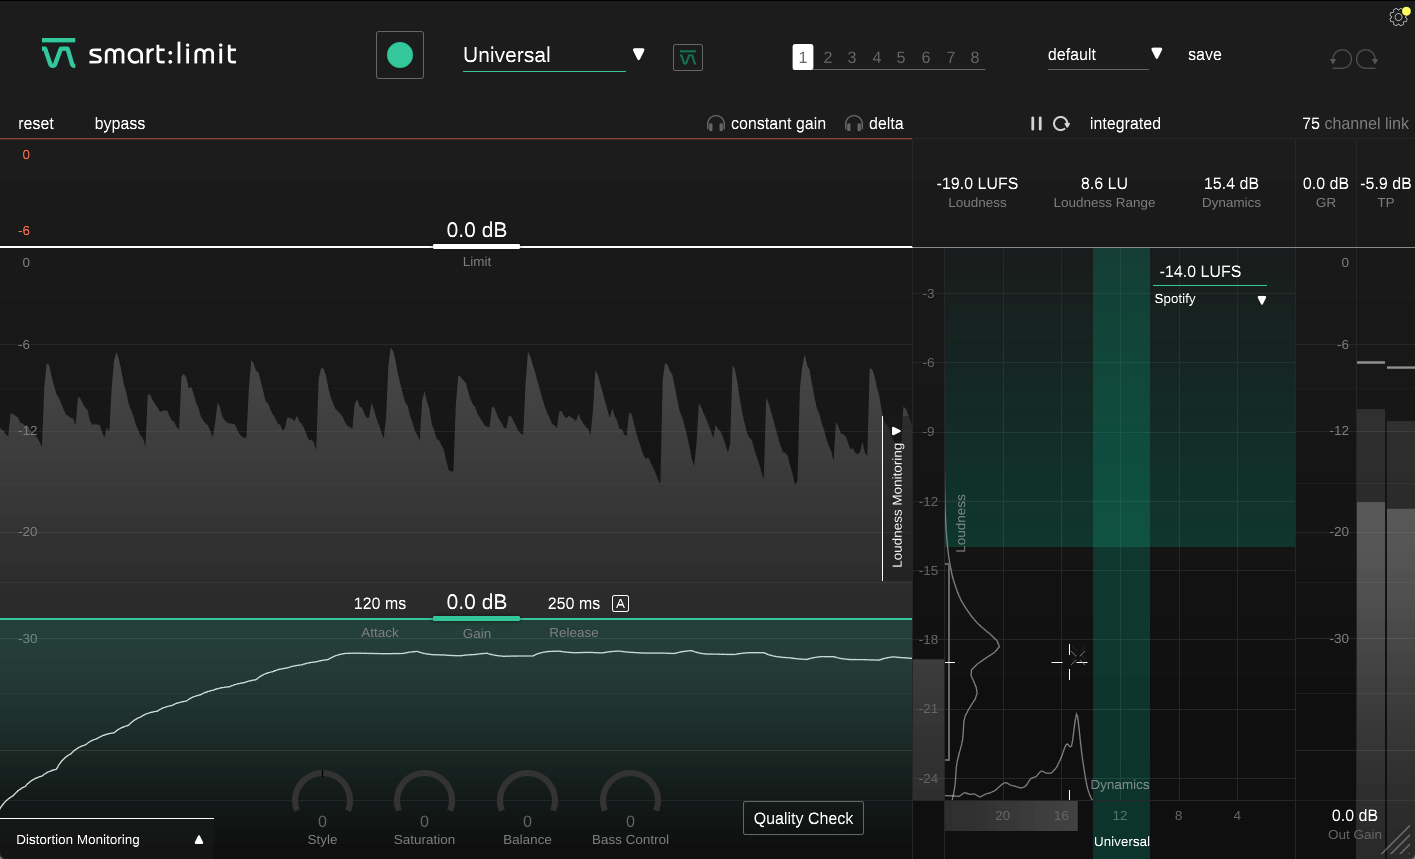
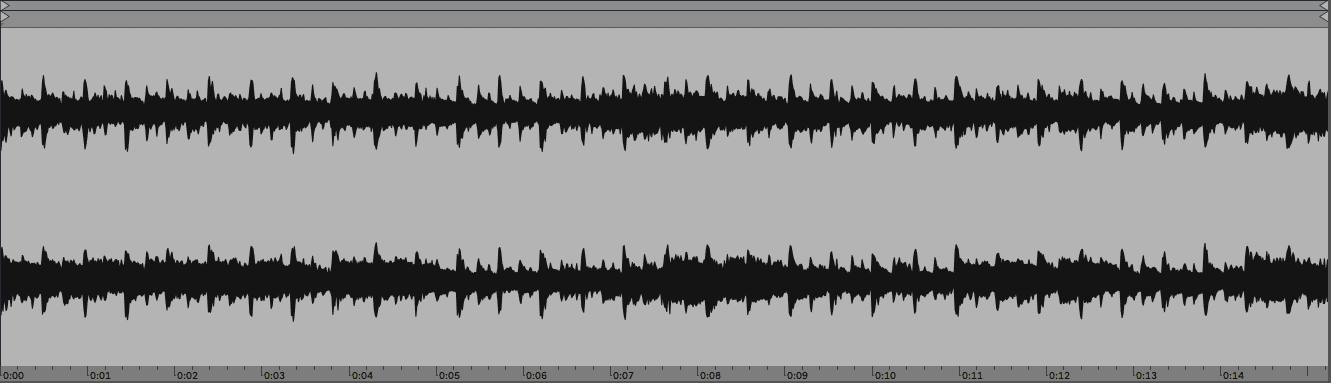
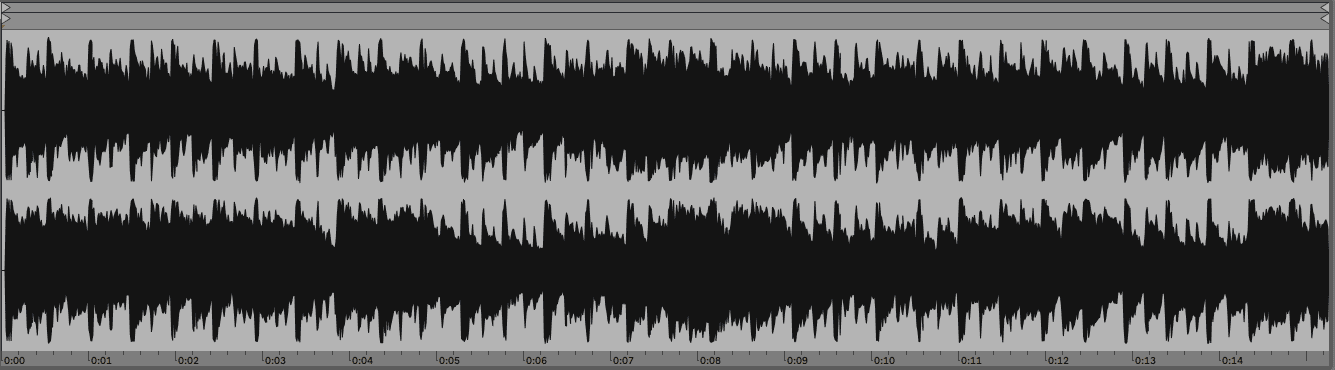
We used smart:limit to take our house track from this unmastered state:
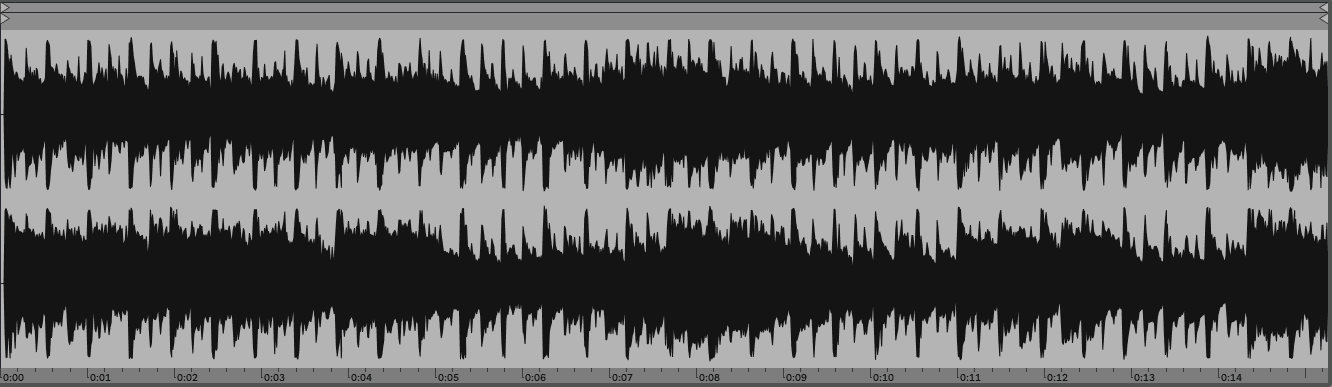
To this Spotify-ready loudness level:
Note that smart:limit is just a limiter and so it doesn’t have everything you need for mastering. A typical mastering chain involves EQ and compression before limiting. In this tutorial, we aren’t looking at how to create a full master, only in how to get streaming-level loudness.
A Quick Overview Of Sonible smart:limit
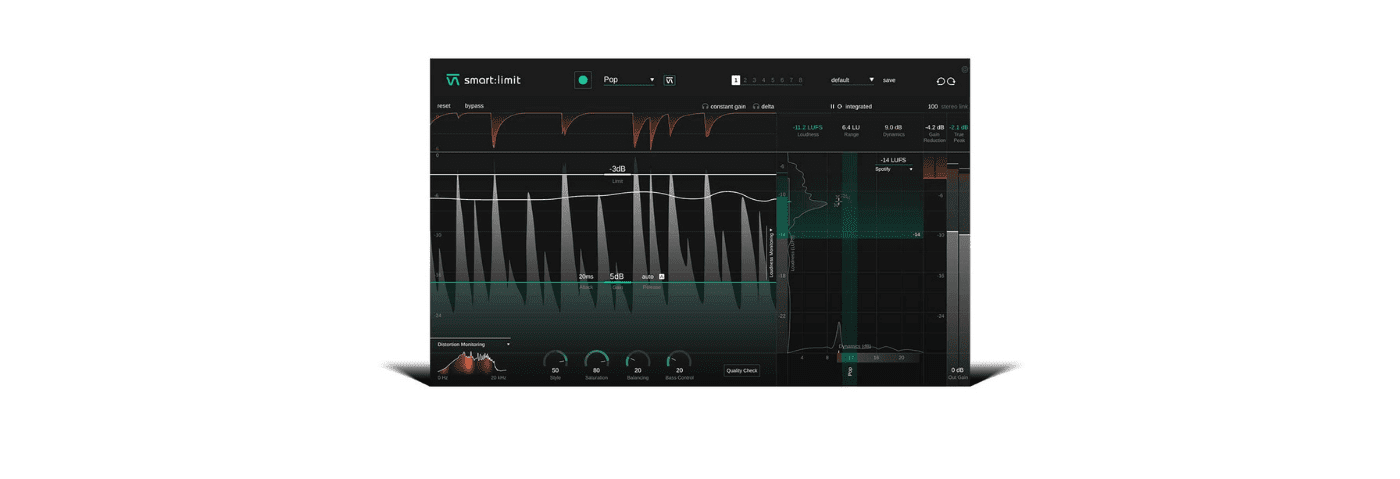
smart:limit follows the same design conventions of Sonible’s other smart series of plugins, so if you know any of them, smart:limit should feel familiar. Being a limiter, there are a number of differences as well.
The main section of the plugin is the limiter itself. Pull down on the Limit line to set the ceiling in decibels. Raise the Gain line to set the input gain. The Gain line also has settings for Attack and Release (in milliseconds). Click the letter A to the right of the Release amount to turn on Auto Release.
Above the limit area are two useful settings, Constant Gain and Delta. Constant Gain level-matches the incoming signal to the outgoing for A/B purposes, while Delta solos the part of the audio signal that’s being limited. Above this is the Learn section where you can choose genre types to get the AI involved. Click the green dot to start the learning process.
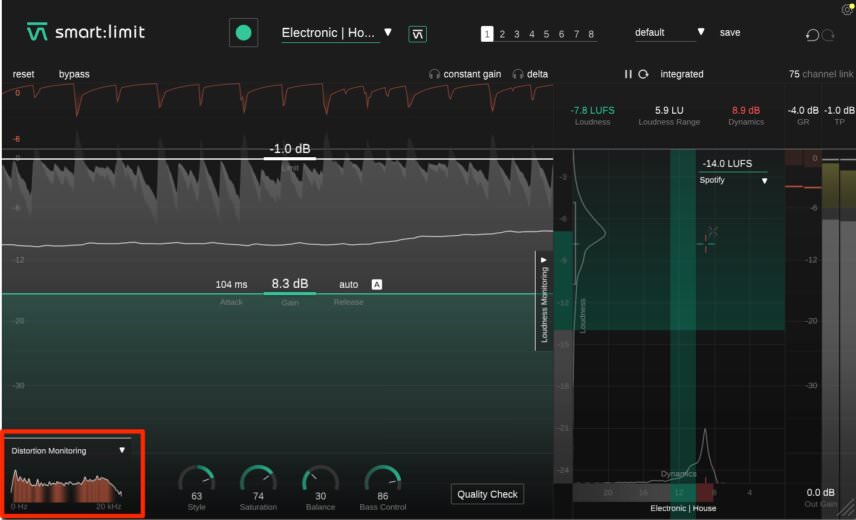
Next, below the limiter section is Distortion Monitoring, Quality Check for helpful tips on how your settings match your streaming Publishing Target, and the Sound-Shaping Panel, with adjustments for Style, Saturation, Balance and Bass Control to fine-tune your limiting characteristics.
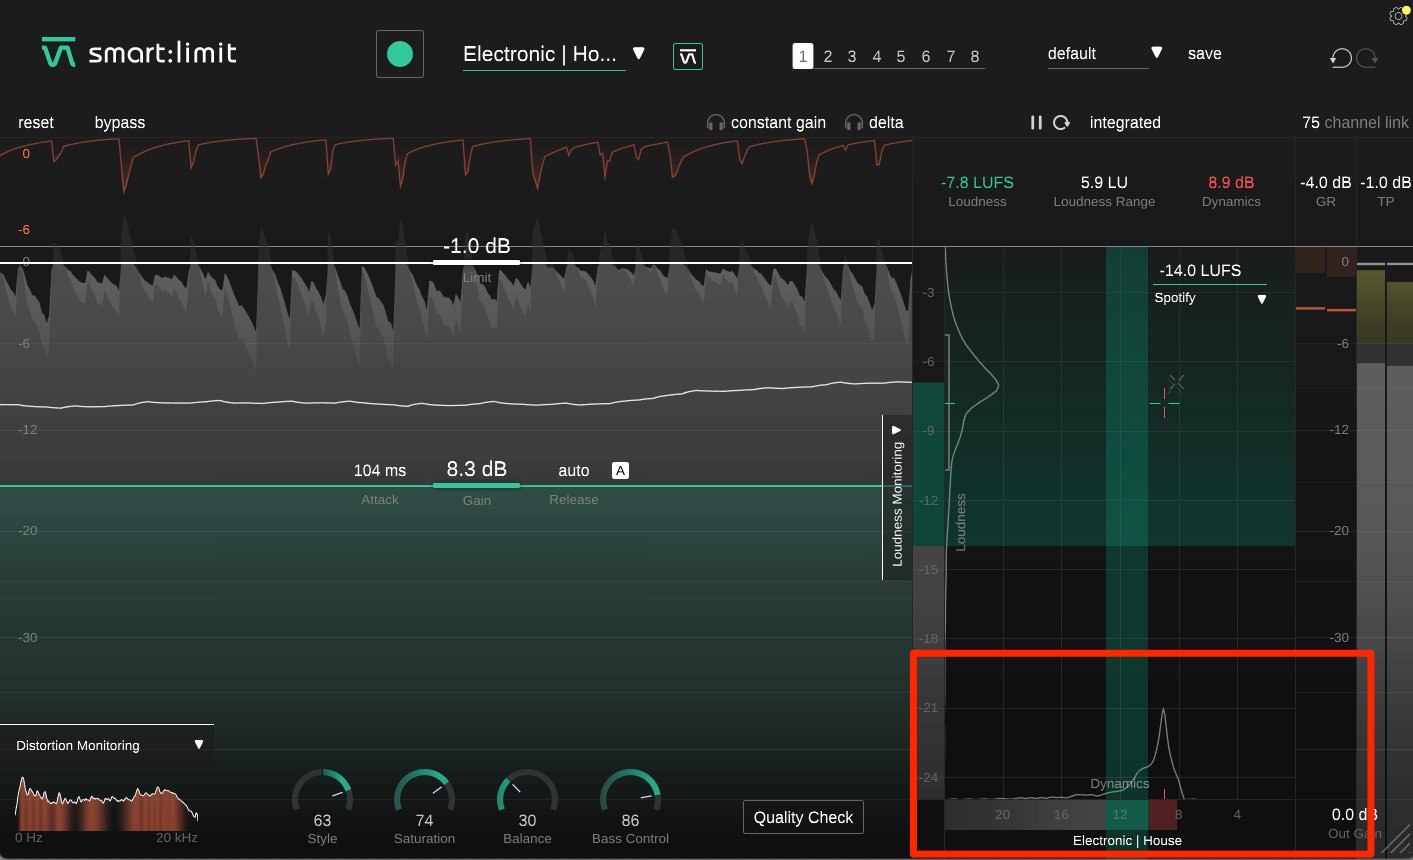
On the right is the monitoring section. Loudness is displayed vertically and dynamics horizontally. Finally, here you can choose your Publishing Target i.e. streaming platform as well as keep an eye on LUFS, the loudness range, dynamics, gain reduction (GR), and the true peak (TP).
Intelligent Limiting
Let’s start with just the AI and see how it does on its own.
Step One: Setting The Publishing Target
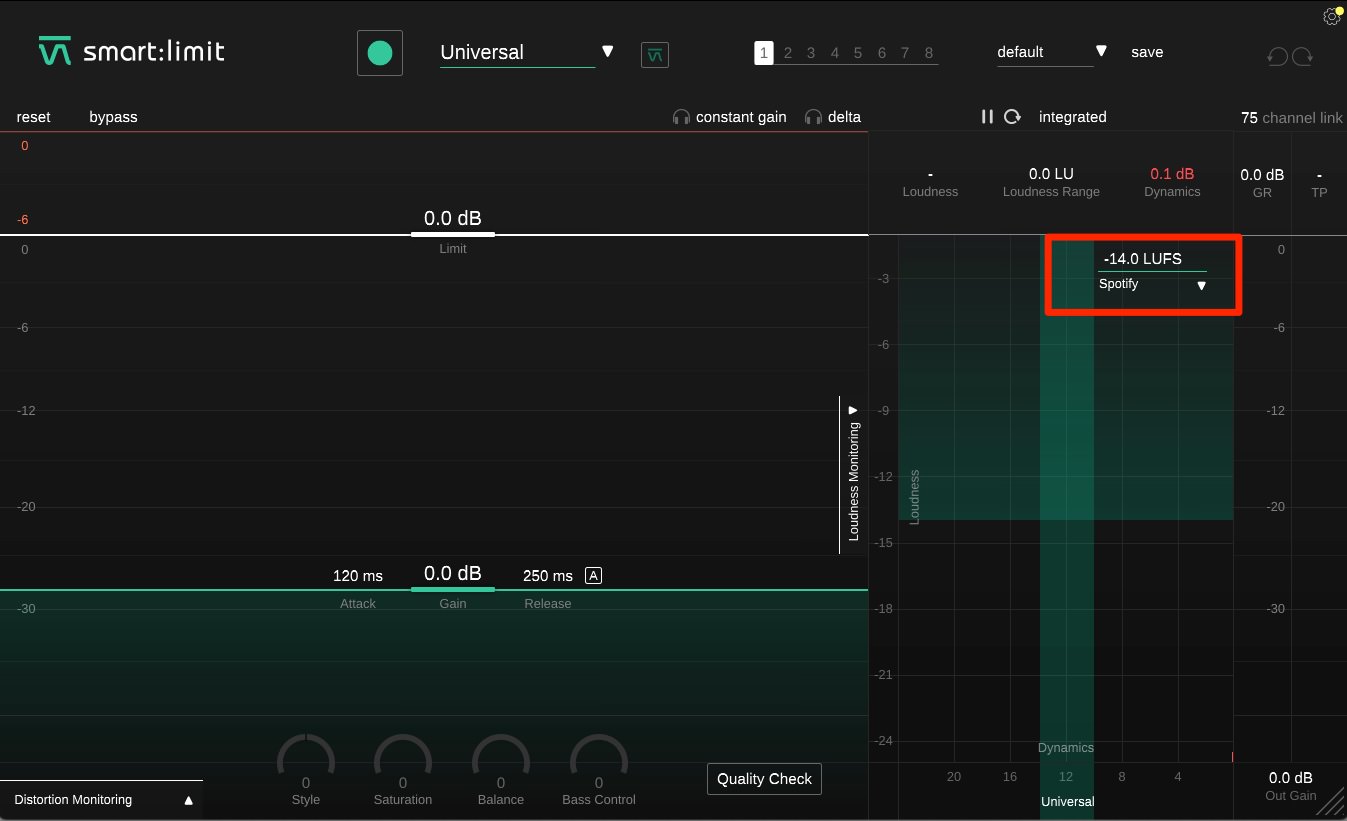
First, we drop a copy of Sonible smart:limit on the audio channel containing the track to be limited. smart:limit has a number of different streaming service targets. We go with Spotify, which has a minimum loudness of -14.0 LUFS (Loudness Unit Full Scale, or the perceived volume of an audio signal). It should be the default setting but if it’s not already there, you can access it from the drop down menu in the monitoring section to the right.
Step Two: Learning
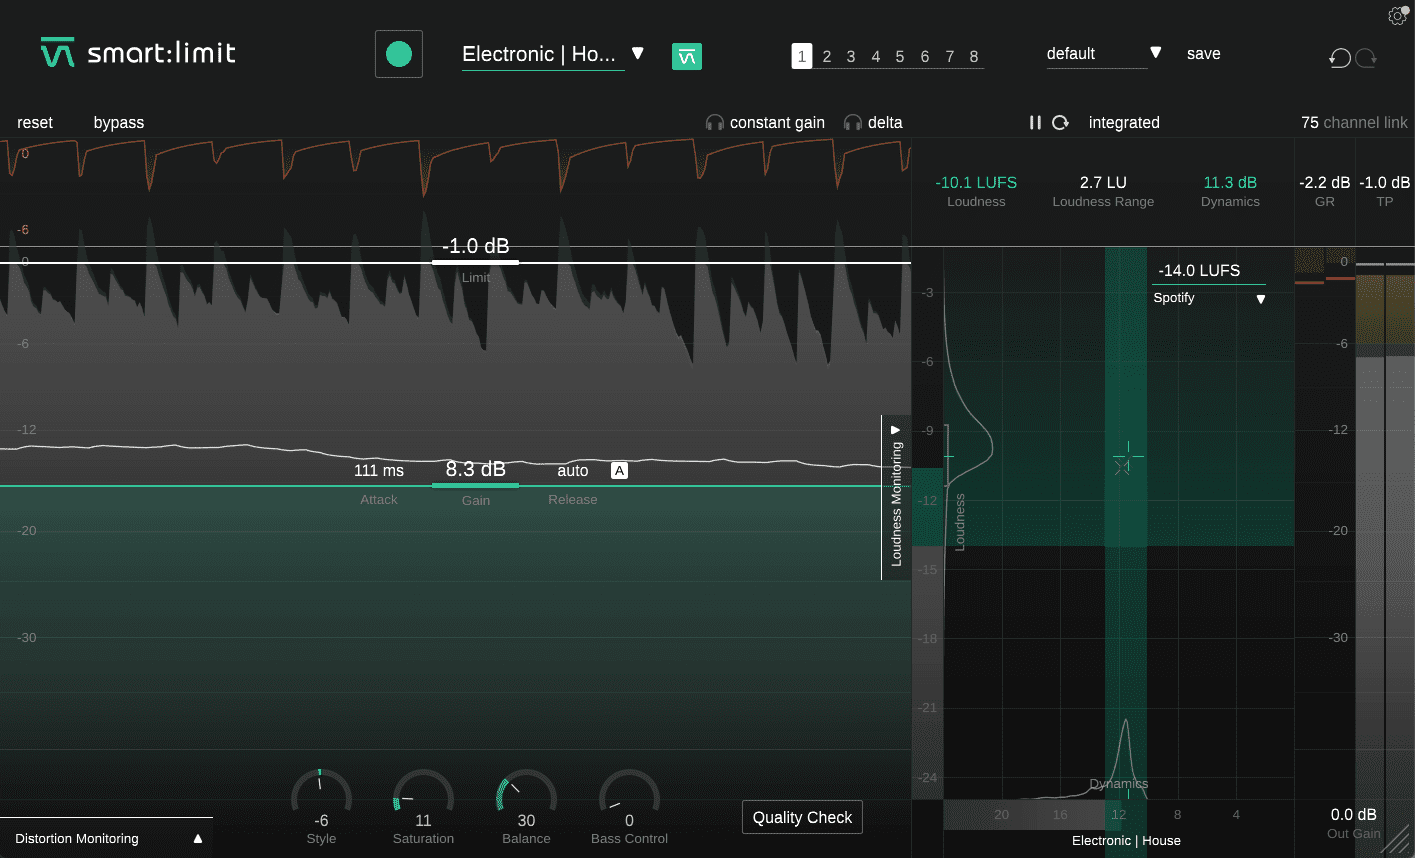
Next, let’s train the AI so it can make appropriate limiting suggestions. Genres have different loudness and dynamics conventions. Heavy metal will obviously be louder and more squashed than classical music. In the Learn section, choose the target genre. We’ve chosen Electronic > House.
We hit the green button, press play on the transport on Ableton Live, and smart:limit analyzes the song. It’s given us a Limit ceiling of -1.0dB, a Gain setting of 8.3dB, an Attack of 111ms and set Release to Auto. Looking at the Sound-Shaping Panel, we can see a Style setting of -6. This puts it on the softer side, which fits the track and genre, although it could maybe be a little tougher sounding. Saturation uses harmonics to add perceived loudness without increasing volume. The Saturation setting of 11 is similarly conservative. Next is Balance, which reduces resonances in the mix. The AI has given us a setting of 30. For Bass Control, which adds punch to the low ends, it’s left it completely off.
The results are pretty good for an uncompressed track.
The track limited by AI:
Intelligent Limiting With Manual Adjustments
For the next part, we’ll start with the AI-assisted genre-based settings and then make our own adjustments to try to improve it.
Step One: Sound-Shaping Adjustments
Our mix is a little anemic. This is likely because we’re limiting without doing any master-level EQing or compression. We can use smart:limit’s Sound-Shaping Panel to address this. We bring up the Style setting to 63 for a harder feel, Saturation to 74 for more harmonics and perceived loudness, and Bass Control to 86. We leave Balance as is, as raising it seemed to thin out the mix too much.
However, we’re pushing the limiter hard now and can hear distortion creeping in. We open the Distortion Monitoring panel and sure enough, there’s a lot of red throughout the frequency spectrum, indicating distortion across the board. Some of this could be from the harmonics we introduced with the Saturation knob but it’s still over the top.
Here’s the audio with audible distortion:
Step Two: Quality Check
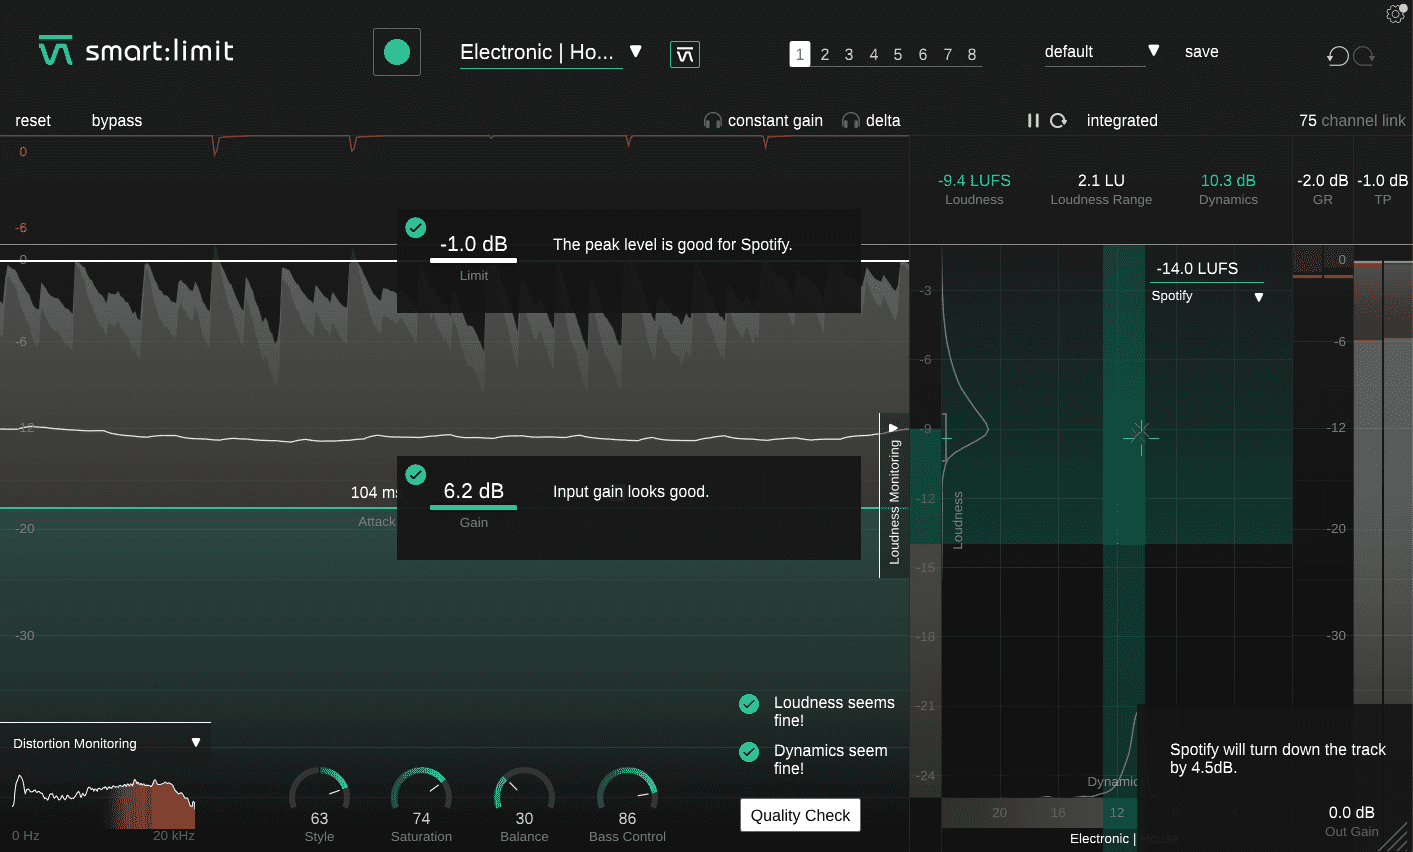
Let’s use the Quality Check function to help us address this issue. We click on the Quality Check button at the bottom. It tells us that loudness levels are OK but the dynamics need to be reigned in. A quick check of the monitor shows that the dynamics level is past the point that’s best for the genre, in this case house. (Note that you need to turn off the Quality Check to properly see the monitor.)
smart:limit’s suggestion is to lower the input gain. We bring it down little by little, keeping an eye on the dynamics part of the monitor. The Quality Check AI confirms that 6.2dB is a suitable amount of dynamics.
The final results are better than machine-only (to our ears) and within tolerances for our chosen streaming platform.
The track with manual adjustments:
Reference Track Limiting
For the last round, let’s get away from the constraints of streaming and use a reference track rather than a genre to guide smart:limit’s AI. Our song is a hardware-heavy house track that was inspired by Todd Terje, so it’s only fitting that we use his fantastic ‘Oh Joy’ as the reference.
Step One: Learning With The Reference Track
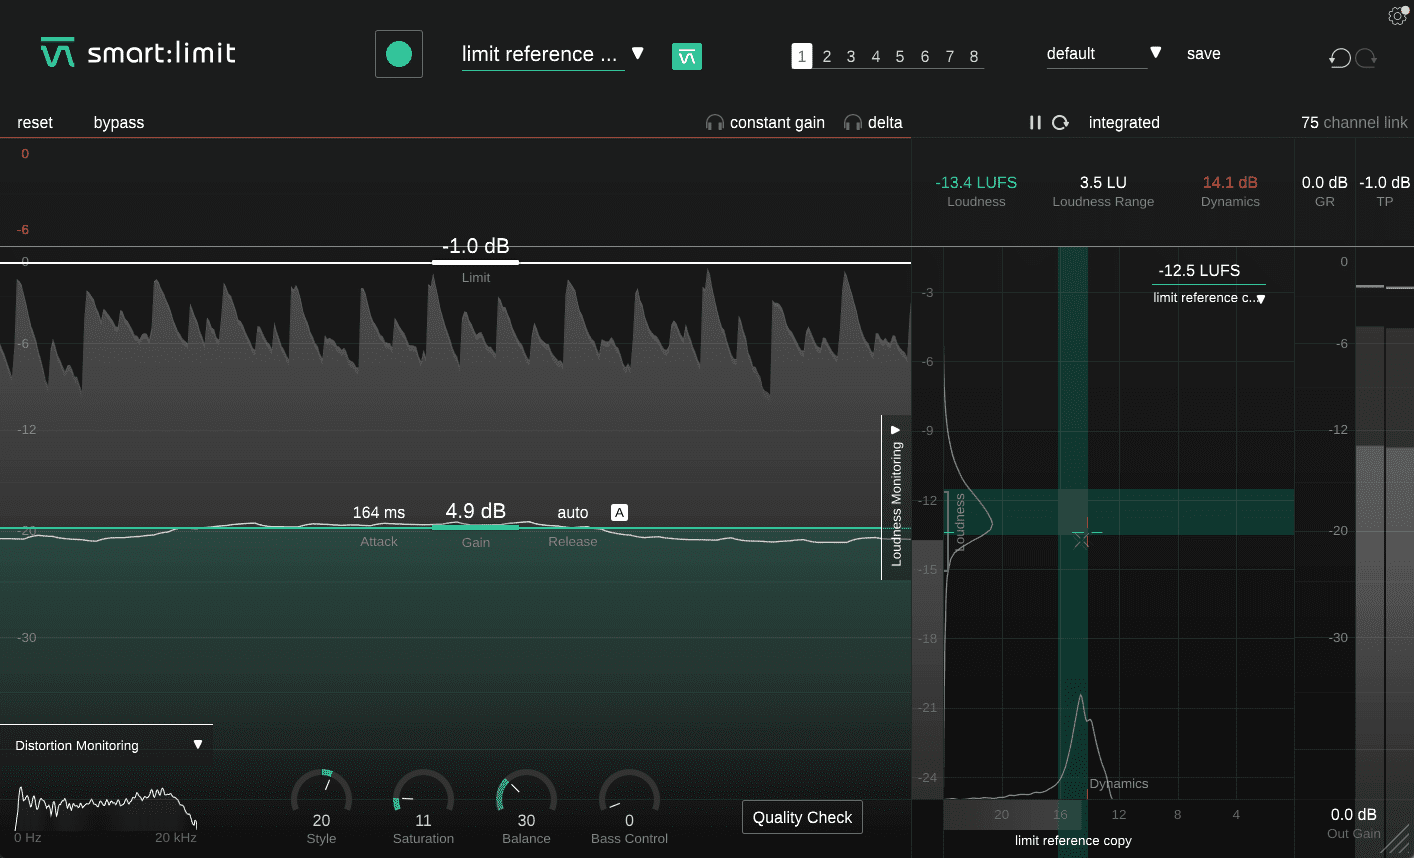
Under the profile section, we choose ‘load reference track’. We select the Todd Terje file, smart:limit’s AI analyzes the track and then creates settings based on that. Next, we click the green button and play our song. The plugin then applies the reference track parameters to it.
Top Tip: Isolate the loudest part of a reference track before uploading or you could get an artificially low LUFS target.
Here is the first result:
Step Two: Manual Adjustments
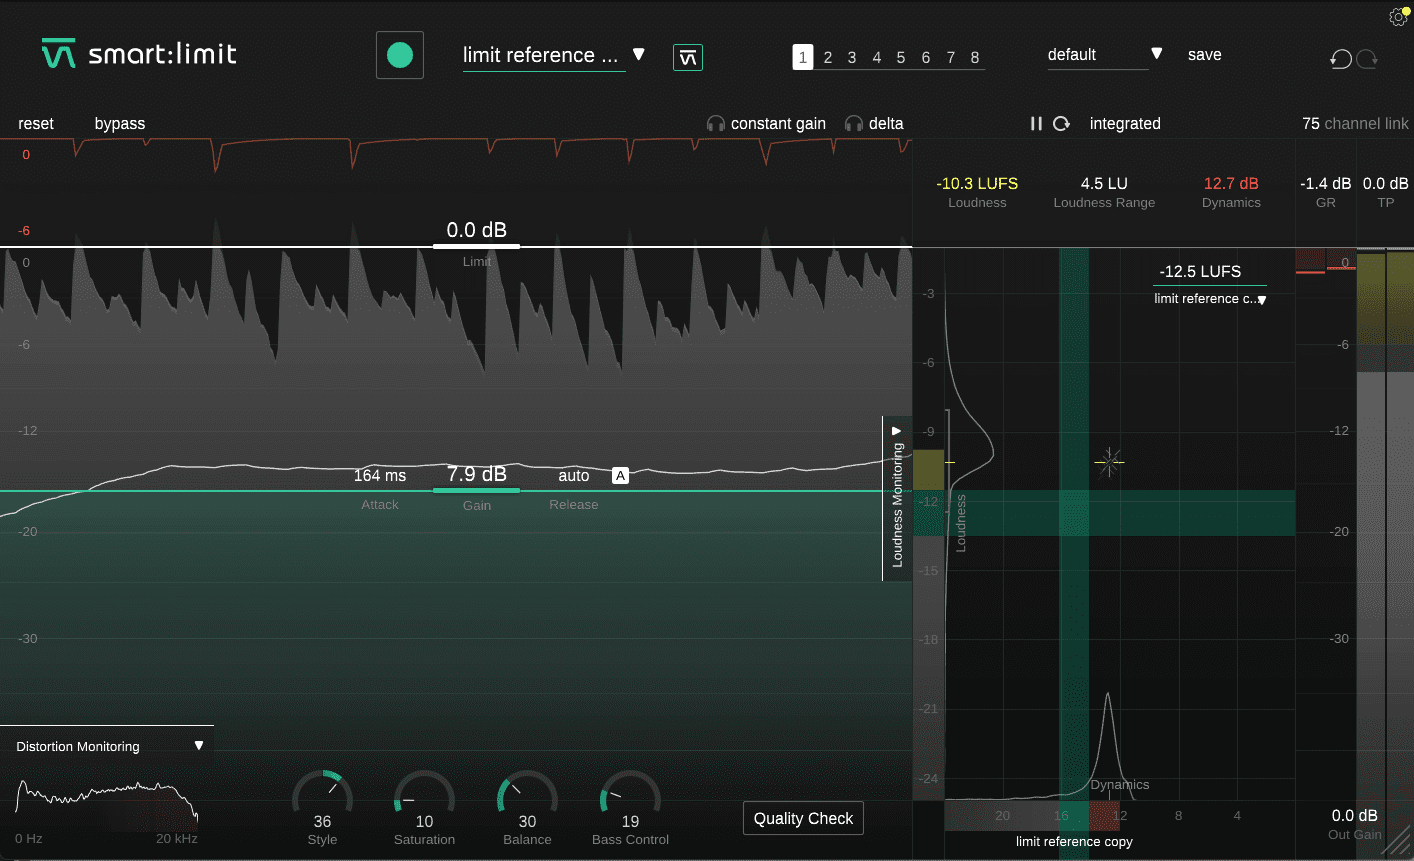
smart:limit automatically sets a Limit of -1.0dB but songs mastered for vinyl and CD are generally louder. Looking at Todd’s track, it has a true peak of 0.00dB. To match this, we bring our Limit up to 0.00dB. Next, we make adjustments to the Input Gain and Sound-Shaping panel, trying to find a balance between volume and dynamics.
Our track is never going to be as well-mastered as Todd Terje’s. His was, after all, done by a top mastering engineer after being professionally mixed, both in pristine and dedicated studio environments. However, ours is a decent compromise. A compressor in the mastering chain would also help to level things out.
Here is the track limited against Todd Terje’s with final adjustments:

*Attack Magazine is supported by its audience. When you purchase through links on our site, we may earn an affiliate commission. Learn more.