
This channel is sponsored by
 Roland Cloud is your creative hub for Roland hardware and software. Access legendary recreations of Roland Classics, find new sounds for your favorite products, and download updates and companion apps to make music fast and easy. Visit Roland Cloud
There’s a difference between raw drum machine samples and production-ready ones. We show you how to get your percussion samples in shape.
The world of music production is awash with drum sample packs. Yet there’s something to be said about making your own samples. Maybe you’ve sold an internal organ and bought an original Roland TR-909. Maybe you’ve picked up a cheap Yamaha RX unit for making synthwave. Or you could even be synthesizing your own percussion sounds with analogue or modular gear. Taking these original sounds and importing them into your DAW, MPC or Maschine can give your productions a boost of originality.
However, there’s a difference between raw and production-ready samples. If you’re after an old-school Chicago sound, you could just throw those Behringer RD-9 samples into an audio track, although we’re guessing you’re going to want to get them up to snuff first.
In this tutorial, we’ll look at how to record, prepare, and process your samples so they’re ready for production. The idea is not to go crazy with distortion and effects – you can do that when you’re working on individual tracks – but to get them uniformly punchy and powerful. We’ll be tackling an 808 boom, 909 kick and snare, and 606 closed hi-hat. These tips will work equally as well on analogue or digital drum sounds. Brandon Rogers kindly supplied the raw TR-808 and TR-909 sounds and the TR-606 ones came courtesy of Starsky Carr. We’re working in Ableton Live today but any DAW will get the job done. As usual, click on the image to see a larger version.
We’ll go from these raw drum sounds:
To these production-ready ones:
Here is how the processed samples sound in the context of a track:
Step 1: Normalizing
We’re assuming that you’ve already recorded your sounds. When recording, make sure that the signal is plenty loud but not clipping. If it’s too quiet, later processing will really bring up the noise floor. (This could be OK if you’re going for a lo-fi vibe but for the purposes of this article we’re assuming that we want clean recordings.) Of course, if it clips, you’ll get nasty pops in the samples. You’ll also want to trim out any silence at the beginning and end of your samples.
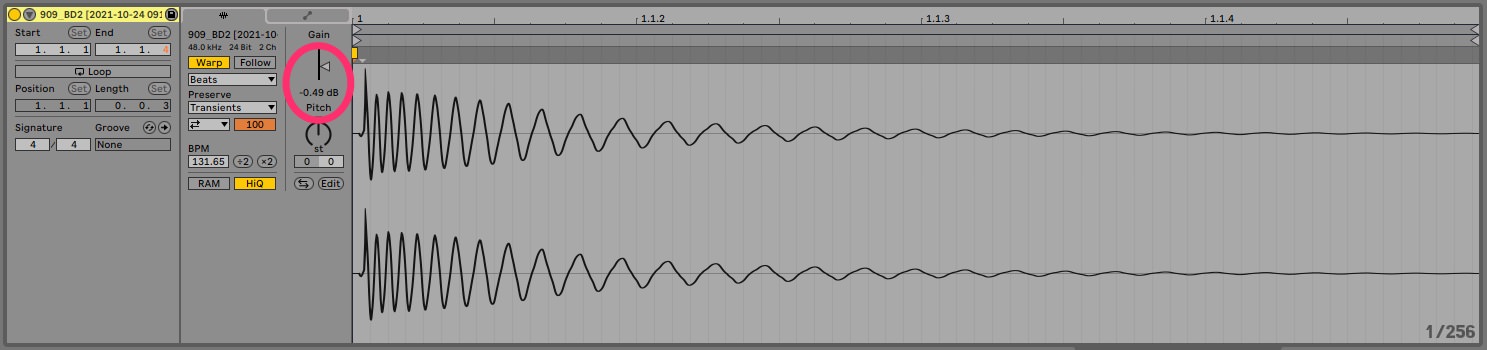
After recording, it’s a good idea to normalize the audio files to get them all to a baseline level of loudness, in this case, 0dB. Most DAWs have a normalize function but unfortunately Ableton Live doesn’t. You can either normalize them in a separate wave editor like Audacity or use the following workaround. Load the sample to be processed into your DAW and click on it. Turn off Warp. Right-click on the file in the main screen and select Consolidate. Back in the Clip View, turn off Warp again. You’ll see that it has lowered the Gain some amount. Double click on the Gain slider to bring it up to 0dB. Now it’s normalized.
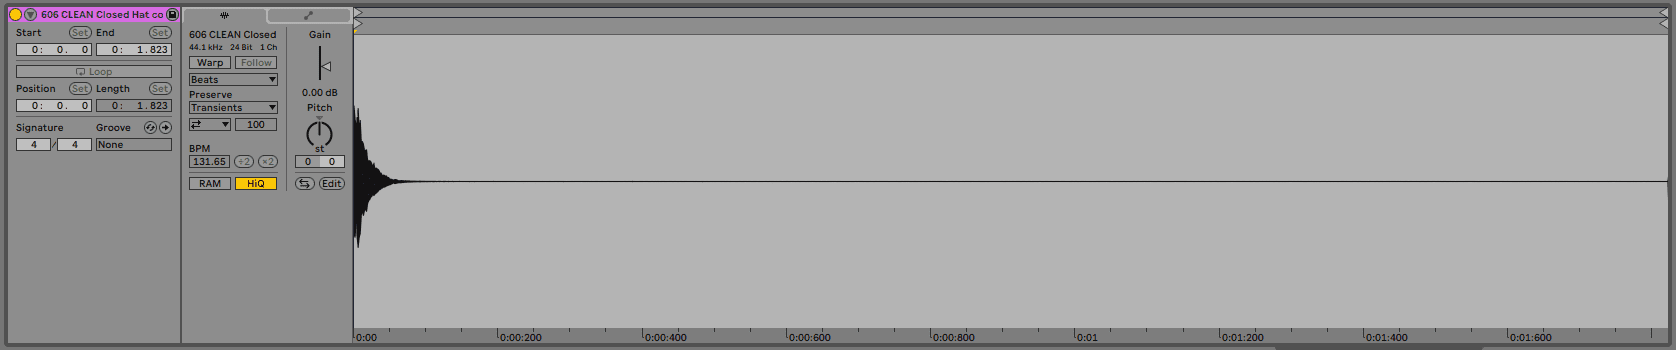
Here is the original 606 hat sample once again:
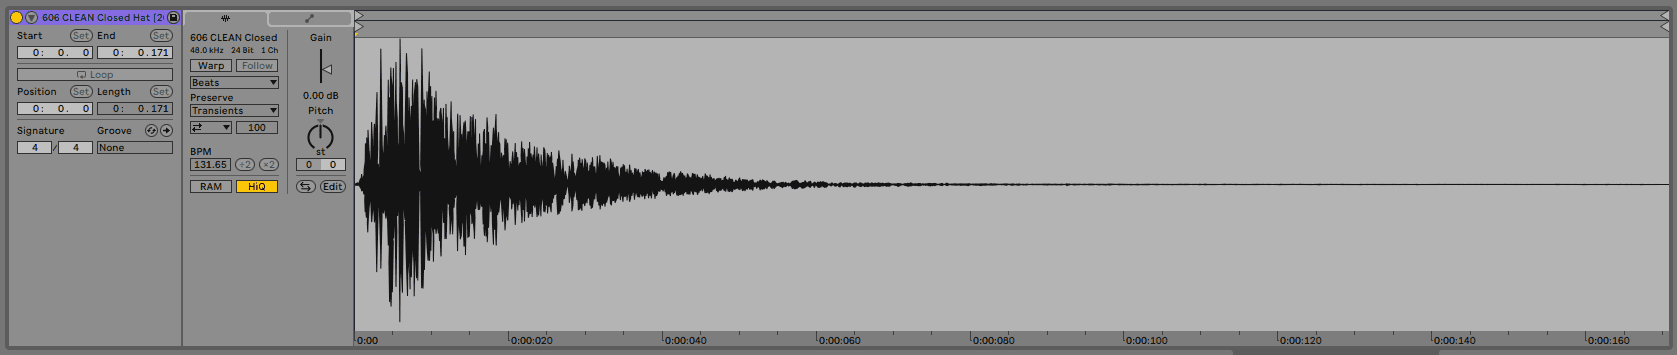
And now normalized:

Step 2: EQ Clean Up
Next, it’s a good idea to remove any unnecessary frequencies from your audio file. We don’t want to affect the overall sound (yet) but we do want to remove anything outside the context of the recorded sound: low rumble, white noise, etc. Normalizing may also have pulled up frequencies that you didn’t notice before.
Drop the stock EQ on the audio channel and play the sample. Pay attention to any frequencies below or above the core sound itself. Use the high and low shelving curves to take these out. Hopefully, you’ve recorded everything cleanly and won’t need to do much work at this stage.
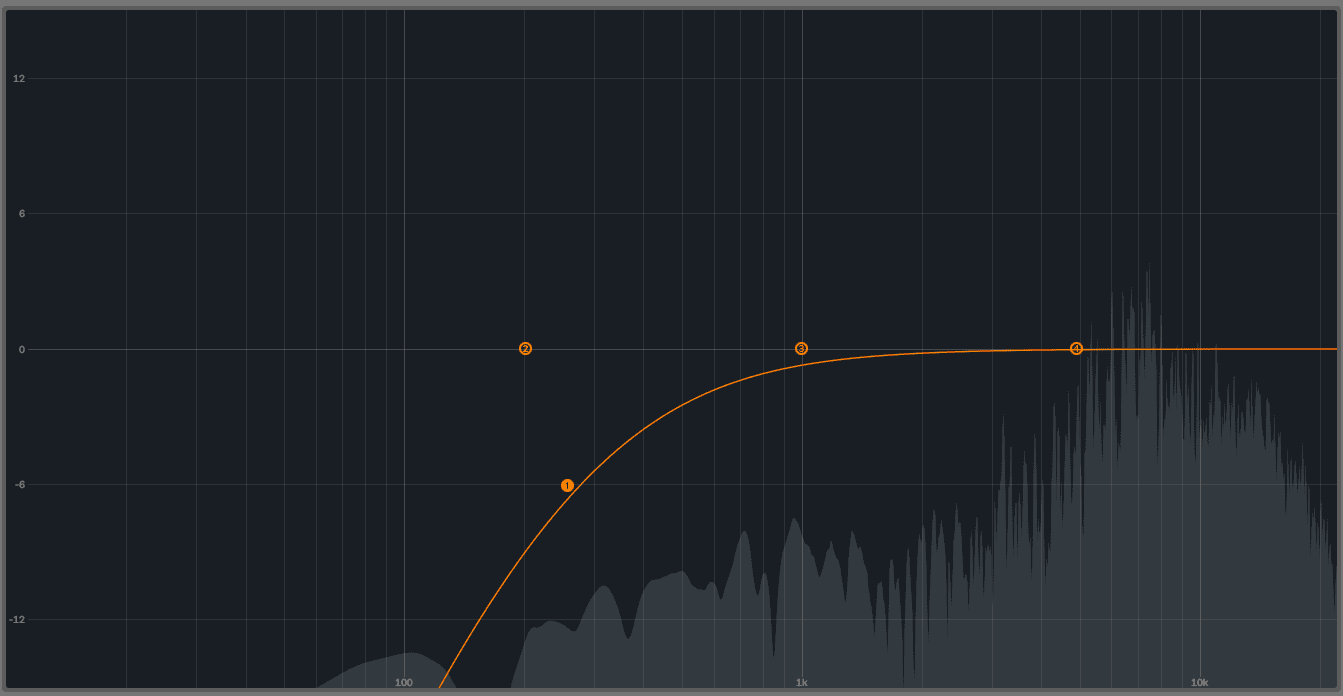
There’s quite a bit of low-frequency energy below 100Hz in the 606 closed hat sample. Even though we can’t clearly hear it we cut it out just to be on the safe side. We don’t need any low build-up making our lives difficult later on down the road. The other samples check out OK.
The 606 hat with low rumble shelved out:
Step 3: EQ Enhancement
Professional sample packs are usually made with high-end recording equipment like mic pres, hardware EQs and mixers that add additional harmonics to the highs and lows. If you’re like us, however, you’re working with a consumer-grade audio interface. We can use EQ plugins to add a little sparkle and bass boost to our samples. But just a touch though. Remember, we’re getting them ready for production but not mixing them yet.
To make things easier, we group all our drum samples onto one bus for processing. We then add Waves Puigtec EQP1A equalizer plugin to the drum bus. This is perfect for baking in some delicious lows and highs. We’ve made a small boost to the lows at 100Hz and a fairly generous boost of 6 to the highs at 10kHz. Make sure to manage your gain staging on the plugin to keep things from clipping.
Here is the original 808 boom:
And now with subtle EQ enhancement in the highs and lows:

Step 4: Light Compression
Our percussion samples are sounding better but there’s more that we can do. Let’s add some very light compression next to help bring out the power and punch of the samples and make them sound bigger.
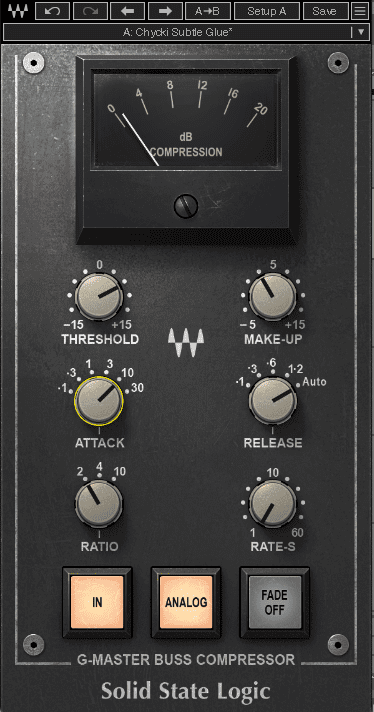
We add Waves SSL G-Master Buss Compressor to the drum group next. We don’t need to slam the drums, just give them a little nudge in the right direction, so we restrain ourselves with the settings. The Chycki Subtle Glue preset works perfectly in this capacity. It’s got a threshold of around +6, a relatively slow Attack of 10 to let the transients through, Release on Auto and a Ratio of 2. We’ve also engaged the Analog button for a little colour.
Top Tip: Try different compression settings for different samples if you’re not getting the results you want.
Here is the TR-909 snare before compression:
And after:
Step 5: Saturation
Saturation can add colour and presence to your sounds. Let’s use it to beef up our drum samples.
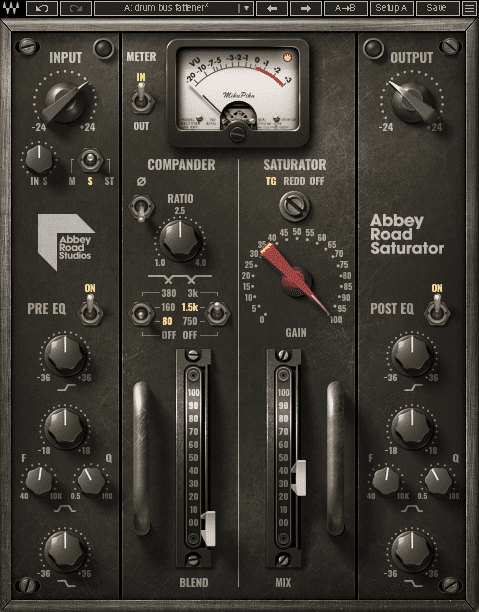
First, place Waves Abbey Road Saturator on the drum group. By cranking the Gain knob and then easing off on the Output, we can drive the saturation to add some warmth and mild compression without going into distortion. Pull down on the Blend to reduce fizz in the highs. the Ease off on the Mix amount for a less pronounced effect.
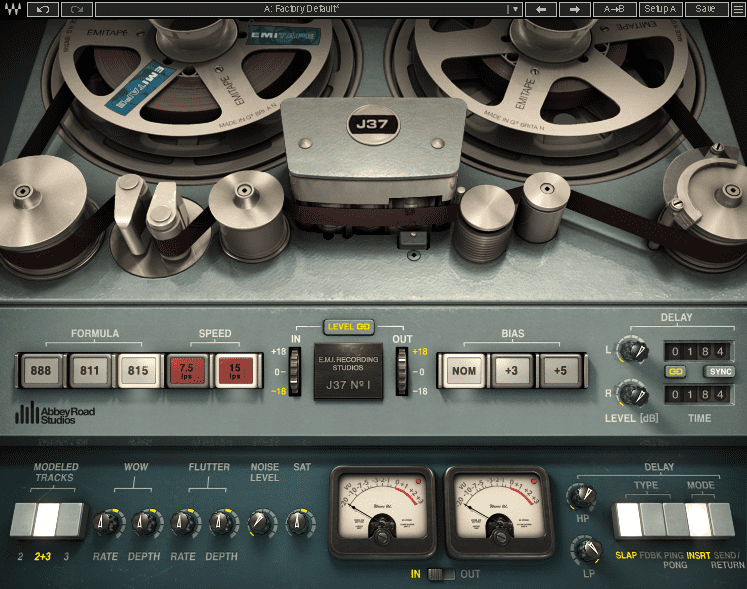
Many modern drum sample packs are recorded to reel-to-reel tape before being bounced down. This adds smooth character as well as a subtle bump in the lows. We can replicate this effect with Waves J37 Tape Saturation plugin. Place this after Abbey Road Saturator. The default setting sounds good but we can crank up the saturation for more presence.
Here is the 808 boom before saturation:
And after:
Step 6: Mastering
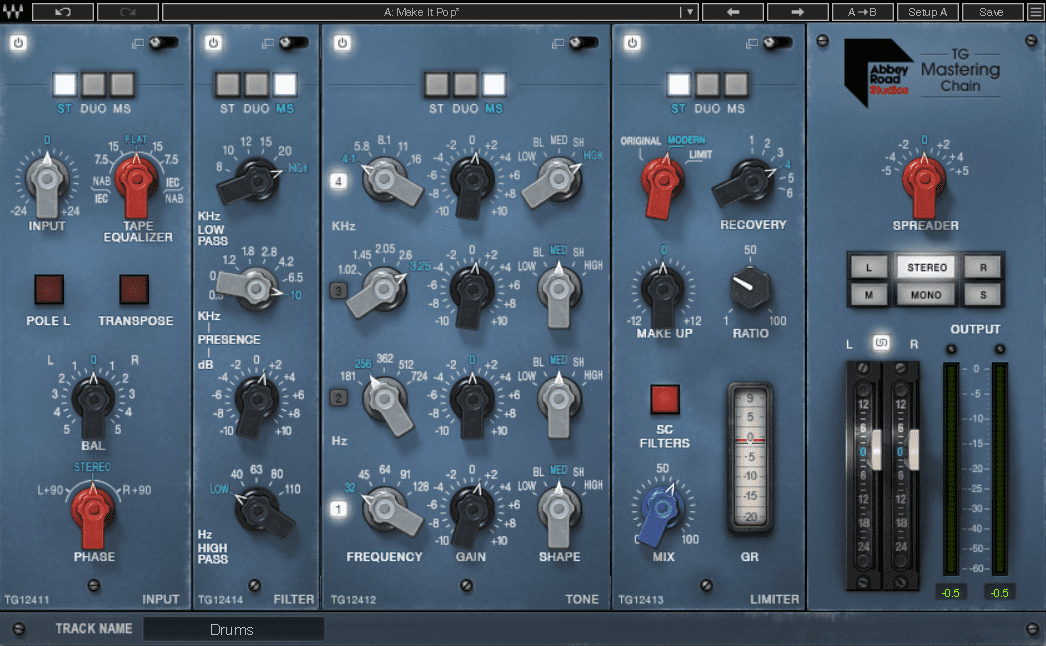
For the last stage, let’s use Waves Abbey Road TG Mastering Chain plugin to add the final bit of polish. With this, we can adjust the last stages of EQ and dynamics. The plugin has four main panels: Input, Filter, Tone, and Limiter. The signal enters at the Input stage and then passes to the EQ-style Filter. By running this in mid/side (MS) mode, we can add a boost to the bass in the centre of the audio while boosting the highs in the side. We can do a similar thing in the Tone section as well although with more bands. Finally, in the Limiter section we use the Modern compressor type to help add perceived loudness.
Here are all of the finished drum samples:
Once you’re finished, bounce out your samples, trim out the silence, and collect them into a pack. Now you can import them back into your DAW, MPC, Maschine, SP-404, or other device.
Here are the samples in the context of a song, which uses the 808 boom as a bassline:
*Attack Magazine is supported by its audience. When you purchase through links on our site, we may earn an affiliate commission. Learn more.
Tutorials is sponsored by
Roland Cloud is your creative hub for Roland hardware and software. Access legendary recreations of Roland Classics, find new sounds for your favorite products, and download updates and companion apps to make music fast and easy.