This channel is sponsored by
 Roland Cloud is your creative hub for Roland hardware and software. Access legendary recreations of Roland Classics, find new sounds for your favorite products, and download updates and companion apps to make music fast and easy. Visit Roland Cloud
A few simple tweaks to your studio can make mixing easier and your productions stronger. In part 2 of our two-part series on hacking your workflow Paul White profiles the perfect home studio layout. (Find Part 1 here).
Studio layout
While the inherent structure of the room, some bass trapping and the right choice of monitors will all help control bass, there are some important considerations relating to the layout of the studio that will make a difference too. At the very least you should:
- Point the speakers down the length of the studio. In smaller rectangular rooms – less than around four metres wide – the bass end is invariably better behaved when the speakers face down the length of the room rather than across it.
- Avoid a layout that has you sitting mid-way between the front and rear walls, especially in very small rooms.
- Avoid placing speakers too close to walls or corners. Placing them in these areas results in complex reflections that cause an overall increase in perceived bass (of up to 6dB near walls and a whopping 12dB at corners!), but it will be very uneven, with some notes much louder than others.
- Ensure that the speaker-to-side-wall and speaker-to-front-wall distances are different.
- Ensure that the speakers aren’t positioned exactly mid-way between floor and ceiling.
Moving a speaker closer to or further away from a wall by a few centimetres can change the evenness (or otherwise) of the bass response by a surprising amount, so it is worth experimenting with their positions to see what gives the most even result at lower frequencies.
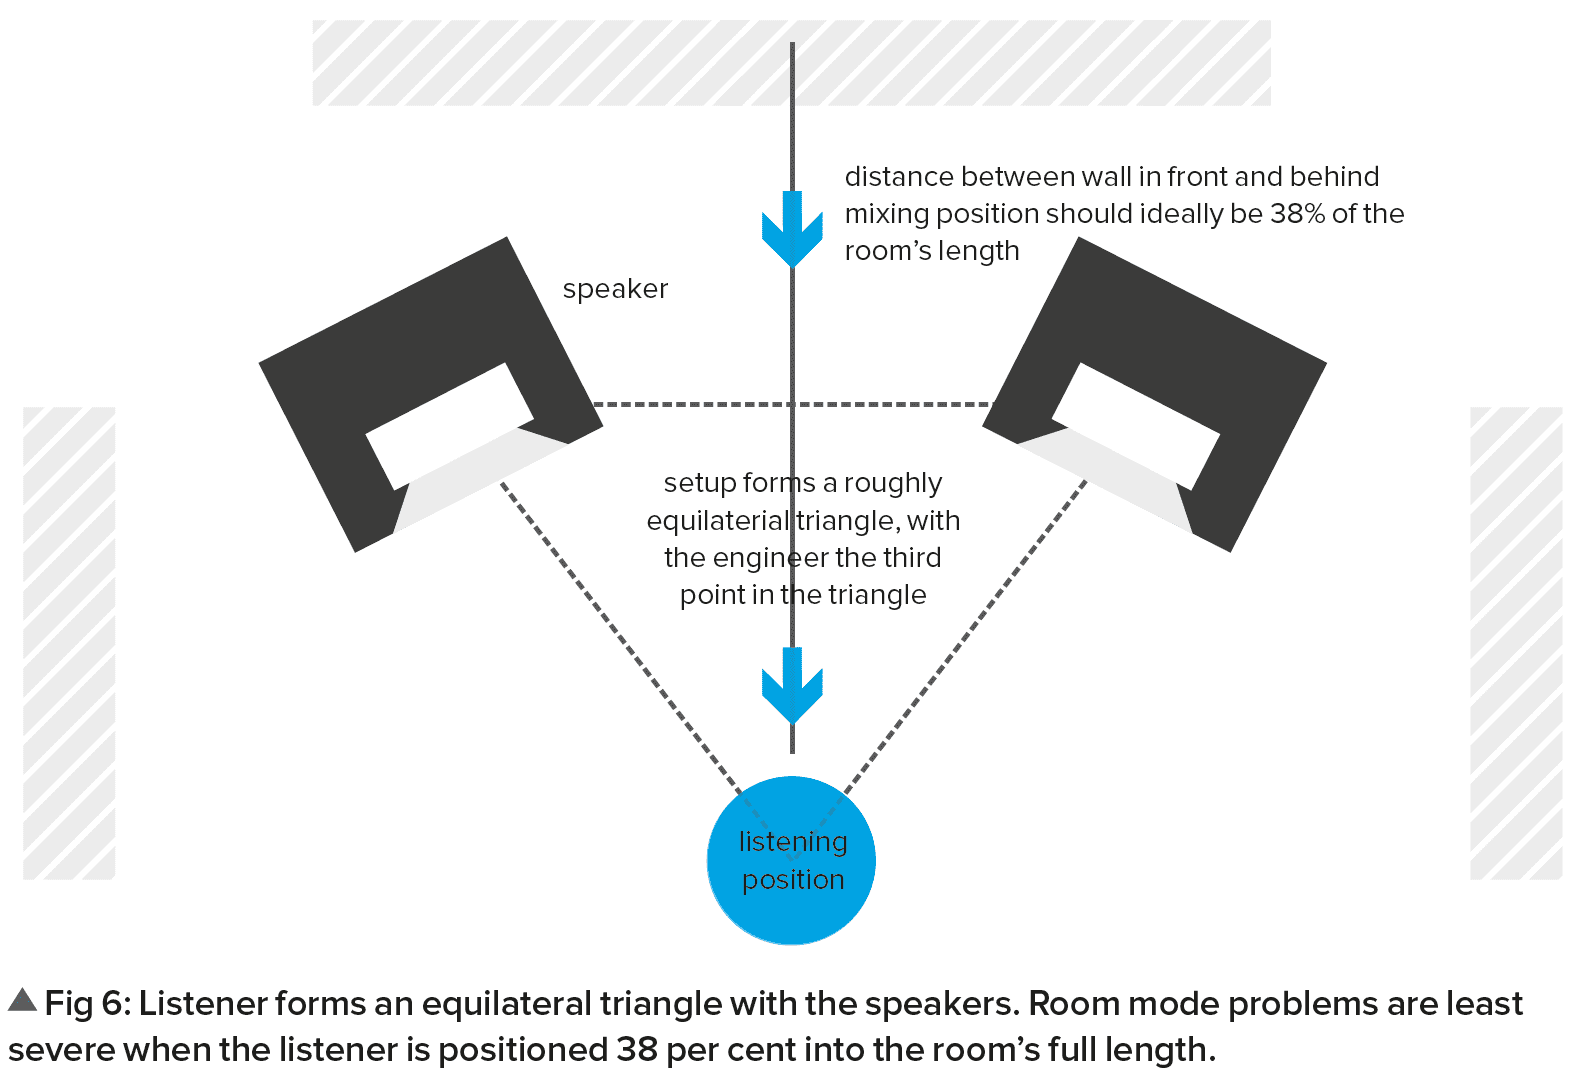
Tip / The modal peaks and troughs are least severe around a third of the room’s length from the end of the room (specifically 38 per cent), so if you can, place your monitoring seat there.
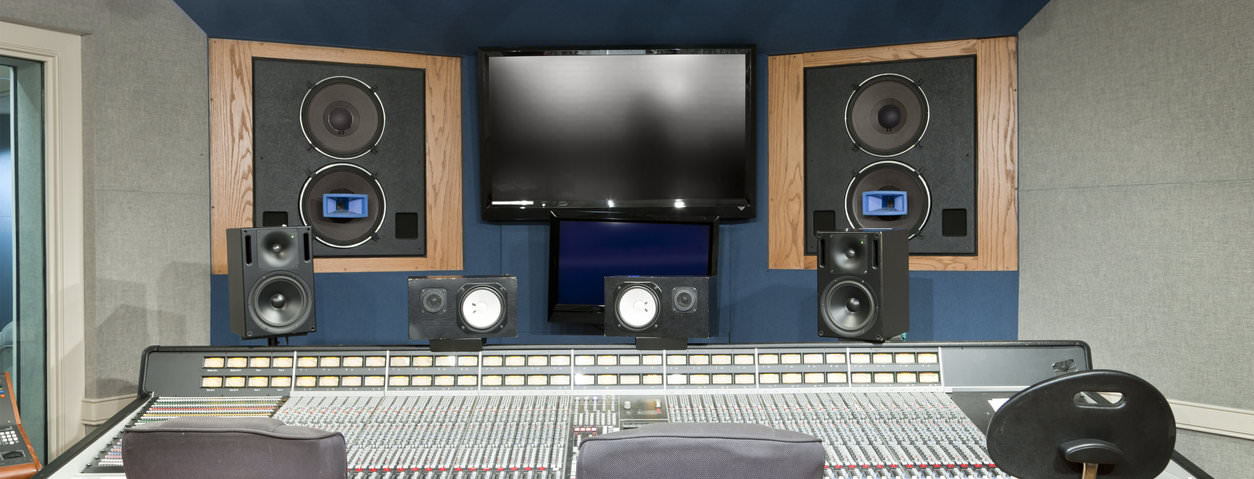
Speaker position
The golden rule when positioning speakers is to form a roughly equilateral triangle with the speakers at the left and right corners and you in front (Fig 6). The tweeters should be pointed directly at your head in both the horizontal and vertical planes. You can afford to widen or narrow the speaker spacing slightly if it helps iron out bass problems.
Setting up studio speakers – Click to enlarge.
- Make sure both the monitoring layout and acoustic treatment is set out as symmetrically as possible. This will produce the most balanced stereo image.
- It was once fashionable to set up small monitor speakers on their sides, but unless your speakers are specifically designed to be used this way they will work better upright, producing a wider sweet spot and a more even frequency response.
- Avoid placing speakers low down at the back of a deep desk as you’ll hear strong reflections from the desk’s surface, which will colour the sound and compromise the stereo imaging and clarity of the mix.
- Where desk mounting is unavoidable, you get a much tighter sound if you use isolating speaker platforms (below) rather than standing the monitors directly on the desk’s surface. A typical isolating speaker mount comprises a slab of dense acoustic foam, sometimes with a metal or ceramic plate on top; if you can’t afford a ready-made one, you can make one that’s almost as good. Most commercial isolation stands can be angled up or down to ensure the tweeters point towards the listener’s head.
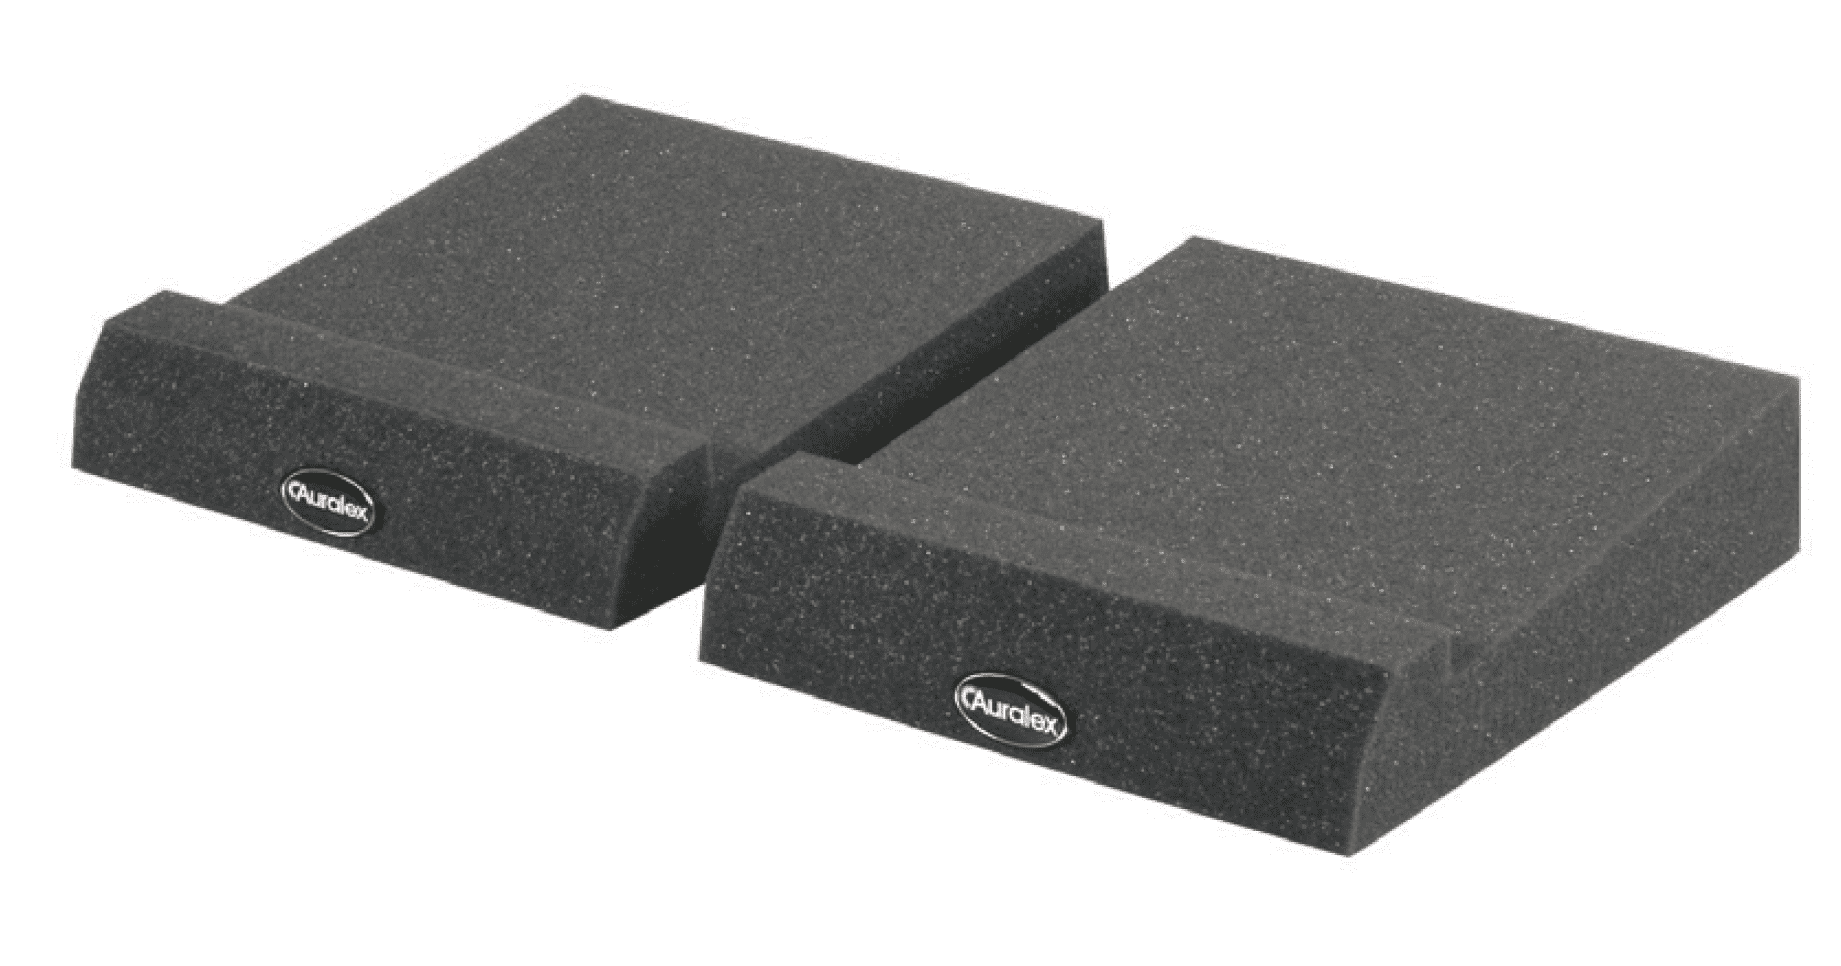
Isolating speaker platforms – Click to enlarge.
- Solid speaker support is important, as any vibrations generated by the loudspeaker drivers that cause the cabinets to move will compromise the sound and result in a less well-defined bass end. If you use separate speaker stands, consider the hollow metal type that can be filled with sand to increase their mass and damp resonances. I also use non-slip matting under the speakers to hold them in place.
Tip / Some active monitors have switches on the rear panel labelled ‘full space’, ‘half space’ and ‘quarter space’. These are designed to modify the bass response of the speaker to compensate for proximity to walls and corners. Full space is optimised for speakers set up away from walls or corners while half space is used when speakers are close to one wall. Quarter space settings are used when there is no option other than to mount the speakers close to corners. Where a speaker is mounted very close to the wall the reflected sound can reinforce the bass end by up to 6dB. The half space setting switches in low-cut filters to cancel the effect.
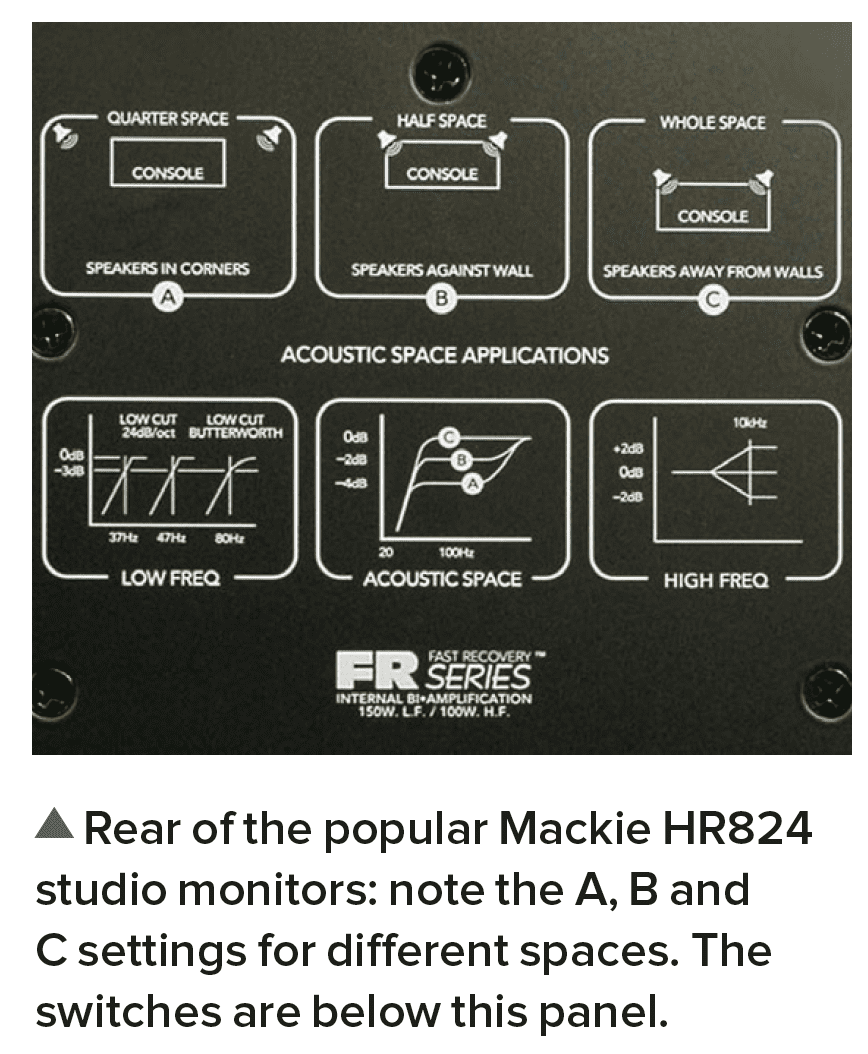
Monitor rear controls – Click to enlarge.
Tip / A good way of finding the best position for the subwoofer if you use one is to temporarily set it up on the floor where you normally sit. Play a record or test disc with a busy bass line (or program a chromatic test sequence) and then listen from a position low down and close to the front wall. As you alter your position you should notice that the levels of the different bass notes become more or less even. Once you’ve found the best spot, place the sub there. This is normally off-centre and somewhere along the front wall. Avoid placing the sub under a table or desk with closed-in sides as this creates a resonant chamber that will cause bumps and dips in the bass response.
The live room
If you’re lucky enough to have both a mixing room and a separate live room for recording purposes then much of the advice for acoustic treatment covered so far in this chapter will apply to the live room too.
As with the mixing room, your overriding aim is a reasonably neutral sounding space with a shortish reverb time that decays evenly across the frequency spectrum.
Many commercial studios have the luxury of several rooms – some more live than others – and some of these rooms have gone down in production folklore as yielding particularly musical ambiences, such as the country house hallway where John Bonham recorded his drum parts for Led Zeppelin.
Sadly back in the real world, domestic rooms and garage conversions tend to be too small to add any useful musical ambience, meaning you’re usually better off treating them to get as dry a signal as possible, to which you can add high-quality artificial space at the mix stage using reverb or delay.
- To damp excessive reverb use the same mid/high and bass trapping techniques as described for the mixing room.
- Set up acoustic screens to further dampen reflections. Hang duvets around the recording area or build plywood panels faced with acoustic foam to reduce mid and high frequency reflections.
- When recording vocals, acoustic guitars or other acoustic instruments, set up a Reflexion Filter or similar behind the microphone to reduce reflected sound.
- If you plan to record acoustic instruments as well as vocals, having a section of hard floor can be beneficial. Hard floors reflect some sound back at the mic, adding life to the signal. You can always put a rug down temporarily when you want a drier sound.
- Avoid – as much as you can –recording bass synths and bass guitars via mics in smaller live rooms. The long waveforms they output, and the subsequent problems these can cause (some notes end up much louder than others) are almost impossible to control in domestic spaces. It’s usually safer to record bass signals using DI methods and then use amp modelling software to shape the sound at the mixing stage as required.
Tip / You can build your own acoustic screen using acoustic foam glued to one side of a plywood or MDF sheet fitted with simple feet to keep it upright. The foam side can be used to create a less live environment. Reverse the screen for a livelier, more reflective sound. These screens can also be used as separators between musicians playing at the same time as a means of reducing spill. Hang blankets over them if you need absorption on both sides.
Tip / Purpose-built vocal booths are used in some studios but unless they are fairly large and very well designed they are best avoided in the home studio: they are easy to get wrong and it’s easy to colour the sound in the wrong way. If you do want to give it a go, the booth should be around 1.5 metres square or larger with 100mm or deeper absorbers around the upper half of the walls and over at least half the ceiling.
Electronic room acoustic compensation
Various products such as the KRK Ergo System are available that measure a room’s response and then apply corrective EQ.
They do this using your own monitor loudspeakers and a flat-response measurement mic. A complex EQ profile is created to flatten the response. This EQ profile is then permanently applied to the output of the DAW so that – in theory at least – what you hear at your normal listening position is what you would hear in a neutral-sounding room.
I’m a little wary of these kinds of products. Although they can certainly help identify and dip EQ hot-spots, they shouldn’t really be used to boost any bass frequencies that are lacking as you can find your monitors running out of headroom fast. A second problem is that this type of system can’t cure flutter echoes or poor stereo imaging.
My own view is that you should get your room working as well as you can by fitting absorbers and choosing suitable monitors before considering compensation.
And finally… Acoustic treatment is not soundproofing!
It is important to appreciate the difference between acoustic treatment and soundproofing as they are two very different things.
Fitting acoustic foam tiles to the walls to improve the listening environment won’t keep sound in or out of the studio, and conversely, filling wall cavities with insulation material or adding extra layers of plasterboard to a drywall partition to improve sound isolation won’t change the acoustics of the room to any significant extent. In short, don’t think that investing in absorption to help your mixing will stop the neighbours (or significant other) moaning about the sounds coming from your studio.
Soundproofing is far too big a topic to cover here in any depth – and there are some good books out there that discuss it in detail – but if you do want to keep sound in (or out) of your studio here are some key things to consider:
- What prevents sound getting out also prevents it from getting in.
- In most domestic spaces the weakest links are the doors and windows. Commercial double glazing is reasonably effective – especially more modern types that have a large air gap between the glass panes.
- Windows should be well sealed when closed: with no gaps or unwanted airflow.
- Internal doors are more problematic because unless they are heavy and seal completely on all four sides when closed they tend to leak a significant amount of sound. While commercial UPVC doors have very effective seals, they are often cosmetically unacceptable for use as internal doors; a heavy fire door with good seals may be more suitable.
- Double doors are far more effective than single doors, so fitting two doors, one flush with the outside of the door frame and another flush with the inside of the door frame, will deliver a big improvement. The larger the gap between the two doors, the better.
- Sound travels through solid structures in the form of vibrations, so place amps and other noise-making devices on foam isolation pads rather than directly on the floor.
Making a room airtight also creates its own problems – how do you ensure an ongoing supply of fresh air, for example? A pragmatic solution is to open the doors between takes and fit a commercial air conditioner to keep the temperature down if equipment heat becomes a problem.
“This article is taken from ”The Producer’s Manual” the definitive guide to recording and mixing in the project studio, written by Sound on Sound editor Paul White and published by the same team who bought you The Secrets of Dance Music Production”.
/**/Tutorials is sponsored by
Roland Cloud is your creative hub for Roland hardware and software. Access legendary recreations of Roland Classics, find new sounds for your favorite products, and download updates and companion apps to make music fast and easy.