
This channel is sponsored by
 Roland Cloud is your creative hub for Roland hardware and software. Access legendary recreations of Roland Classics, find new sounds for your favorite products, and download updates and companion apps to make music fast and easy. Visit Roland Cloud
We use Waves’ new vocal processing plugin Vocal Bender to tweak out an acid house track.
Vocal processing plugins – they’re not just for vocals anymore. Whether you often record vocals for your productions or are strictly instrumental, you can always use a good vocal processing plugin. Sound like a contradiction in terms? It doesn’t have to be. There’s a lot you can do creatively with a vocal processing plugin that has nothing to do with vocals, as we’ll see in his tutorial.
We’ll be using Waves’ new Vocal Bender, a fun and quick vocal processing plugin, to add a little psychedelia and unexpected movement to a Chicago-style acid house track. Don’t be turned off by the promotional videos for Vocal Bender. You don’t have to be an R&B or pop producer to get something out of it. Of course, we’ll be using it on vocals but we’ll also see what it can do for the bassline and percussion elements as well. As always, click on any image picture to see a larger version.
Here’s our finished loop with Vocal Bender abusing the vocals, acid line, and claps.
Warm up your vocal chords and let’s get to work.
Step One – Vocals
Classic acid tracks often had menacing, pitched-down vocals running through them. Think Bam Bam’s ‘Where’s Your Child’. Back in the day, they likely did this with expensive pitch-shifting hardware but we can get it down with Waves Vocal Bender.
First, record some vocals into your computer. If you have a microphone handy, great. If not, record yourself into your phone and transfer the audio file into your DAW. It doesn’t have to be studio-grade quality. We’re going to mangle it anyway. We used a Blue Snowball to get ours down.
We want the audio to be clean going into the plugin so let’s tidy it up first. Place a de-esser onto your audio channel and make sure it’s catching any overly sibilant sounds. We used Ableton’s stock De-esser.
Next, let’s compress it a bit so it sounds even. We again went with a stock Ableton plugin, this time Compressor and the Sustained Lead Vocal preset. We cranked the ratio down to 1.5:1 as we don’t want it to sound anywhere near natural. We want it to be scary. An instance of EQ Eight is next to clear up the low-end and remove any rumbling from passing cars or noisy neighbours.
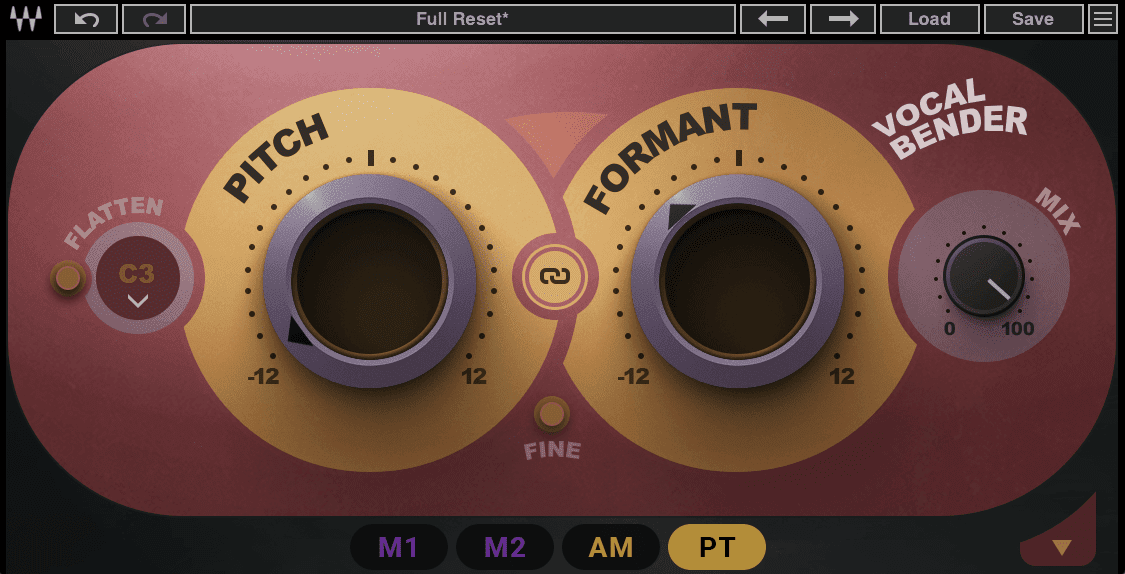
Next comes Vocal Bender. We want it to sound like a monster, so lower the pitch all the way to the left, or down 12 semitones. We also turn down the formant to -4. This gives us more of a ‘male’ sound. Instant acid house vibes.
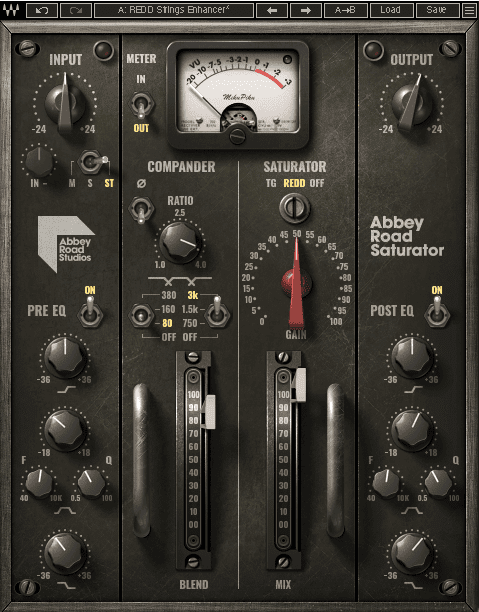
To finish things off, we add a copy of Waves’ Abbey Road Saturator to beef up the harmonics and add presence.
Here are the dry vocals:
And now with Vocal Bender and other effects:

Step Two – Acid
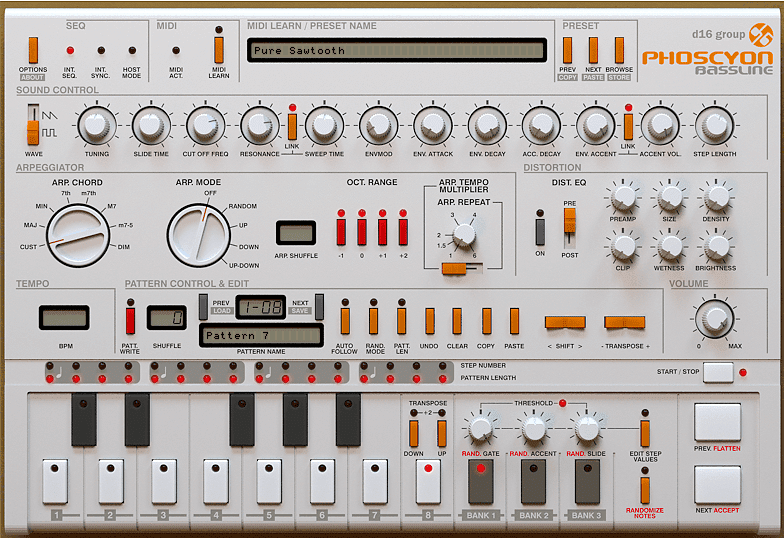
Next, let’s use Vocal Bender to warp an acid line. Start by creating a new MIDI track and programming a Roland TB-303-style bassline. We’re using D-16 Group’s Phoscyon but any emulation will do the trick. We added a compressor (U-he’s Presswerk) in the chain as well to beef things up.
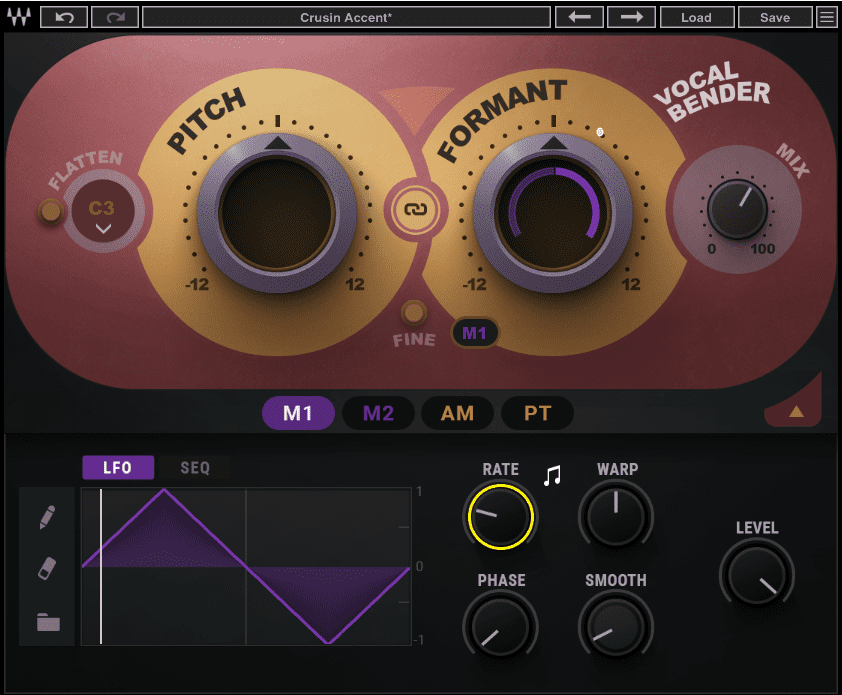
Next comes Vocal Bender. Let’s use modulation to add some movement to our acid line. Click on the triangle at the bottom right corner to reveal the modulation section. Click on M1 (Modulation 1) and set a rate of 1/4 with a sinewave LFO. Drag the M1 letters to the Formant dial. Click on the M1 below the dial and increase the amount to around 20. Now the formant will swing back and forth in rhythm to the beat. Tweaky.
Lastly, add Waves Abbey Road Saturator to the channel to flesh the frequencies out.
Our original acid bassline:
And with Vocal Bender adding extra modulation:


Step Three – Claps
For the last part, let’s see how Vocal Bender reacts to a sound without much inherent pitch information. Start by adding a Drum Rack to a MIDI track and programming in a clap beat. An EQ is also a good idea. We used EQ Eight to cut out low frequencies and reduce the highs a touch.
Next, add Waves Vocal Bender. We’ve chosen the Cruisin’ Accent preset and it has wildly swinging formant modulation. Click on the triangle to reveal the modulation section and check out what’s happening under the hood. There’s a triangle LFO with a rate of one bar. As it oscillates back and forth, it creates an almost phaser-like effect. It’s a bit over the top so we dial the mix down to about 60% wet.
Lastly, we add a touch of tight reverb using send channel A. We go with a short decay time of 400ms. This is just enough to add a bit of a space to the clap.
The claps on their own:
And here with Vocal Bender creating a phasing effect:

*Attack Magazine is supported by its audience. When you purchase through links on our site, we may earn an affiliate commission. Learn more.
Tutorials is sponsored by
Roland Cloud is your creative hub for Roland hardware and software. Access legendary recreations of Roland Classics, find new sounds for your favorite products, and download updates and companion apps to make music fast and easy.