u-he are makers of award-winning software synthesisers and effects including Diva, Repro-1, Zebra2, Hive, Bazille, Presswerk and Satin.
Visit U-he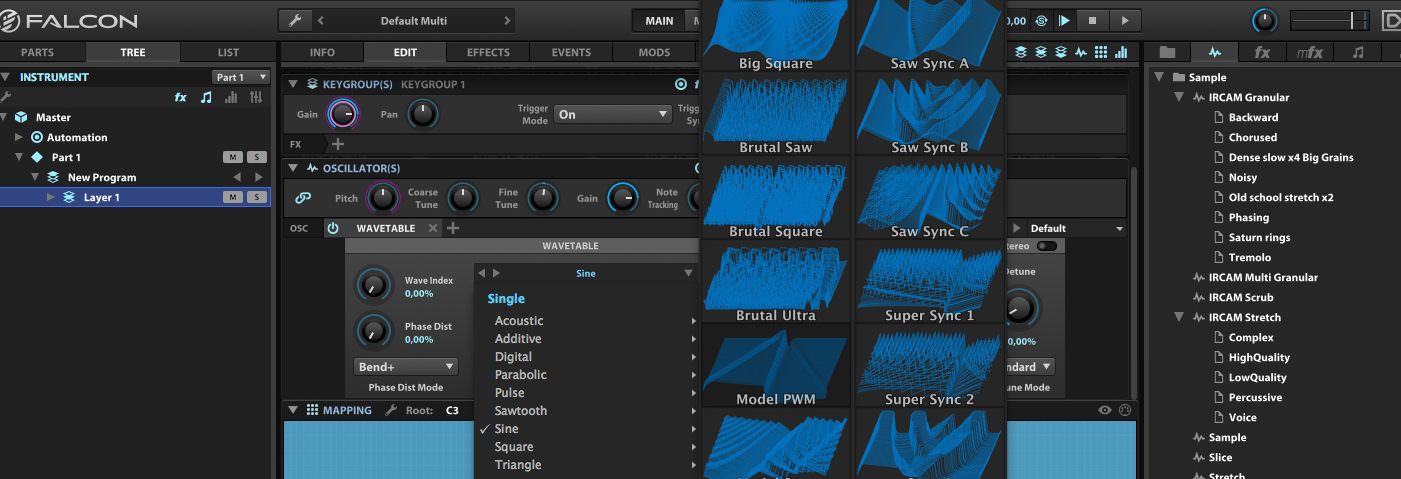
Technique » Synth Secrets »
Wavetable Pads with UVI Falcon
This channel is sponsored by

Synth Secrets is a series of programming tutorials in which we show how to make a range of classic and new synth sounds using plugins such as Massive, Sylenth and Diva.
In this instalment of Synth Secrets we’ll be looking at how we can use the wavetable oscillator in UVI Falcon to create a rich, warm pad sound with lots of movement:
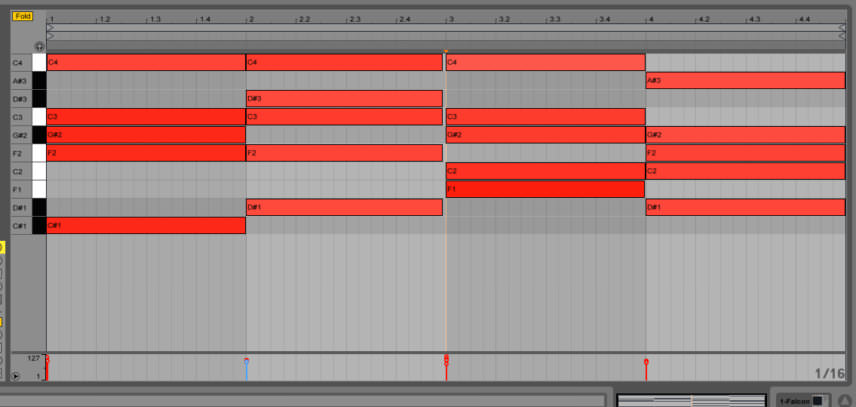
We’ve used a chord sequence in the key of A minor:
Step 1
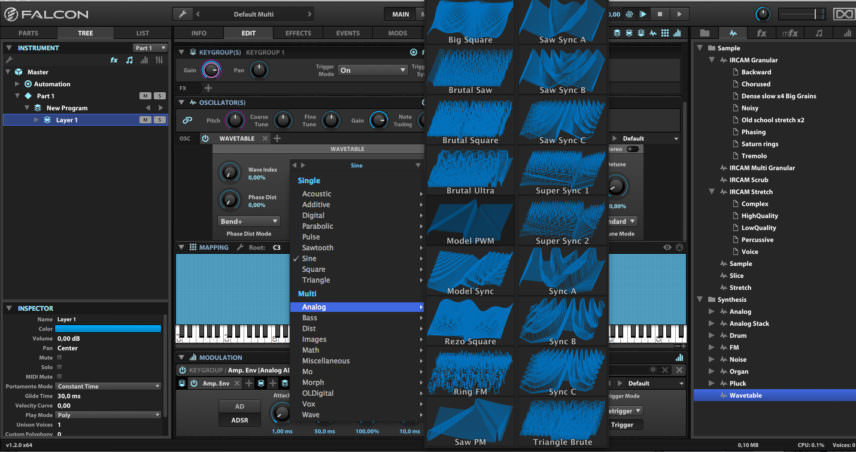
We begin by loading a new instance of Falcon and setting up a wavetable sscillator on a new layer, mapping it across the keyboard. Then we begin auditioning some of the interesting wavetables we have on offer. The wavetable oscillator will load a sine wave by default, so click on the drop-down menu where it says Sine to reveal all the different categories.
To really engage what the wavetable oscillator has to offer, check out some of the Multi wavetables. We opt for the ‘ModelPWM’ table from the Analog section. Note that you can create your own uniques wavetables here by dragging and dropping audio files into the wavetable box. You can even create wavetables from images, so be sure to have a go at creating your own wavetables for some unique tones.
Step 2
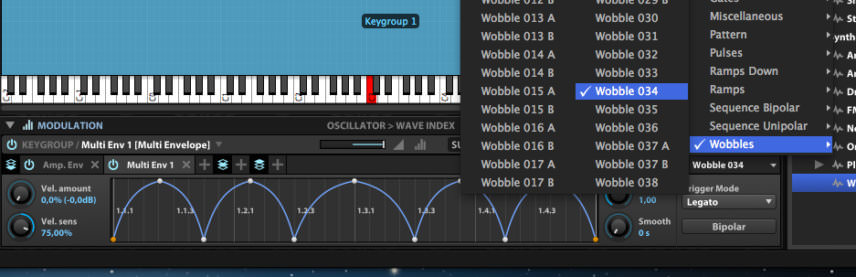
The Wave Index control will sweep through all the different slices contained within a wavetable. Auditioning this, we can hear it will sound great modulated. First we move the Wave Index control up a little, then right-click on the control and choose to modulate it with a MultiEnvelope, with the modulation set up at Keygroup level.
The MultiEnvelope is great for setting up unique modulations – you can either draw in your own envelope or choose from one of the many presets Falcon comes loaded with. We click on the box to the top right of the MultiEnvelope section where it says Default, and choose the ‘Wobble 034’ preset.
We turn the modulation amount down to 0.35 for a more subtle modulation. This creates a sequenced movement on the Wave Index control, meaning the pad sound is constantly modulating as it plays back.

Step 3
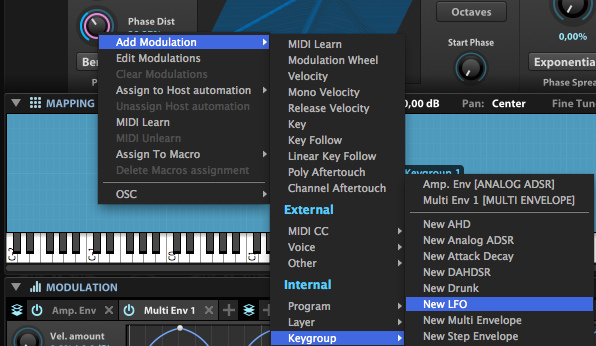
Underneath the Wave Index control we have the Phase Distortion controls. We can set the type of phase distortion here and also adjust the amount. We select the Bend +/- mode, which will stretch and shrink the waves in a way that creates really interesting characteristics when we turn up the Phase Distortion amount control.
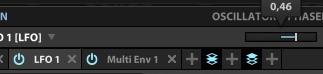
Again, this control will sound great modulated, but this time we’ll use an LFO for our modulation source. Setting the Phase Distortion amount to around 40%, we right-click on the control and add an LFO modulator at the Keygroup level. We keep the LFO controls as they are, just turning the modulation amount down to 0.46.
Step 4
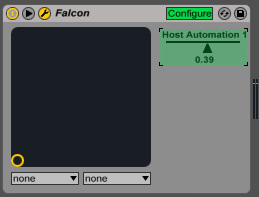
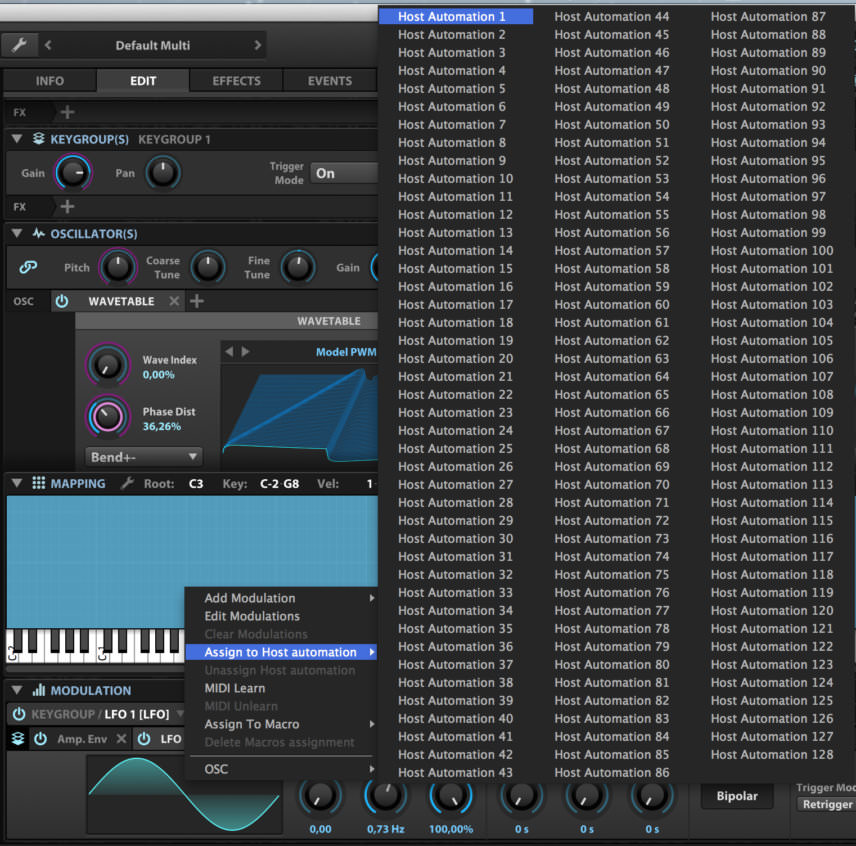
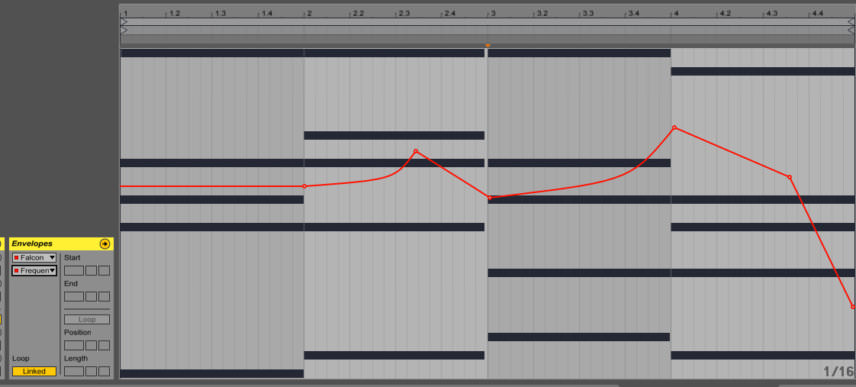
To add even more movement to the pad, it would be nice to modulate the LFO frequency. To set up parameters on Falcon for automation in Ableton, first we need to activate the configure button in the Ableton device, then we can right-click on the control in Falcon and assign it to host automation.
We draw in some automation for the LFO frequency, meaning that the sweeps of the Phase Distortion control move faster and slower as the sequence plays back.
Step 5
When auditioning wavetables, it’s worth experimenting with the Index button. With it turned off, the sound will jump from one slice to the next; when it’s on, there will be a much smoother transition between slices (as is the case with our sound). This is more noticeable with sounds containing fewer slices.
We don’t need to change anything in this section, so we navigate over to the Unison section to add some depth and width to our sound. We increase the number of unison voices to 8, then next to the Voices box we activate the Stereo button to engage the Stereo Spread control. We increase the Stereo Spread to 45% in order to pan the extra unison voices around the stereo field, and we also increase the Detune control amount to around half way in order to detune the extra voices. This creates a really rich, warm and wide sound.

Step 6
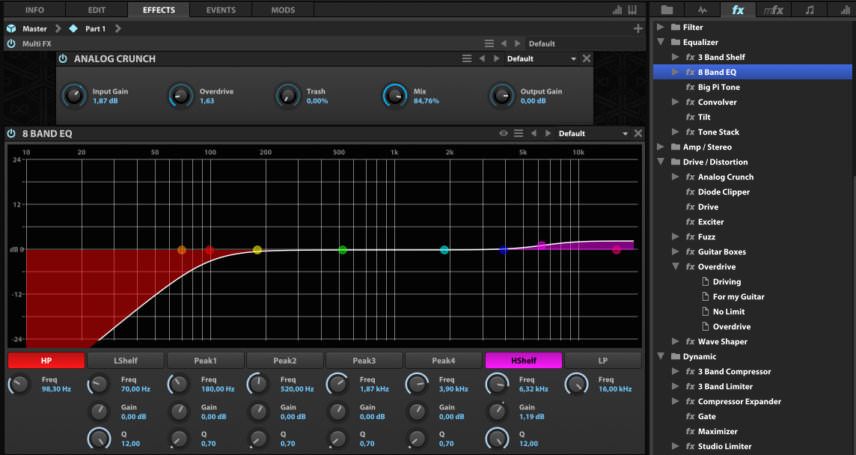
Finally, we add some effects to the sound. We begin with the Analog Crunch effect, increasing the Input Gain and Overdrive settings for some some effect pedal-style distortion.
We follow that with the 8 Band EQ, sweeping away some low frequencies and adding a subtle high shelf.
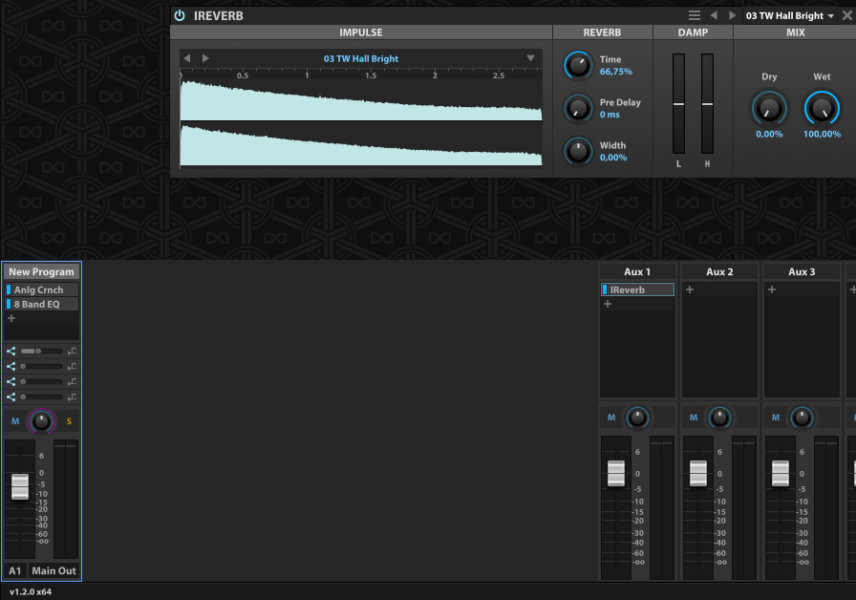
Over on the Mixer page, we add the IReverb effect on an aux send, selecting the ’03 TW Hall Bright’ preset. We take down the Dry control and push up the Wet all the way, also turning down the Time to 66%. Setting the reverb up in this way is more akin to how we would set up a reverb in a conventional mixing setup, and gives us more control over the reverb.
Synth Secrets is sponsored by
u-he are makers of award-winning software synthesisers and effects including Diva, Repro-1, Zebra2, Hive, Bazille, Presswerk and Satin.
Download the demos and try them for yourself at www.u-he.com