u-he are makers of award-winning software synthesisers and effects including Diva, Repro-1, Zebra2, Hive, Bazille, Presswerk and Satin.
Visit U-he
Technique » Synth Secrets »
Resampled Pads with Spitfire Audio Tundra & Ableton Simpler
This channel is sponsored by

Synth Secrets is a series of programming tutorials in which we show how to make a range of classic and new synth sounds using plugins such as Massive, Sylenth and Diva.
In this walkthrough we’re going to explore ways we can utilise a beautiful sounding ROMpler (in this case Spitfire Audio’s Tundra) and combine it with some modern resampling techniques for a sound that is processed and resampled but also maintains a warm and organic feel. The best of both worlds!
Here’s what we’ll be creating in this tutorial:
We’ll be using a combination of Tundra and Ableton Live’s native plugins for this walkthrough, but these kind of techniques aren’t limited to these tools. If you have some nice orchestral samples you can try resampling them, and if you don’t use Ableton be sure to explore your DAW’s built-in sampler and the resampling options you have.
Step 1
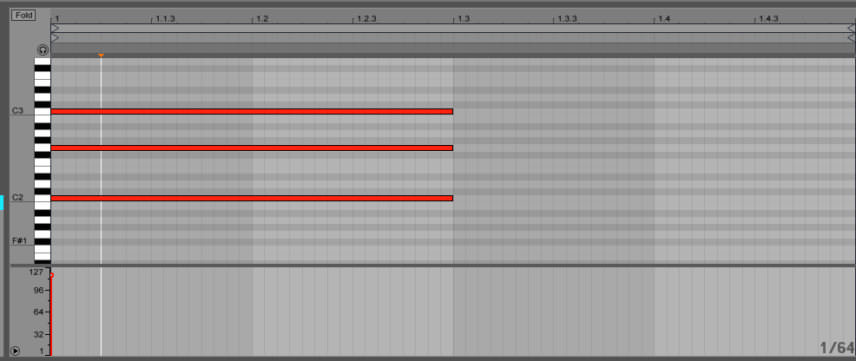
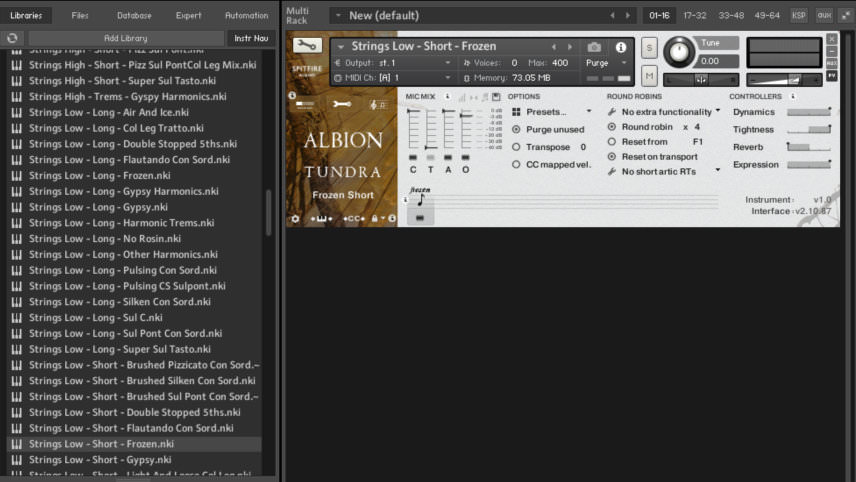
We begin by loading up an instance of Kontakt 5 and Spitfire Audio’s Tundra instrument. On Tundra we browse some presets that might be nice for resampling purposes. We settle with ‘Strings Low – Short – Frozen’. Programming a two-beat-long chord with a C2, G2 and C3 note.
In Tundra itself we turn down the reverb. Although this sounds nice at this stage, it might not play so well when we’re resampling and re-pitching. We also click on the wrench icon to reveal some extra parameters in Tundra and change the balance of the four mic groups used in the recording process. Increasing the C (close) mics level all the way adds a nice definition to the sound, while turning the A (ambient) mics and O (outrigger) mics adds a nice stereo balance.
Step 2
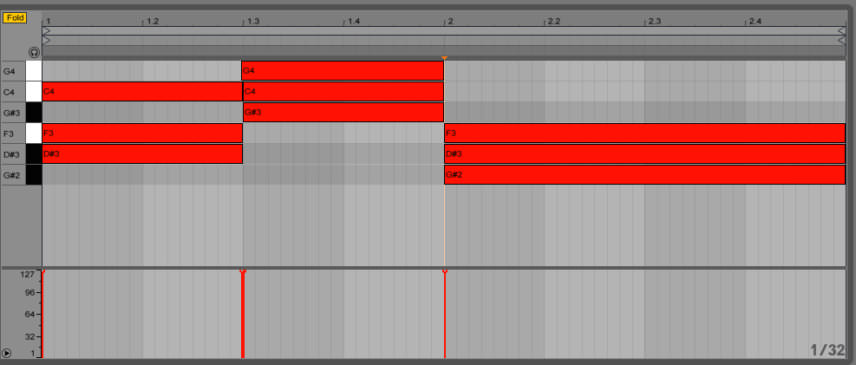
Next, we load our audio into an instance of Simpler. By default, Simpler loads in the Classic mode. Our sample is automatically mapped chromatically, so we play around with some new chords and program a chord sequence in C minor (we know our sample is in the pitch of C, so we don’t need to worry about changing the root note in our sampler).
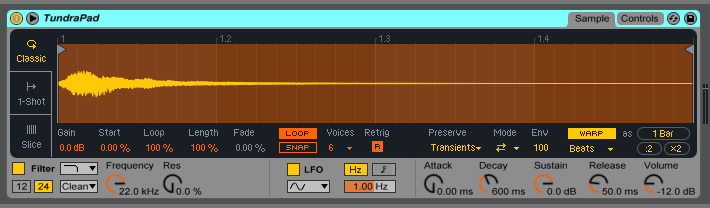
The sound is a little glitchy when we trigger notes. This is due to the Warp mode in Simpler being set to Beats by default, meaning the sample is being sliced. If you want a smoother playback, you can switch the warp mode to Complex Pro. However, we’re going to keep the Beats warp mode for this tutorial and use it to our advantage for some resampling techniques.
Step 3
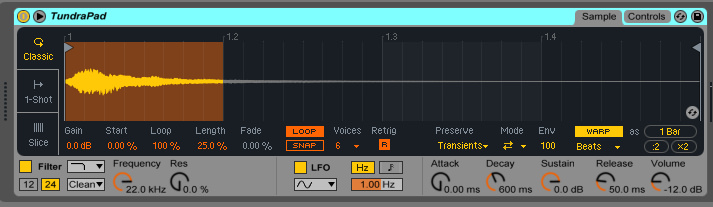
The loop function is turned on by default in Simpler, meaning if we play a note and hold down the key, the sample will loop over and over. To the left of the loop button we have some options for sample start position, loop length and sample length. We can click and drag up and down on these settings to alter them, however if we double-click on the box we can also type in numerical values. This enables us to set tempo-synced sample loops (just ensure you always use samples that conform to a musical grid length for this to work – hence our sample being one bar long).
Note that if we change the sample length to 25% we are now looping over exactly a quarter of the sample (one beat in our case). Provided we either half or double the loop length, we’ll maintain a sample loop length that is synced to our project tempo.
Step 4
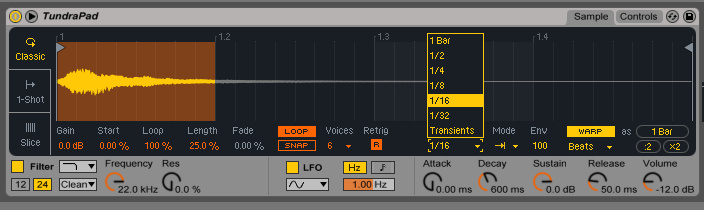
Next we change the Preservation setting from transients to 1/16. This changes how the sample is divided when warped. For more accurate results you can stick to Transients, but some interesting rhythmic effects can be achieved using one of the fixed note values.
To the right of Preserve we have the Mode setting, which determines what happens in between the sample chops – the settings are Off, Loop Forward, Loop Forward or Backward. We select Off (the first option). This creates a gated effect, which is enhanced when we bring down the envelope value to the right, as this shortens each one of the chops.
Step 5
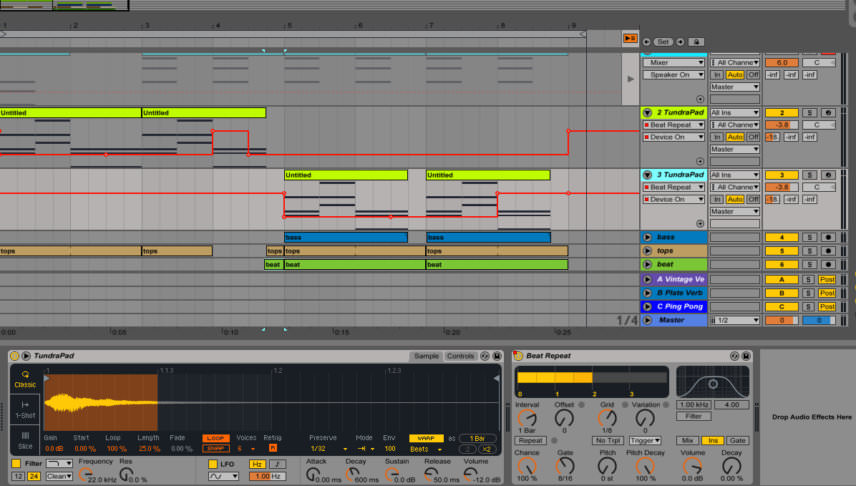
On the right side of Simpler we can half or double the amount of time it takes to play back the sample from start to finish using the :2 and x2 buttons. We click the :2 button to double the tempo of the sample playback. This creates a nice tension with the string.
We then load a Beat Repeat device after Simpler, setting Grid to 1/8, Gate to 8/16 and pushing up the Pitch Decay to 100%. Automating the On/Off for the Beat Repeat creates a pitch fill for the sound, a nice way to introduce new elements into the arrangement.
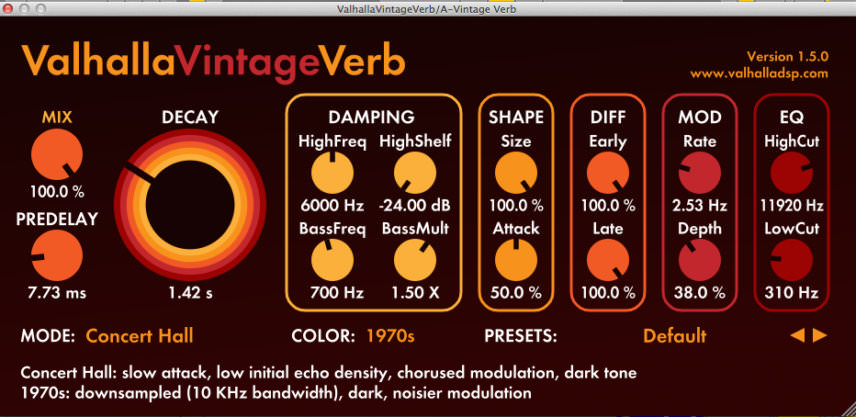
We also add a touch of reverb to the sound via a bus send, applying Valhalla’s VintageVerb. In the following audio example, we’ve duplicated our Simpler instance and changed the Preserve to 1/32 for the drop section, and also automated the Beat Repeat on and off for a nice transition effect.

Synth Secrets is sponsored by
u-he are makers of award-winning software synthesisers and effects including Diva, Repro-1, Zebra2, Hive, Bazille, Presswerk and Satin.
Download the demos and try them for yourself at www.u-he.com