
In this tutorial, we’re going to create a simple but enigmatic sweeping chord sound using KV331’s SynthMaster 2 that you simply can’t get without vector synthesis. DAW all fired up? Fingertips at the ready? Let’s get into it.
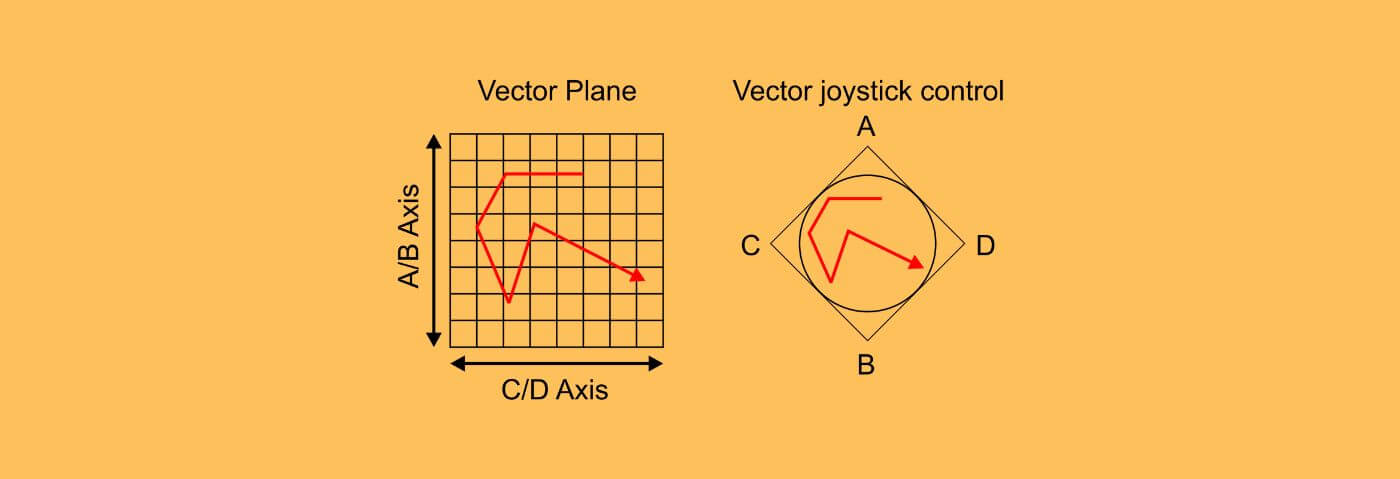
Vector Synthesis is a deliciously expressive variant of subtractive synthesis that has a long and storied history, beginning with the Prophet VS in 1986, and reappearing in such classics as the Korg Wavestation, which was released in 1990, and the Korg Wavestate, which was released in 2020.
It’s a simple concept really; in Vector Synthesis you can dynamically crossfade between multiple (usually four) separate sound sources on a joystick or an XY pad. An oscillator, in Vector Synthesis, can be a shapeshifter… a chameleon. Using modulators like envelopes, LFOs, and sequencers to dance between the sources creates a really unique sound.
You’ll hear vector synthesis, specifically from the Korg Wavestation, everywhere, on records from from Depeche Mode to Faith Hill. The “Sandman” patch from the wavestation is even allegedly the basis for the iconic Mac startup tone.
KV331’s SynthMaster 2 offers an easy-to-use vector synthesis engine that we’ll use today for a simple but enigmatic sweeping chord sound that you can’t get without vector synthesis.
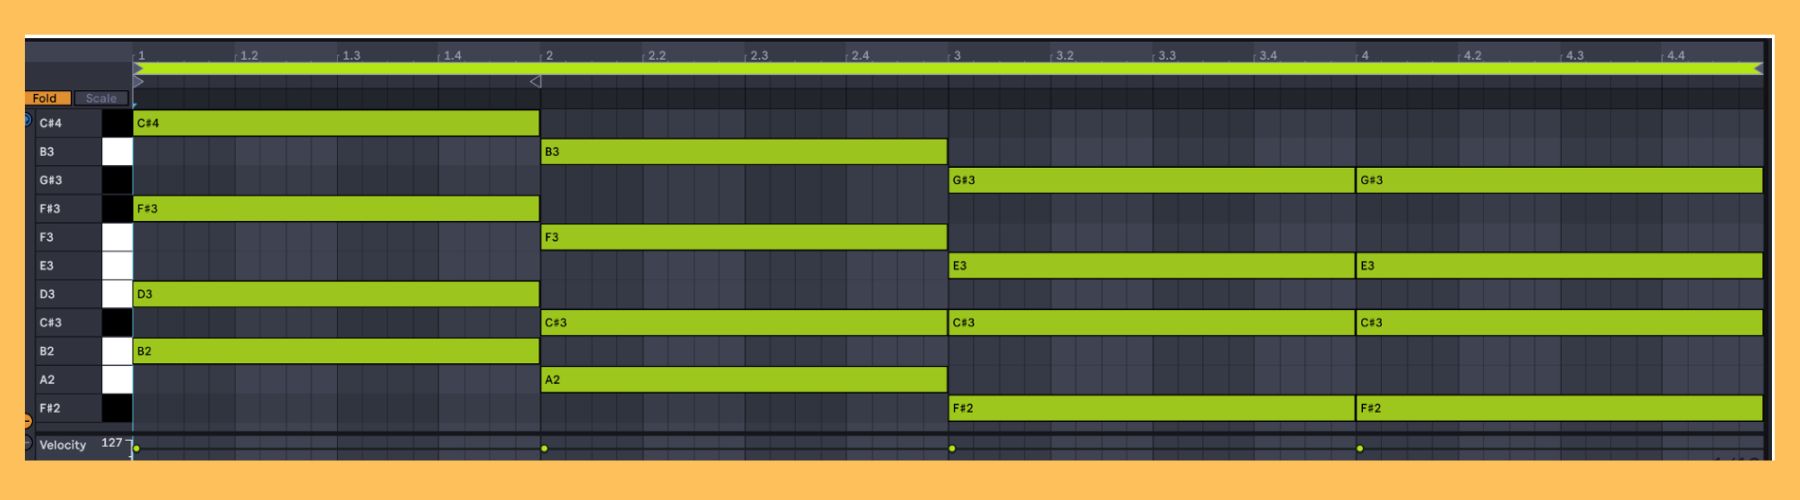
We’ll be using Ableton Live but you can use SynthMaster 2 in any DAW and get the same effect. Start by setting your session tempo to 126 BPM. Then create an instrument track and loop the MIDI below, and we’ll also be using a Splice sample – ZEN_PMHT_126_drum_loop_groove_artic – from the “Pattern – Melodic House and Techno” library by Zenhiser.
Here’s what we’ll be creating from scratch and we’ll be exploring lots of the plugin’s different presets and sounds along the way:
Download the session file to follow along!
Step 1: Basic Setup
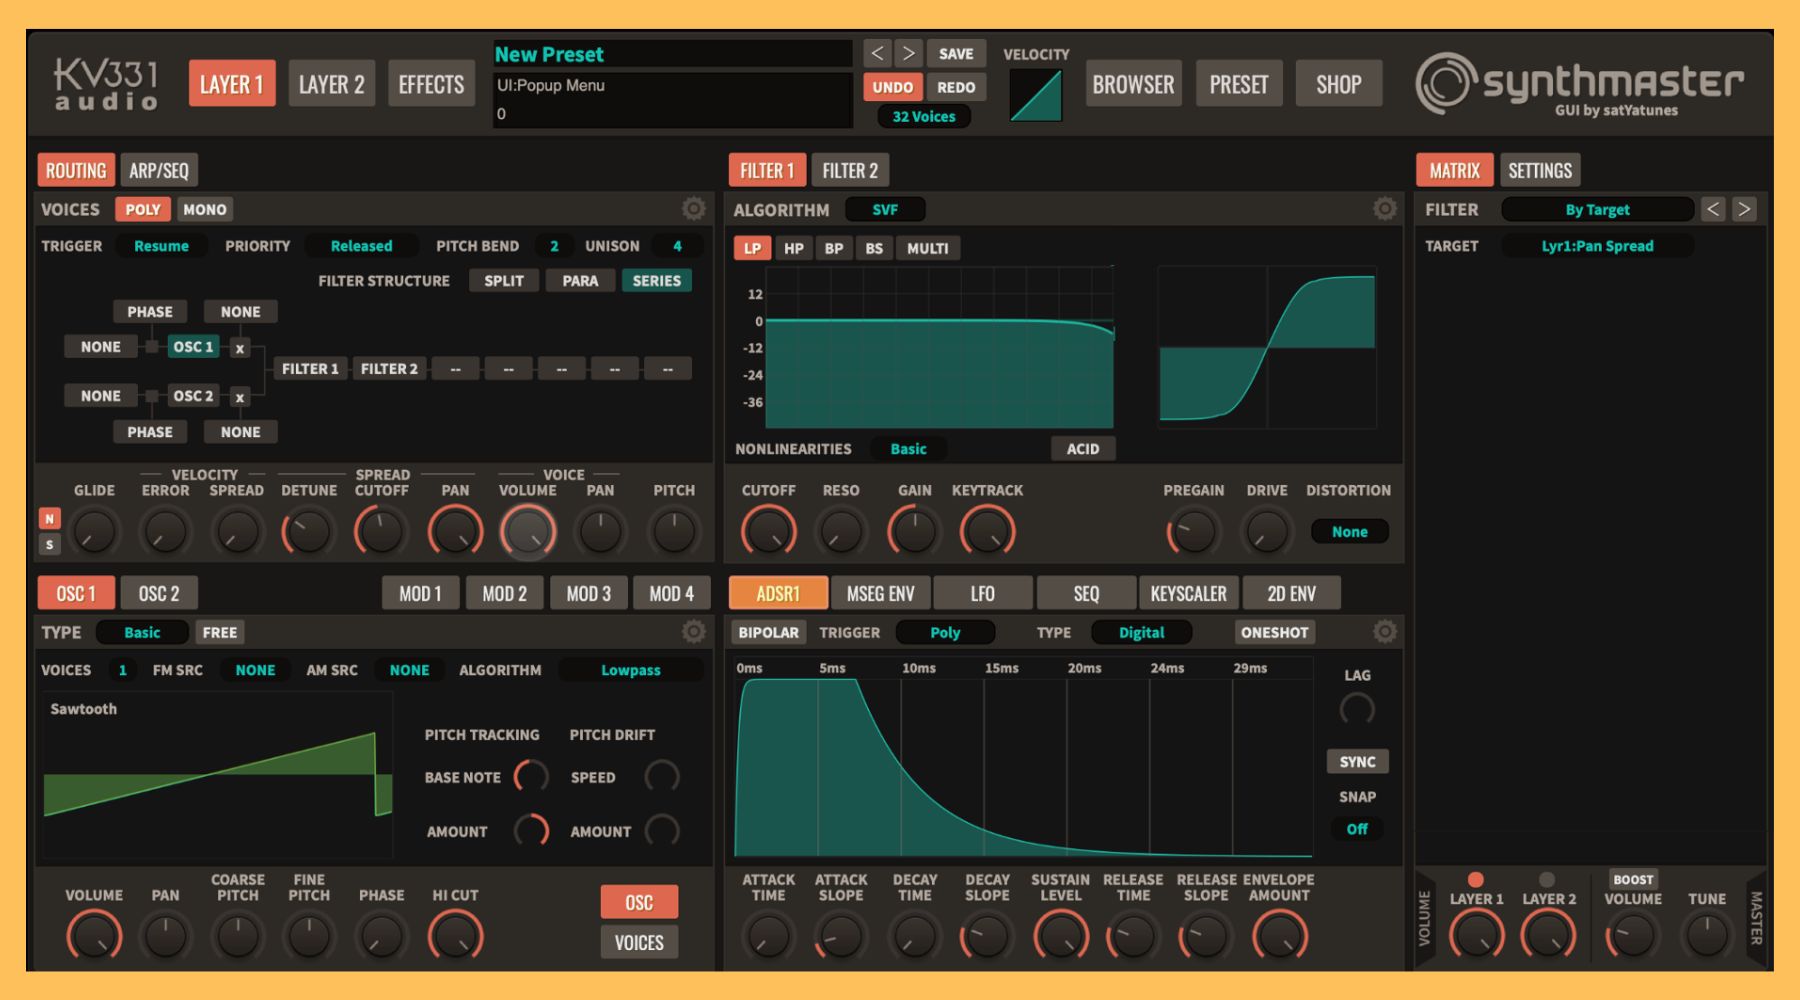
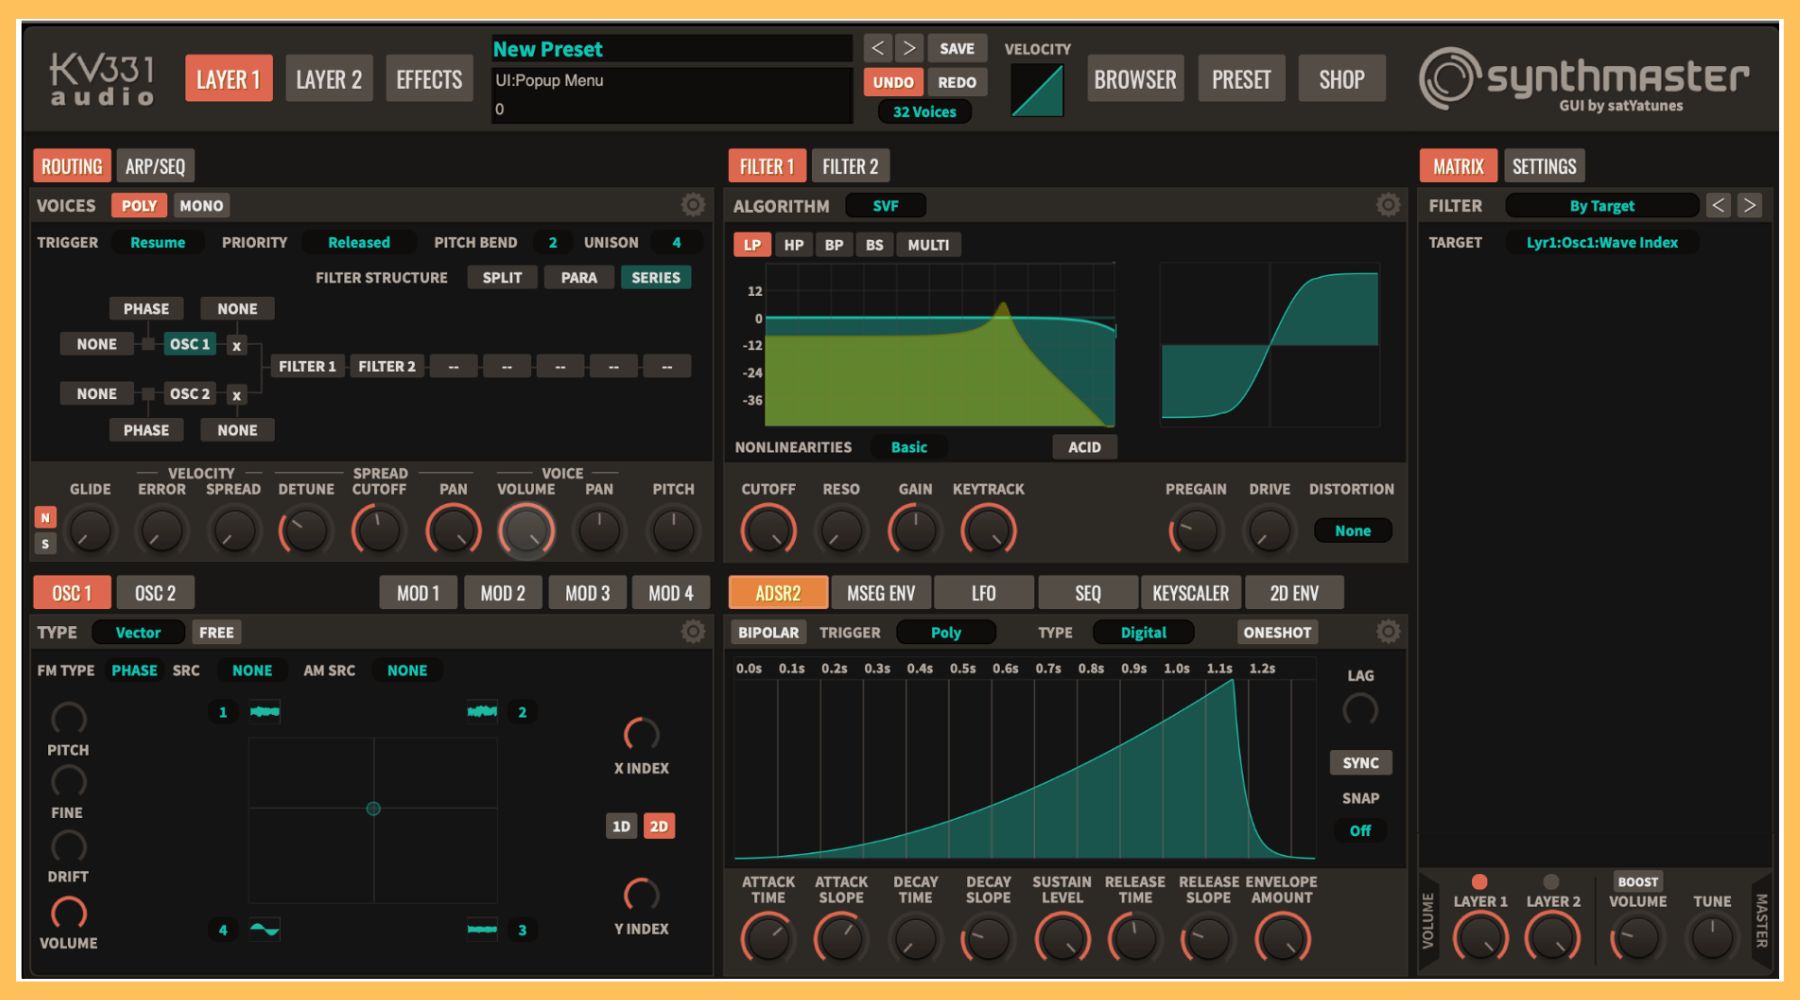
First things first; click on the patch name at the top of SynthMaster 2 and then select Init Preset to start from scratch.
You’ll hear a little Then, right underneath the “undo” and “redo” buttons you’ll find a dropdown that allows you to select how many maximum voices your patch can contain, and we’ll click on it and select 32.
Now move to the left half of the synth, the Voices section. In the Unison area, select “4” for four voices of unison.
Then pull the three Spread knobs up a healthy amount – about 10 o’clock for Detune, 12 o’clock for Cutoff, and all the way up for Pan. Now we have a thick and interesting tone to start with.
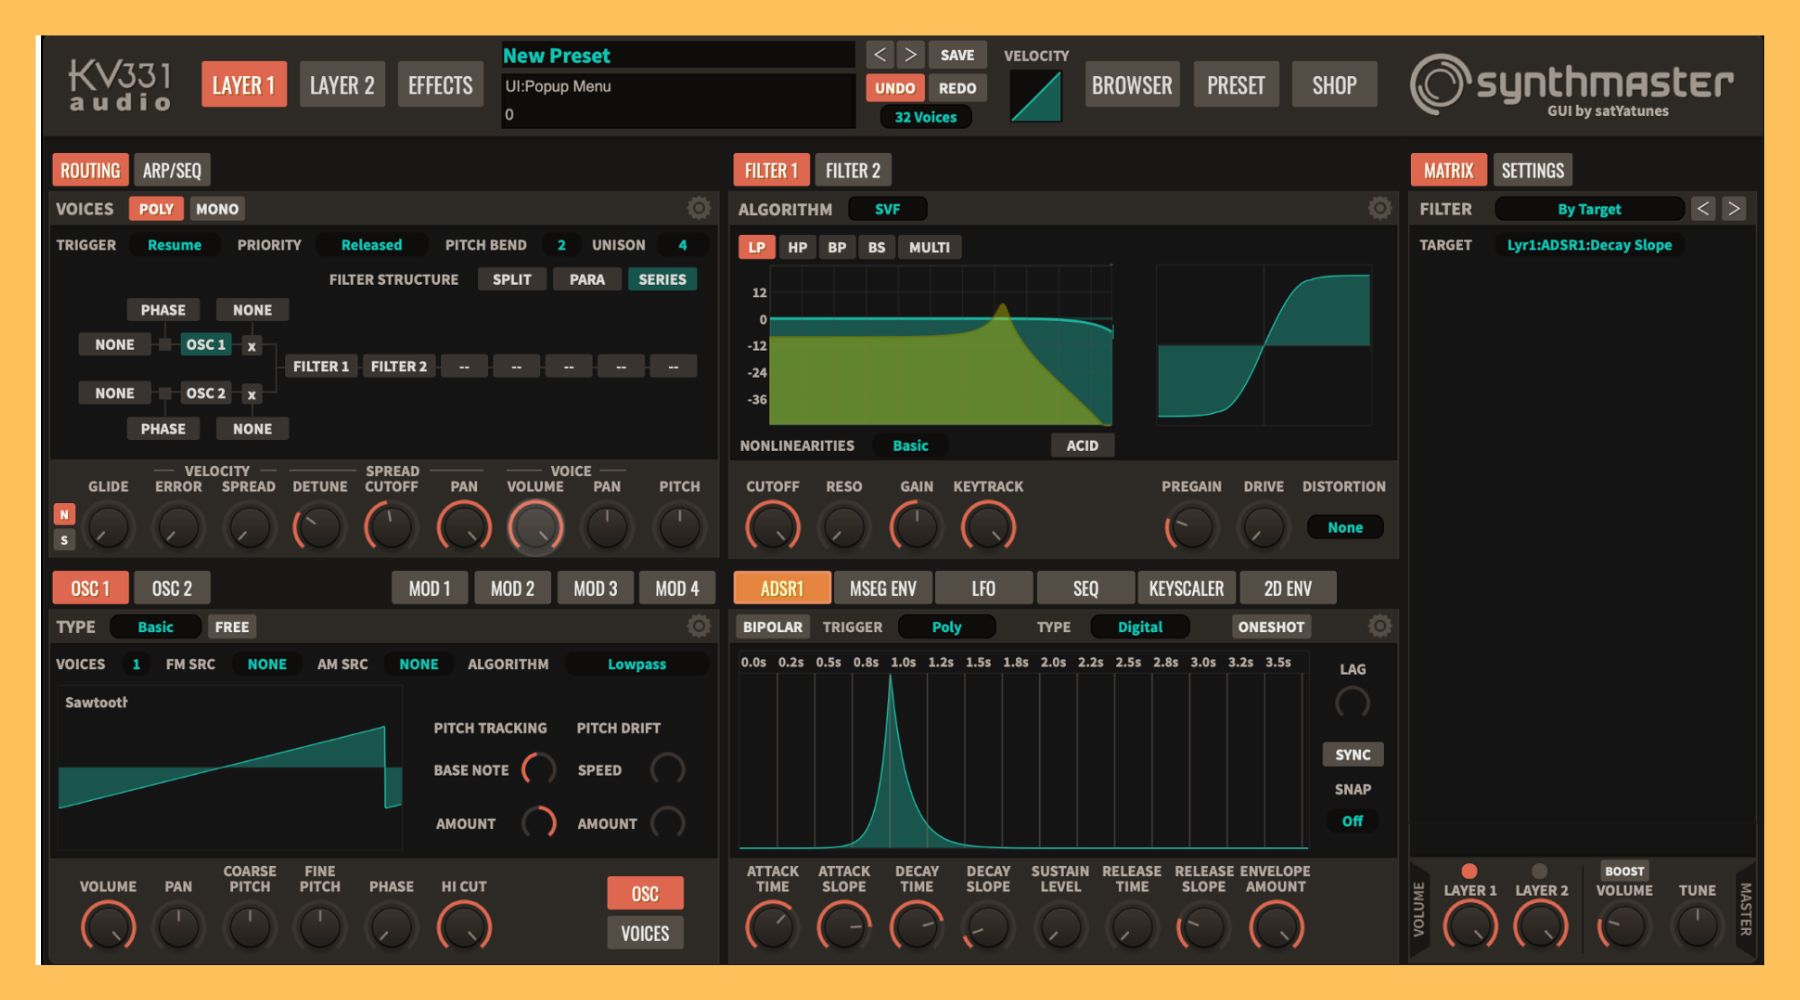
Step 2: The Volume Contour
Next up, we’ll modify the volume envelope to get a kind of sweeping motion with our patch. The ADSR1 envelope will be routed to oscillator 1 amplitude by default and it will appear in the bottom right-hand corner of the interface.
Pull the attack time up to about 1 second, increase the sustain level to about 1 o’clock, and adjust the attack and decay slopes so they have a bit of an abrupt approach, as seen below.
Step 3: Enter The Vector
Now we’ll bring vector synthesis into the mix. On the bottom left-hand corner of the interface you’ll see the Oscillator section, with Osc 1 selected by default. The first choice you can make is the Type of oscillator, which starts set to Basic. Click there and change the oscillator to Vector.
If you hit play while clicking and dragging around the XY pad that just appeared, you’ll hear instantly what vector synthesis does. It’s an easy crossfade between four different oscillators.
Click on the tiny little waveform button near the number 1 on the top left-hand corner of the XY pad and a waveform selection menu appears. Navigate to the Samples & Multisamples submenu, then click on Particular – Sound, and select the Lost In Space sample.
Repeat this process for waveform 2 on the top-right corner, selecting the same menu and submenu but this time choosing the Dronelabor sample, and repeat once more for the 4 waveform, this time choosing the Dronished sample.
Click in the middle of the vector oscillator’s XY pad to hear a mix of all the oscillators and you’ll hear this:
Step 4: Motion
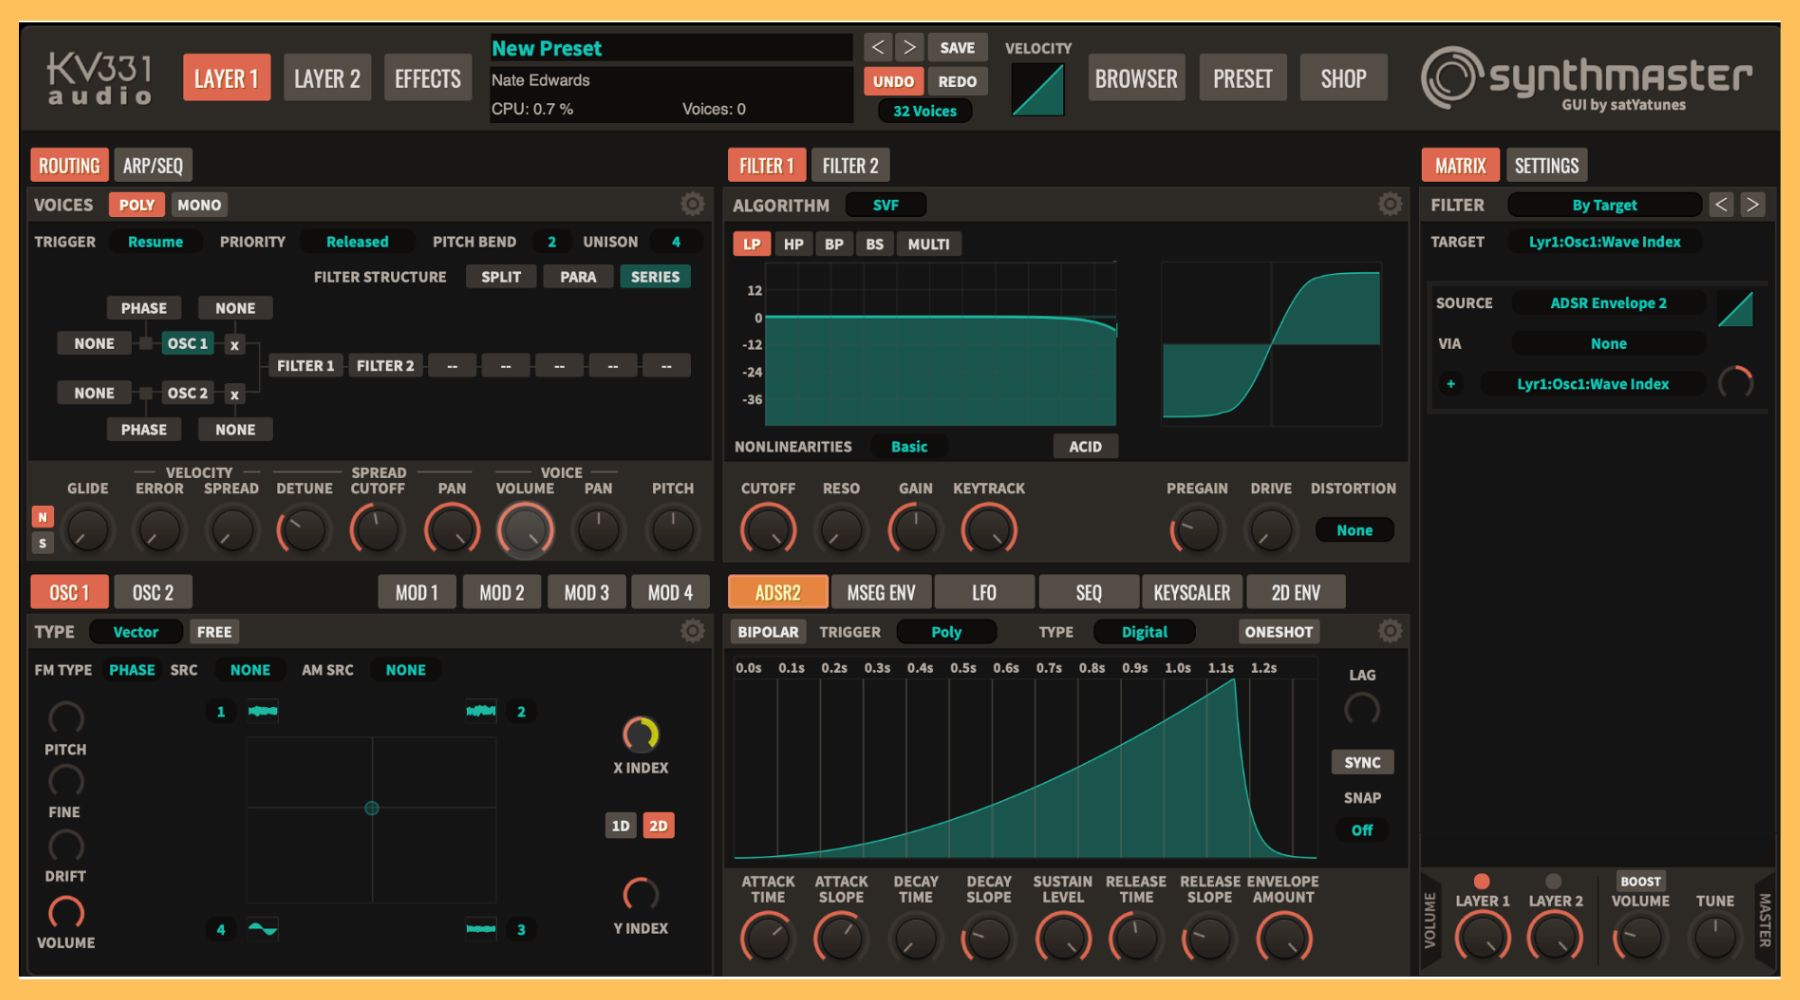
Now we’ll use the ADSR 2 envelope to modulate the relative balances of the four vector sources. In the oscillator section set the X Index to about 12 o’clock, then right click on the knob, select Add Modulation, Envelopes, ADSR Envelope 2. Follow the same procedure for the Y Index knob as well, mapping it to ADSR Envelope 2.
Then, in the Mod Matrix on the right side of the interface, make sure you match the settings to what you see in the picture below.
Finally, modify ADSR2 at the bottom of the interface, cranking the attack time up to about 1.15 seconds, turning Attack Slope up to about 2 oclock, and modfying the release so you see what you see below, and you should hear this:
Step 5: A Touch Of Processing
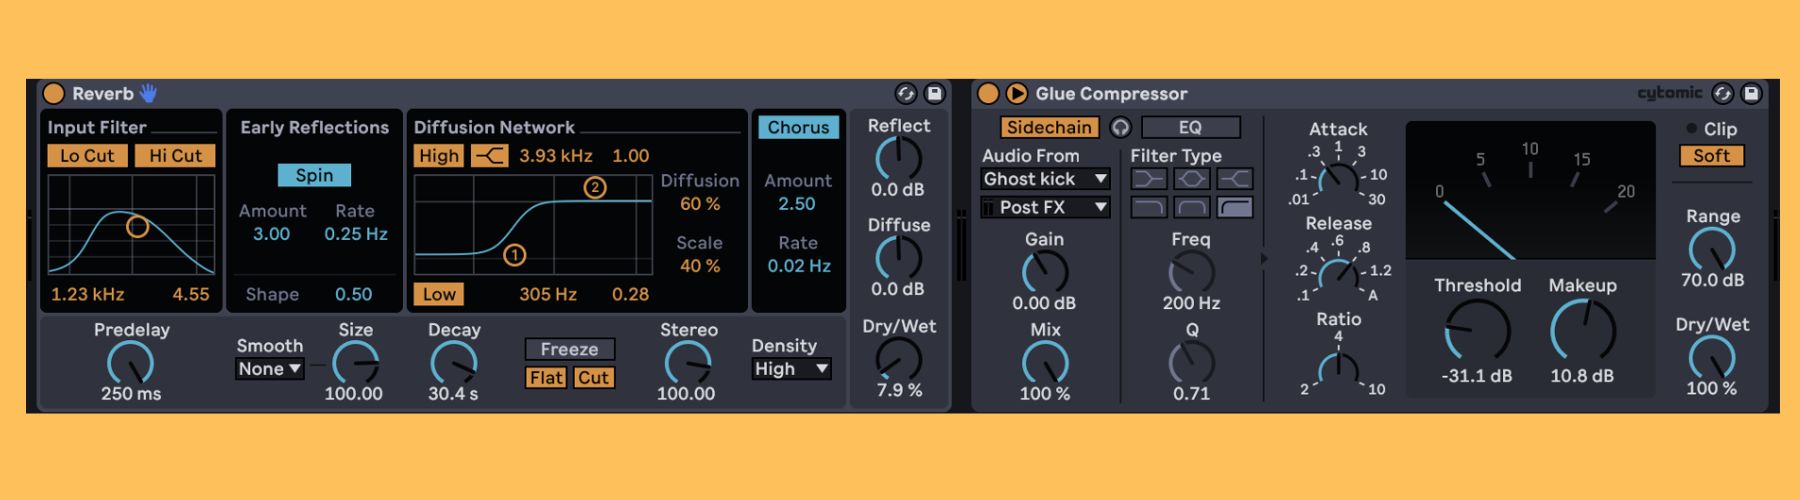
Finally, we’ll use a bright reverb with a long decay followed by a compressor sidechained to the kick in order to give it a pulsing feel.
Bring the beat back in, along with a simple bassline also created using SynthMaster 2’s vector synthesis engine (get the patch by signing up for emails and downloading the session!) and you’ll hear our final product.
This is just the tip of the iceberg. Using SynthMaster 2’s sequencers, its rich library of wavetables and samples, and great sounding effects, the possibilities are limitless.
To check out SynthMaster 2, head to KV331’s site.
*Attack Magazine is supported by its audience. When you purchase through links on our site, we may earn an affiliate commission. Learn more.