u-he are makers of award-winning software synthesisers and effects including Diva, Repro-1, Zebra2, Hive, Bazille, Presswerk and Satin.
Visit U-he
Technique » Synth Secrets »
Make Music Like Aphex Twin’s ‘Polynomial-C’ With SynthMaster2
This channel is sponsored by

In this Synth Secrets, we’re going to use KV331 Audio’s SynthMaster2 to recreate the sound and synths of Polynomial-C by Aphex Twin.
Today in Synth Secrets, we’re going to use KV331 Audio’s SynthMaster2 to get a sound that could easily be mistaken for vintage. Few softsynths are up to the challenge, but SynthMaster2 and its rich effects section and unique arsenal of oscillator waveforms offer a unique combination that will allow us to take a swing at recreating the iconic sound of the main arpeggio from Aphex Twin’s classic track Polynomial C.
Here’s the original:
Here’s the remake we’re working on today using SynthMaster2:
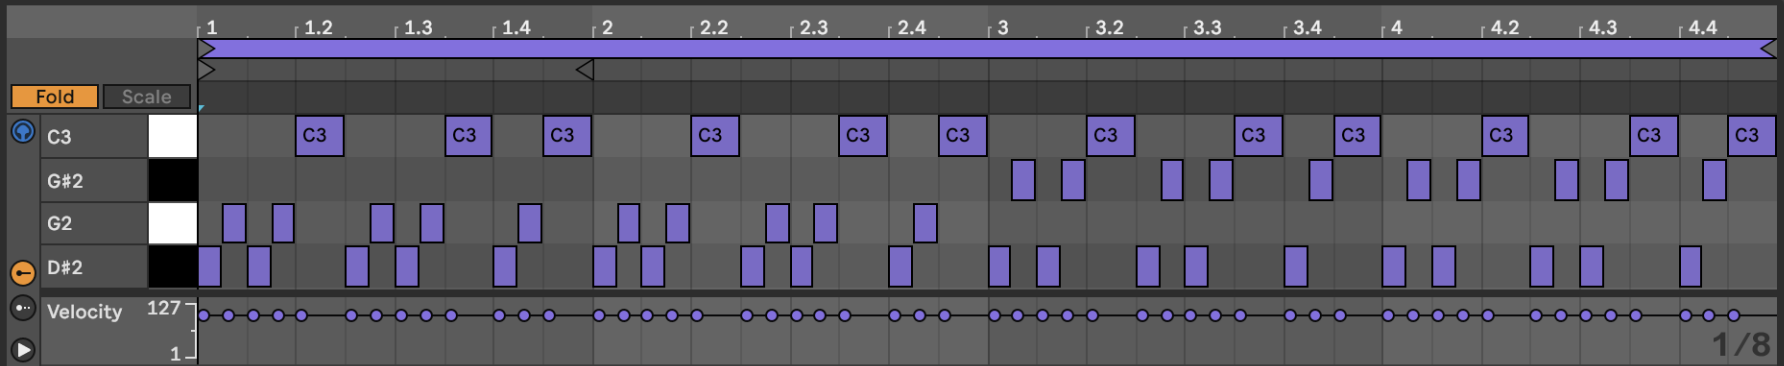
Here’s the MIDI we’ll be working with:
And if you want to follow along and you don’t already own SynthMaster, you’ll want to grab a free demo here.
As is the story with so many classic tracks, legend tells us that this arpeggio was crafted on a Roland SH-101. Though there are plenty of software recreations of Roland synths available, SynthMaster2 is far less limited than the classic two-oscillator Roland synth and it’s up to the task of invoking this sound in its own unique way.
Set your project BPM to 150 OR download the session and let’s go.
Download the session here:
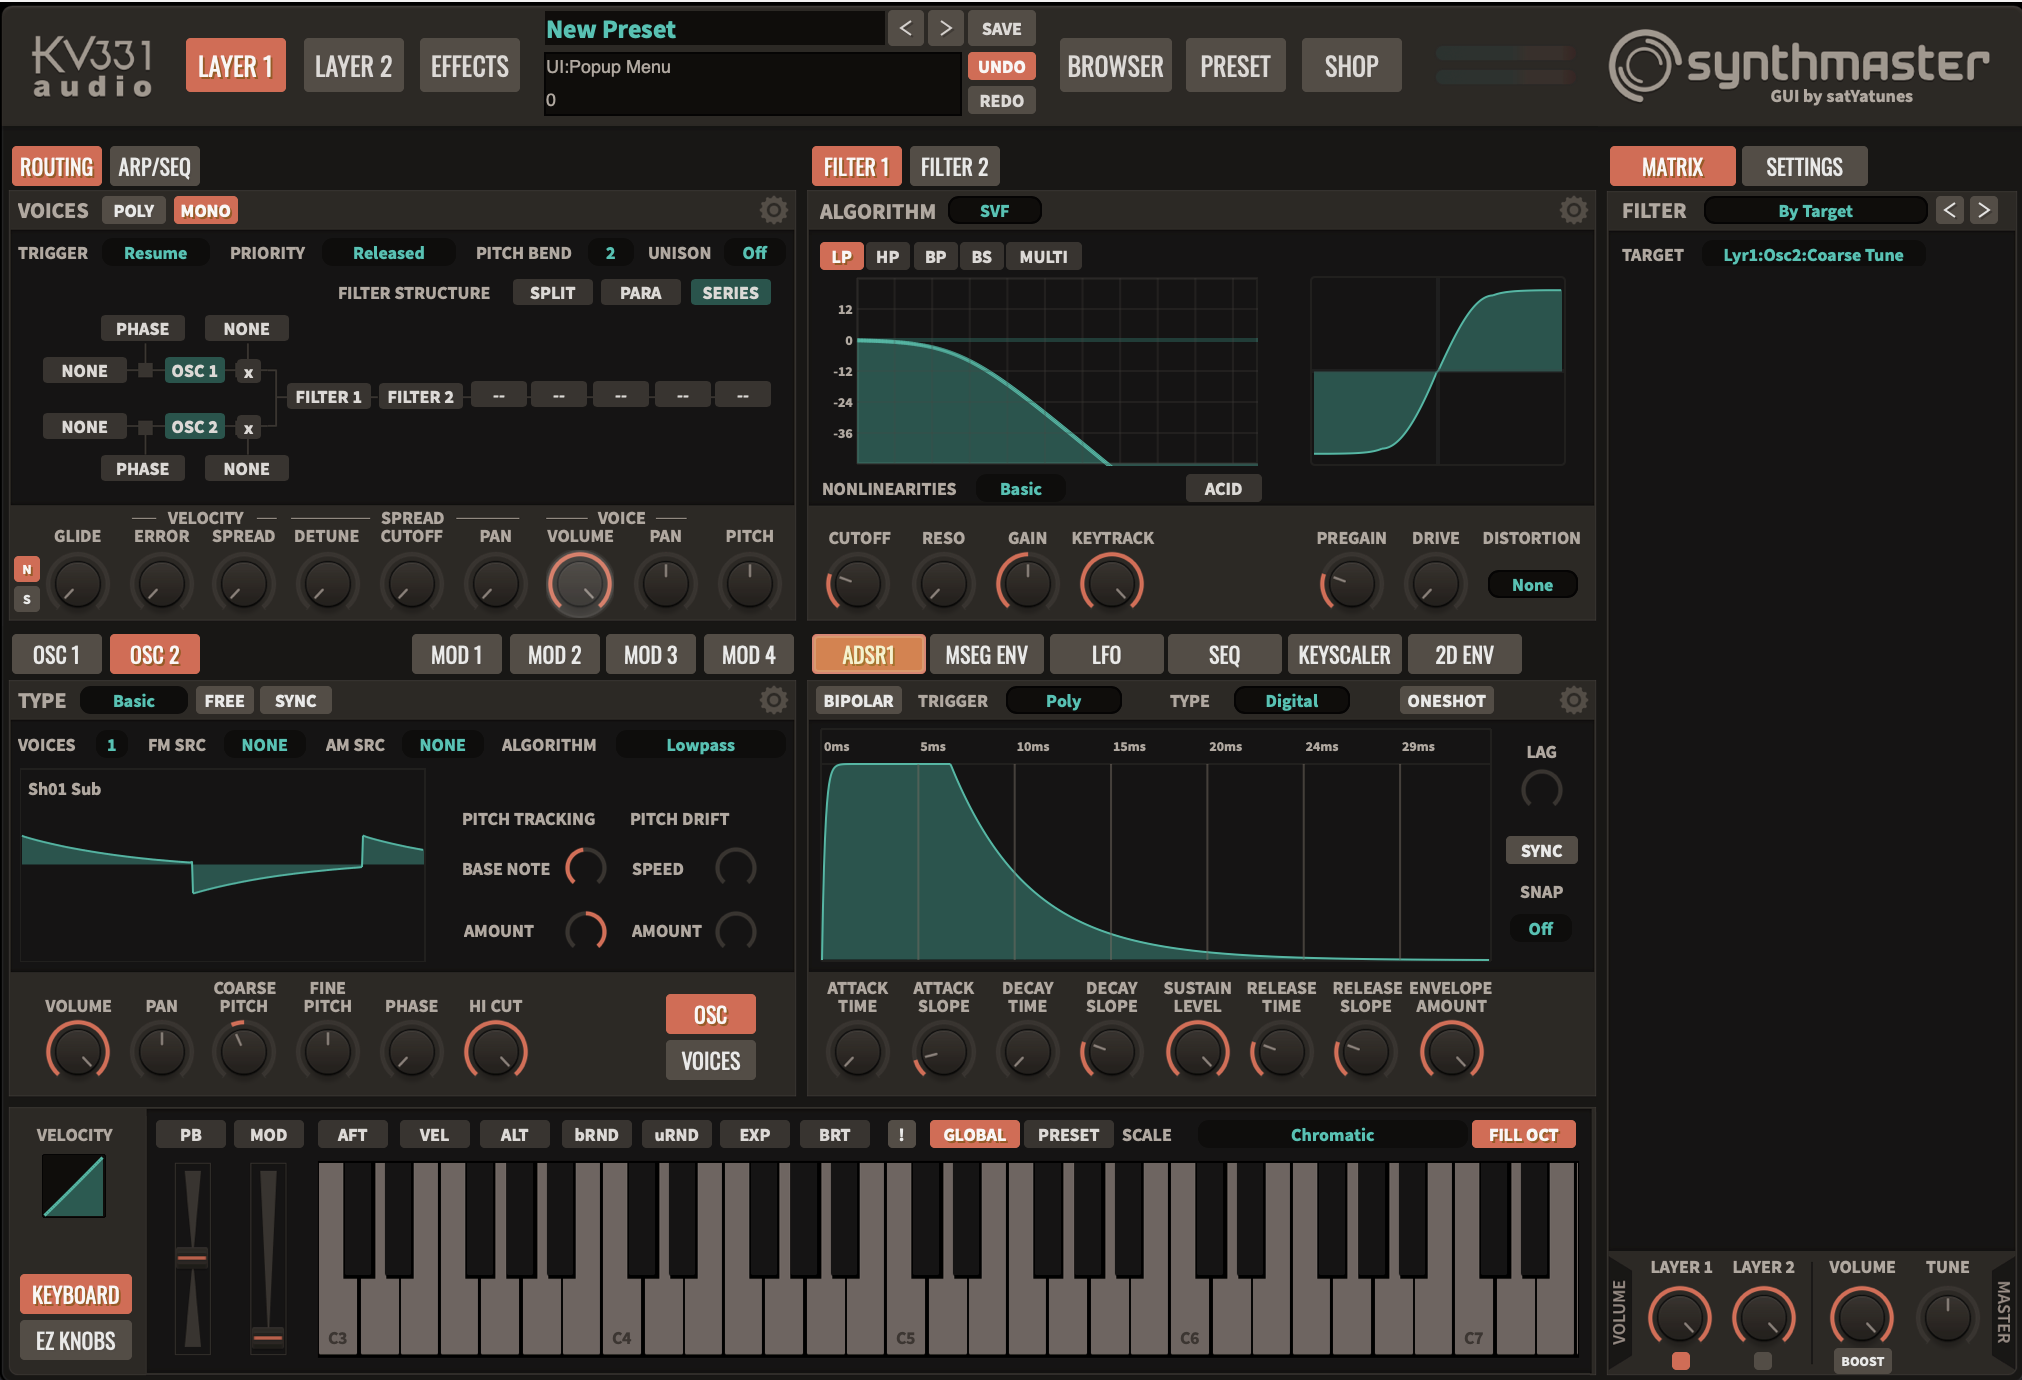
Step 1: Basic Voicing With SynthMaster2
First things first – click on the patch name on the top of the synthesizer and click on “Init Preset” to set all values to their defaults.
Then, in the top left section labeled “Layer 1,” we’ll switch the Voices mode from Poly to Mono. In that same section, click on Osc2 to activate Oscillator 2. Now down to the oscillator section in the bottom-left quadrant of the synth and click on the image of the waveform to open up the waveform browser. Under the Single Cycle Waveforms section, select the category labeled UHF, then choose UHF Leach for oscillator 1.
Staying in the lower left quadrant of SynthMaster, move from the Osc1 tab to the Osc2 tab. Click on the waveform, open the Single Cycle Waveforms section, this time select Analog, then the subfolder Sh01, and finally choose the Sh01 Sub waveform.
Now on the very bottom left of Synthmaster while still in the Osc2 tab, click on Coarse Tune and drag it down until you’ve lowered the pitch one octave. We’ve got a start:
Step 2: Setting the Envelope
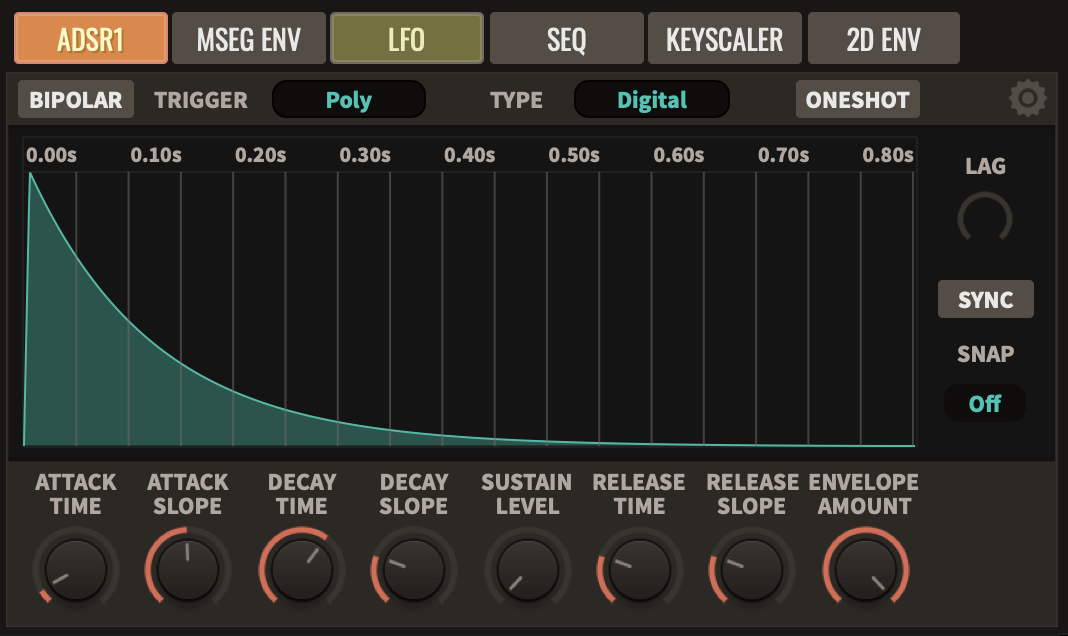
SynthMaster2 has a copious number of envelopes available that you can use to dive into wild territory, but for this sound we’re going to use the envelope ADSR1 to control both the volume contour and the filter cutoff of our sound.
In the envelope section, which lives in the lower-right quadrant of Synthmaster2, start by bringing the attack time up just a tiny bit and setting the attack slope at about halfway to max. Then push the Decay Time value to about 2 o’clock and pull the Sustain Level down to nothing. That should do it. Our progress so far and an image of what we’ve changed in the envelope section:
Step 3: Filter
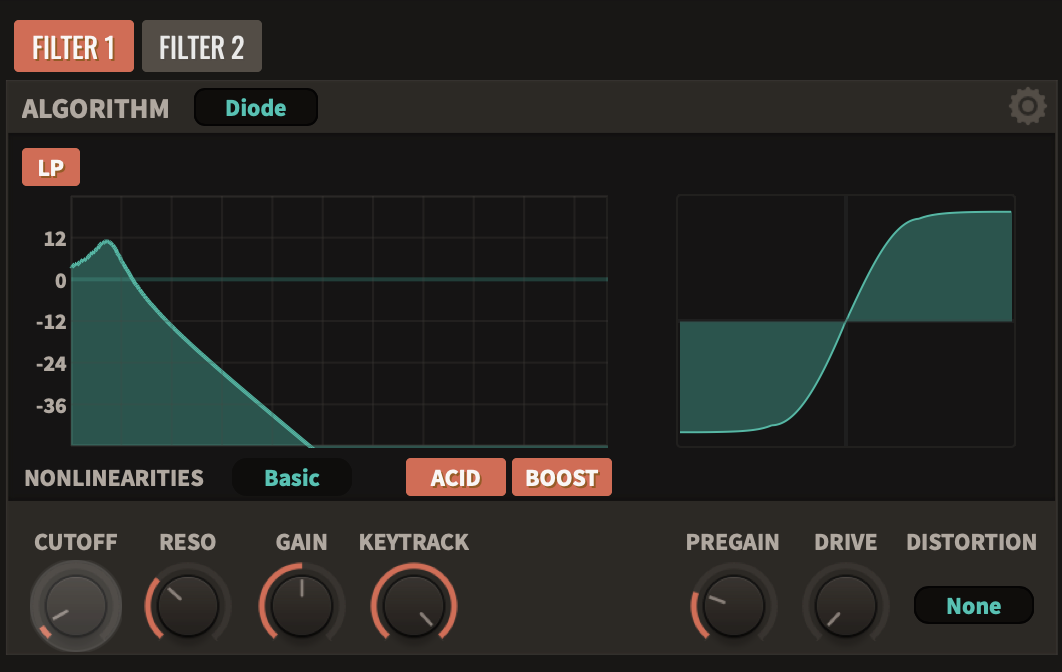
Here’s where SynthMaster2 really begins to show its colors. Its filter section sounds quite lush. First, we’ll focus our attention on the top-left quadrant of SynthMaster2, the “layer” section, where we’ll click on Filter1 in the signal flow diagram to activate Filter 1. Then we’ll move to the filter area which lives in the top-right quadrant of Synthmaster2.
In the filter section, we’ll change the filter algorithm from SVF to Diode Ladder. Then we’ll pull the cutoff down to about 8 o’clock, push the resonance knob up to about 10 o’clock, and engage both the Acid and Boost toggles.
We’ll route the same envelope we used in the last step to the filter cutoff by right-clicking on the cutoff knob, going to the Add Modulation menu, selecting Envelopes, and finally selecting ADSR Envelope 1. Here’s what we should be hearing and seeing at this point:
Step 4: Minor tweaks
You’ll notice there’s a panel all the way to the right of SynthMaster2 that has a Matrix tab and a Settings tab. When you click on any parameter that’s modulated by another component of SynthMaster2, the modulation settings will appear in that Matrix tab. Click on the filter cutoff in filter 1 and you’ll notice that the assignment we just made appears in that Matrix section:
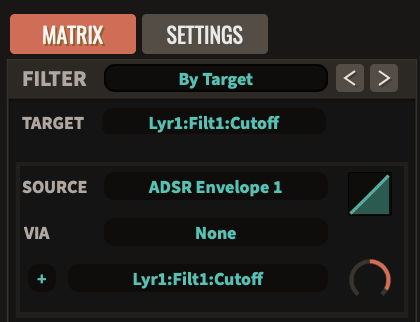
Notice that the little knob on the right is turned to max. That indicates that the envelope we’ve assigned to modulate the filter cutoff is operating at max strength. Let’s back that off to about 1 o’clock so the filter modulation is a bit more subtle

Step 5: Adding Space With SynthMaster2
This is when everything really starts falling into place.
At the very top-left corner of SynthMaster2 we see three tabs we can toggle between – Layer 1, Layer two and Effects. Let’s select the Effects tab and start adding some space to this patch. Start by right-clicking in the first empty cell in the Insert 1 section of the Layer FX routing area, and select “delay” as pictured below.
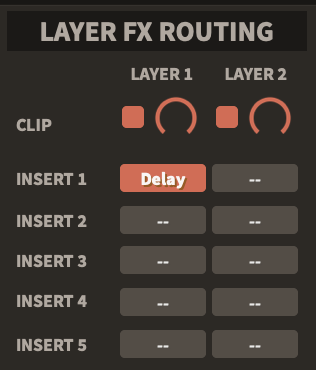
Then, change the Mix, FB, and Delay Left settings to match what you see below

Now right-click on the first empty cell of insert 2 and select Reverb. Move the Mix, Distance, and Time knobs until they reflect the settings you see here:

We’re getting closer. Our progress so far:
Step 6: LFO movement
To add some more interest, let’s modulate the filter cutoff with an LFO. On the top left, go back to the Layer1 tab, then head to the filter section and right-click again on the cutoff knob.
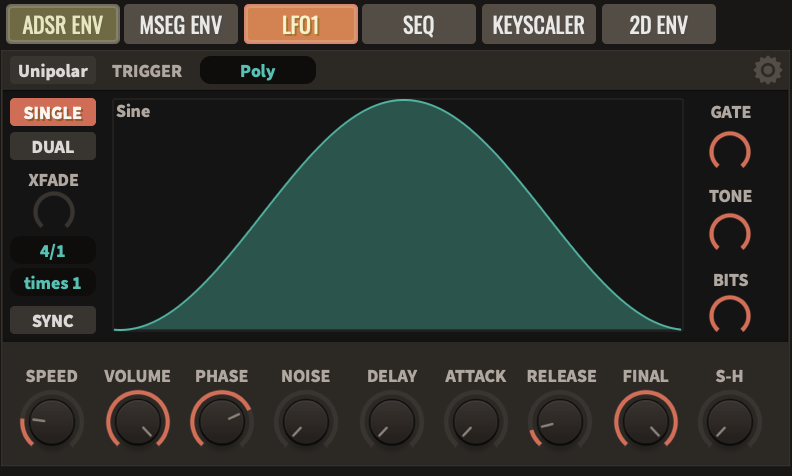
Select Add Modulation, head to LFOs, and select Synth LFO 1. The LFO should pop up on the bottom-right quadrant of the interface.
Change the Speed and Phase settings until it matches what you see below, and make sure to change the trigger mode from Poly to Mono, otherwise the LFO resets every time a note is triggered
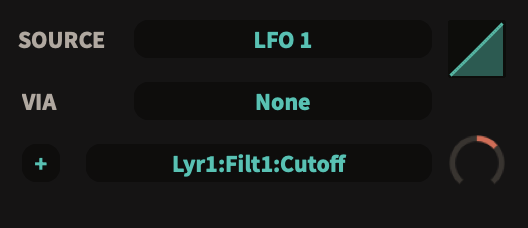
Then click on the Cutoff knob on Filter 1 so that all of the modulation sources for Filter 1’s Cutoff appear in the Matrix tab on the right.
Much like we did earlier with the envelope settings, roll back the LFO’s intensity until you see something like this:
Now we’ve got something that sounds just about right.
Now let’s bring in some synth strings and a drum loop – Richard sampled Simon Harris’ Dopejam for the original tune and we’ll approximate the sound using Ableton’s Madder Beats pack and a tambourine loop from the core library. You’ll hear it’s pretty close to the real thing. Not bad for a softsynth!
*Attack Magazine is supported by its audience. When you purchase through links on our site, we may earn an affiliate commission. Learn more.
Synth Secrets is sponsored by
u-he are makers of award-winning software synthesisers and effects including Diva, Repro-1, Zebra2, Hive, Bazille, Presswerk and Satin.
Download the demos and try them for yourself at www.u-he.com