u-he are makers of award-winning software synthesisers and effects including Diva, Repro-1, Zebra2, Hive, Bazille, Presswerk and Satin.
Visit U-he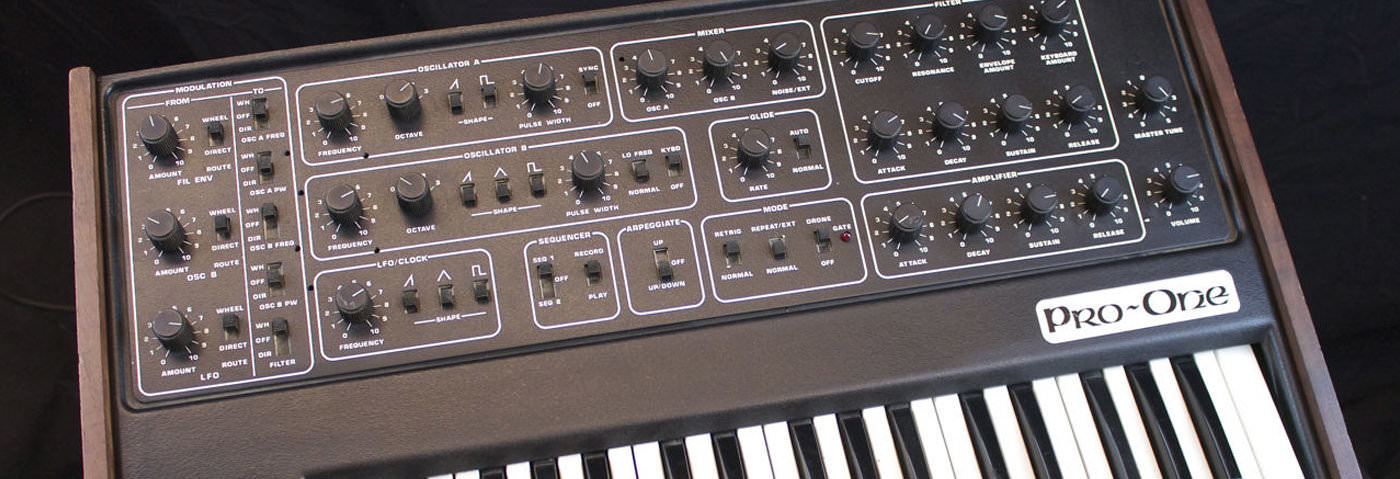
Technique » Synth Secrets »
Tech-House Bass With U-he Repro-1
This channel is sponsored by

Synth Secrets is a series of programming tutorials in which we show how to make a range of classic and new synth sounds using plugins such as Massive, Sylenth and Diva.
In this instalment of Synth Secrets we’ll be using the public beta version of U-he’s new Repro-1 synth to create this tech-house bass sound:
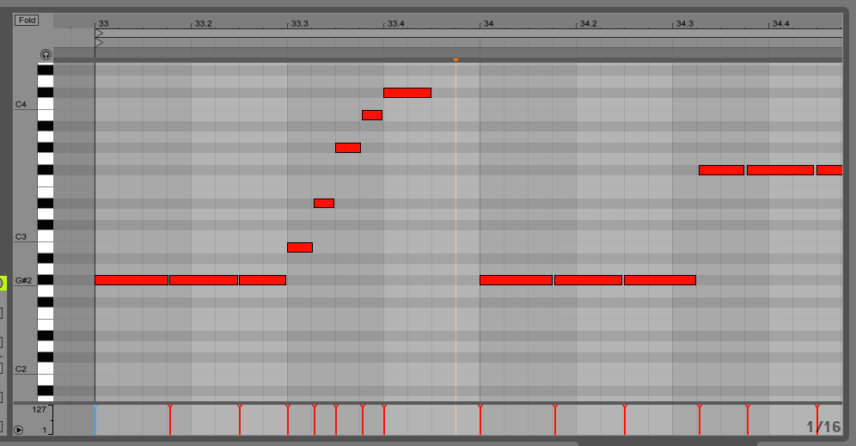
Here’s the MIDI part we’ve used for the bass hook, in the key of G# minor:
Step 1
Repro-1 is a software emulation of Sequential Circuits’ classic Pro-One monophonic analogue synth. However, U-he have added a number of great extra features, some of which we’ll take a look at in this walkthrough. Like the original synth, which was a cross-genre classic from the time of its release in 1981, Repro-1 is capable of a range of outstanding analogue sounds.
When you load a new instance of Repro-1 it should have the init preset loaded by default (the init patch can also be loaded from the presets section).
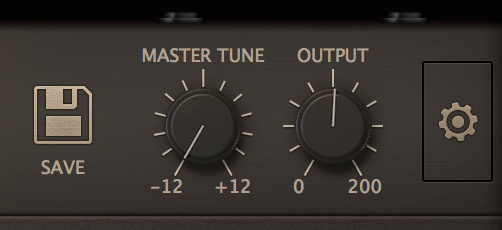
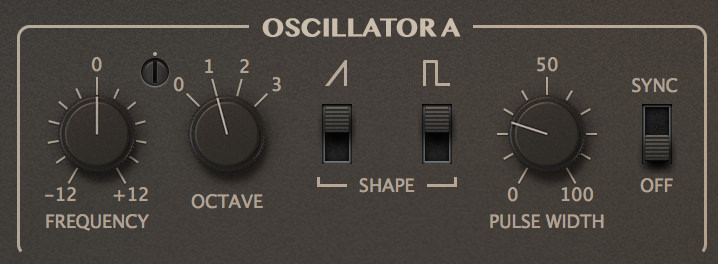
We begin by taking the patch down an octave using the master tune control (found in the top right corner), which should be set to -12. Then on oscillator A, we have a choice of either a sawtooth or pulse wave (the pulse having some pulse width options). We click the pulse wave so we have a saw and a pulse playing simultaneously, then we turn down the pulse width control slightly. The pulse width setting can be modulated to the left of the synth – either directly or via a mod wheel – if you want to add pulse width modulation to your sound.
Step 2
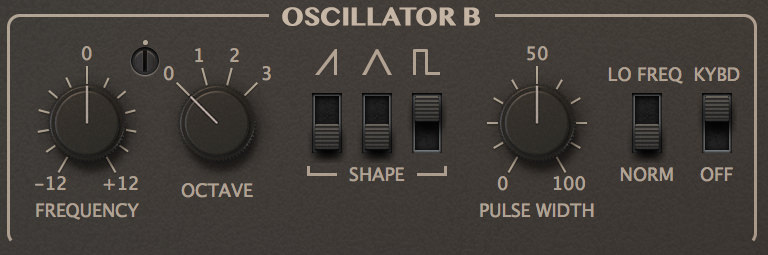
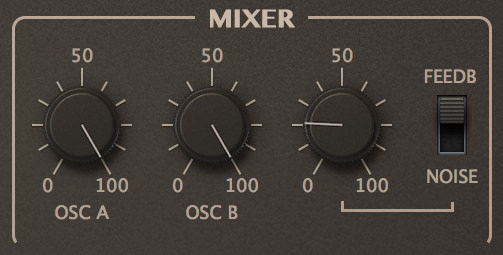
On oscillator B we have the option of a saw, triangle or pulse wave. We switch the saw wave off and turn on the pulse wave. We also take the oscillator down an octave for a more bass-driven tone. Over in the mixer section we turn up the volume for osc A and osc B. To the right of the oscillator volume controls we have a switchable feedback/noise control. Set to noise and the control is a volume for the noise generator, set to feedback and this knob controls the amount of signal fed from the amplifier section back into the mixer, perfect for adding some weight to bass sounds. We turn this up to a quarter of the way.
Step 3
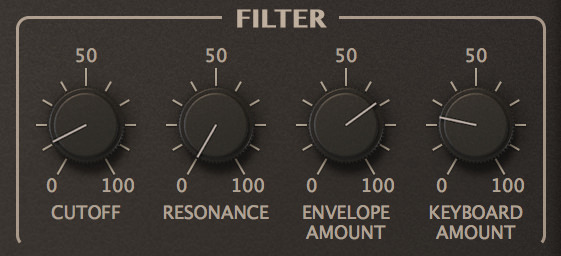
Now on the filter section, we take the cutoff nearly all the way down, and then turn up the envelope amount, thus applying the filter envelope to the cutoff parameter.
We also turn up the keyboard amount control a little, which applies keytracking to the filter cutoff, meaning the filter will automatically open a little more as we play notes higher up the keyboard. This works nicely with our bass hook – the low notes play a bit deeper, whilst the higher notes open up the filter slightly.
Step 4
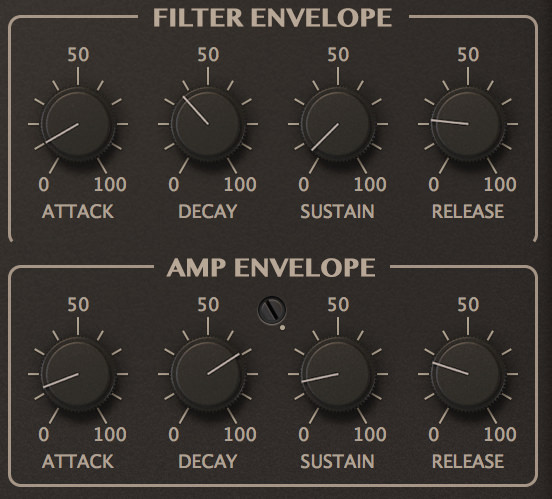
Now it’s time to set both the envelopes to shape our sound. We begin with the filter envelope. Keeping the attack where it is, we bring down the decay to a third of the way round, bring down the sustain nearly all the way, and keep the release where it is.
For the amp envelope we push up the decay control slightly and bring down the sustain to just below a quarter. The sound is very deep and plucky now, and would be a useful sub sound in its own right, but we’re going to add some grit the next section using Repro-1’s stompbox effects.
Step 5
Although not faithful to the original Pro-One, the stompbox effects are a welcome addition, each one having a character all of its own. At the bottom of Repro-1 we can switch between the keys and effects views. By default the keys view will be displayed. Click on the effects button on the left to bring up the effects.
We begin by turning on Jaws, a waveshaping effect of epic proportions. We turn up the Folds setting slightly to drive the input, then we turn the Teeth knob to the fully clockwise position for a different type of distortion effect. We turn up the F-mod control to three quarters, which applies an envelope to the Folds control. Finally, we turn up the R control for added release to the F-mod envelope.
Next we turn on Lyrebird, a delay/chorus effect. We click where it says Sync 16th and select Chorus/Short from the drop-down menu. We change the mode from PPong to Echo, bring the Time control down to 1.26, the Mix to 14.50 and take the modulation switch up to Med for a subtle but warming chorus effect on the bass.
Next we turn on the RESQ effect, boosting the low shelf for some added bass.
Finally we turn on Sonic Conditioner – it’s capable of transient shaping and controlling width, but in this case we’re simply going to turn up the gain control in order to add a nice touch of saturation.

Synth Secrets is sponsored by
u-he are makers of award-winning software synthesisers and effects including Diva, Repro-1, Zebra2, Hive, Bazille, Presswerk and Satin.
Download the demos and try them for yourself at www.u-he.com