u-he are makers of award-winning software synthesisers and effects including Diva, Repro-1, Zebra2, Hive, Bazille, Presswerk and Satin.
Visit U-he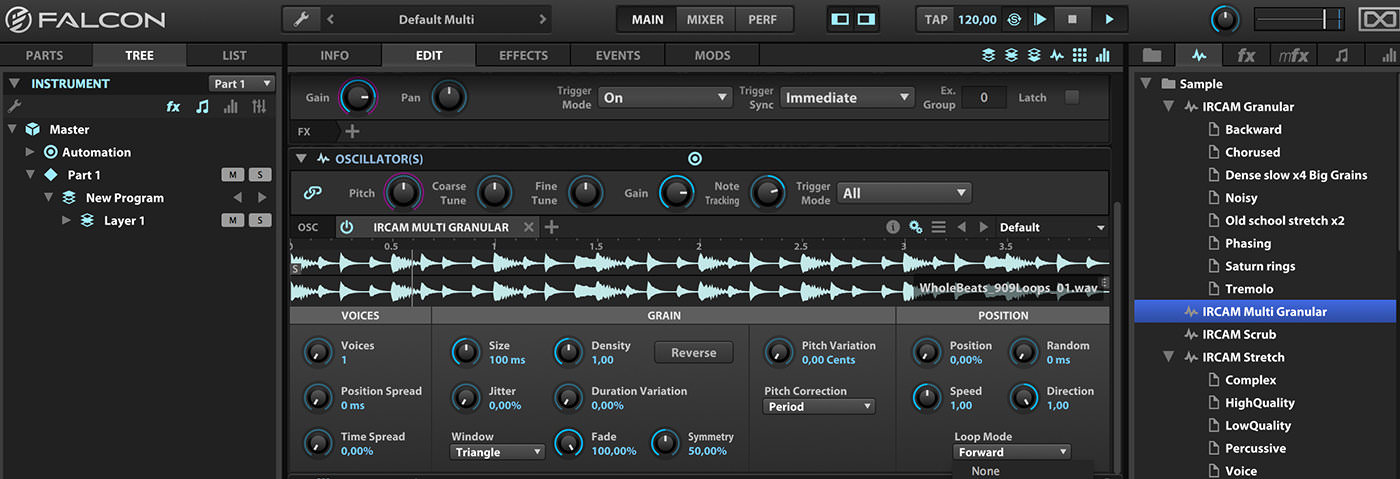
Technique » Synth Secrets »
Granular Synthesis with UVI Falcon
This channel is sponsored by

Synth Secrets is a series of programming tutorials in which we show how to make a range of classic and new synth sounds using plugins such as Massive, Sylenth and Diva.
In this instalment of Synth Secrets we’ll be exploring some of the potential of the granular synthesis features in UVI’s Falcon plugin. We’re going to create the following effect:
We’ve created this effect using this basic drum loop taken from Samples From Mars’s 909 Loops From Mars pack:
Step 1
Our previous Synth Secrets on Falcon covers the basics, so if you’re not familiar with the structure of Falcon and want to follow along it might be advisable to go through that feature first to avoid any confusion.
First off, we load a new instance of Falcon, and then we load the IRCAM Multi Granular instrument onto our empty Layer. We map the Granular instrument right across the keyboard. In order for us to use the instrument we need to load a sample, so in the box where it says “No Sample Drag and Drop a Sample here” we load our ’WholeBeats_909Loops_01’ audio from 909 Loops From Mars.
Trigger the sample at C2 and it plays back at normal pitch. If you trigger another note you’ll hear granular synthesis at work already – not only will the sample trigger at a different pitch but you’ll also begin to hear the granular textures on the sound, more noticeable the further you stray from the original pitch of C2.
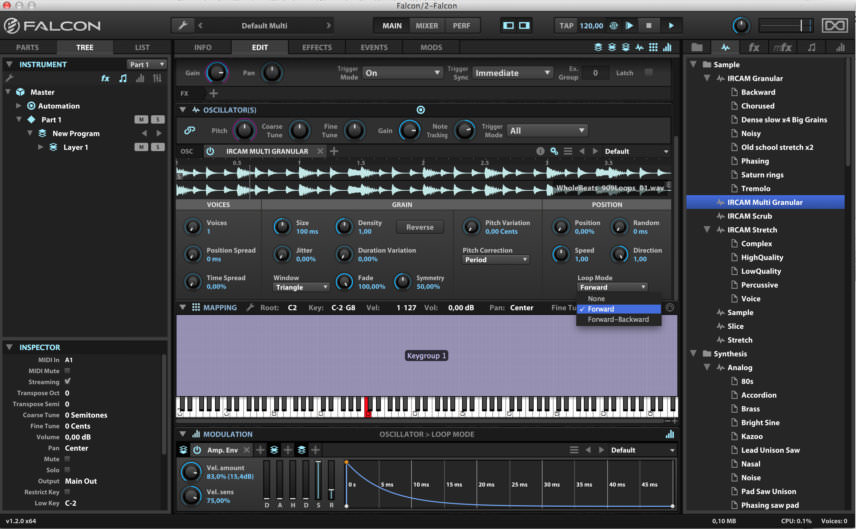
If you’re wanting to work with loops in IRCAM Multi Granular and match them to your project tempo, you’ll need to activate one of the Loop Modes (Forward or Forward > Backward) and also match the tempo of your loop to your host DAW tempo.
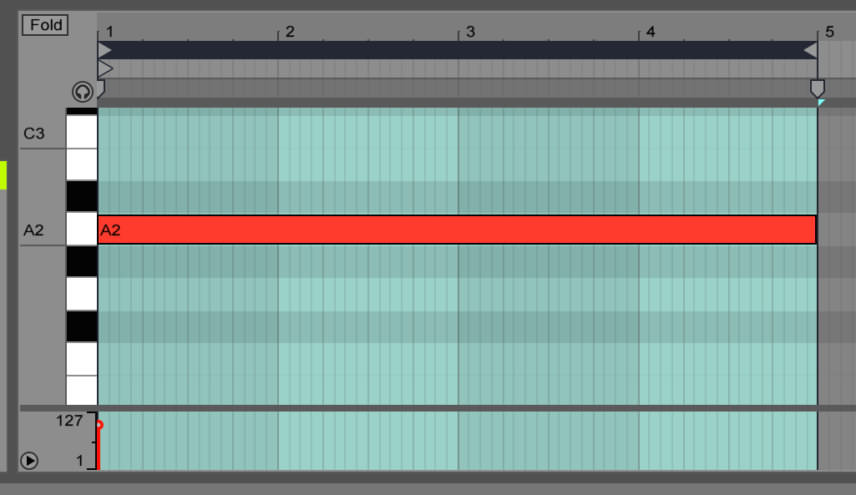
We use a simple A2 note dragged out for two bars to trigger our sample. The drum loop plays back in time with the project as we’ve matched the tempo in our host DAW to the tempo of the drum loop (120bpm).
Step 2
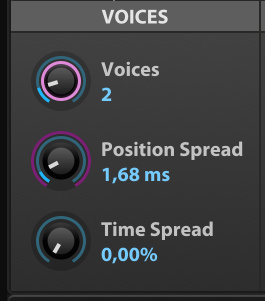
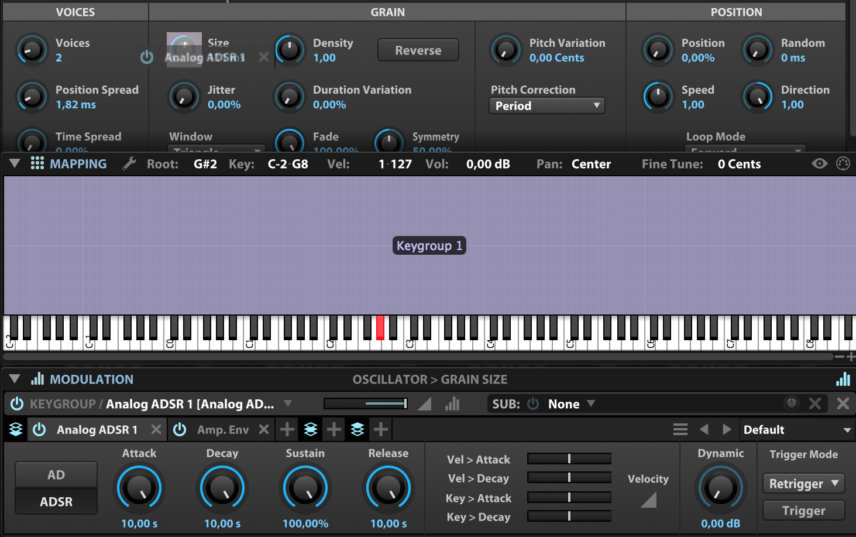
Granular synthesis splits the audio into small ‘grains’ which are then re-combined and played back in new ways, depending on the chosen parameters, which can result in all kinds of different textures and otherworldly effects. We begin in the Voices section of IRCAM Multi Granular. With just one voice, playback will be similar to the more basic IRCAM Granular instrument, but with the Multi Granular we can set multiple voices for more interesting results.
We set the Voices control to 2, and then set the Position Spread to 1,68 ms which adjusts the start point in the sample, resulting in a flanger-type effect. Experiment with longer Position Spread times for more twisted effects.
Step 3
Now we turn our attention to the Grain section. The Size control sets the duration of the grains, while the Density determines how many grains will be played at once. Experimenting with these two controls will result in some very interesting textures, especially when combined with the Jitter control that varies the timing of the playback of the grains. We opt to keep things pretty much as they are in the default setup, just tweaking the Size slightly to 111 ms. However, we then modulate the Size control with an analogue-style ADSR envelope to trigger increased movement.
Modulation can be set up by clicking on the + icon in the Modulation section at the bottom, then selecting Analog ADSR from the menu. An envelope is created in our modulation section, which we can drop onto other controls in order to modulate them. We direct it to the Size control of the Granular instrument, and then set the envelope with the slowest possible attack, and a full decay, sustain and release. Now the Size control slowly increases as we trigger and sustain a note.
Step 4
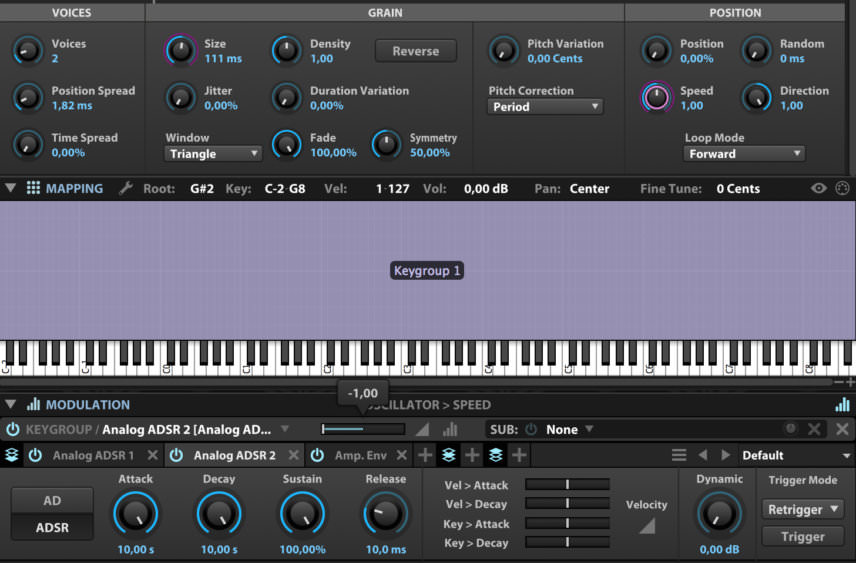
In the Position section, we have a few more controls that determine some of the playback behaviours of the sample. The Speed control sets the scrubbing speed factor (the speed at which playback will cycle through the sample). Setting this to 1.00 (as it is by default) means the sample plays back at normal speed. However, if we move this control in either direction it will either speed up or slow down the scrubbing speed.
Playing back our sample and slowing down the Speed control in real time we can hear some really interesting effects. With really slow speeds you can hear the individual grains of sound the sample is broken up into (these can create some very interesting synth sound in their own right).
We decide to use another modulator to control the Speed setting, creating a new Analog ADSR with identical controls as the last, only this time we reverse the direction of the modulation, so that the playback speed decreases over time, giving us a nice evolving effect.
Step 5
One final modulation could be added to this sound to really ramp up the intensity of the effect as it progresses, and that’s modulation of the pitch control. This time we opt for the Multi Envelope modulation source as this offers us much more precise control over time.
We set up a Multi Envelope just as we did with the Analog ADSR and use it to modulate the Pitch control in the Oscillator section, found above the IRCAM instrument on our Layer.
We back the Attack setting right off, and curve the attack stage of the envelope by clicking and dragging down on the line. We also bring down the Speed setting in Multi Envelope. This slows down the scrubbing speed of the envelope, meaning our pitch modulation is only introduced right at the end of the sound.

Step 6
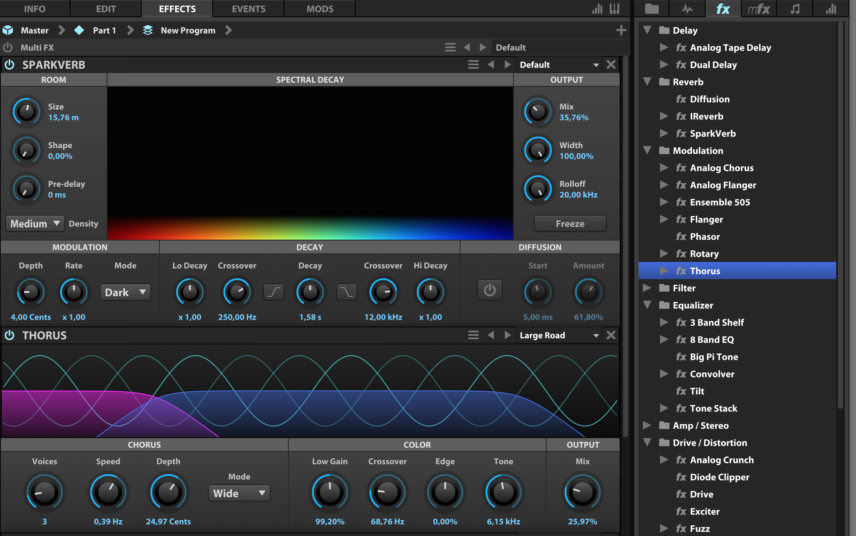
It would be a crime not to utilise Falcon’s outstanding effects with this sort of sound. Over on the Effects page, we load Sparkverb, setting the Size to 15,76 m and the Mix to 35,76%.
We then load the Thorus plugin for some increased depth and width, loading the ‘Large Road’ preset. We take the Mix on Thorus down to 25,97% for a more subtle effect, but dial down the Crossover to 68,76 Hz to apply the effect to the low mids as well as the tops.
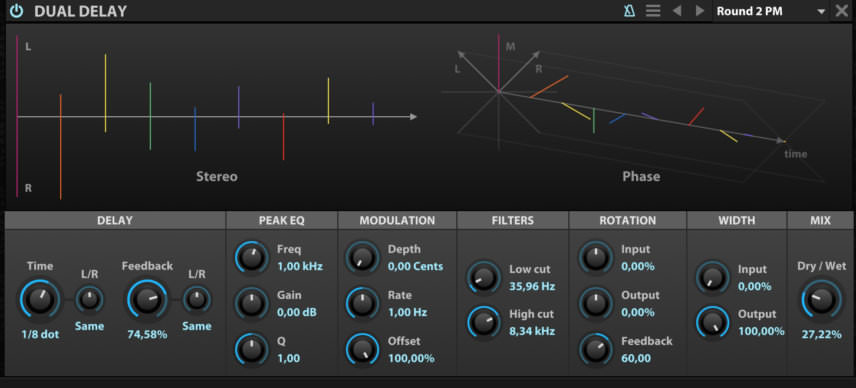
Finally we add a Dual Delay effect, selecting the ‘Round 2 PM’ preset from the Stereo Delay section. We take the Dry/Wet control of the delay down to 27,22% for a less smeared effect.
The effects finish the sound off nicely, adding a very big and spacious feel.
Synth Secrets is sponsored by
u-he are makers of award-winning software synthesisers and effects including Diva, Repro-1, Zebra2, Hive, Bazille, Presswerk and Satin.
Download the demos and try them for yourself at www.u-he.com