u-he are makers of award-winning software synthesisers and effects including Diva, Repro-1, Zebra2, Hive, Bazille, Presswerk and Satin.
Visit U-he
Technique » Synth Secrets »
Remake The Synth From ‘We Do What We Want’
This channel is sponsored by

It’s a bonafide techno classic. One of the most iconic tracks from the brilliant Alan Fitzpatrick. Time to take it apart and rebuild the main synth using Hive 2 by u-he.
In this installment of Synth Secrets, we will make a rave-ready techno lead heavily inspired by Alan Fitzpatrick’s ‘We Do What We Want.’
It’s a timeless sound with an old-school vibe that you could create with just about any capable synthesizer and a few effects, but we will be using u-he’s eminently capable Hive 2 and its lovely-sounding onboard effects suite to get just what we want.
Set your DAW’s tempo to 126 BPM, use the MIDI pictured below for the lead patch, and take a listen to what we’re going to make:

Remember, click any image to enlarge.
Step 1: Voice 1 basics and global settings
First things first, open Hive and initialize the patch by either clicking on the preset name at top center and selecting “init” at the very bottom of the patch list, or by simply right clicking on that same spot and selecting the only option that appears – “init.” Good idea, init?
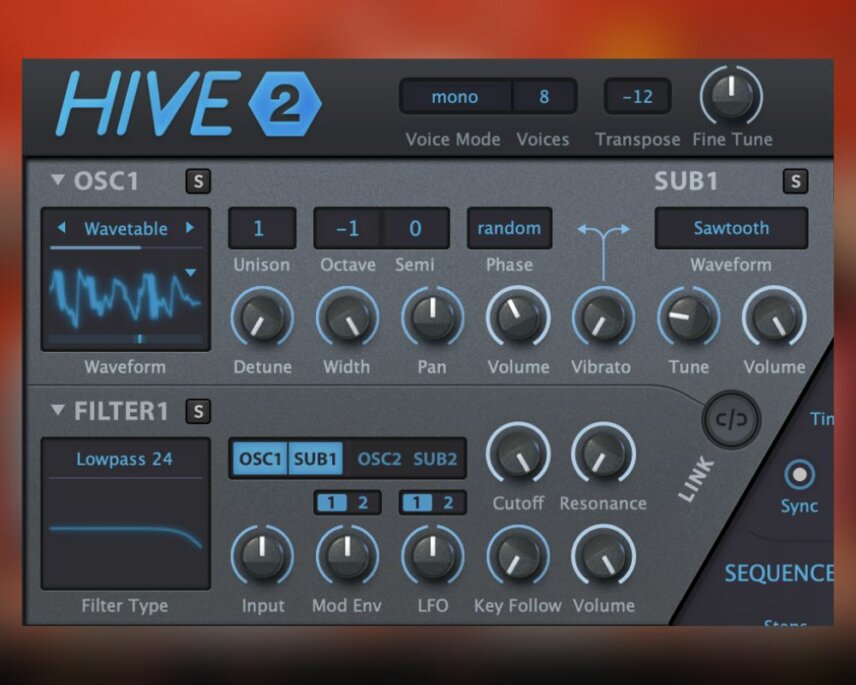
Now at the very top of the interface change the “Voice Mode” to mono.
Move down to oscillator 1 and change the waveform from the default Sawtooth to Wavetable. Then click on the little downward-pointing arrow that appeared on the waveform to open the wavetable selector, move to the complex category and select electrify. Now we’ll move that wavetable position (the slider on the bottom of the waveform) a touch past the halfway point. Then turn oscillator 1’s volume down to about 10 oclock.
Still in the OSC1 section, select -1 for the octave value, then move a bit down on the interface to the AMP1 section and pull sustain down to about 20 percent, also pull release down just a touch.
Finally, route sub oscillator 1 through filter 1 by activating SUB1 (click on the SUB1 button to the right of the FILTER1 display). Now that you can hear what you’re doing with it, go up to the SUB1 section, change the shape to Sawtooth, and keep the volume turned up all the way.
Progress so far:
Step 2: Filter time
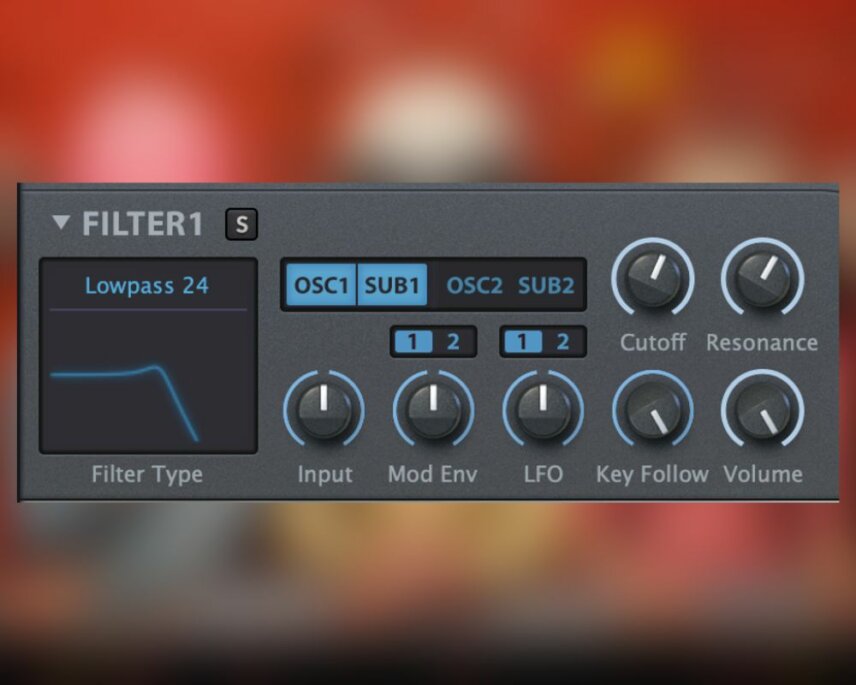
In the FILTER1 section we’ll turn both cutoff and resonance to about 1 or 2 o’clock, and turn Key Follow up to 100%. Key follow will modulate the filter cutoff frequency based on the MIDI note that’s played, and this gives us something dynamic and moving that spices up the sound.
Step 3: A second voice
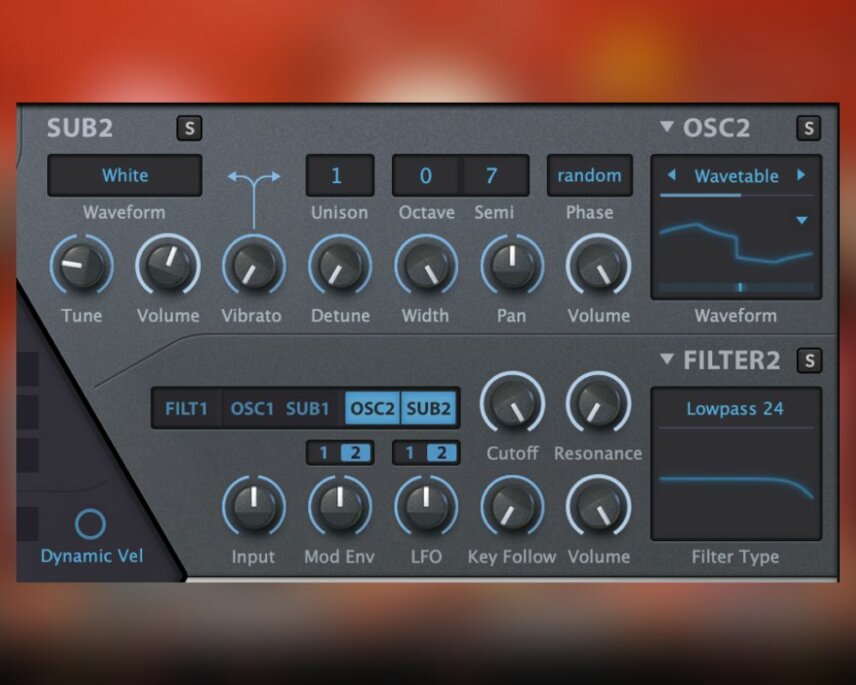
Let’s move over to oscillator two and create a second voice. By default, oscillator 2 isn’t active, but by clicking the OSC2 button near the FILTER2 readout you’ll activate it and route it through filter 2 (and the second amplifier section, and ultimately to the main output). Once you’ve clicked OSC2 and made it audible, you’ll want to change the Semi value to 7, pitching oscillator 2 up seven semitones and giving us a harmony note that’s a perfect fifth up from what oscillator 1 is generating.
As we did with oscillator 1, change the waveform to wavetable, and this time move to the Simple category of waveforms and select Six Waves. Set wavetable position to a bit past halfway for some sine/saw/square hybrid that sounds just right in this setting.
Then we’re going to activate sub oscillator 2 by clicking the SUB2 button near filter 2, and we’re going to change sub oscillator 2’s waveform from the default to White, giving us some noise to play with. Turn sub oscillator 2’s volume down to just over 50 percent.
A final fine tuning of this second voice has us move down to the AMP2 section and pull sustain down to about 40 percent and reduce the release value ever so slightly from the default value.
Step 4: Whistle a tune
Now we’re going to use filter 2 to give us a kind of whistling effect that really ties the sound together.
Adjust the cutoff value of filter 2 to about 55 percent, crank the resonance up to about 75 percent, max out the Key Follow value, and now when you play the notes you’ll hear a kind of whistling that mirrors the melody and adds further movement and interest to the sound.

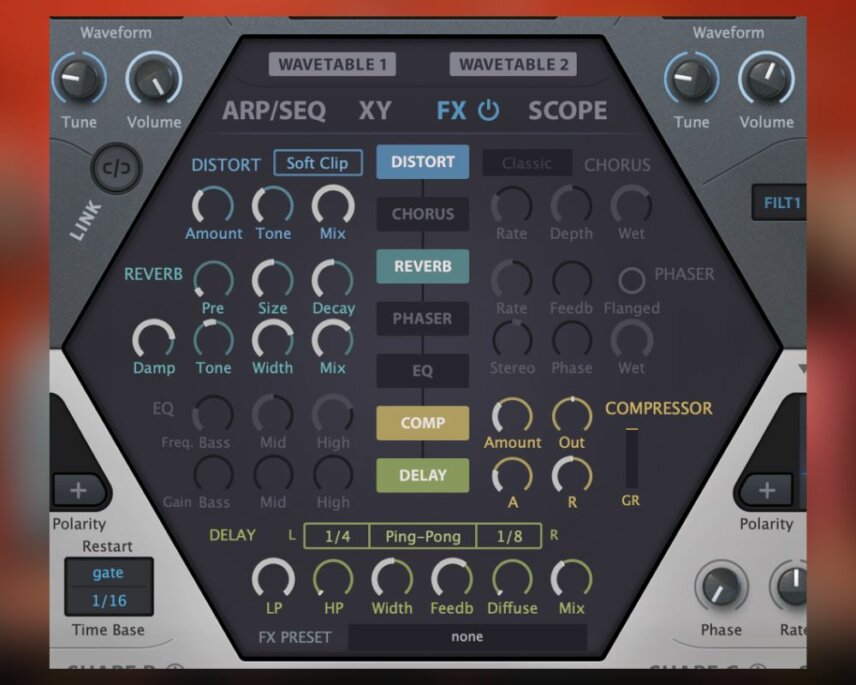
Step 5: Add grit
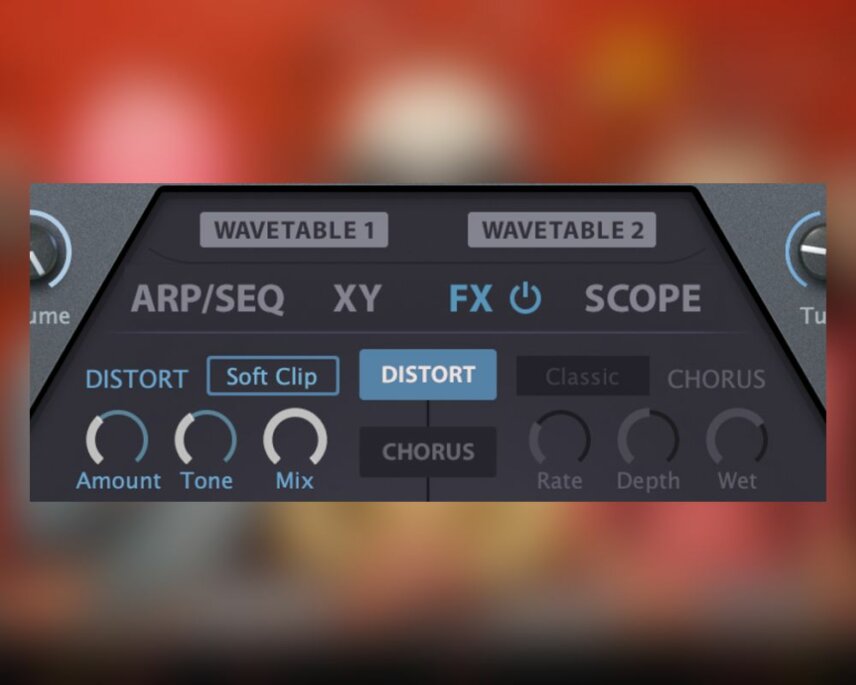
Using effects, we’ll put the finishing touches on this sound. Hive’s great FX section is accessed by clicking on the letters FX in the center of the interface. The first effect we’ll add is distortion. Just click on the word DISTORT to turn it on. Then crank the amount up to about 40 percent and bring the tone down to 10 o’clock. This really adds an edge and blends the different oscillators into one cohesive whole.
Step 6: Add space
Activate the reverb now, and don’t change anything but the mix. You’ll turn that up to about 2 o’clock.
Now activate the compressor and turn Amount up to about 10 o’clock, which will make the reverb effect all the more evident.
Finally, activate delay. Change the left timing value to ¼, the right timing value to ⅛, and turn the feedback up to about 2 o’clock. Then turn the diffuse knob down to zero so we have a very sharp and focused delay sound. Finally turn the mix up to between 40 and 50 percent, and we have our final result.
Adding some rave-ready percussion, compliments of a stock Ableton kick sample and Splice loop TVD_120_resampled_break_double and you’ll hear it working in its natural habitat.
Remember that you can download a fully functional demo of Hive2 (and u-he’s other fantastic synthesizers like Diva and Zebra) at u-he.com. Have some fun!
Follow Attack Magazine
Synth Secrets is sponsored by
u-he are makers of award-winning software synthesisers and effects including Diva, Repro-1, Zebra2, Hive, Bazille, Presswerk and Satin.
Download the demos and try them for yourself at www.u-he.com