u-he are makers of award-winning software synthesisers and effects including Diva, Repro-1, Zebra2, Hive, Bazille, Presswerk and Satin.
Visit U-he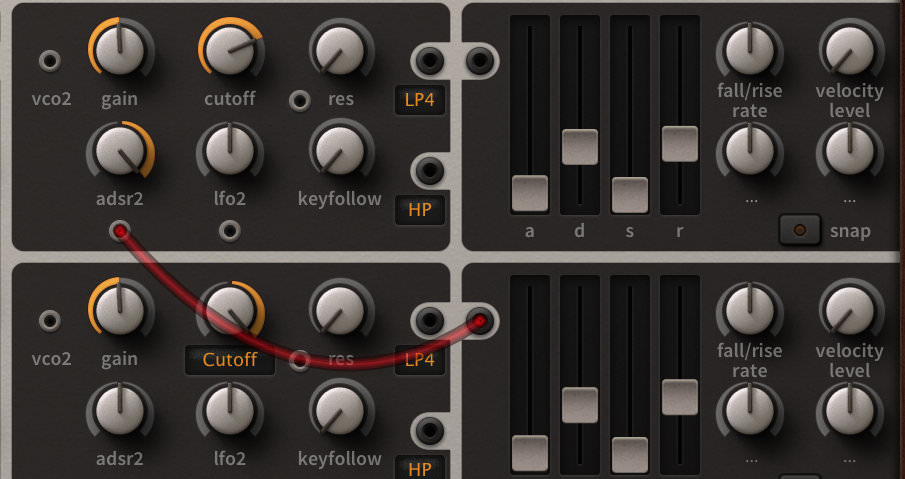
Technique » Synth Secrets »
Melodic Arpeggios in U-He ACE
This channel is sponsored by

Synth Secrets is a series of programming tutorials in which we show how to make a range of classic and new synth sounds using plugins such as Massive, Sylenth and Predator.
For this instalment of Synth Secrets we’ll be creating a melodic arp using U-He’s ACE synth and Logic’s arpeggiator:
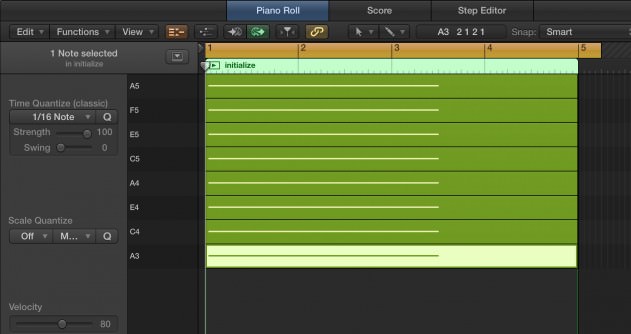
Here’s a screenshot of the MIDI we’ve used to create this hook, we’ve used notes in the key of A minor, minor scales work very well creating a moody melodic vibe:
Step 1
Although we’re using ACE in Logic, essentially any soft synth and DAW will work for this sound. If you’re using a different DAW, many of them feature an arpeggiator MIDI effect now, or alternatively you could use a soft synth with a built-in arpeggiator.
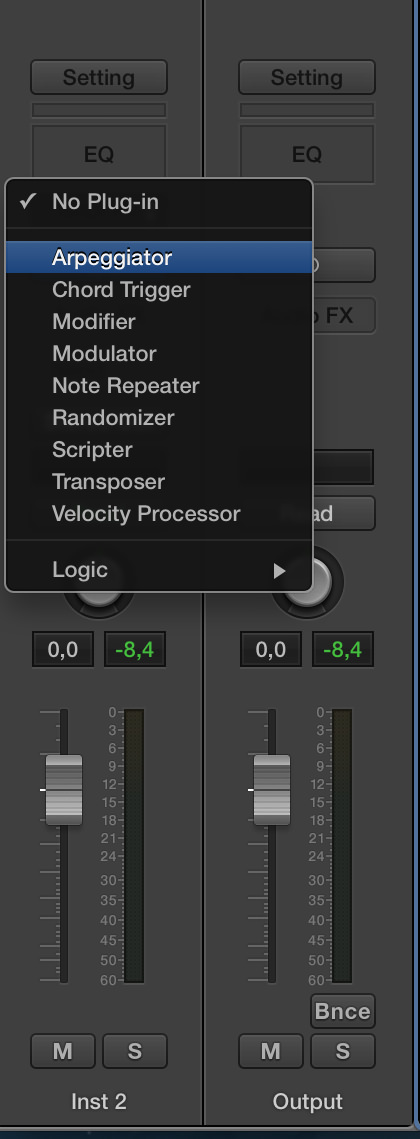
Begin by loading an instance of ACE. Close the plugin window for a moment and head back to the channel strip. Above where you loaded ACE, you’ll see a box labelled MIDI FX. Click on it and select Arpeggiator from the list. Now, when you play chords on your synth, the notes will play back according to the note order we set in the Arpeggiator MIDI effect.
Step 2
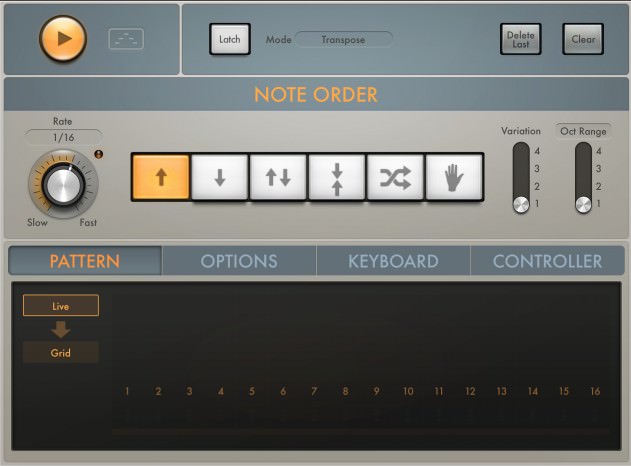
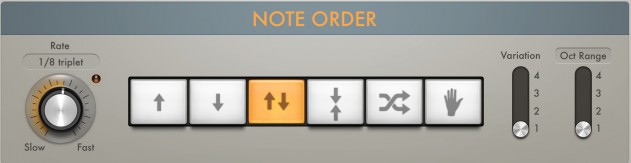
Before we create the synth sound, let’s set up the arpeggiator. Just by playing around with the rate, you can achieve some very interesting results, especially using one of the dotted or triplet settings. To the right of the Rate control we can set the note order, which is set to upwards by default, meaning the notes will play back starting from the lowest (in our case A3), working up to the highest note in the sequence, then jumping back down to the lowest and starting the pattern again.
Play around with the different note order options you have here. We’ve settled for up and down, meaning the sequence will play up the scale and then back down again, creating a nice melodic vibe. We’ve also set the rate to 1/8 triplet, which gives the pattern you hear in the audio clip below.
Step 3
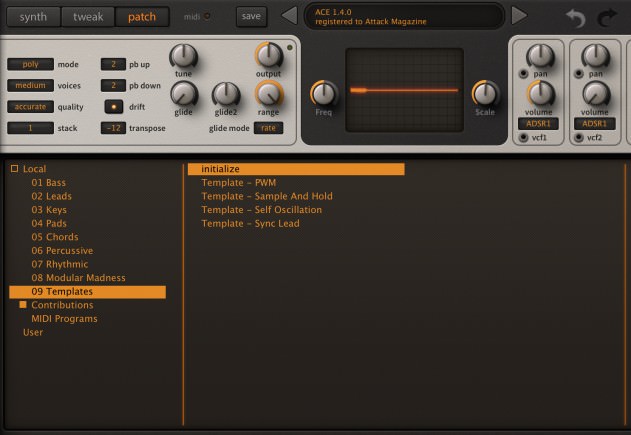
With our arpeggiator set up, let’s now turn our attention to ACE. If we go to the Patch page, we can initialise the synth by selecting 09 Templates from the left-hand list, then choosing the ‘initialize’ patch to the right. This gives us a simple sawtooth wave to work with.
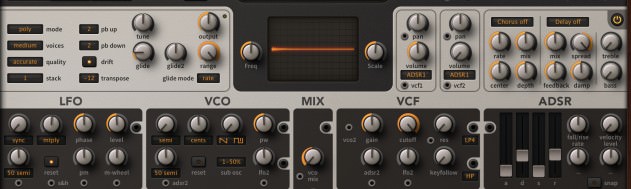
Now go back to the Synth page, and in the top left corner apply a small amount of glide, to provide a nice transition between notes. We’ve set the glide control to 19.00. For a full explanation of what glide does, check out our recent feature on legato playing styles.
Over to the right of the synth, we have two ADSR envelopes. The top one is the amplitude envelope. Bring the decay down to 30.00, the sustain to 0.00 and the release to 32.00, giving us a tighter sound with some nice atmospheric release.
Step 4
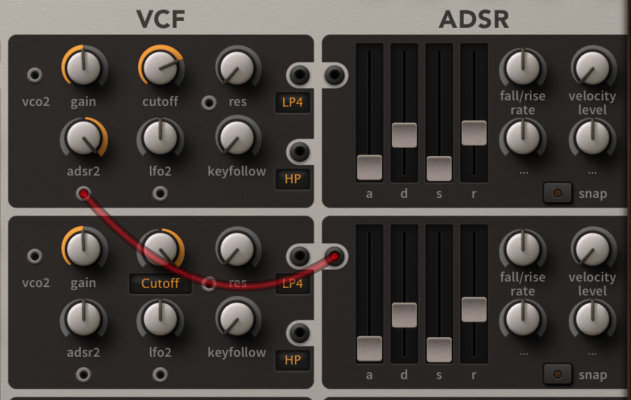
We can now apply a modulation envelope to the cutoff frequency of the filter in order to shape the sound. To the left of the second ADSR envelope you’ll see a brownish-grey socket. In ACE’s semi-modular setup, these darker sockets are outputs, while lighter grey sockets are inputs.
Click and drag on this socket and drag over to the input below the adsr2 control in the VCF section. This connects the envelope to the filter. Now, take the adsr2 control all the way to the right to apply positive envelope modulation to the filter.
Take the cutoff all the way down, then set up the lower envelope with an attack of 0.00, decay of 31.00, sustain at 0.00 and release at 36.00.
We can now also automate the cutoff frequency to adjust the filter on the sound, providing some nice momentum.
Step 5
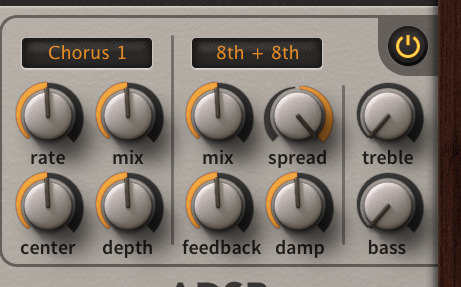
The final things to set up on this sound are a couple of subtle effects. First we can use ACE’s built-in effects. In the top right corner of the plugin window, click once on the box labelled ‘Chorus off’ to load Chorus 1. This applies a suble chorus effect, adding some thickness to the sound.
To the right, click once on the ‘Delay off’ box so the 8th + 8th delay is loaded.
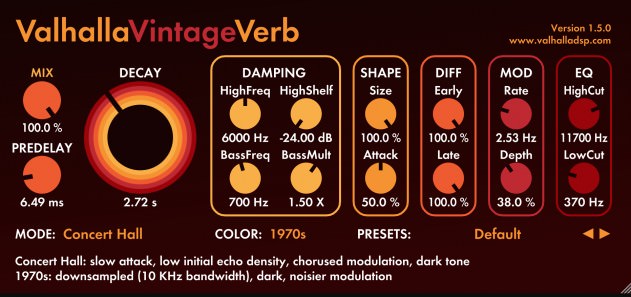
We’ve also added some reverb via a bus send, loading up Valhalla’s Vintage Verb, with the mix set to 100%, the pre-delay to 6.49 ms and the decay set to 2.72s. The delay and reverb effects add some nice depth and space to the sound, and work well when the filter is automated.
Synth Secrets is sponsored by
u-he are makers of award-winning software synthesisers and effects including Diva, Repro-1, Zebra2, Hive, Bazille, Presswerk and Satin.
Download the demos and try them for yourself at www.u-he.com