u-he are makers of award-winning software synthesisers and effects including Diva, Repro-1, Zebra2, Hive, Bazille, Presswerk and Satin.
Visit U-he
Technique » Synth Secrets »
Drum & Bass Leads
This channel is sponsored by

Load up Hive by u-he or a synth of your choice, and let’s make a hard-hitting drum & bass rave-ready lead from scratch.
If you’ve been into drum & bass any time in the last decade, you’ve surely come across a track or a mix by Metrik. His hard-hitting, rave-ready sound has been a crowd favorite for years, and today, we’re going to use u-he Hive to build sounds in his vibe – specifically a lead. The only samples we used were drum hits from Splice’s Noisia sample pack, a distorted guitar from Sample Focus, and some one shots from Ableton’s core library. You can use anything, though, as the focus today is on synthesis.
Here’s what we’re making today:
Now set your DAW to 174 BPM, add the following MIDI information into an instrument track with Hive (demo available at u-he.com) on it, and follow along.
Remember to click any image to enlarge!
And while we’re here, it is worth remembering the Comment Of The Week 🙂
Want to follow along? Get the free Hive trial!
Step 1
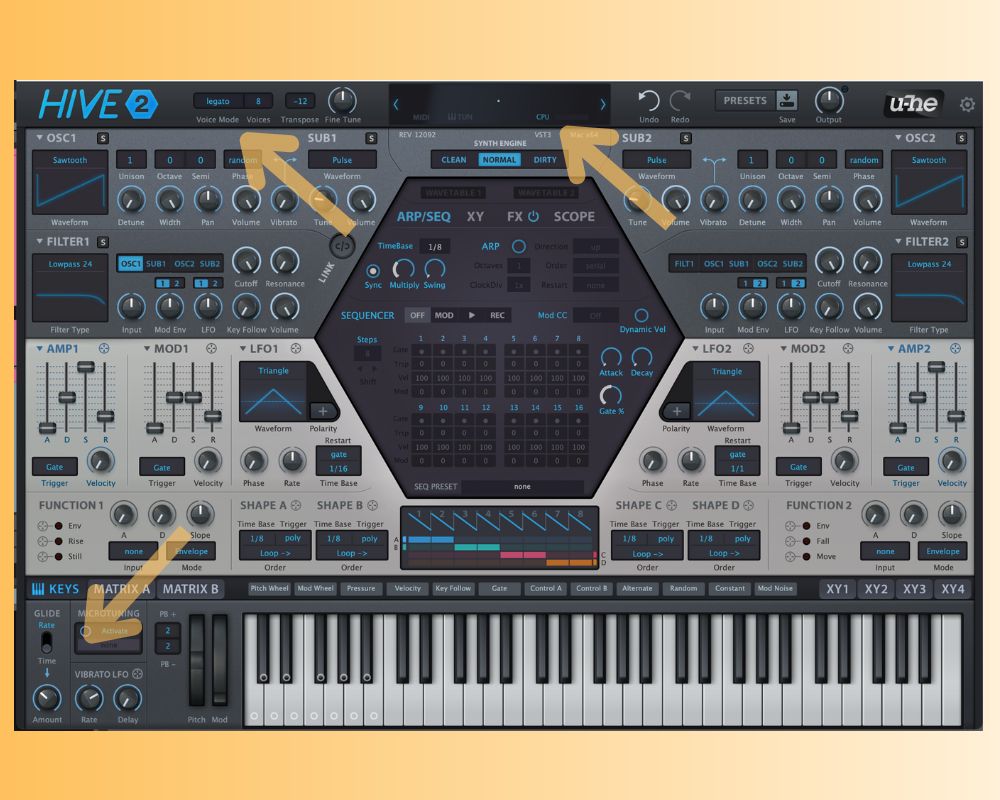
Of course, we start by initializing the patch. Right-click on the preset browser and select “INIT.” Because it’s a new sound… init…bruv.
First, we always set our patch’s global and voicing settings, so let’s change this one from poly to legato up on the top-left corner of the interface. Then skip down to the glide time on the bottom left corner and turn it up to just shy of 10 o’clock, giving us the slinky, fluid movement we want in this lead sound.
Step 2
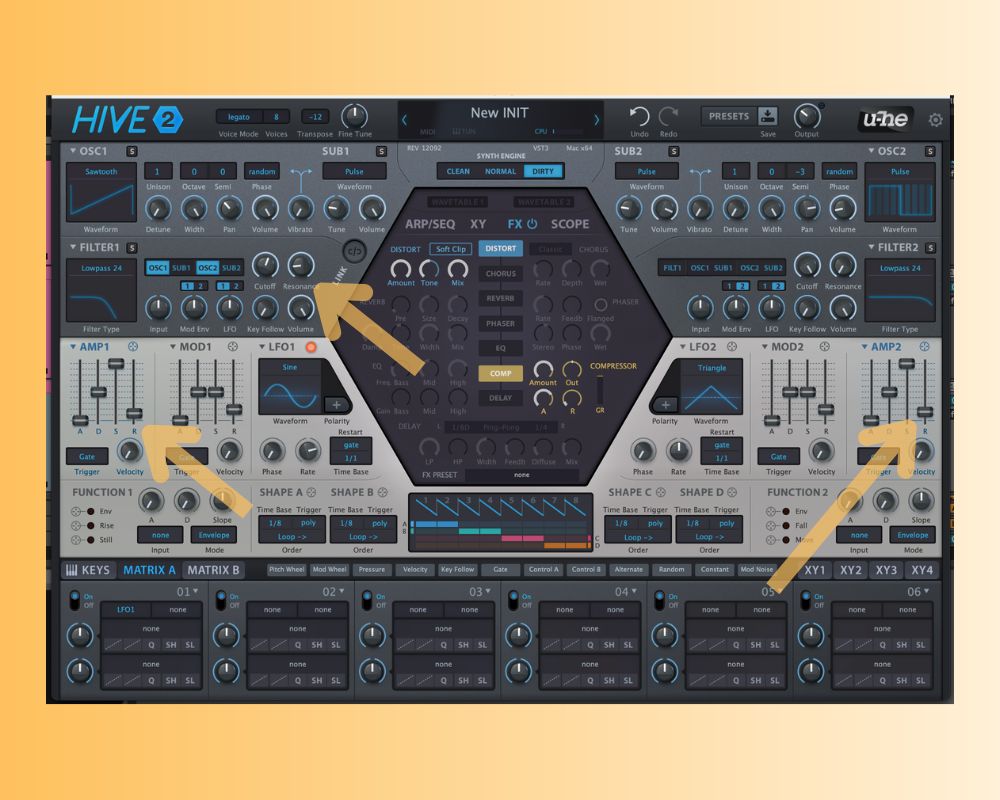
Now, let’s set the oscillators up the way we want. We want a little width to this sound… Not too much, but a little.
To do so, let’s pan oscillator one left to about 10 o’clock, then activate oscillator two by clicking OSC2 in the filter input selector of filter 1. Set the oscillator’s shape to Pulse. Then we’ll pull that oscillator’s volume down in the OSC2 section to about 8 o’clock and pan it right to about 3 o’clock.
Then, in the section labeled Semi, detune the oscillator 2 by -3 semitones. While we’re at it, change the Synth Engine mode from Normal to Dirty to give it some subtle extra funk. So far, what we have sounds nothing like what we’re going for… but wait… we’ll get there..be patient!
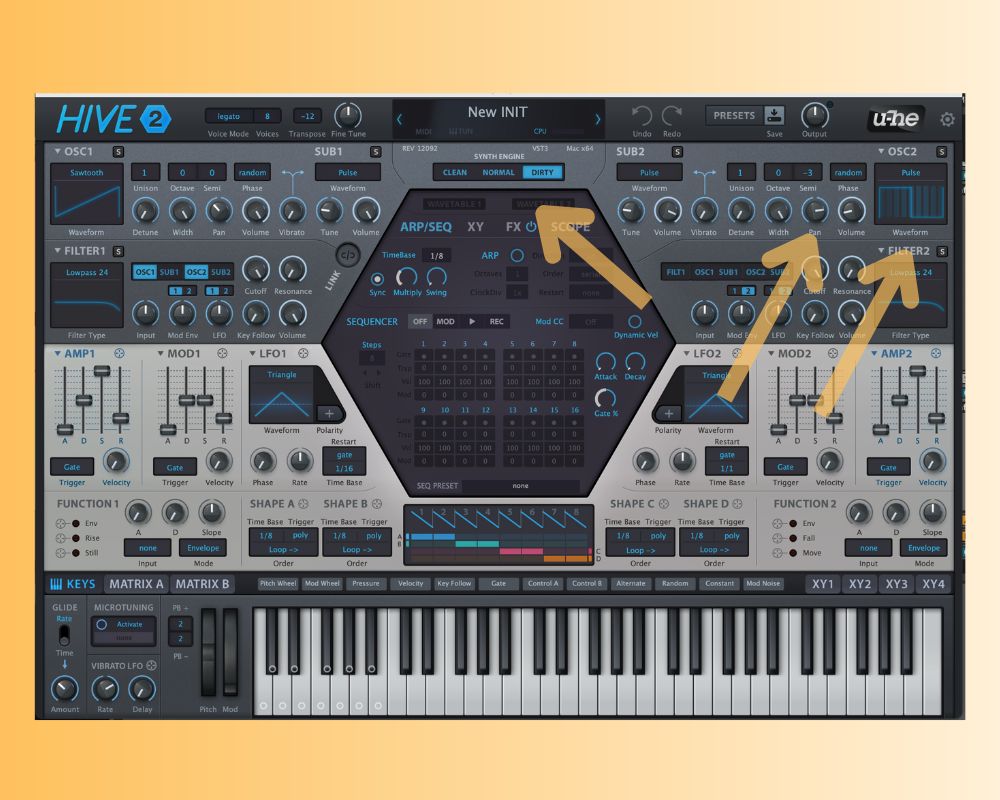
Step 3
Usually, we like to move through the synthesizer block by block to create a patch, adding effects last.
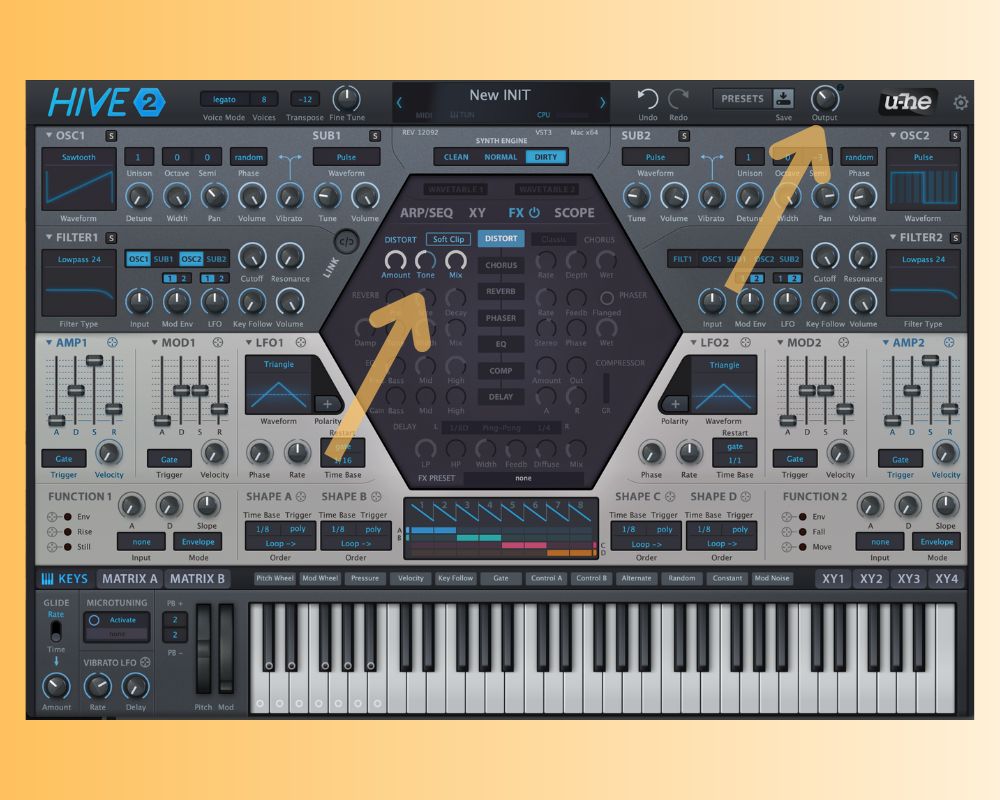
In this case, however, distortion is so crucial to the sound and informs our patch design so much that we want to bring it in sooner than later. So let’s go to the effects section by clicking FX in the center section, activate the distortion by clicking DISTORT, and set it up as pictured. The distortion plays the two oscillators against one another in a way that makes it sound less like two oscillators playing in harmony and more like one oscillator with a lot of attitude.
The added volume from the distortion and the compressor we’ll eventually add does make it necessary to turn the overall output of the patch down to about 10 o’clock to avoid clipping, so let’s do that, too.
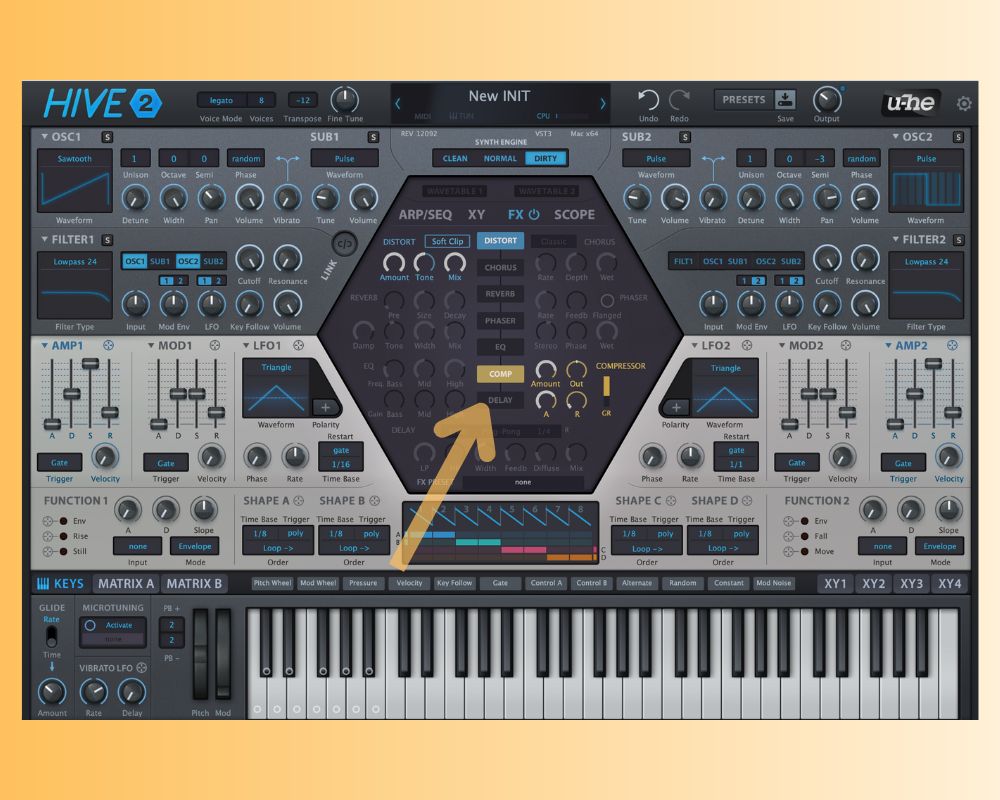
Step 4
Speaking of the compressor, let’s add that right now so we can keep our patch at a happy, healthy volume and add a bit more bite. Engage the compressor with the settings pictured below.
Step 5
Let’s go back and make a few subtle tweaks that really jump out now that the whole patch is getting mangled and smashed through distortion and compression. First, visit the FILTER1 section, pull the cutoff down to about 1 o’clock and give the filter just a touch of resonance. That takes some of the unwanted sizzle out of the sound and adds some girth to the tone.
Then move down to the AMP1 envelope section and pull the release or R down just a touch to give the lead sound a more abrupt ending. Repeat on AMP2 as well.
Step 6
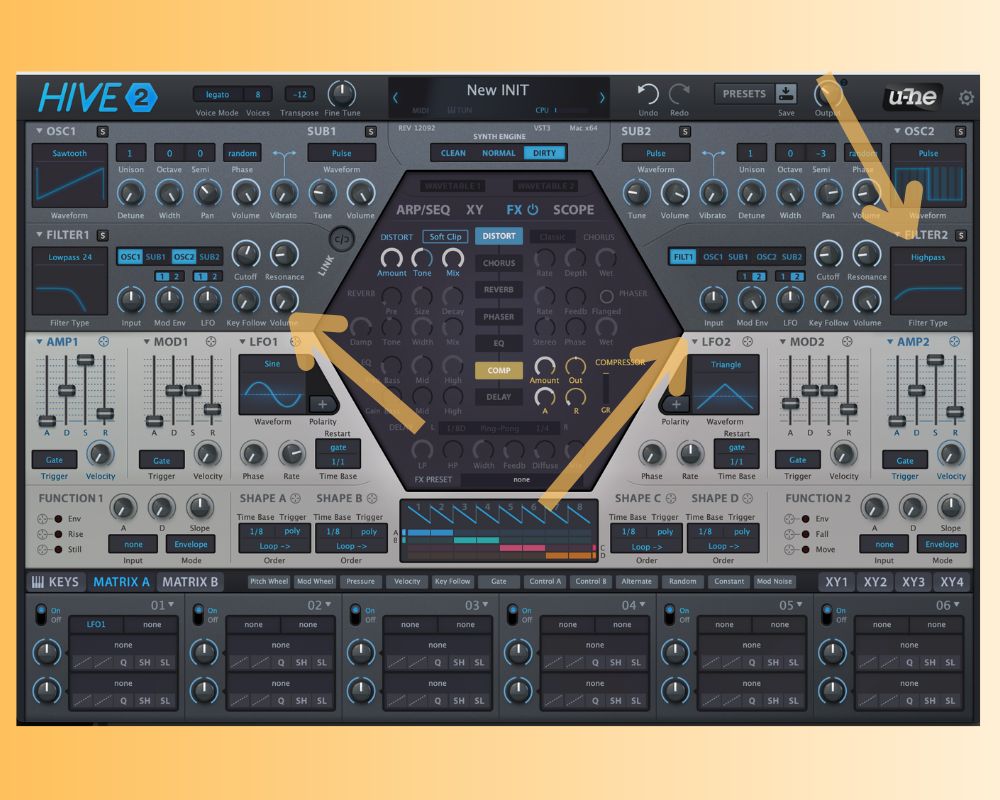
Another subtle touch incoming. We’re going to route FILTER 1 completely through FILTER 2 in series by turning the volume in the FILTER1 section to zero (pulling all of Filter 1’s output out of the main mix) and then engaging the FILT1 button in the FILTER2 section.
We’re going to switch the filter mode from Lowpass 24 to Highpass and force the cutoff frequency to move with the mod envelope by turning Mod Env up to max.
Pull the cutoff down to about 10 o’clock, hit play, and watch and listen to the filter move with each note. You’ll notice at first that it sounds way off. Now, move to the MOD2 envelope, turn the attack all the way up, and notice that the effect totally falls away.
Then move the attack slider down until you only hear the filter engage at the tail end of each note. Then you know you’re in the right place.
Step 7
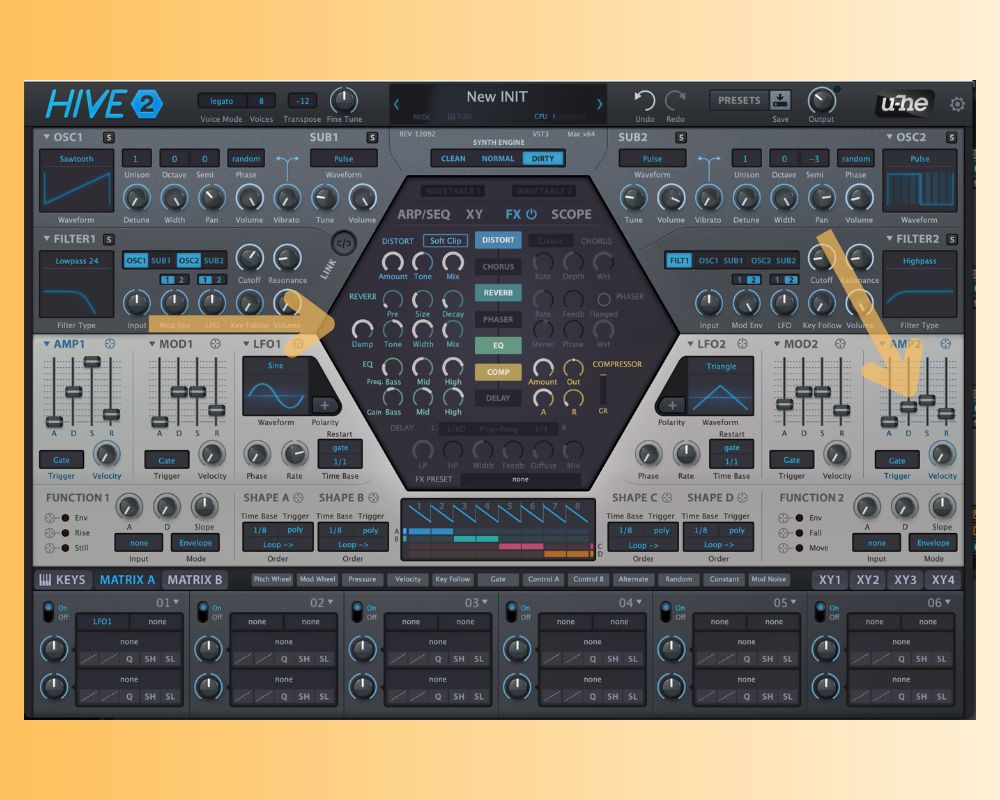
Now let’s shape the amp envelope to make it look like so, giving it a more abrupt ending and a transient edge at the beginning. In the AMP2 section just copy these parameters.
Finally, some effects for special sauce. Activate reverb (the compressor really helps it pop) and some EQ for final shaping, match your parameters to these, and we have our sound.
For more Synth Secrets visit the full series on Attack or on YouTube. If you want to learn synthesis, step by step, this is for you.
The world-leading book on dance music production. Comes with samples too. Everything you need to take a mix, from initial recording to final master. La guía definitiva para producir música electrónica de vanguardia.
Add controlled yet random fluctuations to your most important parameters Anti corporate, political, powerful and progressive the power house of Jeff Mills, Robert Hood and "Mad" Mike Banks needs little introduction.
Attack Store

The Secrets of Dance Music Production

The Producer’s Manual

Secretos de la Producción de Música Dance

Max For Live: Chance Engine

Underground Resistance: The Final Frontier Poster


Follow Attack Magazine
Synth Secrets is sponsored by
u-he are makers of award-winning software synthesisers and effects including Diva, Repro-1, Zebra2, Hive, Bazille, Presswerk and Satin.
Download the demos and try them for yourself at www.u-he.com