
In this new Passing Notes, we use Ableton’s Follow Action feature to produce a leftfield drum pattern and a complex bassline.
When listening to IDM artists like Aphex Twin, Squarepusher or Autechre, producers are known to find themselves questioning, “Did they actually go in there and manually program in a drum fill every bar throughout this nine-minute track?” The answer is hard to know for sure but it would be safe to assume that they do occasionally have some help from auto-generated parts.
There are countless sequencers on the market and many have random buttons for every single one of their parameters. Using these is one option to generate unlimited drum patterns and melodies, but there are also lesser-known tricks in Ableton that can yield powerful results.
In this tutorial we go over these techniques, using Follow Actions to generate a beat and bassline.
Here’s what we are going for:
What Are Follow Actions?
Follow Actions are a feature for clips that allow you to pre-program commands in the Session View instead of manually launching one clip after another. Some examples of these commands as words would be, “switch to the clip below after one bar,” “switch to a random clip after three 16th-notes,” or, “go back to the clip at the top after reaching the end of the lowest clip.”
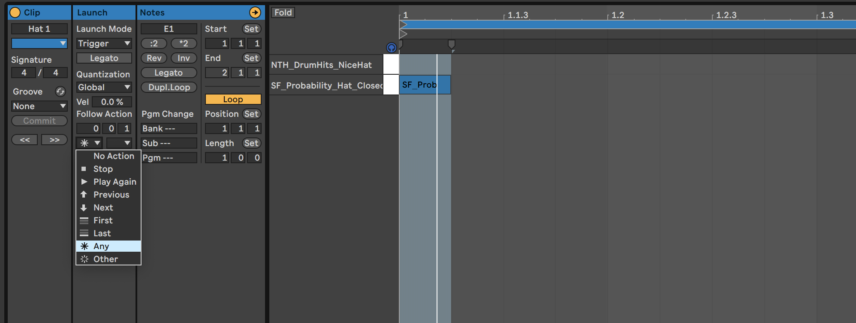
The option to add follow actions appears when you double click a clip in the Session view and tap on the small L button at the bottom left. When you click this button the Launch settings appear. The bottom category in this column contains the Follow Actions.
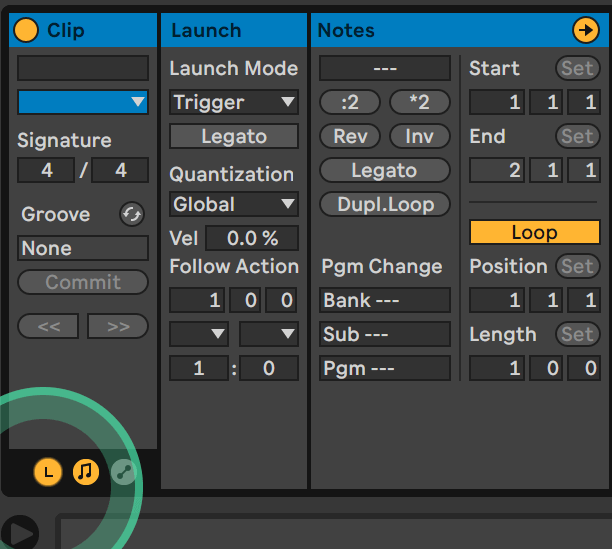
The three digits you’ll see (1-0-0) represent bars, quarter notes/beats and 16th-notes, respectively. For example, if you set these to 0-0-2 then your action will occur after two 16th-notes. If you set it to 0-2-0 then your action will occur after two quarter notes.
Below these digits are two boxes containing the choices for the Follow Actions. These will be empty by default but once you click on them you can choose from eight different options. There are two boxes, so you have the option to program two different actions and set the probability of their occurrence in the bottom two boxes. By default the left box is set to 1 and the right to 0, so make sure to program your Follow Actions in the left box while following this tutorial.
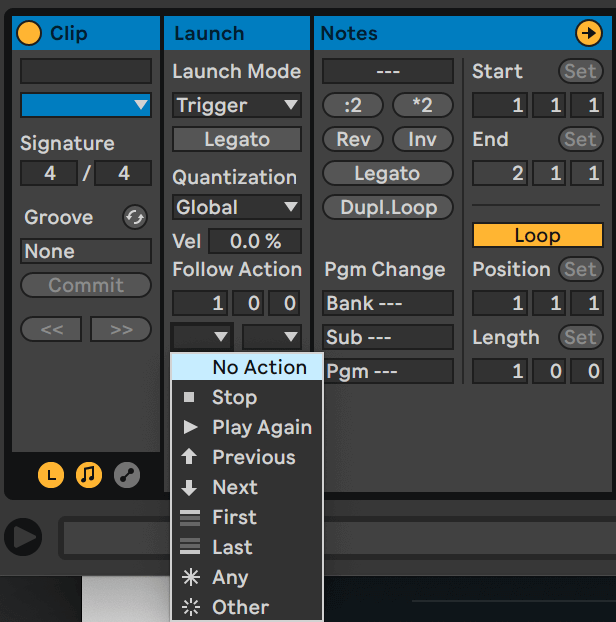
The most powerful actions for generating random patterns are Any and Other because these make clips play in a random order. The only difference between the two is that a clip with Other selected cannot play itself twice in a row.
For this tutorial’s purposes, your Launch Mode should be set to Trigger and the Quantization should be set to Global. If you want to learn more about the other options available for these parameters check out the chapter on clip launching in Live’s manual.
Generating Drum Patterns
How can we use Follow Actions to generate drums?
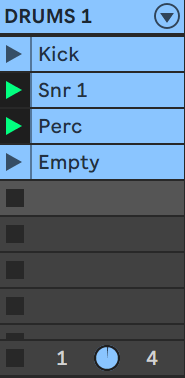
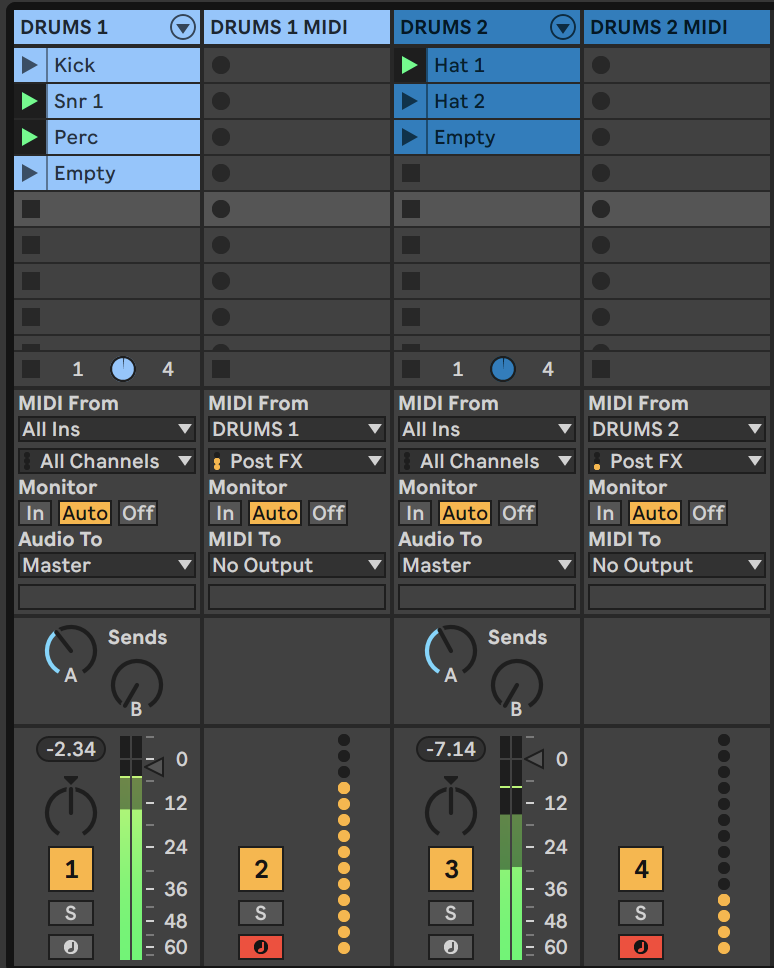
First, load up a drum rack and insert three (or more) sounds. We used a kick, snare and shaker with the Drum Buss audio effect added.
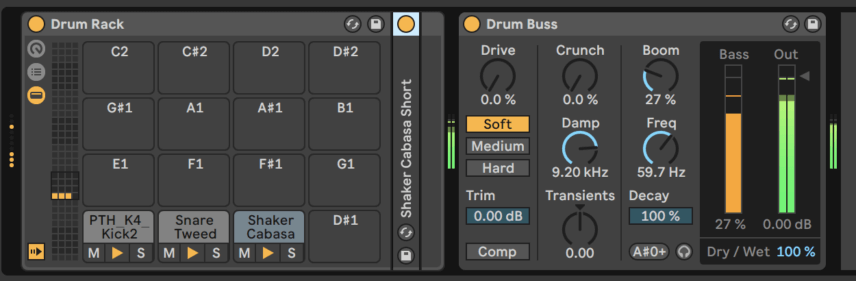
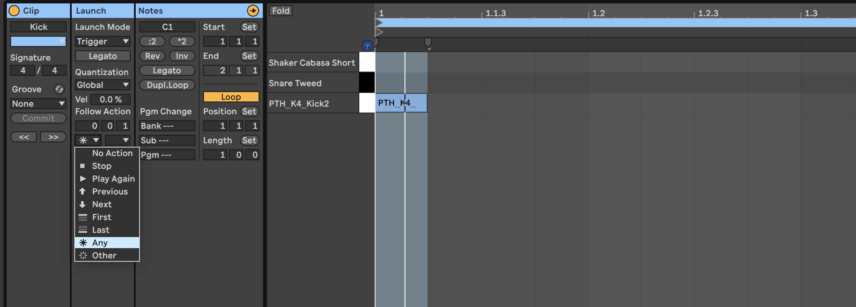
Next, in Session view, create one MIDI clip for each sound and program one MIDI note on the downbeat in each clip.
Now for the Follow Actions! In each clip, set the follow action to Any and program the action to occur after every 16th note (0-0-1). A fast way to do this is to double click on a clip and hold Shift to select all of the other clips. This will allow you to set the same follow action for all of your clips at once. This is really handy while working with larger amounts of clips!
Note that Follow Actions only work within a connecting group of clips, so make sure all of the clips you want to use are stacked together.
Now when you launch one of the clips madness will unfold before you and the clips will start to randomly jump between each other. You’ll get some great rhythms but, as there is a sound on every single 16th-note, it can get pretty wild.
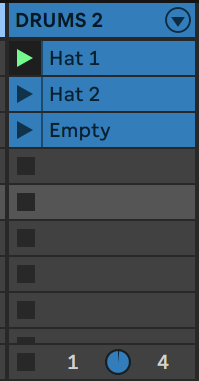
The trick to combat this is adding one or more empty MIDI clips to the group. Simply insert another MIDI clip into your group but don’t program any notes into it. Assign it the Other follow action instead of Any—you probably won’t want the silent 16th note to repeat itself. This new empty 16th-note clip will make sure that there are some rests between the notes in the sequence.
Here are our kick, snare, shaker and empty clips, all playing with the 16th-note Any Follow Action.
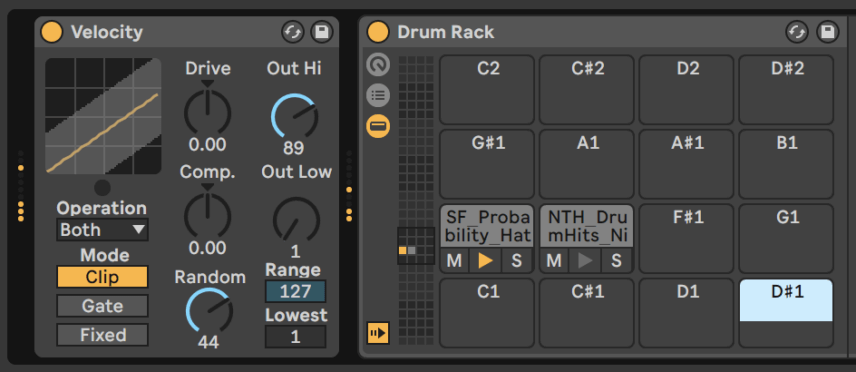
Here is the same trick used with a Drum Rack with two hi-hat samples. We’ve also added the Velocity MIDI device to this rack with the Random knob increased to add variation to the velocity of each hit.
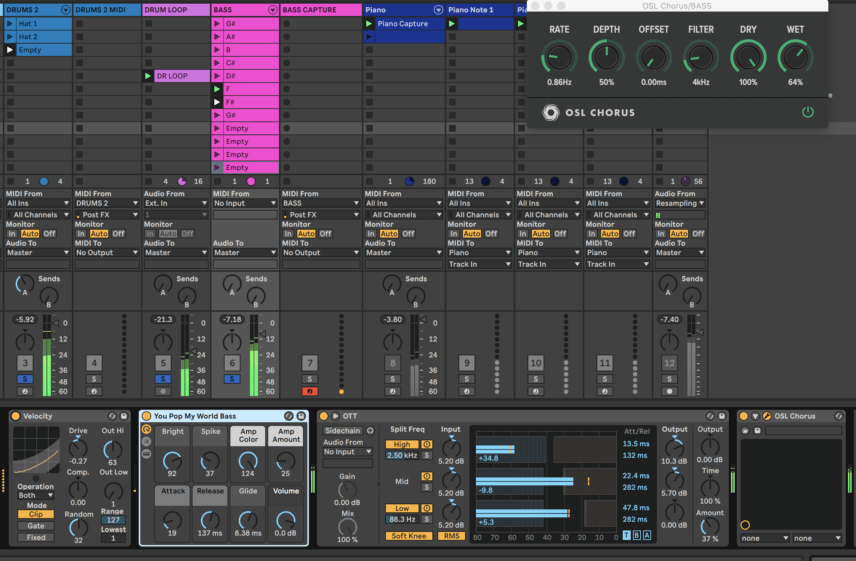
The next step is recording the resulting patterns as MIDI clips so that you can edit them. To do this create a new MIDI channel. In the MIDI From dropdown list select the channel where your Follow Action clips are playing. Arm this channel, press record and watch as Live gifts you endless drum patterns.
After recording our clips, we chose six bars from the generated pattern and added some swing from Live’s Groove pool. Everything is fully quantized with this technique so tools like swing and the Velocity MIDI tool can add a human or live-played type feel.
For the kick, snare and shaker pattern, we used MPC 16 Funker-55 swing and for the hat pattern, we used MPC 16 Funker-60 swing. Here’s how the two swung patterns sound combined:


Generating Bass Patterns
This technique can also apply to melodies but we wanted to bolster our crazy beat with an even crazier bass line.
Create a new MIDI channel and insert your favourite synth bass patch. We used Live’s You Pop My World Bass preset with some random velocity, Multiband Dynamics running the OTT preset, and chorus.
Similar to the previous technique, the idea is to again program one MIDI clip for each note, while setting the follow actions to Any. We’ll again be using a rate of one 16th-note (0-0-1).
We decided to program a bassline in the key of G# Dorian, so we added one clip for every note in this scale, plus one more G# note an octave up. We also inserted five empty clips to increase the probability of rests. Otherwise, the bassline could get way too busy. You can experiment with different amounts of empty clips for different results. You can also change your note selection for riffs with different note combinations.

Here’s how the bassline sounds in solo with each empty clip gradually de-activated, resulting in no rest-notes toward the end:
As with the drums, to record the random MIDI being generated create a new MIDI channel, arm it, select the bass channel in the MIDI From dropdown list and hit record.
Here’s how a portion of our recorded bassline sounds with the drums from the previous section and an additional top loop featuring an open hi-hat and clap.
Top Tip: If your bass pattern is too nuts you can always chop up shorter portions and loop them.