
In this latest Beat Dissected, we’re going to create a rolling techno beat inspired by the likes of Andre Crom, Perc, Setaoc Mass and Tommy Four Seven.
Beat Dissected is a regular series in which we deconstruct drum patterns, showing you how to program them in any DAW. Just copy our grid in your own software to recreate the loop. To enlarge any photo, just click on the image.
If you find this tutorial helpful you might also enjoy our book “The Secrets of Dance Music Production“.
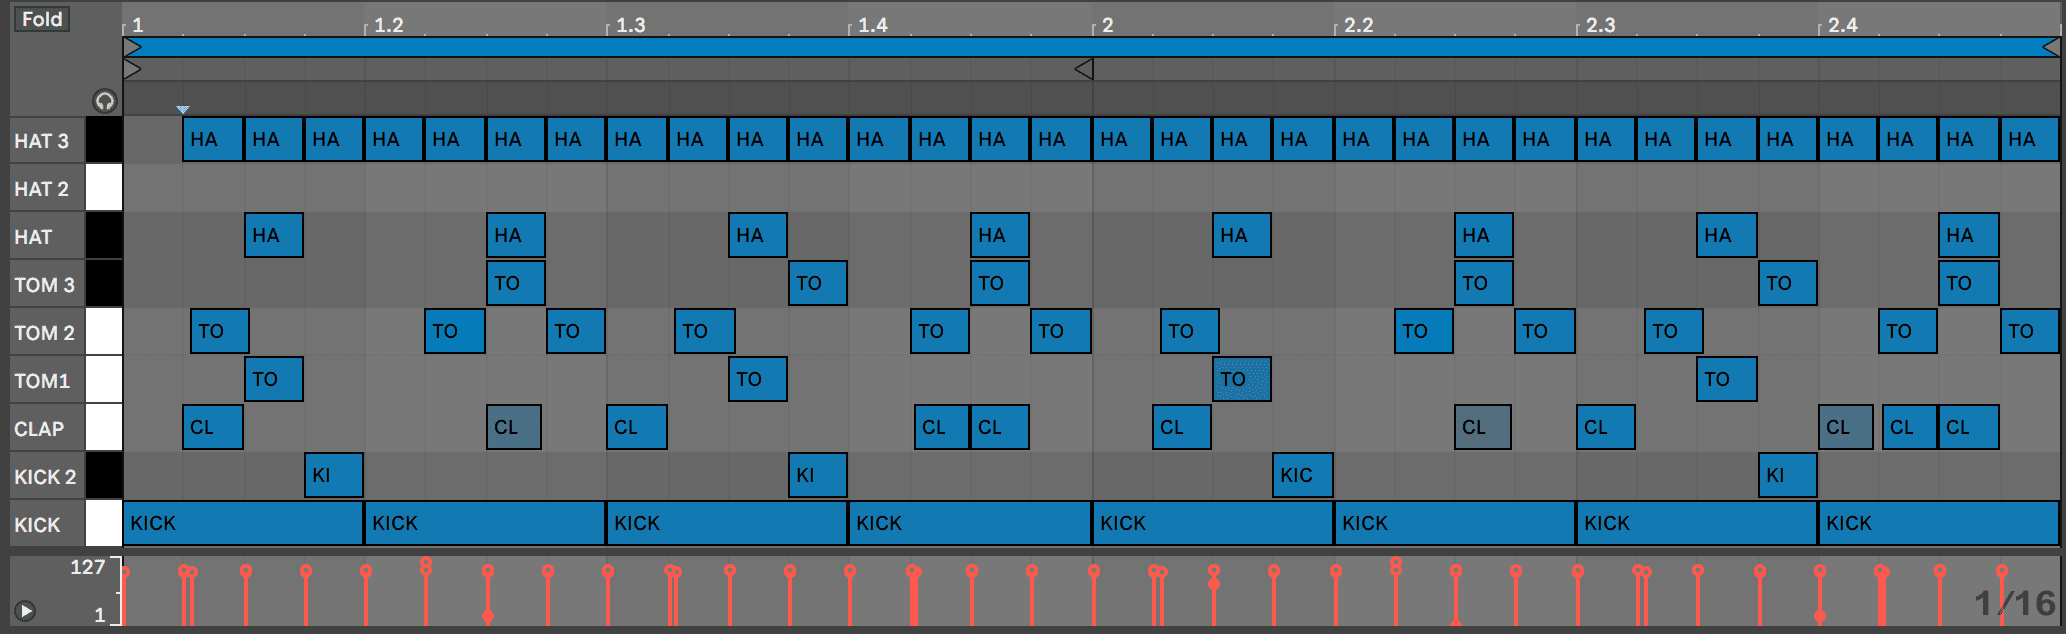
Here’s the beat we’re building today:
Spec
Tempo
131 BPMSwing
20%Sounds
Digital Drum MachinesThere are many examples where 16th notes programmed within the low frequencies are used to increase the energy in a groove. This is often backed up in the high end as well. These techniques can make your music sound more seamless, fluid and help ravers sit into the groove on the dancefloor.
This tutorial will focus on using filtered toms to create a 16th-note pattern to seamlessly alongside a modern kick, hi-hats with applied swing and ghosted claps.
Step 1
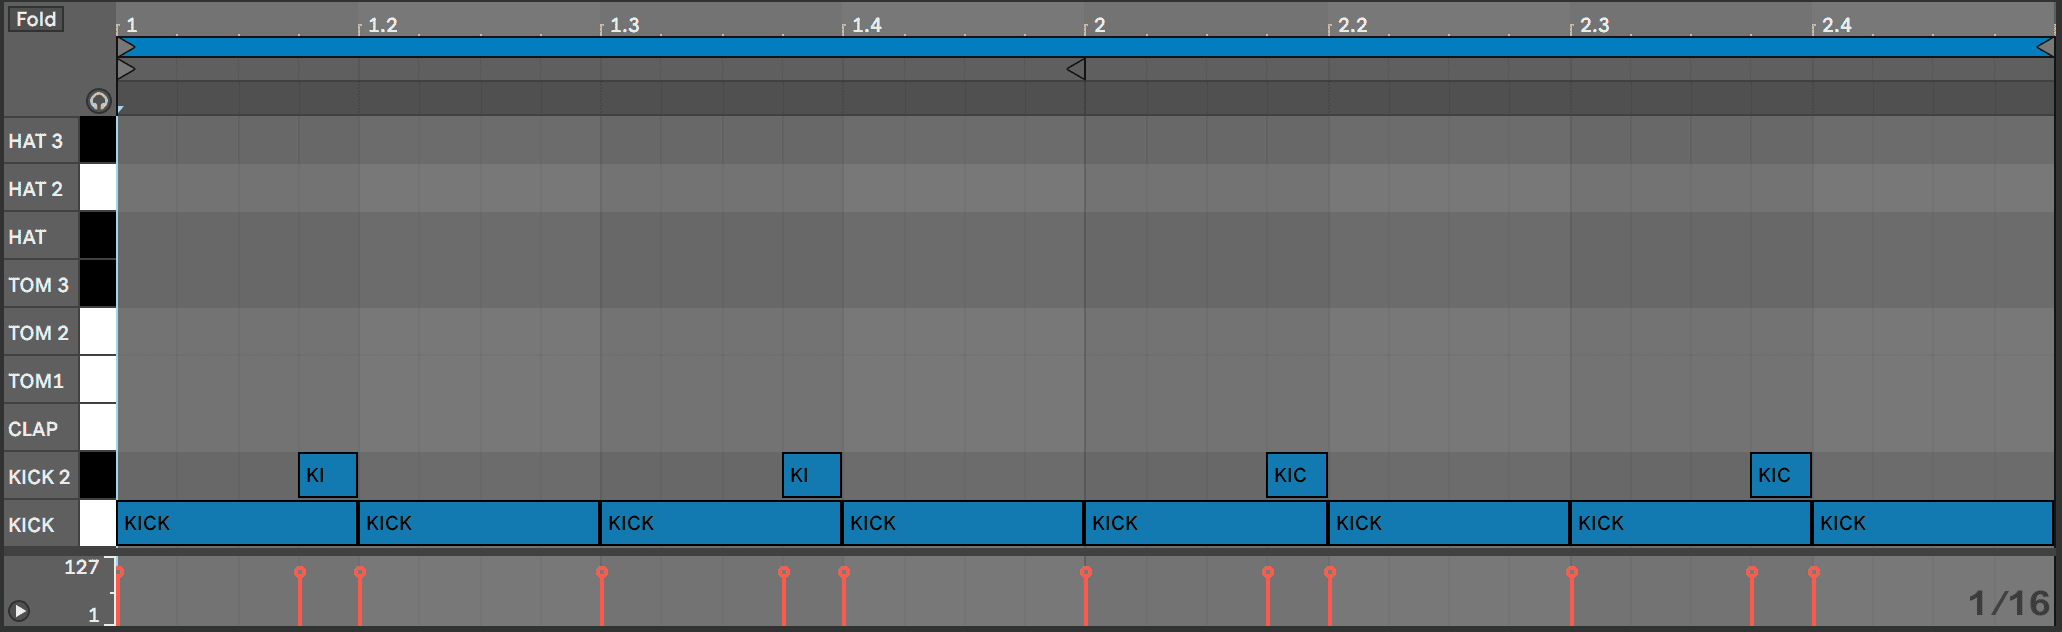
As with most techno tracks we begin by using a 909 and in this case, the Ableton “Kick Analog 1” provides a good starting point.
Building on the Dark Techno Rumble Beat Dissected from last month, filtered reverb is used to increase the sustain, bathing it with a generous decay at a relatively low percentage. We want to be gentle here since overdoing it will wreak havoc on a clubs sound system! We’re not looking for 8-16 second Berlin Atonal reverb responses here…!
Rolling loops rely on busy low-end grooves so in this case, we place a cheeky ghost kick in before each beats two and four of the bar to create a pendulum effect in the groove. We’ve used the same one shot “Kick Analog 1”.
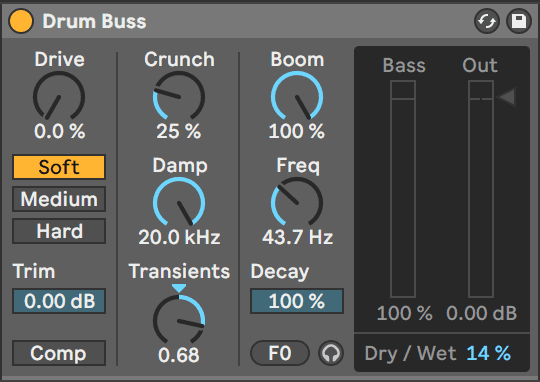
Even at a low percentage, reverb rumble can be difficult to accentuate in the low end. A good tip is to use the Drum Buss to resonate the kick at its root key, in this case F0.
Alternatively, this can also be done using an EQ with a sharp Q value that boosts at the relevant frequency. A frequency vs note chart can help. There is one available in our book but also here online.
Step 2
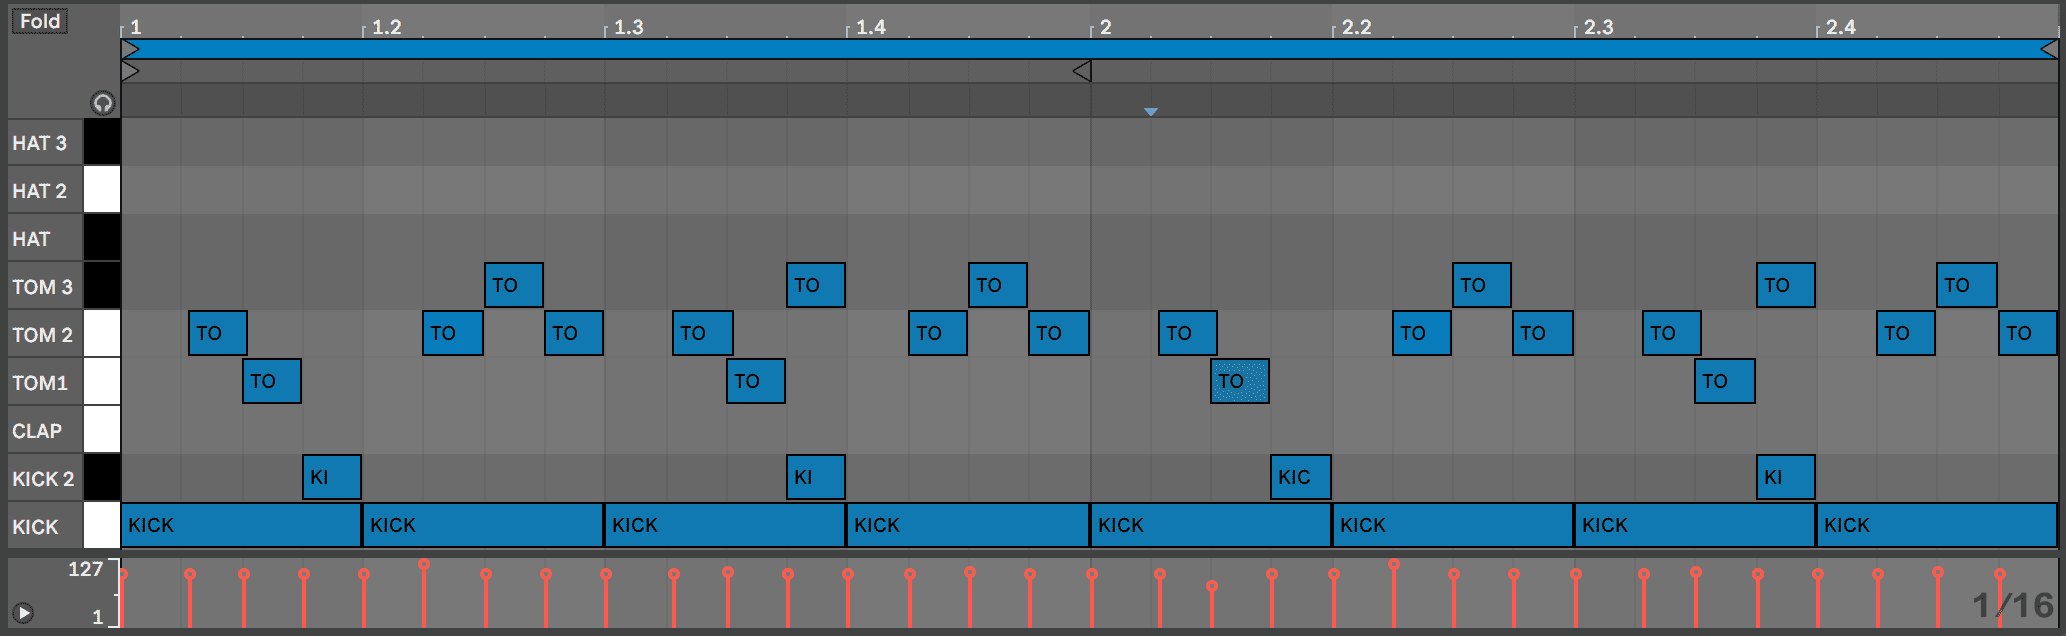
It’s time to groove! Let’s up the pace and intensity of the track by placing a set of alternating toms on each quarter beat, in other words, 16th of a bar.
Use experimentation here to get a feel for how each individual tom contributes to the groove. It’s best to use toms which sound fairly similar so Ableton’s Tom YamDam set really works a treat.
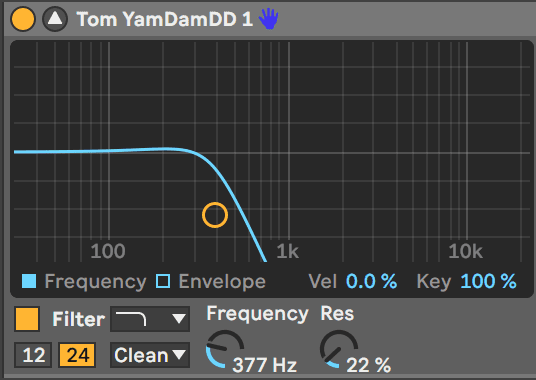
Ableton’s drum rack is really a group of simpler devices, each of which features a fully functional filter. To finish off our low-end groove we filter each of the three toms individually using a low pass filter with various amounts of resonance. Experiment to taste!
Step 3
A 909 beat can easily be enhanced with the use of a few claps. In our beat, we’re looking to go beyond the simple one shot on beats 2 and 4 on the bar and place notes in different parts of the pattern to add intensity and energy.
To breathe some life into the repetition of the low-end we use the 16th grid and place the claps in various positions throughout the entire two bars. Ghost notes can make the programming feel more human so we place a few low velocity hits around the main instances. Having different velocities is often a quick way to improve the human touch to a programmed beat.
A simple reverb and delay, with nearly 10% Dry/Wet mix, works wonders on the depth of the sound. It’s easy to bathe claps in effects since their frequencies will not interfere with the ‘mud’ in a mix. So, go ahead – push the effects as far or as little as you wish.


Step 4
Moving on to the high end, we place a simple off-beat hat throughout the sequence and add support with a fast 16th hat.
A 16th hat does tend to sound robotic at the best of times so grooves are often used to add interest to repetitive instances of percussion.
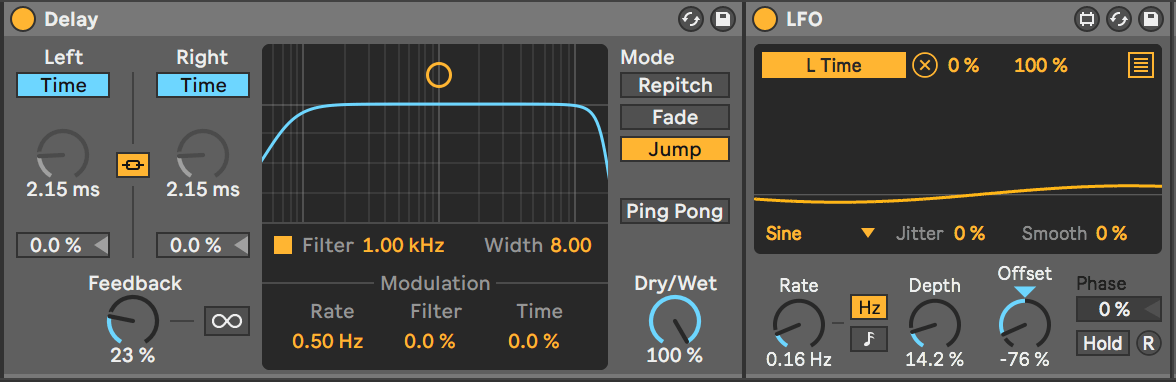
Another way to add interest is to use modulated parameters to adjust spacial, dynamic and spectral attributes of sound. In this step, we open an instance of the LFO device and map the basic sine wave to the time parameter on a delay set to 100% wet. This very subtly moves the repeating hats forwards and backward in time. Something similar can also be done with the wobble setting in the echo device.
Step 5
The final programming step calls for a light open hat with a slightly laid back groove.
We place hat two on the second and fourth quarter beats of each beat and remove a few instances to create more variation. The second-quarter beat is pushed slightly back in time and the velocity decreased to around 50%.
