This channel is sponsored by
 Roland Cloud is your creative hub for Roland hardware and software. Access legendary recreations of Roland Classics, find new sounds for your favorite products, and download updates and companion apps to make music fast and easy. Visit Roland Cloud
In this tutorial, we show you how to produce and process a layered rolling techno bassline, with a focus on useful low-end mixing tricks.
Subby basslines are a double-edged sword. They provide powerful energy when processed well, but without good balance they can ruin an entire mix. Warehouse or Berghain-style techno tracks have a unique quality, in that they usually contain multiple strata of clearly separated low end. Layers of kicks, subs and a pumping bassline on top all work together to get the crowd dancing.
Producers who work at home on headphones or basic studio monitors tend to inflate the low frequencies while attempting this type of rolling bass. This is often because it never sounds big enough in comparison to its impact when heard on massive warehouse sound systems! The other reason is not enough attention given to tuning each element in the low end.
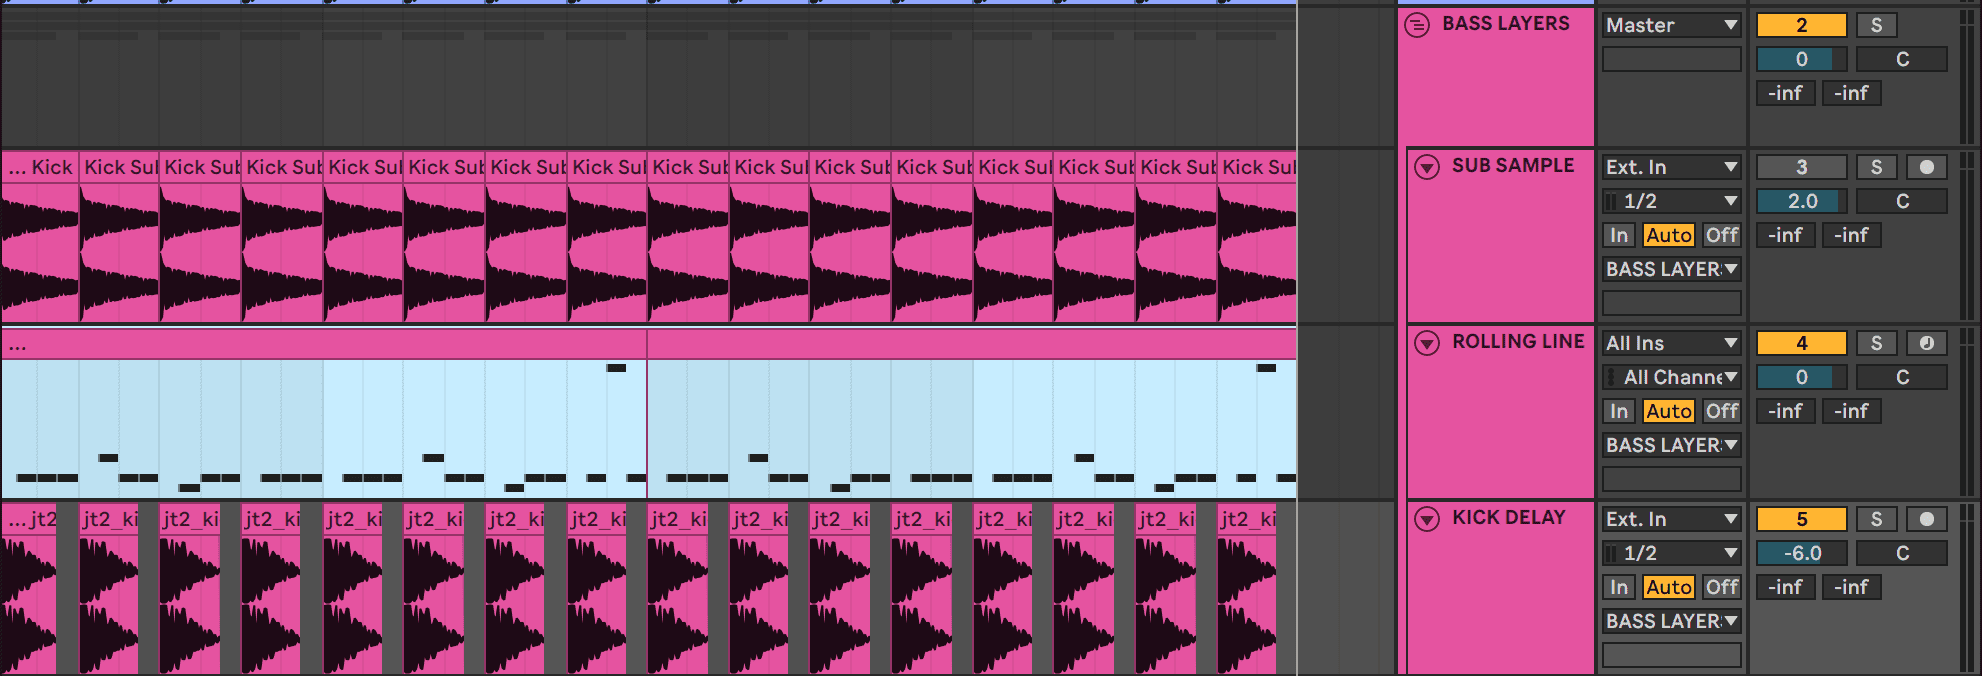
In this tutorial, we produce a rolling techno bass part while employing useful mixing tricks to avoid low-end pitfalls. The part will be composed of three layers:
- A sub sample
- A bassline
- A percussive layer
We will also tweak the kick to ensure that it fits perfectly with the bass. More detailed guidance about processing hard kicks can be found in our previous warehouse-style production tutorial.
The focus here is sub frequencies, so we recommend following along with headphones or studio monitors. Click any image to see a larger version.
Here are the kick and bass parts we are producing:
The kick and bass parts with top elements for context:
Step 1
Kicks are not the main element of this tutorial, but they need to be processed a certain way to work well with multiple bass layers.
Before anything, add a limiter to your master channel to prevent clipping. We added the Waves L2 and lowered the ceiling to -0.3 without adding any gain.
Drag a low-end-heavy hard kick into an empty audio track and set it to play a classic four-to-the-floor pattern. We used “jt2_kick_lomo_G” from Splice’s Jackin’ Techno 2 pack.
It helps to know the tuning of your kick because this will determine the key of the bassline. Tuning is crucial in sculpting a clean low end, as we will explore further in the following steps.
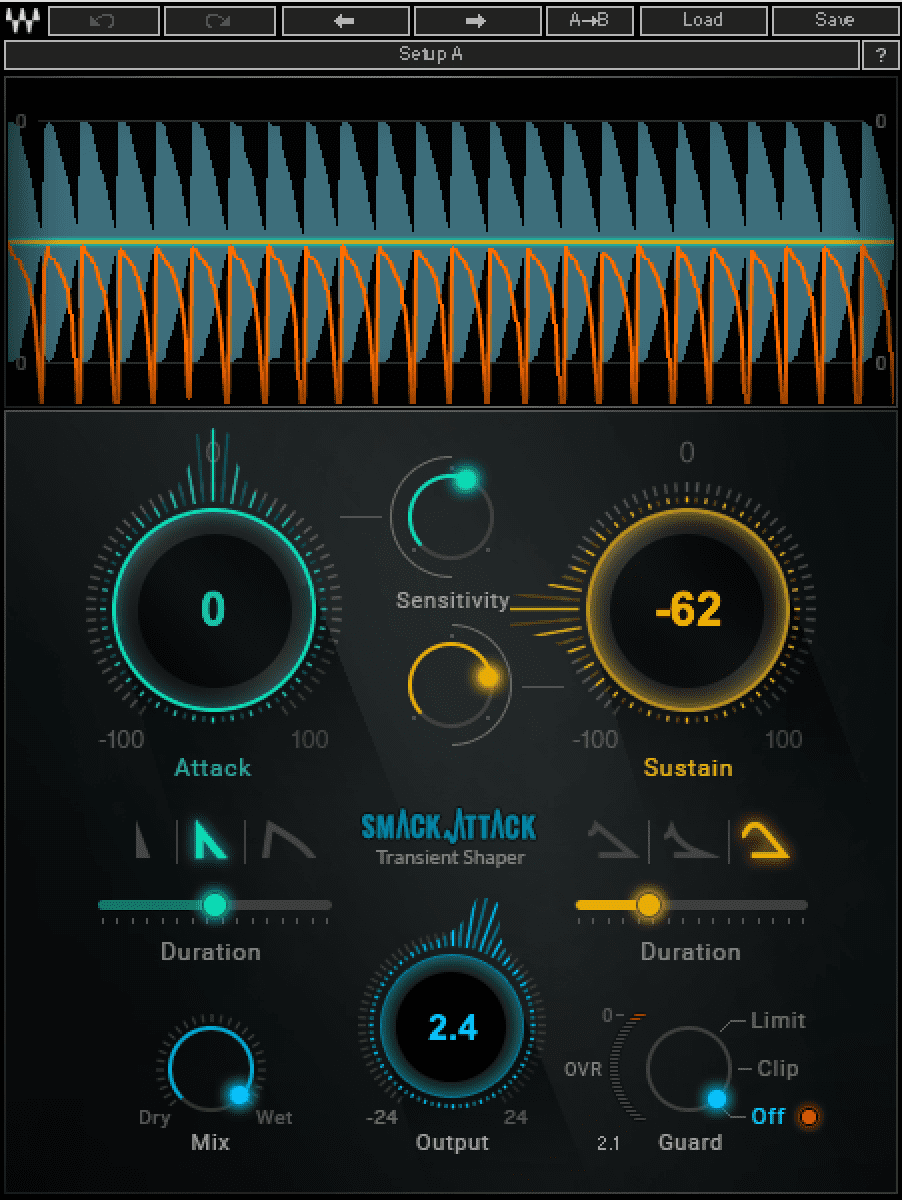
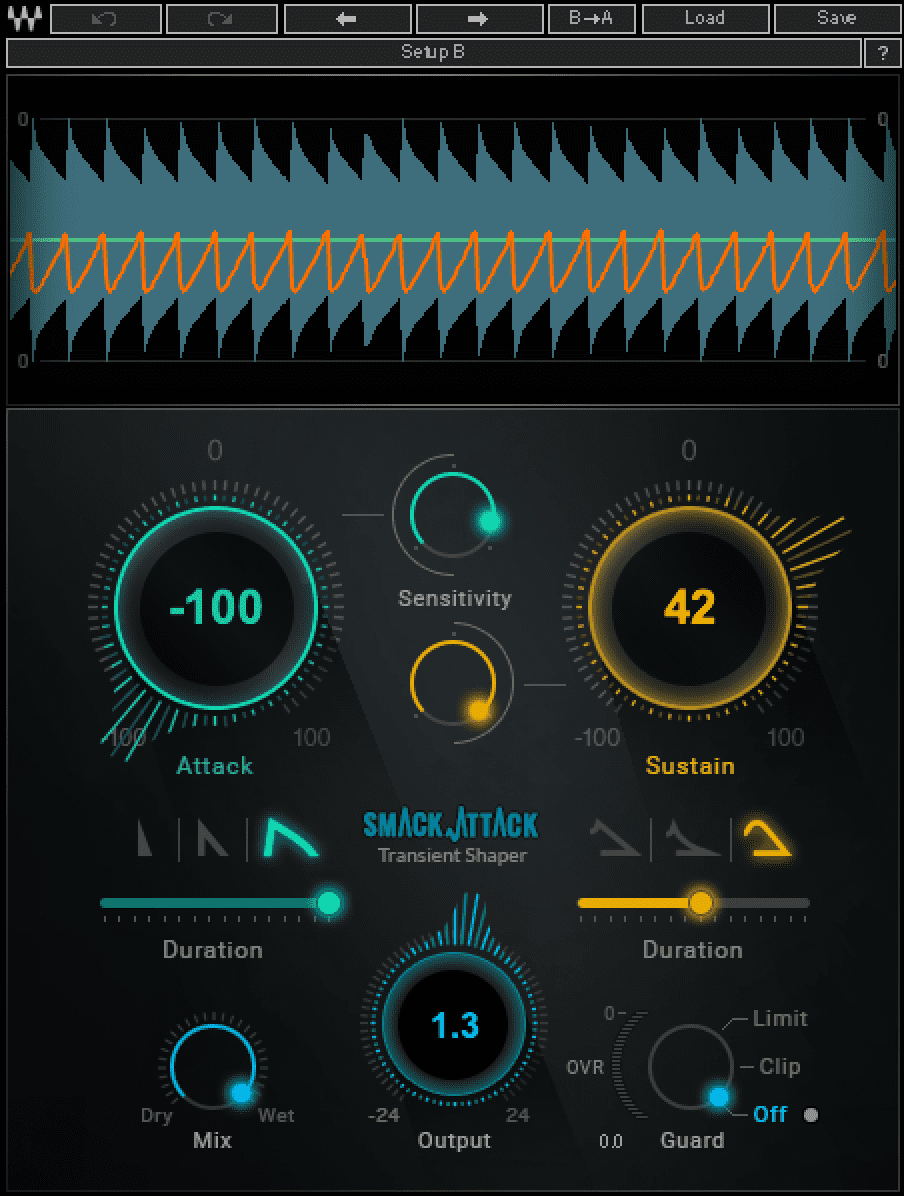
The bass part will have a sub layer, so removing the subby tail from the kick is necessary to prevent mud. To do this, use a transient shaper to lower sustain. We used Waves’ Smack Attack and brought the Sustain down to -62, while making up for the gain lost by raising the Output to 2.4.
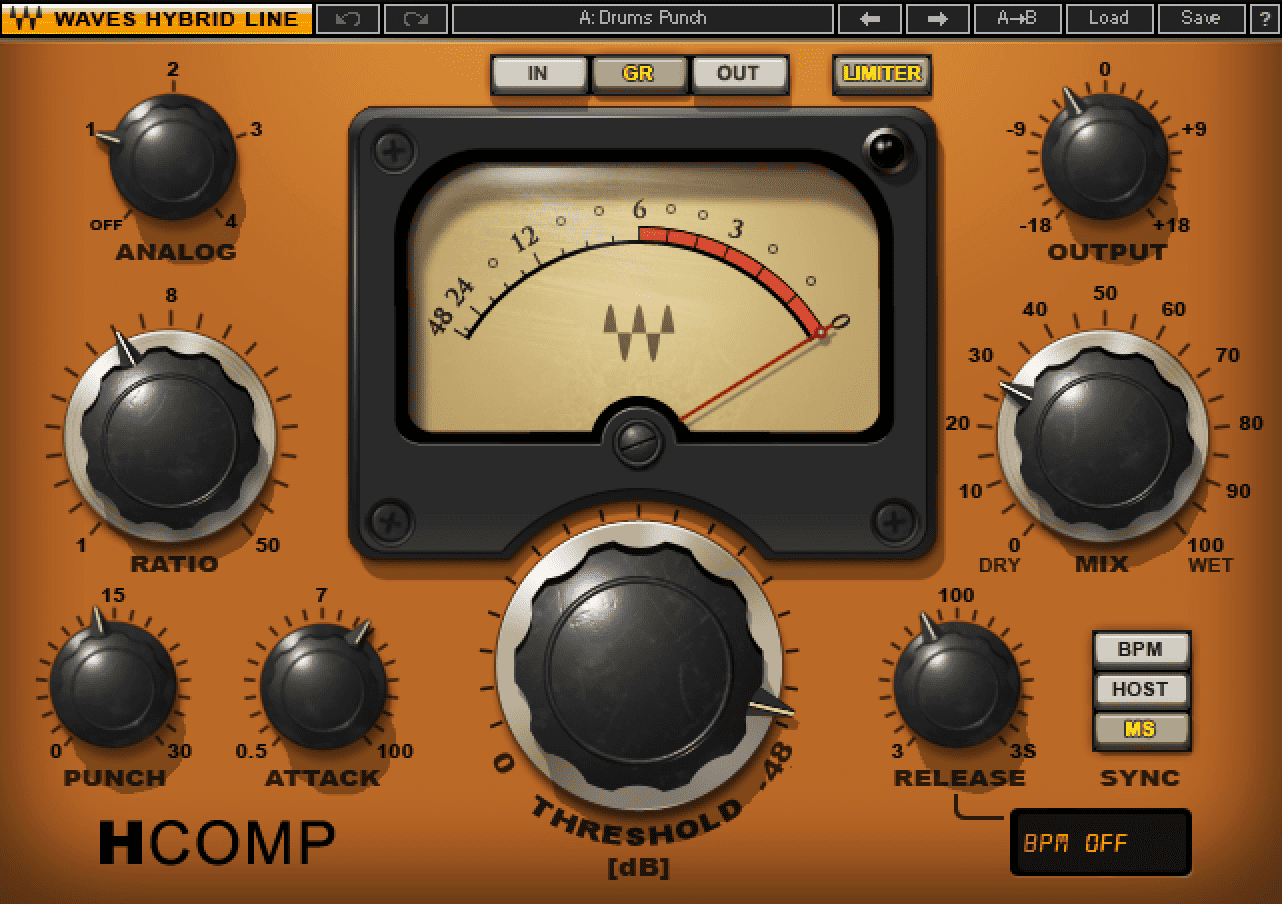
You can also add a compressor to the kick to add more punch. We used Waves’ H-Comp’s Drum Punch preset and dragged the mix knob down to around 30% to apply parallel compression.
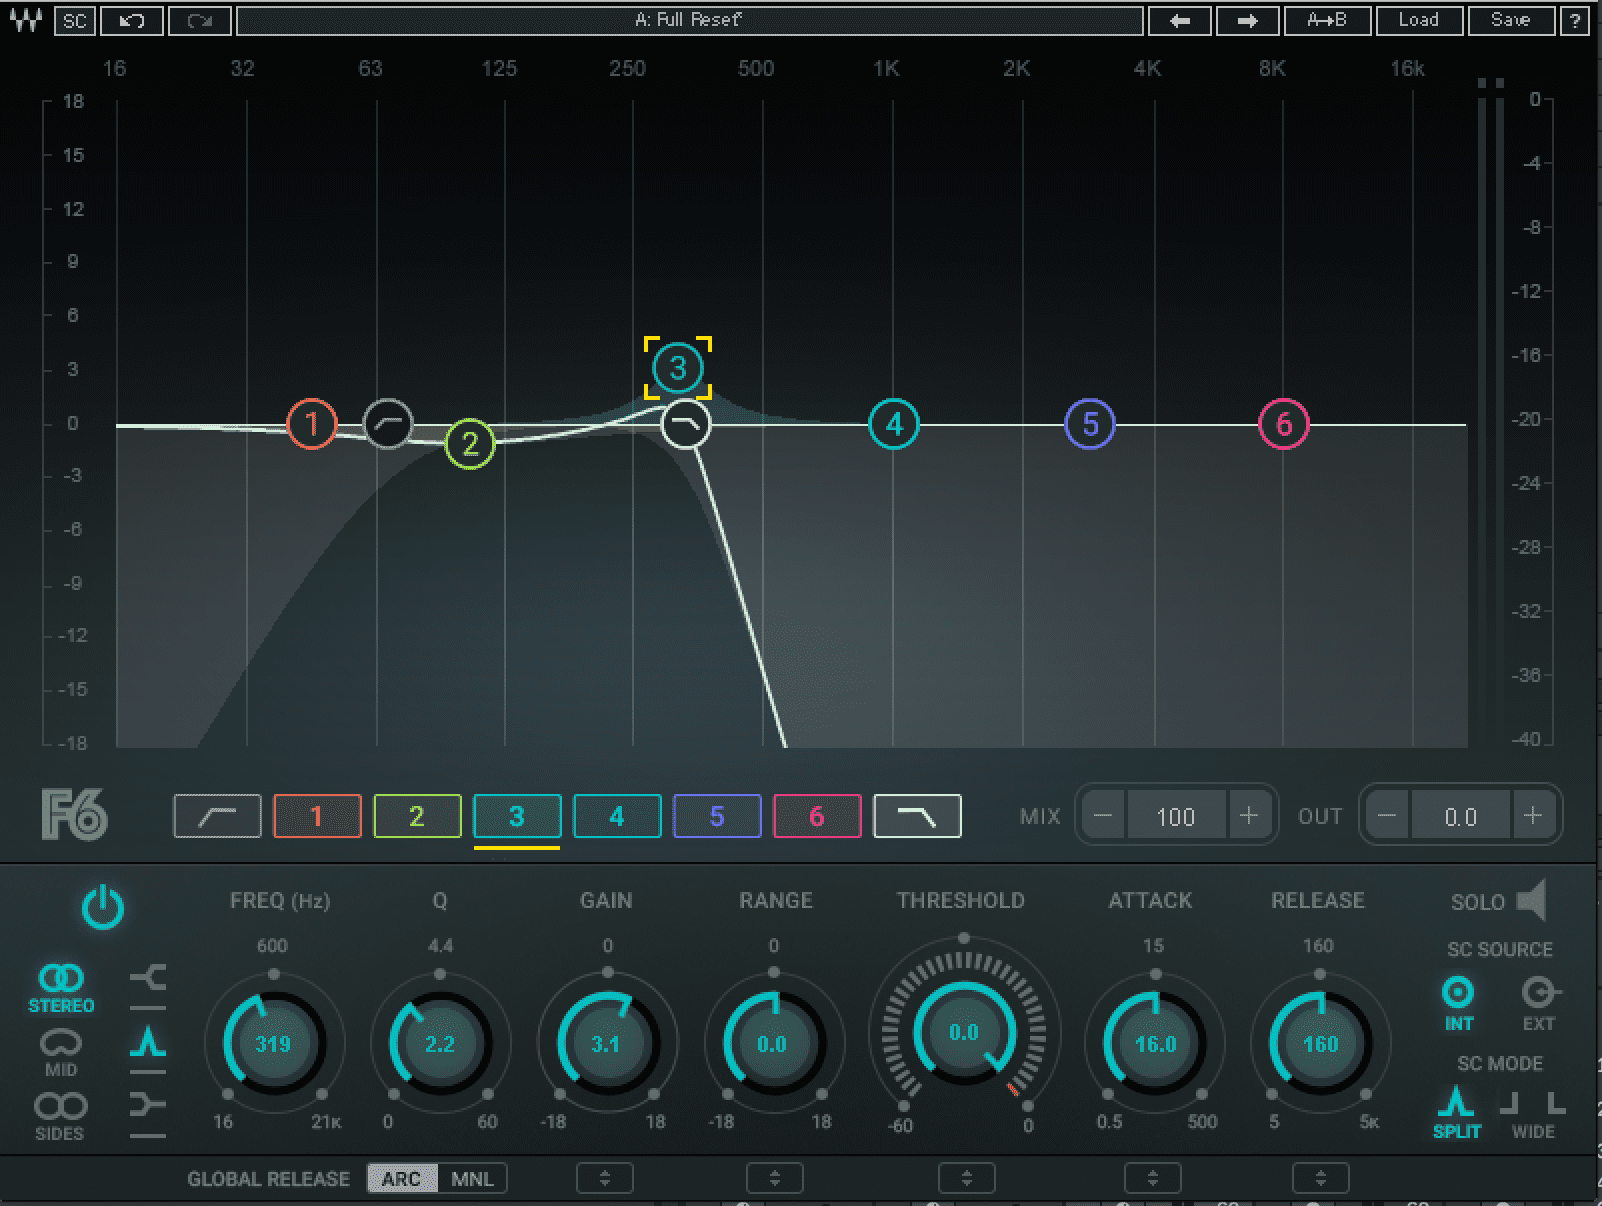
Insert an EQ on the kick and make a cut of around -4.5db at around 98Hz with a bell-shaped curve. We’ve used Waves’ F6 Floating-Band Dynamic EQ. We want to make room for the bassline, which is going to be playing repeating G notes in the G2 range.
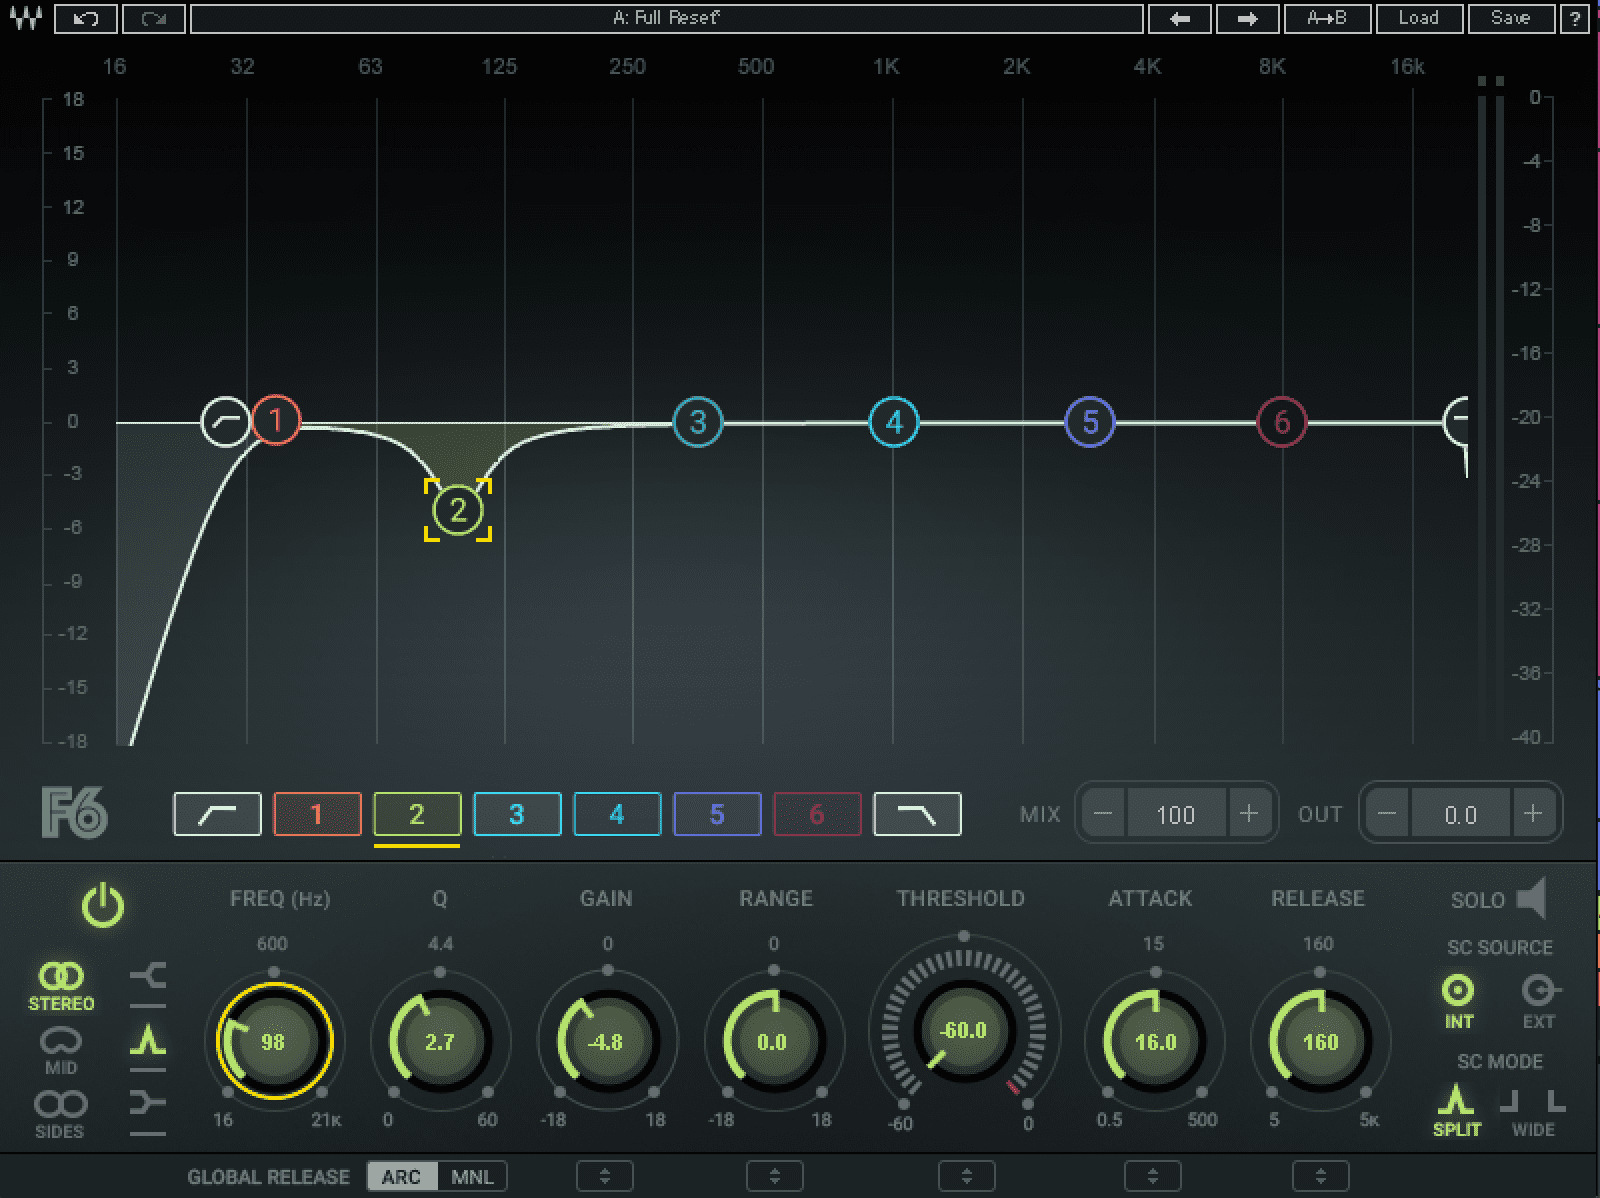
A Note Frequency Chart (as seen below) can be very helpful when EQing the low end. It can help you separate the bass and kick more accurately when making space for the bassline’s dominant frequencies in the kick, or vice-versa.
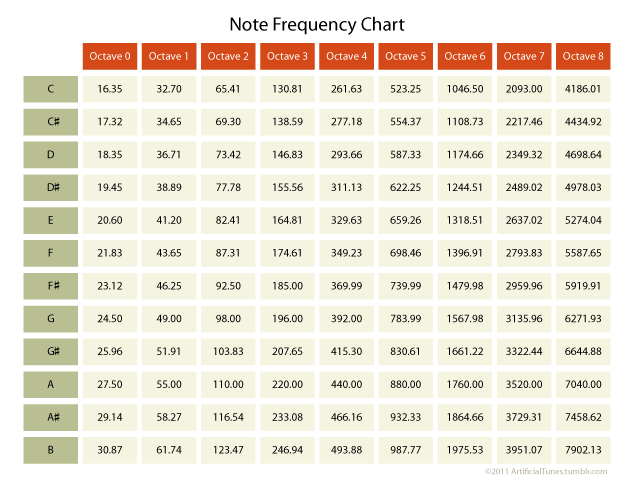
As you can see in the chart, G2’s frequency is exactly 98, which is why we scooped out that frequency in the kick.
Step 2
Now for the bass part! We start with the sub layer.
Create a new audio channel and drag in “Kick Sub Butter” from Ableton’s Factory Chop and Swing Pack. This is a kick drum sample but we are only after the long, subby tail.
Insert a transient shaper plug-in and bring the attack all the way down. Add sustain to emphasize the tail more and slightly increase the output gain to make up for the lost volume.
Reducing the attack also technically sidechains the sub to the kick. The sub will now duck its initial transient that would have otherwise competed with the kick’s.
By chance, this sub sample was tuned to G. If not, we would have had to re-pitch it to G to ensure it was in the correct key. You can use tuners or spectrum analyzers like Voxengo’s free tool Span to easily determine the tuning of drum parts.
Next, insert an EQ to isolate the sub frequencies. Drag your lowpass band down to around 80 Hz with a Q of 12db/octave. You don’t want the subs’ higher frequencies competing with the bassline!
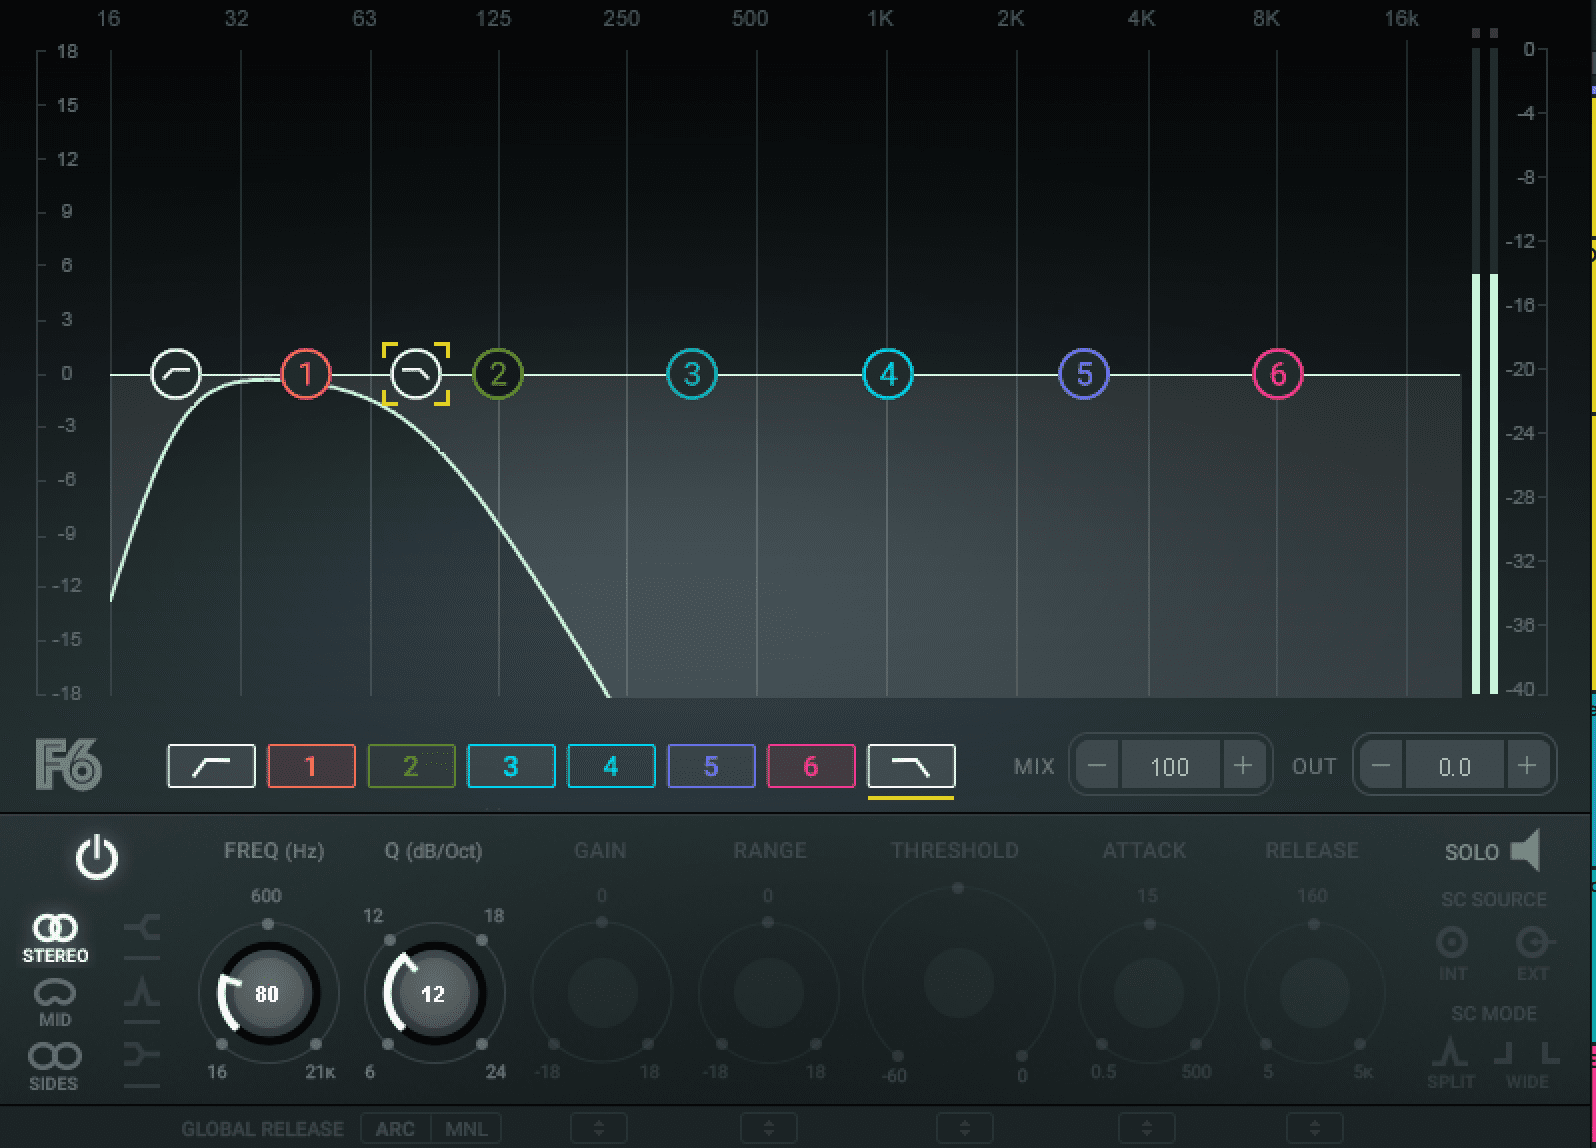
With this curve, the gain really starts to dip around 90 Hz, which is perfect as the bassline’s dominant frequencies (G2) start at 98 Hz.
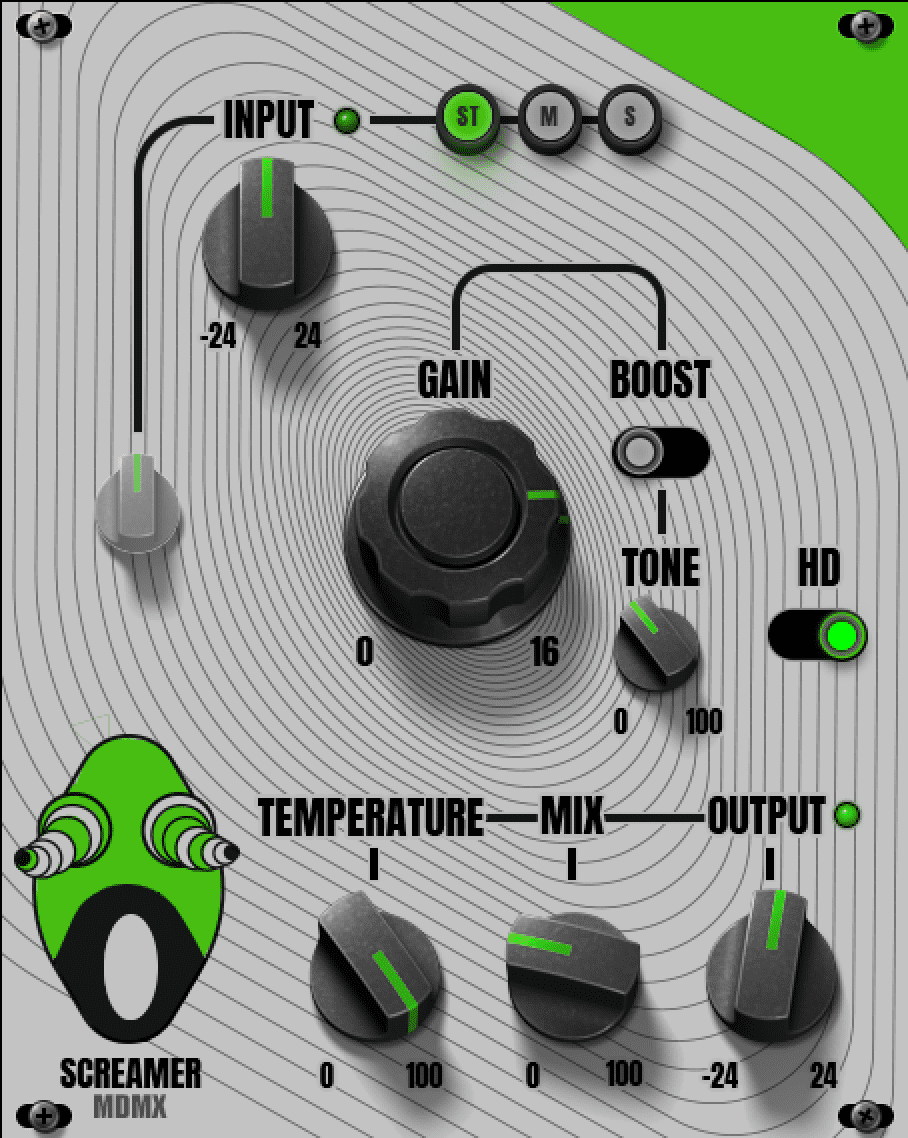
Finally, add some overdrive to the sub to help it cut through the mix. We used Waves’ MDMX Screamer with the Dry/Wet at about 35%. Make sure that the overdrive does not reduce the low end of the sub!
The sub layer:
Step 3
Time for the rolling bass line.
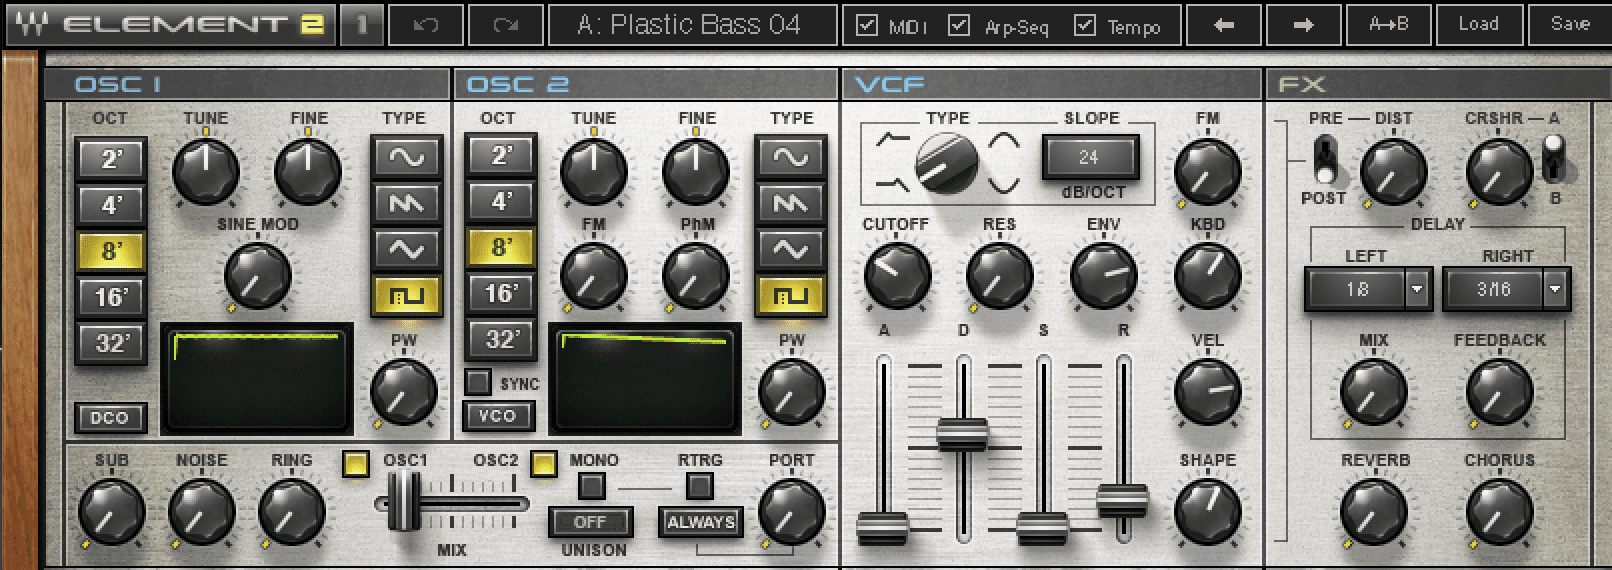
Create a MIDI channel and load up your favourite bass synth. We used Waves’ Element 2 running the Plastic Bass 04 preset. Saw or square waves with a fast attack or a fast filter envelope work best for this type of sound. The transients need to be audible!
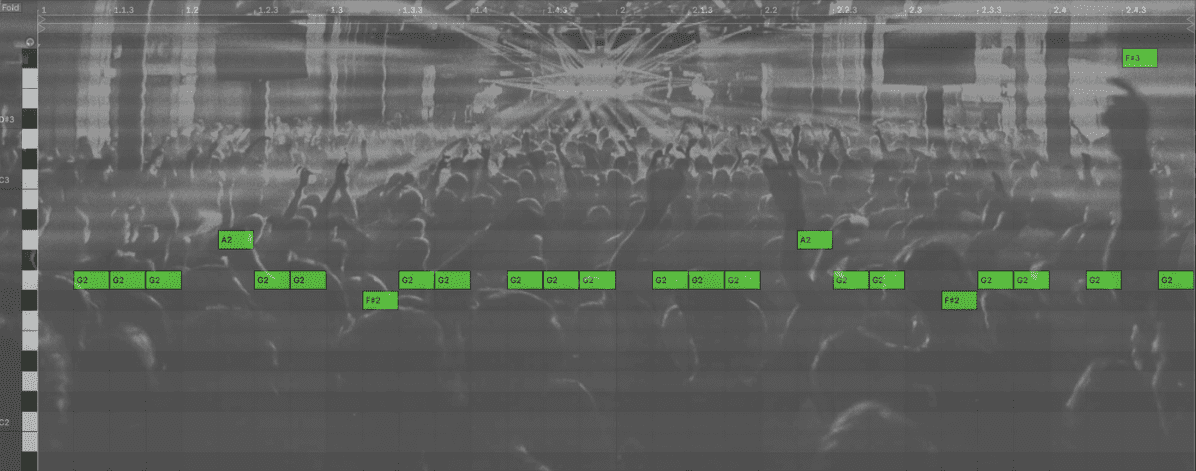
Program a MIDI bass line in the key of G within the C2 octave range (G major or minor will both work). Leaving the first 16th-note of every beat empty is important to prevent clashing with the kick.
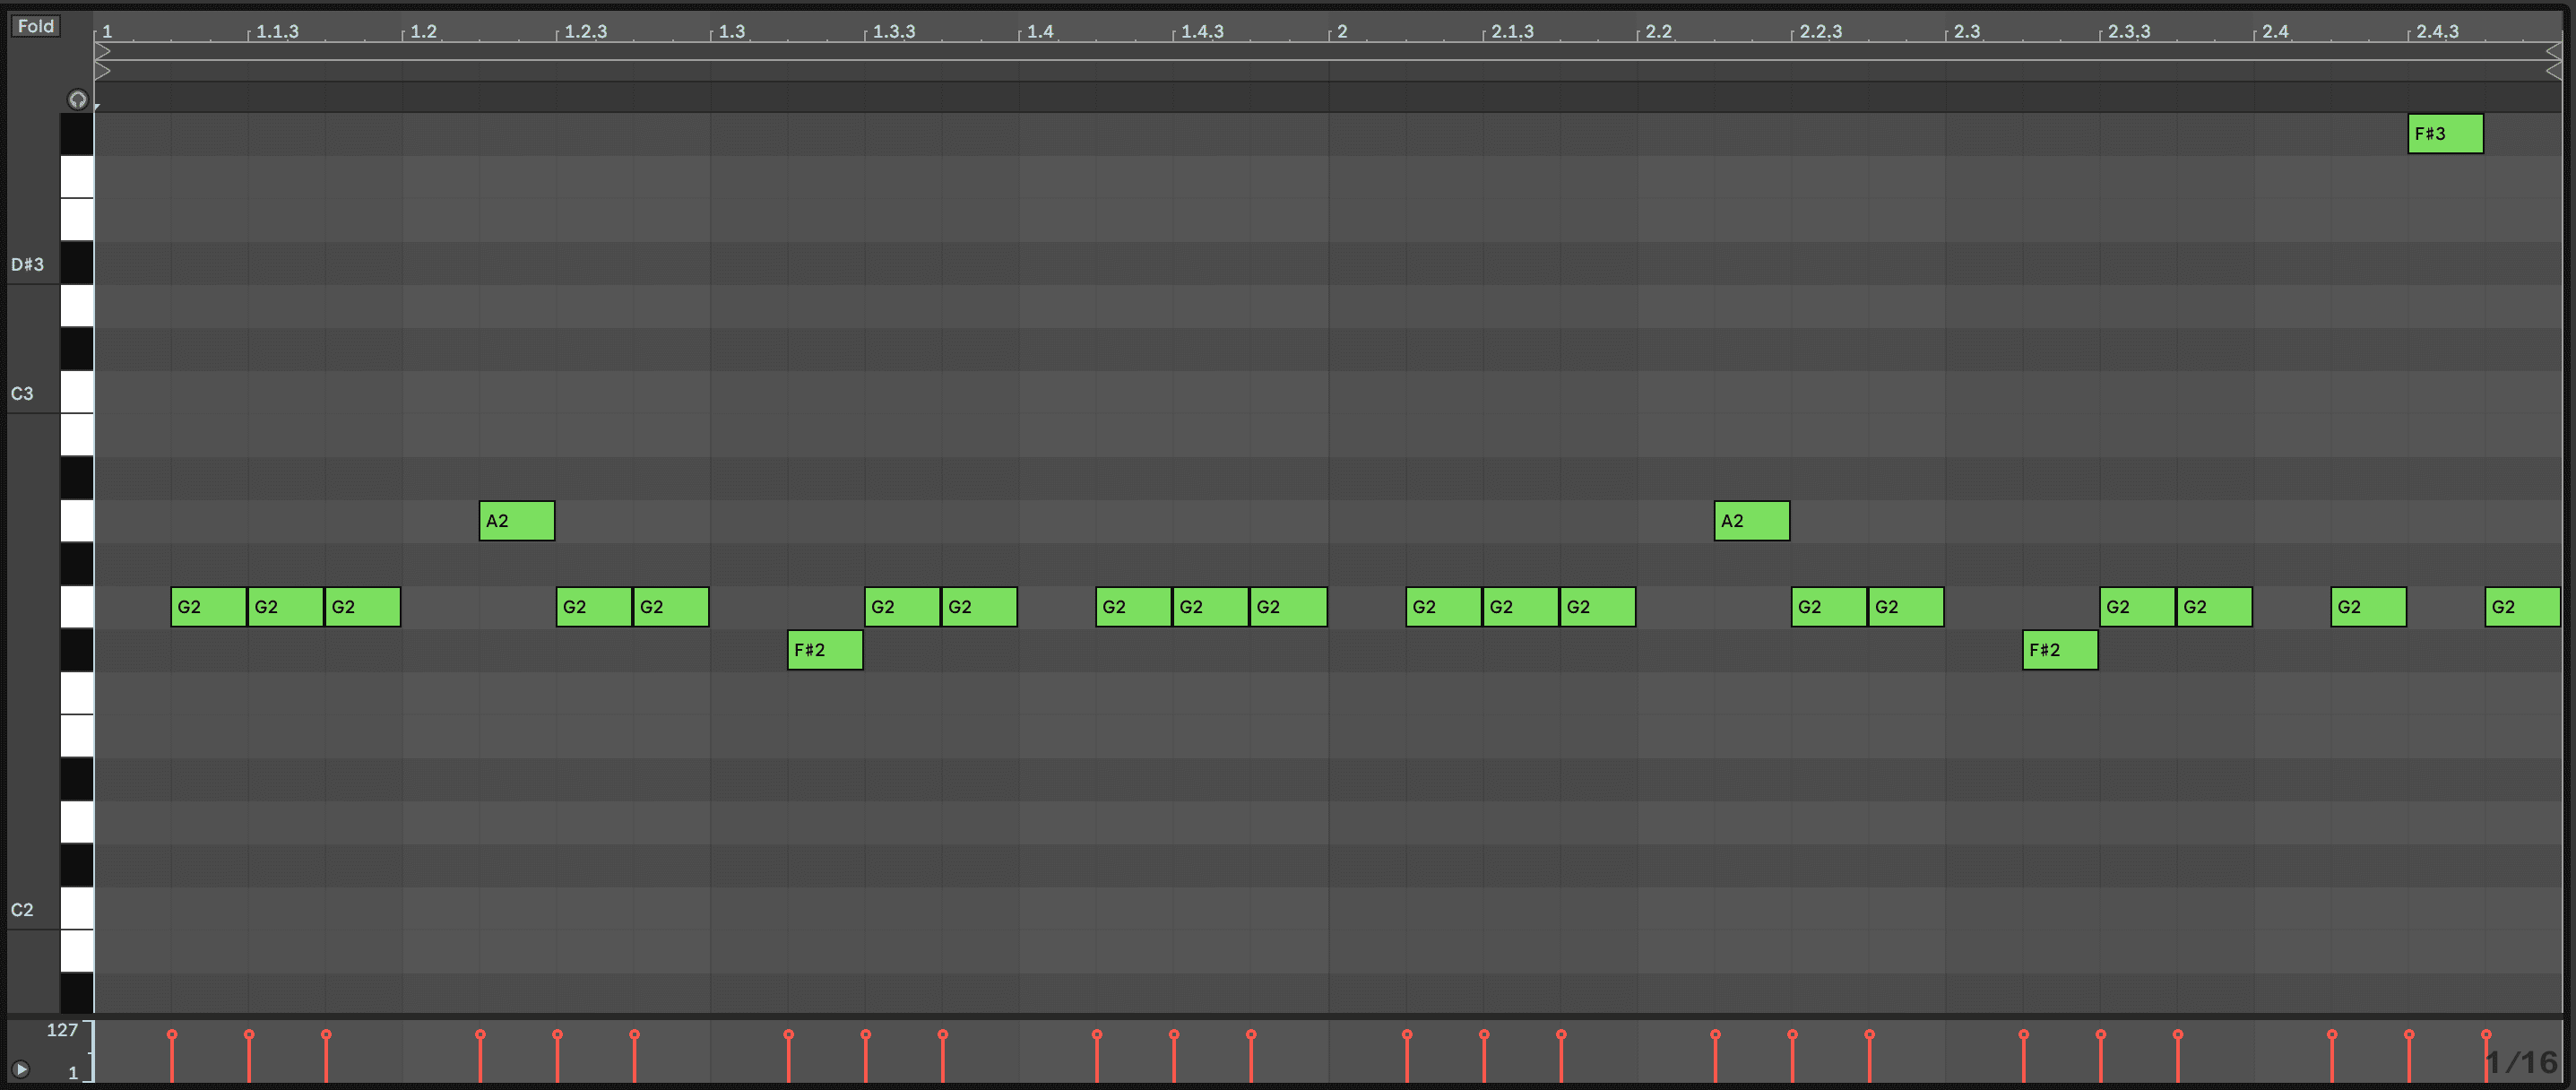
We relied on the G note, programming it in almost every 16th note, with some other notes thrown in to vary the sequence.
Next, insert an EQ and drag the highpass up to around 65Hz so the bassline does not compete with the sub’s frequencies. Bring the lowpass down to around 350Hz and make a slight cut at 100Hz to help control the frequency build-up from the repeating G2 notes. Thirdly, make a slight boost around 330Hz to bring out some of the bassline’s upper harmonics.
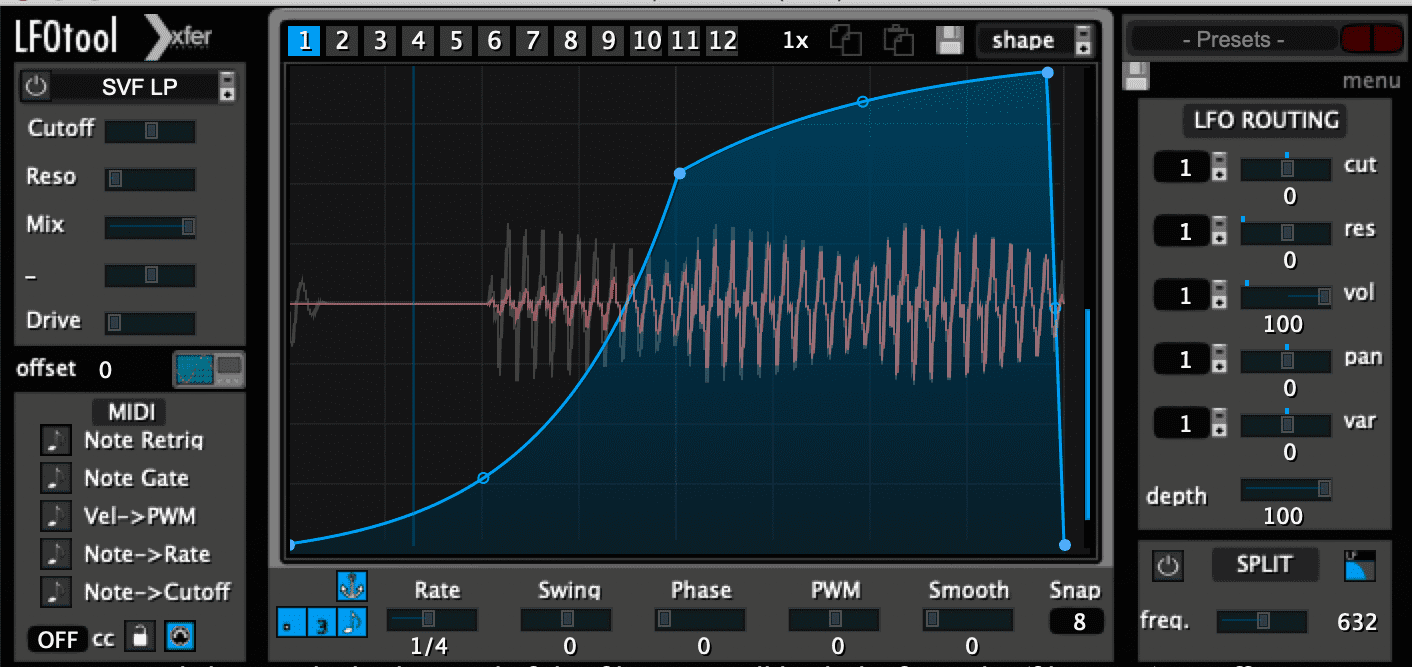
To ensure maximum kick/bass separation, sidechaining is necessary. You can do this with any compressor but we used LFO Tool. The aim is to ensure that the bassline ducks out of the way of the kick. While we programmed the bassline to give space to the kick, there is still some note-tail overlap.
If using a volume shaping plugin, set the envelope so that even the first bass notes’ volume is not yet at full. This will also add swing to the pattern. With sidechain compression, this can be emulated by setting a slower release time.
Pro Tip: With rolling basslines, experiment with different volume envelope shapes for different types of swing. The same applies to the release settings if you are instead using a compressor for sidechaining.
The bassline:
Here’s how it sounds with the sub:
Step 4
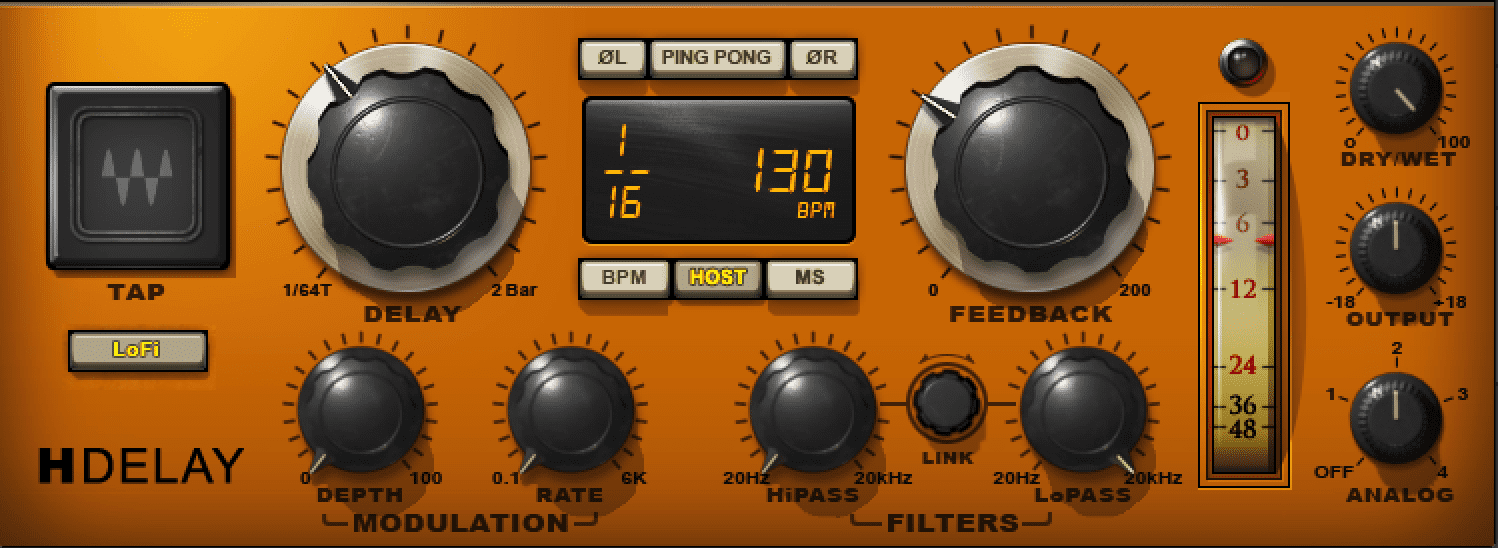
The final step is adding a percussive layer. This will help the bassline’s groove come through on speakers without a sub. A creative way to do this is to create a new audio channel, copy your kick to this channel and then add a 16th-note delay. We used Waves’ H-Delay set to 1/16 and 100% Dry/Wet with EQs both before and after to shape the sound.
Finally, add stereo width to the percussive to help it stand out from all of the low-end parts. We used Waves’ Reel ADT but any chorus or stereo width plugin can do the trick.

The final combination of all three bass layers:
Once again, the bass part with the kick and top elements:
Tutorials is sponsored by
Roland Cloud is your creative hub for Roland hardware and software. Access legendary recreations of Roland Classics, find new sounds for your favorite products, and download updates and companion apps to make music fast and easy.