
This channel is sponsored by
 Roland Cloud is your creative hub for Roland hardware and software. Access legendary recreations of Roland Classics, find new sounds for your favorite products, and download updates and companion apps to make music fast and easy. Visit Roland Cloud
Spectral processing can open up possibilities when working with stems, from adding effects like delay, to targeting specific instruments for dynamics processing, and more. In this tutorial, we show you how.
Working with stems can be frustratingly limiting. With all of the sounds and frequencies already baked in, how can you separate things out for additional processing? Spectral processing makes this easy to do and really opens up creative possibilities. Whether you’re doing a remix based on a limited number of audio files, stem mastering, or even just looking for new ways to mix, spectral processing can really open up doors.
We’ll be using Peel by plugin company Zplane to expand what we can do with a static drum stem. We’ll add compression to the kick and add rhythmic delays to the hats. Finally, we’ll explore how Peel can be used in unexpectedly creative ways as well.
As always, click on any picture to see a larger version.
We’ll use Peel to go from these dry stems:
To this:
Step 1: Compressing The Kick
We start with the drum stem ‘US_WT_125_Aggressive_stp.wav’ from the Warehouse Techno pack by UNDRGRND Sounds. It’s a pretty cool loop, with a distorted kick, claps, and hats. It sounds good, no doubt about that, but we’d like to emphasize the kick even more with compression and saturation. While we could probably set up a custom multiband routing system, there’s an easier way.
We start by putting Peel on the audio channel. Peel displays frequency information as a spectrum, with low information at the bottom and highs at the top. It also shows us stereo width, with the centre bring mono and the sides the left and right spread. Looking at the display, we can see there’s a centred blob at the bottom. That’s the kick we want to target.
Next, we draw a box around the area that we want to isolate for processing. By clicking the small square next to the word ‘EQ’, we can toggle between the original audio minus the selected area, and the selected area in solo. Let’s mute the selected area.
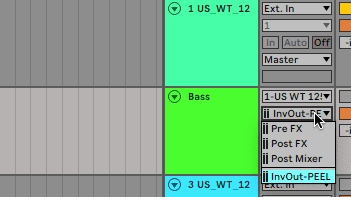
Next, let’s create a new audio track so we can hear the selected area in isolation. On the new audio channel, select the stem channel as the audio in. Next, choose the InvOut – PEEL option from the next dropdown to hear the isolated section. Make sure to click Monitor In as well to hear it. Now we can add effects to the targeted area.
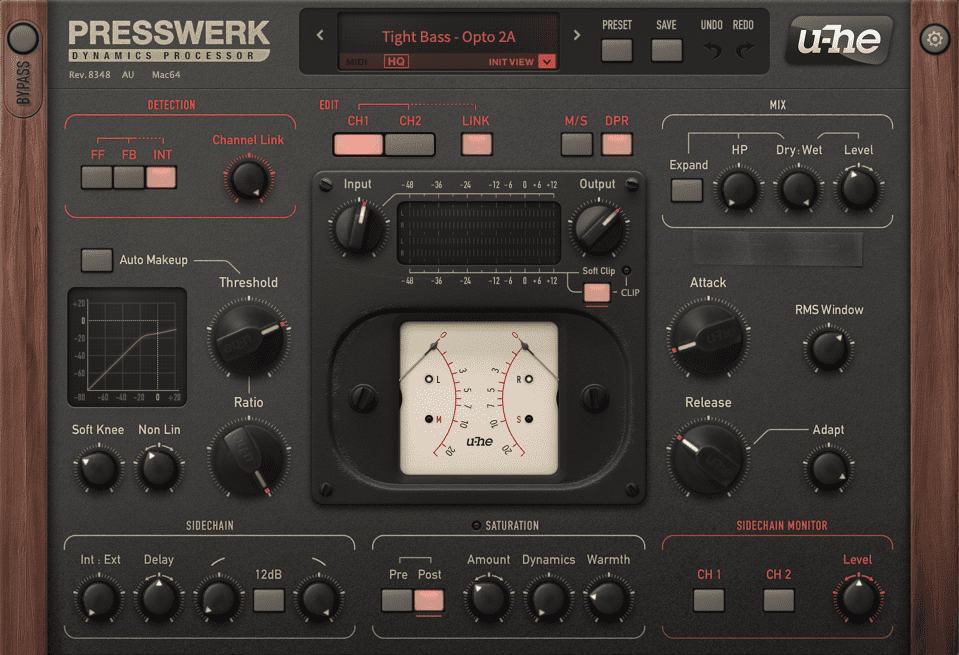
We add u-he Presswerk to compress the kick even more and then beef it up with Live’s Saturator.
Here’s the loop in its original form:
Here it is with just the kick frequencies in solo:
And conversely with the kick area muted:
And finally the whole loop with effects applied to the kick:


Step 2: Reverb On The Top Percussion
Next, let’s add reverb to the tops. We bounce out our processed loop from step one and then import it onto a new audio channel. We add Peel as before but this time we target the hats. We draw in a rectangle between 1 and 5kHz, adjusting both the height and width (we can see that there’s stereo information this time) until it sounds good. It’s easiest to do this with the selected area in solo.
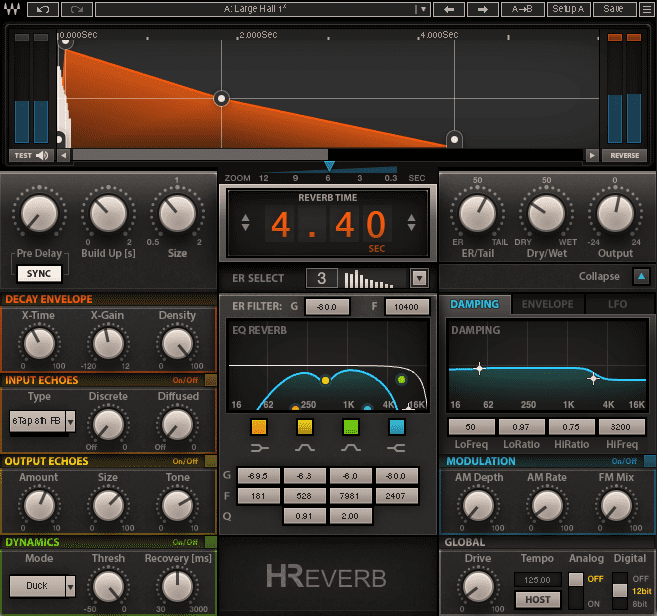
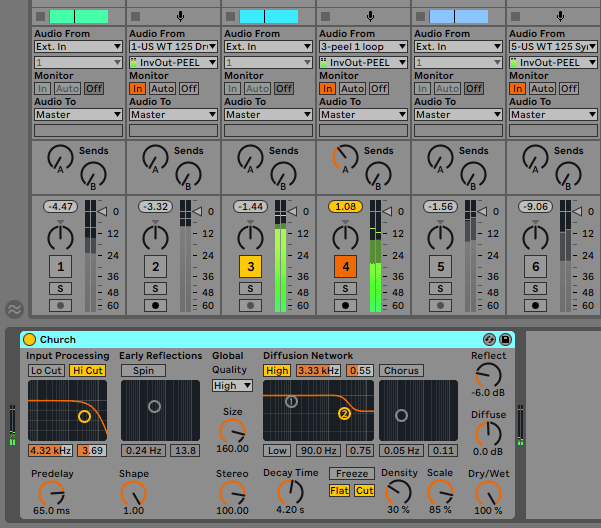
Next, we create a new audio channel and route Peel to it as before. We go with Waves H-Reverb, as it has a lot of sound-shaping options. We want something that moves in time with the groove so we listen to both tracks together, tweaking settings on H-Reverb and readjusting the window on Zplane until things sound perfect. Finally, we pipe the affected top channel into the Reverb send for additional processing.
Top Tip: It can be difficult to isolate individual instruments completely so it can be helpful to think of them not as instruments specifically but as frequency ranges.
The stem with no reverb effects:
The top percussion isolated with effects:
And in context of the whole stem:

Step 3: Creative Effects
Peel doesn’t have to be limited to just sound enhancement. Its spectral processing function makes it ideal for creative effects too.
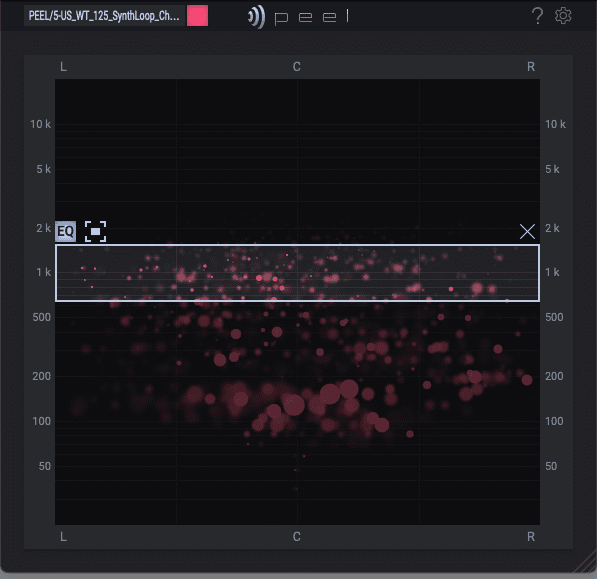
We have a synth loop from the same pack that we like (‘US_WT_125_SynthLoop_Chordal_D#.wav’) but it’s a little full. Instead of using an EQ to carve it up, Let’s use Zplane to create a ghostly spectral sound.
We drop the sample onto a new audio channel and add Peel, although this time we don’t bother to create a new audio channel as we’re only going to use the affected sound. We draw in a box between 750Hz and 1.5kHz and make it really wide, as there’s lots of stereo information to capture. We solo the sound so all we hear are the mid frequencies surrounded by the box.
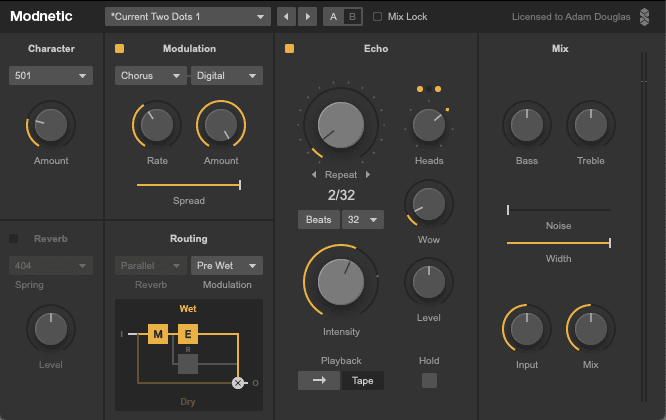
Next, we add Surreal Machines’ Modnetic, a tape delay-style dub plugin. We dial in some juicy delay and then fine-tune the frequencies in Peel by dragging the rectangle up and down.
The original synth loop:
Isolated with Peel:
And with effects from Modnetic:
Finally, here are our fully processed stems together:
Tutorials is sponsored by
Roland Cloud is your creative hub for Roland hardware and software. Access legendary recreations of Roland Classics, find new sounds for your favorite products, and download updates and companion apps to make music fast and easy.