
In this tutorial, we show you how to create your own bespoke clap using white noise and analogue synthesis.
The struggle is real. Trawling through thousands of percussion samples looking for the perfect one for your track can be a real creativity killer. However, it’s fairly easy to craft your own percussion using analogue synthesis. Much as you make your own bass and lead sounds, why not use the tools you already have to whip up some bespoke drum sounds? It’s sure to fit your track and has the added bonus of being unique to you.
One of the easier types of sound to synthesize is the clap. Many of your favourite claps, such as the TR-808 and TR-909, were made using analogue synthesis. As there’s no pitched tonal content, we can do most of the heavy lifting with white noise and a filter. The key to a convincing sound, however, lies in the envelope, as we shall soon see.
Using just a few simple tools, you’ll soon be able to create a clap like this:
As always, click any image to see a larger version.
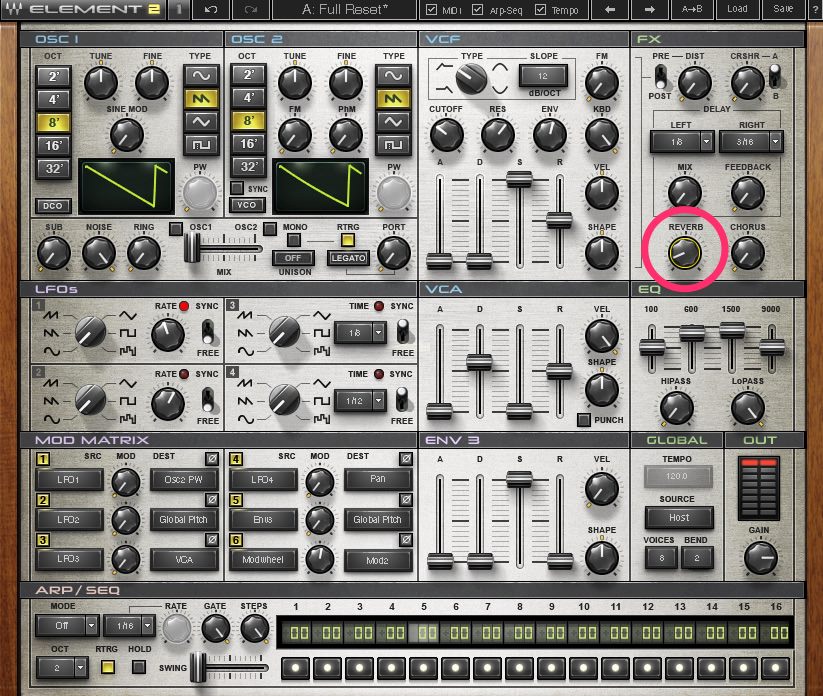
Step 1
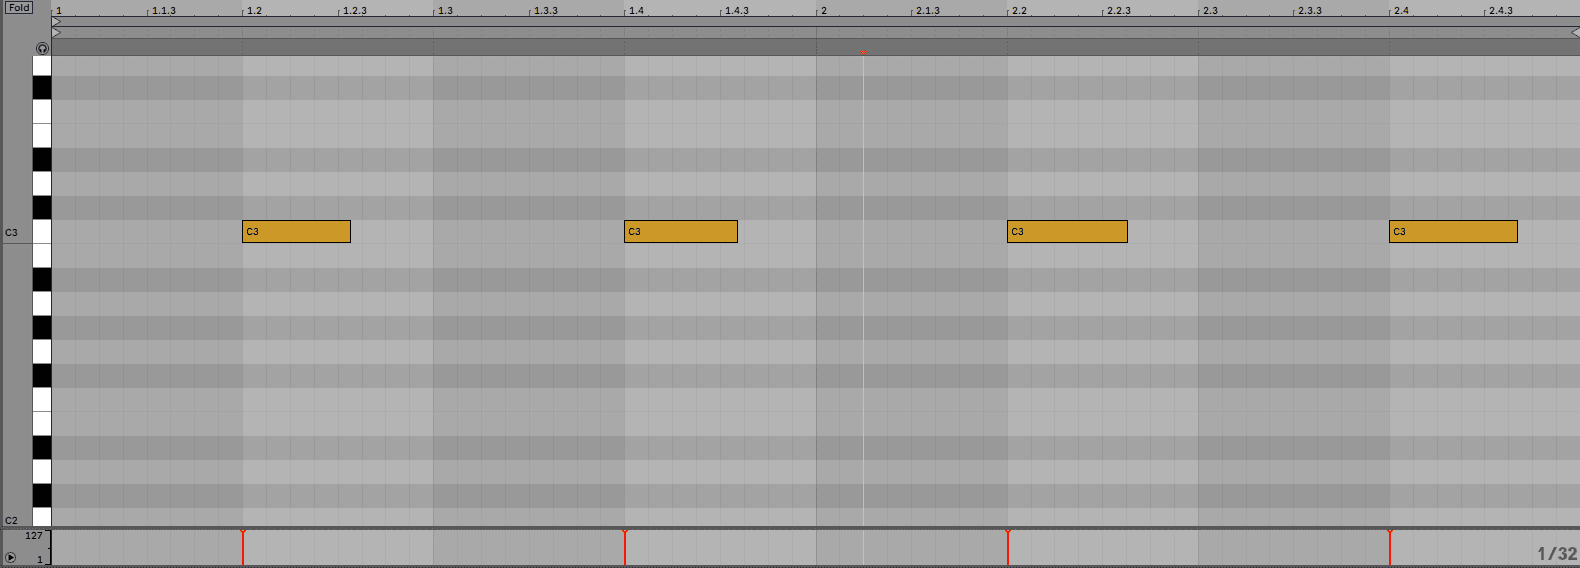
First, create a new MIDI track and add an analogue-style synthesizer plugin to it. We’re using Waves’ Element 2.0 but any virtual analogue synth with white noise will do the trick. Initialize it by loading the Full Reset preset. Draw notes into the piano roll on the 2 and 4. These will be our claps.
Step 2
Press play on the transport. We’re hearing oscillator one playing a saw wave. We don’t need any harmonic information so turn off both oscillators. The main sound source for our clap will be white noise, so turn that all the way up. You should now hear bursts of static. This is not at all clap-like, is it?

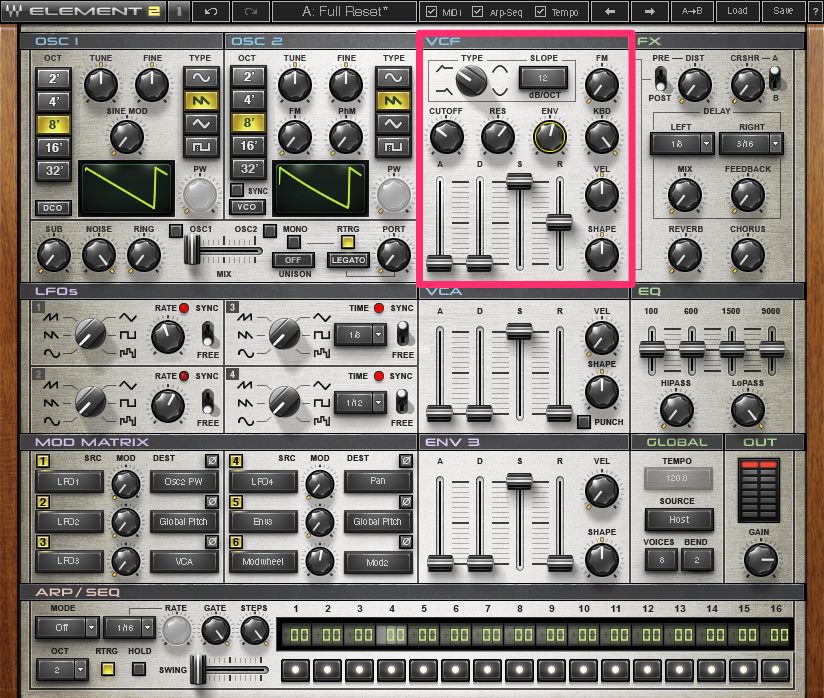
Step 3
Let’s shape our white noise with the filter. Claps don’t need much low frequency content, so change the filter type to highpass. We want a more gentle slope, so choose 12dB/octave. Turn down cutoff to around 30. This will let some low frequencies through and give our clap a little body. Increase resonance to about 62 to give it some bite.
Now let’s look at the filter envelope. Sustain is perfect where it is but let’s turn up the release to about half-way to give our clap a little more length. Next, set velocity to 50% to make the attack snappy and turn up the envelope amount to about 10. Our clap is starting to take shape.
Step 4
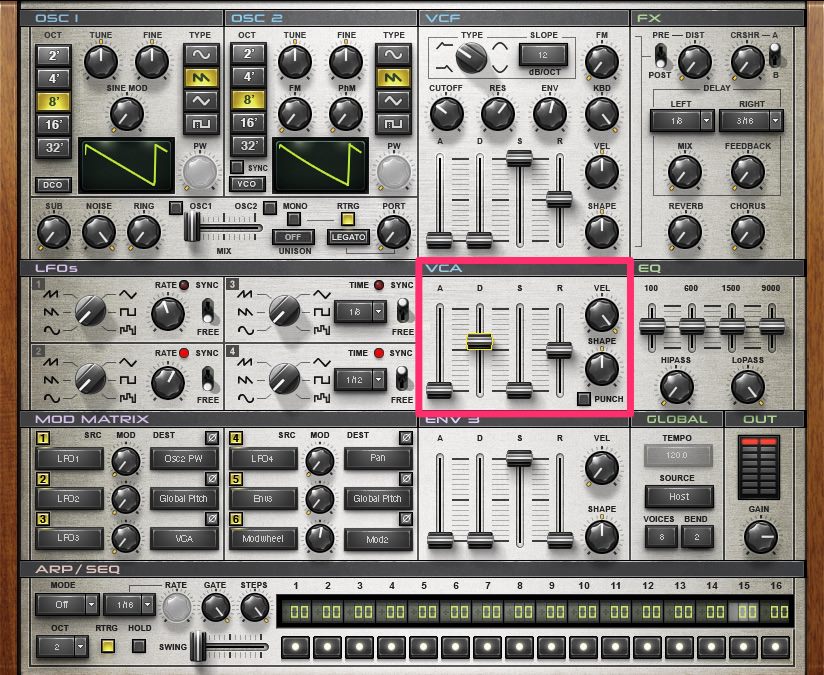
It still sounds like gated white noise, so what we need is some volume shaping. Let’s turn our attention to the VCA section next. Percussion sounds tend to have a very sharp attack and no sustain, so make sure those are both set to 0. Turn up decay and sustain to about halfway. Feel free to further adjust the decay until it’s long enough for your track. Next, turn velocity all the way up. This can be useful for programming variation should you want it.
Step 5
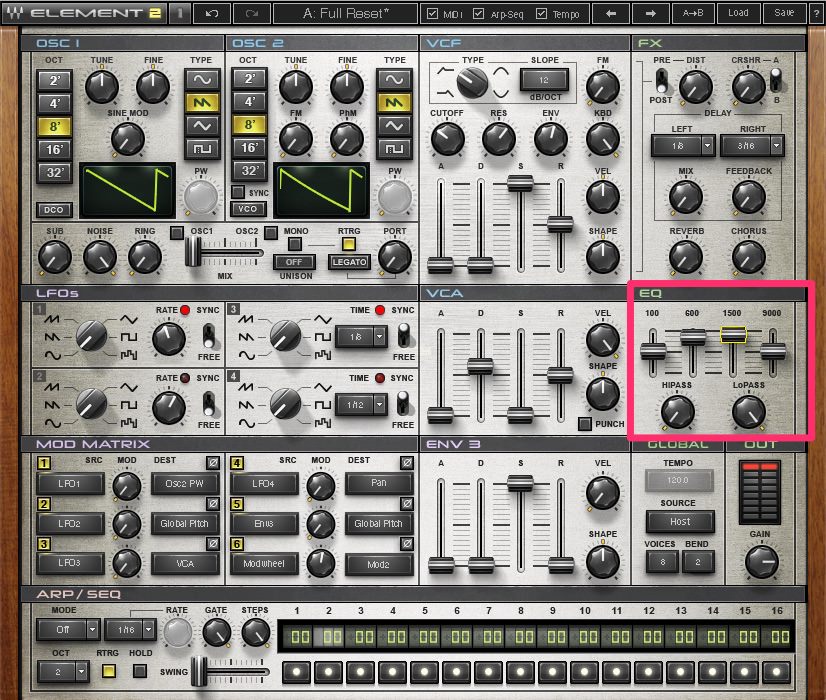
Our clap could use a little oomph in the mids. Use the EQ section to boost the frequencies in the upper and lower mids. If your soft synth don’t have an EQ section, you can get similar results from an EQ plugin placed after the synth in the signal chain.
Step 6
Lastly, let’s add a little reverb to give our clap a nice tail. Head up to the effects section and increase the reverb dial until it sounds good. We’ve gone for a fairly subtle amount, just enough to give it some depth.
Step 7
To make your clap production-ready, add a compressor next in the signal chain. We’re using Waves H-Comp. We have it set to medium Attack and Release settings to let the transient through. We’re also using the Punch knob to sharpen up the initial transient. We have our threshold set to -20.

Step 8
Our clap is a little bright, and there might be some low-frequency mud creeping in, so let’s add an EQ next in the chain just to be sure. Looking at the display in Waves’ H-EQ, we can see that there is indeed a little rumbling down below, so we use the highpass shelf to lop it off around 550Hz. In the upper end, we use the lowpass to gently roll off frequencies around 19kHz.

Step 9
A common trick with old drum machines was to double up the clap signal to make it seem like a group of people clapping at once. We can use a delay to achieve this. We’re using Waves’ H-Delay. Set the Delay time to 1/16 and the feedback very low, around 7. This will create a short, slapback effect. Adjust the filters and Dry/Wet knob as you see fit.
And our clap is finished. Here is the final clap alone:

Here is our clap again in context with an electro beat:
For extra variation, try tweaking the filter sustain for a darker or brighter clap sound. Play around with the VCA Shape (curve) settings as well.
Once you’re happy with your clap, you can bounce it down to use as a one shot, or as programmed MIDI notes with variations in length and velocity for a more organic, analogue feel.