We show you how to take your mix from dull to sparkle with bus processing plugins from the new and improved Arturia FX Collection 2.
When mix engineers talk about the final five percent, they mean that extra polish and sparkle that elevates a mix from good to great. There are many ways to achieve this but one of the easiest is with bus processing. By using plugins across an auxiliary bus – whether that be drums, vocals, or master bus – and processing everything together, you can help meld a lot of separate sounds into one. You create a sense of totality. Think of it like a salad versus a soup. With a salad, which is served cold, you can taste each ingredient separately. But with a soup, with everything heated together, the end result becomes more than the sum of its parts. Bus processing is the heat of your mix.
Arturia have recently updated their mammoth FX Collection to version two and added some new bus processing tools. Let’s use those as well as other goodies from the collection to add depth and sparkle to a house mix. All of the stems in this tutorial came from Splice’s sample pack, House Nation. As always, click any image to see a larger version.
With bus processing, we can go from this flat mix:
To this:
Grab your chef’s hat and let’s get cooking with heat.
Step 1: Kick And Percussion
We start with the kick (as most house songs do). Using the Splice sample, ‘hn_kick_lowz.wav’, we’ve laid down a basic 4/4 beat. The kick sounds great on its own with plenty of girth and bass weight so we don’t need to do anything else to it.
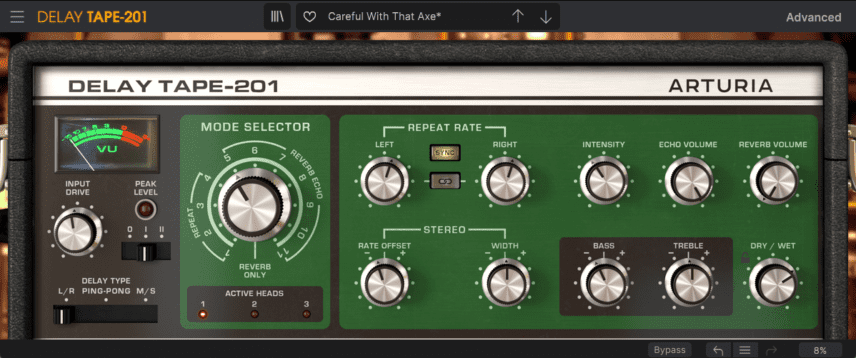
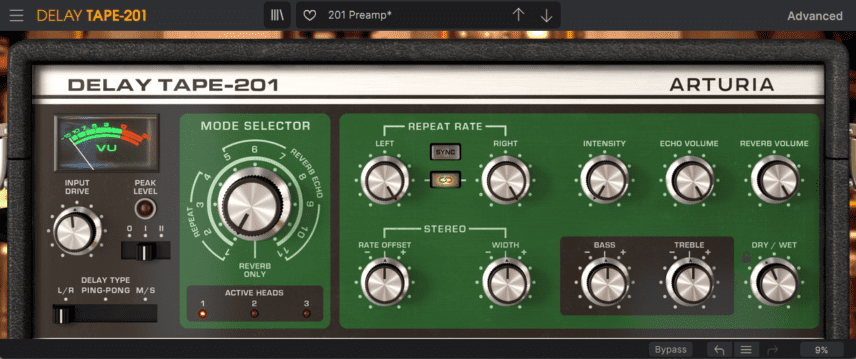
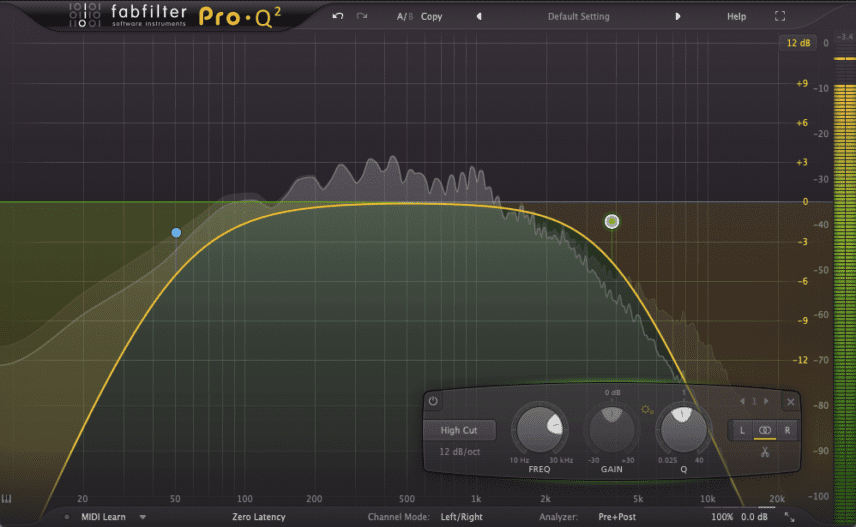
Next, we go with ‘hn_prc125_filtad.wav’, a percussion loop. It has a nice middy feel although it’s a little static. We use Arturia’s Delay Tape-201 to give it some extra rhythmic drive. Note that Delay Tape-201 adds tape-style saturation as well. Building up saturation throughout a mix is a nice way to add character. We also shave off some of the lows and highs with FabFilter Pro-Q 2 to help it sit better in the mix.
The kick and percussion loop together:
Step 2: Top Loop
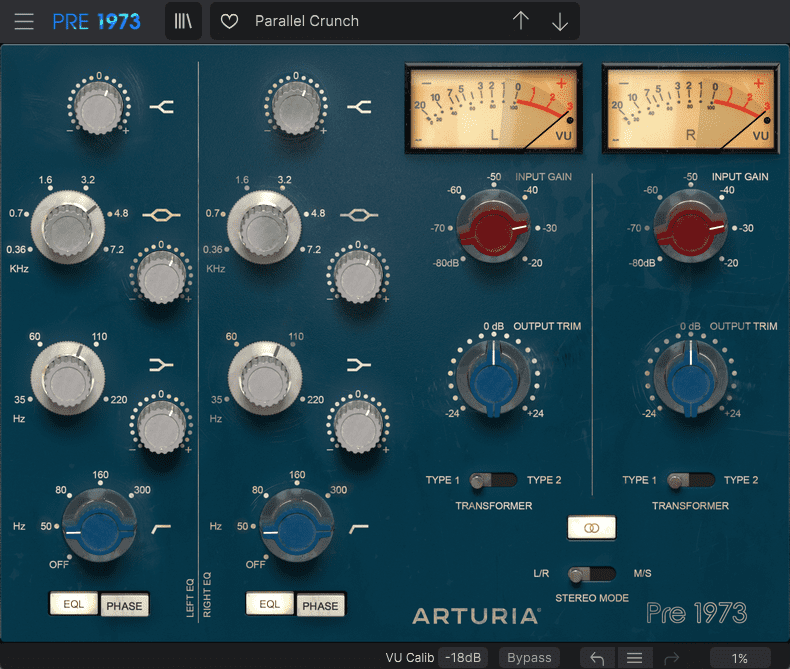
There are many different ways to process a bus or stem. For our first one of this mix, we’ll use a mic preamp emulation to sweeten a percussion top loop.
The sample, ‘hn_top125_dirtytop.wav’, sounds great right out of the gate but is clashing a bit with the percussion loop from step 1. Remember when mixing, you need to consider sounds in terms of the mix, not just individually. We’d like to brighten it up and make it pop. There are a number of ways to do this but let’s use a mic pre, which doesn’t get nearly enough love in in-the-box productions.
We put Arturia’s Pre 1973 on the channel. It’s an emulation of the Neve 1073 microphone preamp. Neve is legendary in the world of recording, and for very good reason. Let’s see how it affects our loop. With a gentle boost of the highs at around 4.1kHz and a bit in the mids, as well as plenty of input drive, it breathes a lovely amount of air into our top loop.
Here’s the loop without Pre 1973:
And with:
And together with the kick and percussion loop:
Step 3: Drum Bus
Now that our drums are all set, let’s group them into a bus and use processing to help them congeal together.
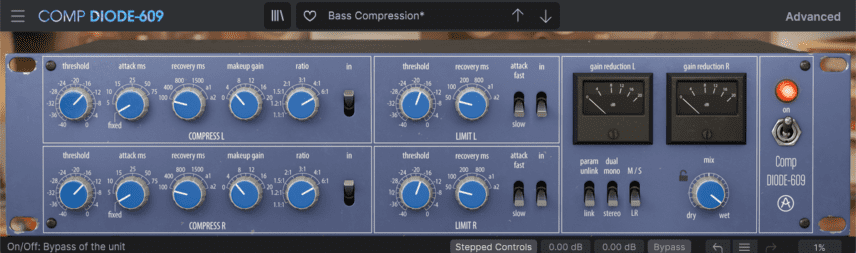
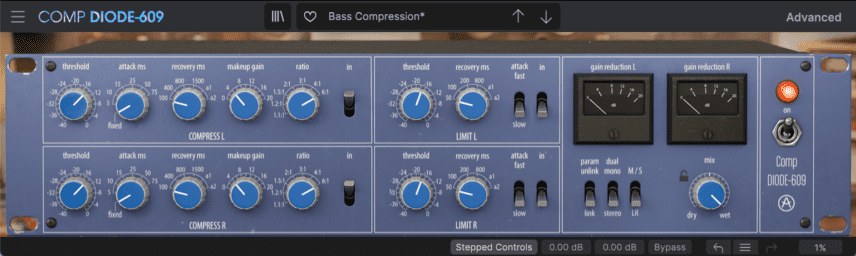
One of the new bus processors in FX Collection 2 is Comp Diode-609, a version of the Neve 33609 compressor. It’s a two-channel comp that can be run as dual mono channels, stereo, or mid-side. Let’s use it in L/R mode to get our drums jumping.
We going for a fairly aggressive feel but we also don’t want to nuke our drums. We settle on a threshold of about -14.0dB but a ratio of 6:1, the heaviest it has. We’re hitting it hard but only the peaks. The rulebook says that we don’t want to set the attack too fast or we’ll lose our transients. However, we like the way it sounds at the fastest setting, Fixed (which is 3ms). We also go with the fastest release (here called Recovery). Remember, it’s all about what sounds good to you and what works in the mix.
Here’s our drum bus before the Comp Diode-609:
And with. Notice how it not only improves dynamics but also adds air and depth.
Step 4: Bass
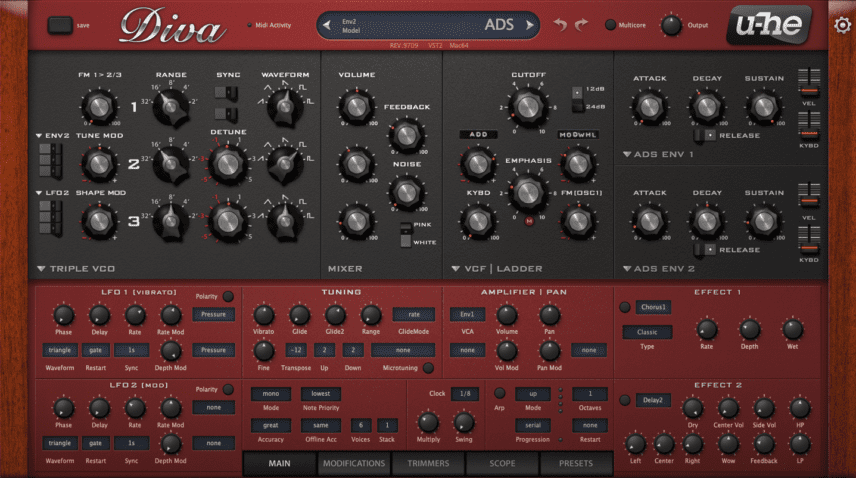
For our bass, we’ve programmed a Minimoog-ish line in with u-he Diva. We haze zero complaints about the sound quality but we would like it to jump out of the mix a bit more.
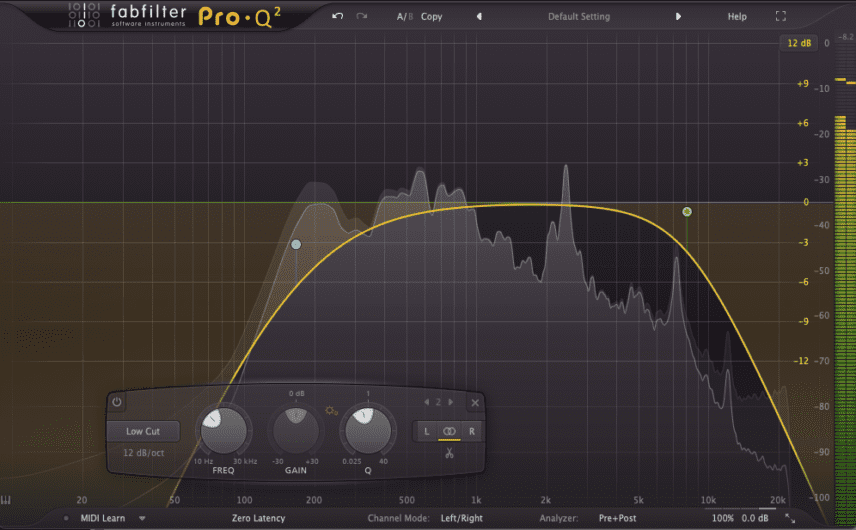
First, we load up another Delay Tape-201. This time, instead of using it as a delay, we’ll employ just its saturation circuit to beef up our bass. Owners of the original Roland RE-201 prize it almost as much for its mic pres and saturation power as for its tape delay. We liked the Comp Diode-609 so much, we decided to use it on the bass too. We went with roughly the same settings, as they just sound so good. Finally, FabFilter Pro-Q 2 rounds off the excess lows to help the bass sit with the kick.
The bass before processing:
And after:
Step 5: Keys
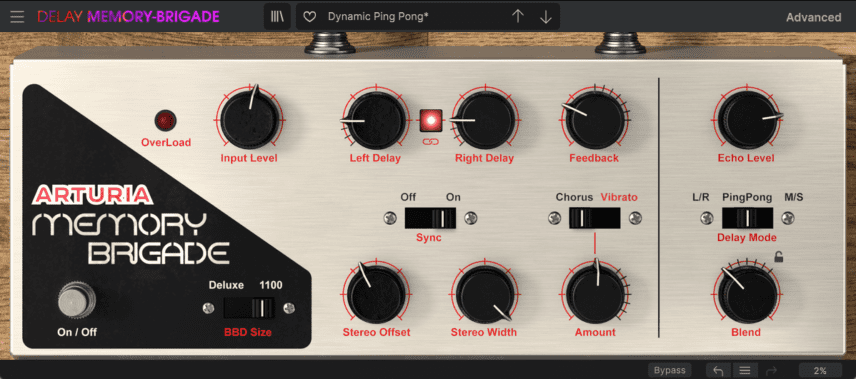
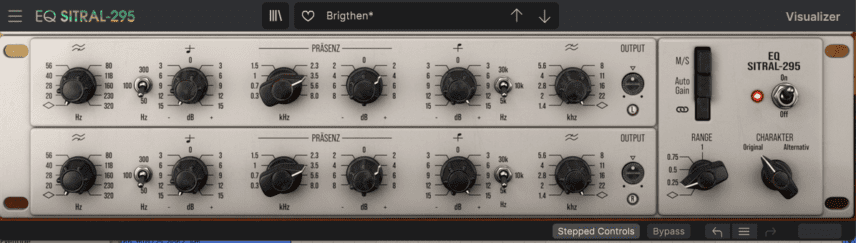
For our final element, we chose a nice Rhodes sample, ‘hn_mus125_don2_Am.wav’. First, we added some modulation courtesy of Delay Memory-Brigade, an update of the coveted Electro-Harmonix Memory Man. The sound was a little dark in the mix, though. Instead of reaching again for Pro-Q 2, we decided to use EQ Sitral-295, an emulation of a German broadcast EQ and new to the collection. A little bit of a boost at 3.5kHz opened the sound right up.
Before effects:
And after:
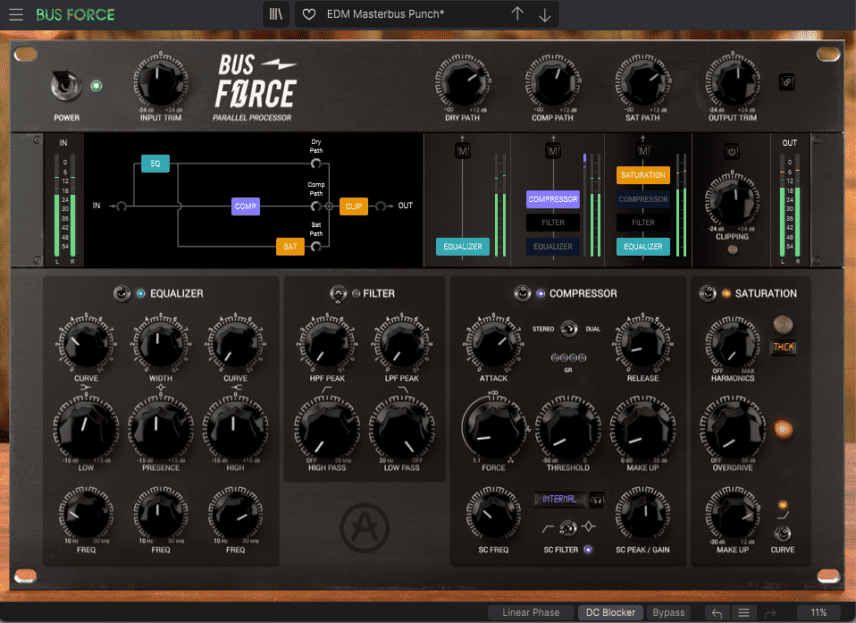
Step 6: Master Bus Processing
We’re loving all of our sounds but as a mix, it’s still a cold salad. It’s time to turn up the heat and make this collection of sounds into a hot and tasty meal. Bus Force is just what we need for this.
Bus Force is Arturia’s new bus processing plugin and it’s a doozy. There are four effects sections: Equalizer, Filter, Compressor, and Saturation. There are also three parallel signal paths, one for the dry signal, one for the compressor, and one for the saturation. Within each path, you can engage or disengage different effects stages. You can also mute whole paths. Finally, you can control the level of each path, allowing you to craft a blend of the signals. It’s extremely flexible and sounds incredible. Let’s put it to work on our master bus.
We start with the EQ section. We can see on the display (and also hear) that our low end is a little lacking, so we give it a slight boost at 150Hz. Lovely. Next, we use the compressor to glue things together. We’re not trying to be heavy-handed now. A little goes a long way. We stick with slow attack and release times and a very low threshold. We bring up the Force dial (essentially ratio but it’s also volume-dependent) until it bites. In saturation, we give it a little overdrive and push the makeup knob until we can feel it.
Now it’s time to adjust our signal paths. We engage the equalizer in the dry path, compressor in the compressor path, and equalizer and saturation in the final path, as we want the saturation to work on the bass we introduced. We then blend the signals to taste, favouring the dry and saturation signals over the compressed.
The full mix before Bus Force:
And after: