
Technique » Tutorials » FM Electric Piano »
FM Electric Piano
This channel is sponsored by
 Roland Cloud is your creative hub for Roland hardware and software. Access legendary recreations of Roland Classics, find new sounds for your favorite products, and download updates and companion apps to make music fast and easy. Visit Roland Cloud
Now we need to simulate the sound of the tonebar which creates the electric piano’s sustain. To do this we’re going to use another operator. Right click Operator D to activate it, then drag up on its output row at the bottom of the matrix to 80. This sets its output to the same level as Operator F’s. We’re layering two different carriers here, creating a more complex sound than the single carrier which was fed to the output in our previous walkthrough.
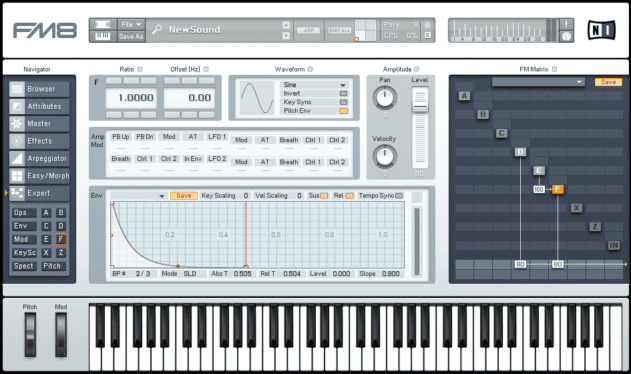
We haven’t modified Operator D in any way, so it’s only going to output a simple sine tone, but its gives our sound the smooth body it needs.
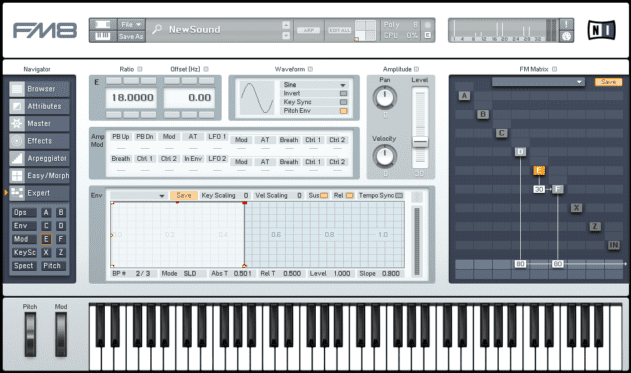
The tine hit at the start of the sound is too harsh, so we can hear that we need to bring down the Operator E to Operator F modulation level. Drag down on the modulation amount in the matrix, and hear how the sound changes as you do so. It’s the 20-50 range that gives us the best results, but you can adjust this setting to taste.
We could simply pick a fixed modulation level and have every note that comes out of the synth have exactly the same timbre, but we can make a more expressive patch by tying the modulation level to each note’s velocity.
Set the modulation level to 30, and click Operator E again to show its parameters.
In the Amplitude panel, turn up the Velocity amount to 100. Now when we play harder notes, Operator E will be louder, meaning it’ll affect the timbre of Operator F more. So, harder notes give us a sharper, more percussive sound, with softer ones affording a mellower feel.
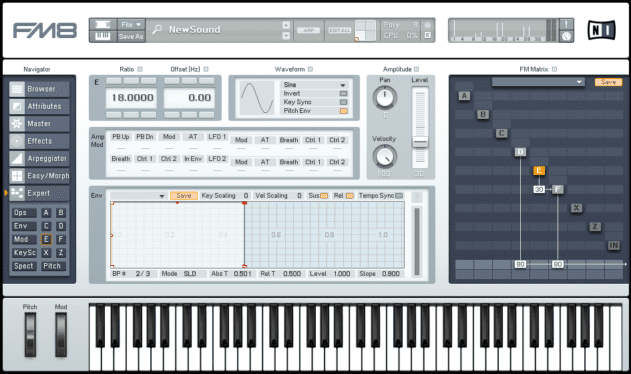
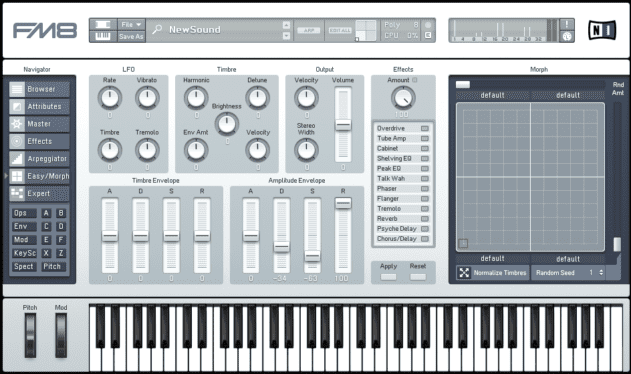
There we have the basics of our DX7 electric piano, but our patch is currently in a very raw state – it doesn’t even have any release, so it sounds pretty unnatural. The note cuts off as soon as we take our finger off the key, which doesn’t happen with a real electric piano.
We could adjust the release time of every operator individually, but FM8 has a much quicker way to tweak the patch as a whole. Click the Easy/Morph tab on the left hand side of the interface, and turn up the R (release) fader in the Amplitude Envelope panel to 100.
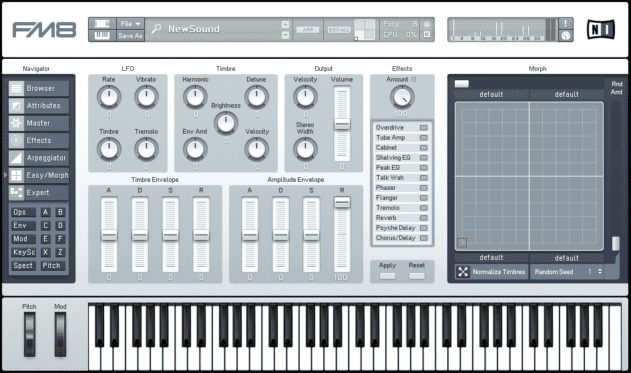
This gives the patch a slightly lazy release tail, which feels much more natural than it simply stopping dead. You can further customise the patch’s dynamics with the D (decay) and S (sustain) faders. Lower values will give you a more percussive feel, resulting in something verging on a marimba.
For the final touch, we can also click the Effects tab on the left and activate FM8’s Tremolo, Reverb, and Chorus/Delay effects.
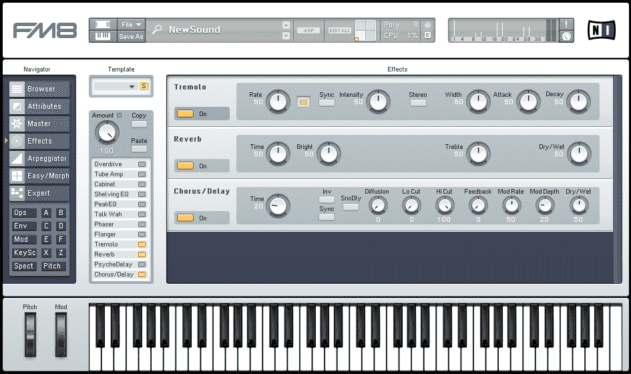
We can clearly hear the way that by using multiple operators to create the various parts of an instrument, it’s possible to use FM synthesis to create a broader and more complex array of instrument emulations than one can easily achieve with virtual analogue synthesis.
Tutorials is sponsored by
Roland Cloud is your creative hub for Roland hardware and software. Access legendary recreations of Roland Classics, find new sounds for your favorite products, and download updates and companion apps to make music fast and easy.