There are numerous approaches to reverb from echo chambers to mechanical devices through to analogue circuits and on, of course, to digital hardware and computer software. The modern producer has well over half a century of techniques to consider when applying reverb in the mix. Like the effect itself, it’s easy to get lost in it! In this tutorial, we take a better look at how producers such as Burial sculpt huge reverbs in their mix.
When not caught in a fog of ambience, reverb is a great tool for adding texture and depth to any production. Filling the space in between drums and hits with ambient sound and extended reverb tails can permeate your tracks with a warm and organic feel.
Some producers have taken this technique to extremes, making it a real feature and staple of their sound. Burial’s recent album Tunes 2011-2019, released on Hyperdub, is (amongst many other things) a masterclass in reverb and space. Just the initial opening with State Forest sets the tone for things to come.
In this tutorial we’ll dissect how to create endless reverbs, firstly making an atmospheric sound bed, after which we’ll take a look at both reverb sends and reverse reverb techniques. We’ll be utilising Ableton’s native Reverb plugin for our walkthrough, but if you’re following along in another DAW not to worry, as pretty much any reverb plugin will be capable of achieving the same or similar results.
Here’s some audio of the loop we’ve created both before and after we add our reverbs. To enlarge any image, just click on it.
Before reverb:
After reverb:
Step 1:
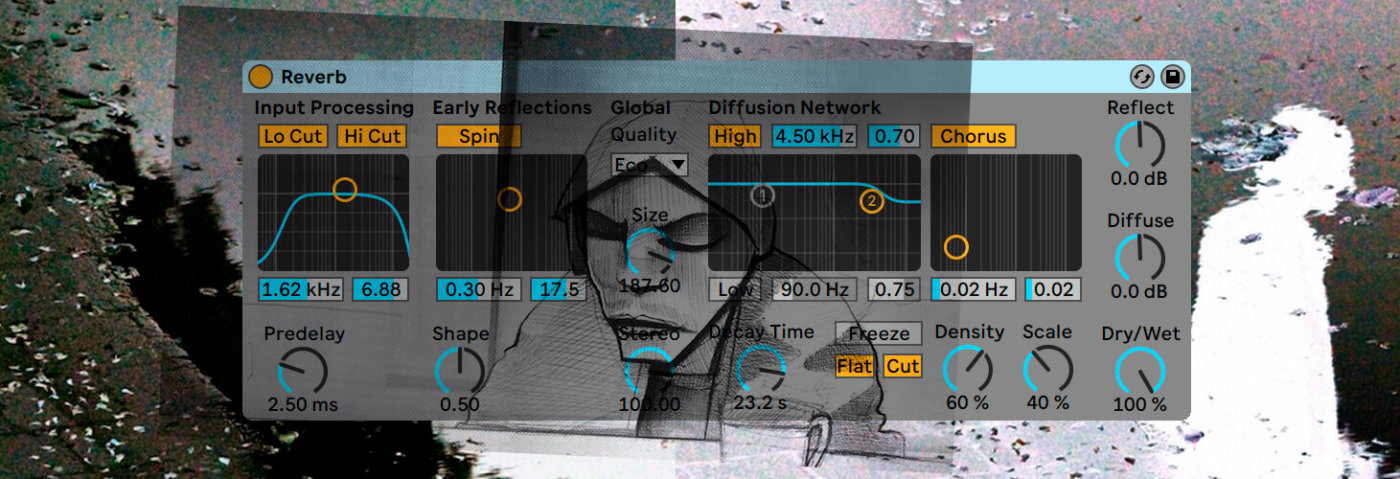
Place the kick drum onto a channel and load an instance of Ableton’s Reverb. The settings for this reverb effect are entirely subjective as the main technique we’ll be utilising here is the Freeze function. Once it’s activated the Freeze button will freeze the reverberation so it sustains endlessly.
The point at which you turn it on will alter the sound, so experiment with your timings here. In our case, automate it to activate approximately a 1/8th note after the kick drum plays. Tweak the reverb settings, adding a long Decay time and then boost the Size, Diffuse and Dry/Wet.
Step 2:
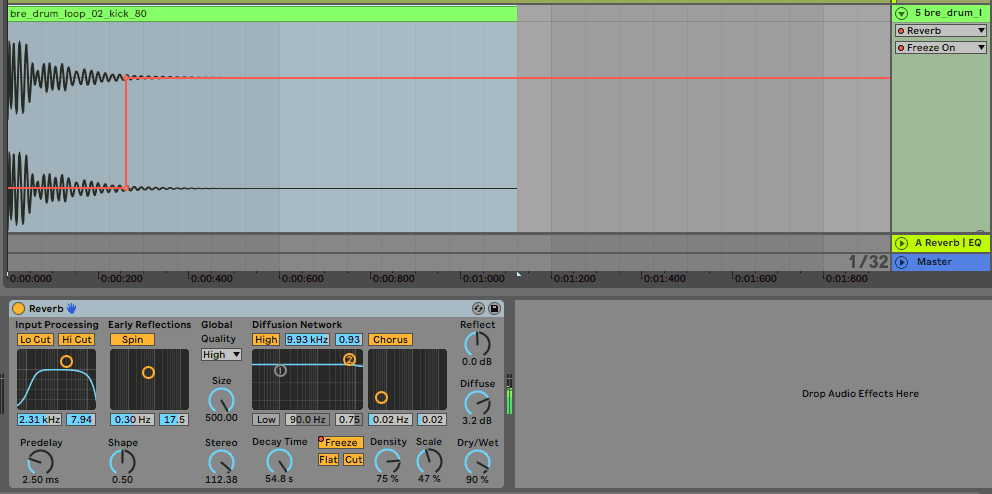
Having the reverb play out in this way isn’t ideal for producing, as it’s long tail needs to be controlled! It’ll be much easier to do so if we bounce it to a separate audio track.
Set the loop length to 49 bars and render the track. Once re-imported, Transpose our audio by +12 semitones, in order to lift the tone a little. Then add a Compressor, and direct the Sidechain Input to our Drum Group, applying a Fast Attack with medium to fast Release. Bring down the Threshold until we have around -5db to -6db of gain reduction.
The compressor is ducking the level of the reverb when the kick and snares play, thus adding a rhythmic feel. We also add a Chorus with a very slow rate for added movement, an EQ to sweep away any rumbling low frequencies and finally an Auto Filter, with the LFO engaged again with a very slow rate, adding subtle frequency modulation.

Step 3:
For our next Reverb effect, we’ll turn our attention to the guitar loop that we have programmed.
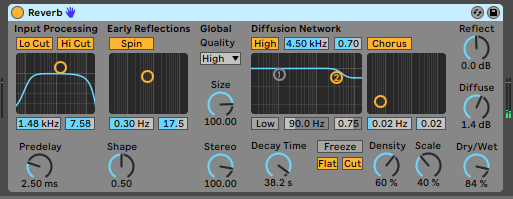
We’ve already added a Delay to give it a more dubbed out and dreamy feel, but a big reverb will definitely elevate the atmosphere and depth. Create a Return track and add a Reverb plugin to the return track.
Send a healthy portion of our guitar into this return track. Once again employing a long and big reverb tail by boosting up the Size and Decay Time, seeing as it’s a return channel we’ll also want to set the Dry/Wet to 100% so none of the dry signal is being received.
The advantages of working with effects on return channels is that they can be treated and processed separately from the source audio. So we can add plugins to affect the reverb only, leaving the guitar track untouched.
Begin with an EQ, cutting some lows and tops. Then add a Redux, applying some subtle Downsampling and Bit Reduction to the reverb return, followed by some Saturation for a crunchy and lo-fi reverb tail.

Step 4:
Although the whole idea of this effect is to give the feel of a ‘wash’ of reverb over the guitar, we can use a clever sidechain trick to bring some clarity back to the guitar track itself.
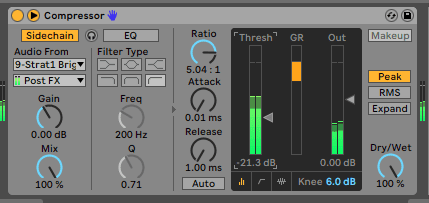
Place a Compressor as the last effect on our return track, and direct the sidechain back to the guitar. Working with a fast attack and release, we push up the ratio to 5.00:1, and bring down the threshold until we’re applying around -6db of gain reduction.
The level of the return track is now being ducked when the guitar plays, meaning we have a big reverb effect in between the guitar notes. By soloing the return track you should be able to hear the compressor in action.
Step 5:
For our third and final reverb effect, we’ll apply reverb but this time in reverse.
Duplicate the guitar loop and delete all but the first note of the duplicate loop. Freeze and Flatten this note so we have it as an audio Clip. Reverse the clip, and then add (yet another!) instance of Ableton’s Reverb. Tweak the settings until we have a decay tail of around 6-7 bars. Freeze and Flatten this audio to ‘print’ the reverb tail. Once done, reverse our audio again, and voila our reverb has been added in reverse!


Step 6:
Whilst the walkthrough in step 5 covers the crux of the ‘reverse reverb’ technique, we can take things a step further now to turn this into an endless drone, which will add some nice atmospherics to our production.
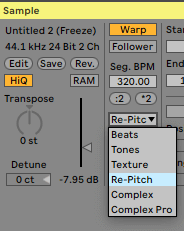
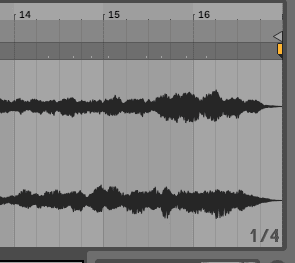
First, chop the audio clip from step 5 so it’s 4 bars in length. In the Clip overview section, head over to the Sample and change the Warp mode to Re-Pitch. Return to the audio clip, click and drag the warp marker at the end of the clip (top right of the waveform), which will extend the length of the audio.
Drag the clip so it’s 17 bars long. Using the Re-Pitch warp mode in this way pitches the audio down whilst also extending it, as long as you either double or half the length of the audio clip you’ll be transposing the pitch in octave increments, thus staying in key.
As there’s quite a lot of dynamics with this sound, we use some gain automation to control this to some extent, so it loops over almost seamlessly. Some simple EQ’ing of the low-end to remove any serious rumble and we’re done. This final reverb adds a lovely, yet eery, texture to proceedings.
Here is how everything sounds together:
And here it is with a beefier kick drum added for the purpose of context: