u-he are makers of award-winning software synthesisers and effects including Diva, Repro-1, Zebra2, Hive, Bazille, Presswerk and Satin.
Visit U-he
Technique » Synth Secrets »
Rumbling Techno Bass
This channel is sponsored by

Synth Secrets is a series of programming tutorials in which we show how to make a range of classic and new synth sounds using plugins such as Massive, Sylenth and Diva.
From artist to artist, the way bass is made in techno differs vastly. There’s no single defined technique as such, but more of a creative rumble that provokes a certain attitude. We’ll use Ableton’s versatile Operator (an FM or frequency modulation synth) to create something suitably weighty.
Here’s what we’ll be making today:
The art of creating the bassline isn’t too complicated, but in order to create such a dark energy we need to start simply.
Step 1
Let’s open up Operator to its default setting and input a basic sequence.
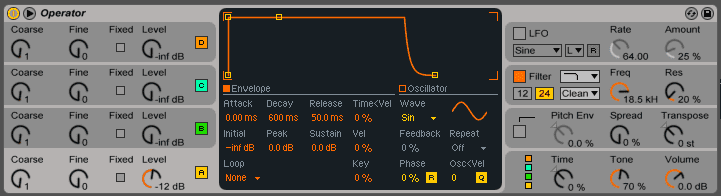

Notice how none of the notes start where the kick would be. It can be useful to leave that space free so that the kick has some space in the mix and is fighting less with the bass due to their commonly shared low frequencies.
The bassline mainly consists of one note, F. The additional notes add variation and give the wave-like motion that we mentioned before. We will be able to accentuate these notes with some EQ later.
The fourth note of the sequence has been moved off-grid to give a lazy or dragging feeling, which in turn makes the following notes feel faster. Try this technique to humanise the rhythm and add a less predictable swing.
Step 2
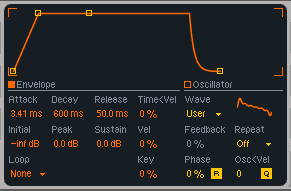
Our attention needs to be turned to Operator now, which is sounding far from rumbly. Click on Oscillator and use the pencil tool to draw in some frequency modulation on the already selected sine wave.

Secondly, let’s adjust the envelope by setting a slow attack to help get rid of the clicks.
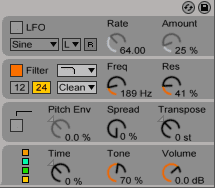
Thirdly, adjust the filter so that there are fewer high frequencies. We’re using the 24 dB/octave low-pass setting with a touch of resonance to boost the frequencies around the cutoff point.
Step 3
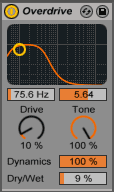
Ableton’s Overdrive device works well on almost anything. In this case, we’re using it to bring in some warmth and aggression to our sound. We’re mainly focusing here on adding more frequencies to the sound, which any distortion plugin is very good at doing. Don’t worry too much about the high frequency grittiness that it adds – we’ll be able to filter this out later on.
step 4
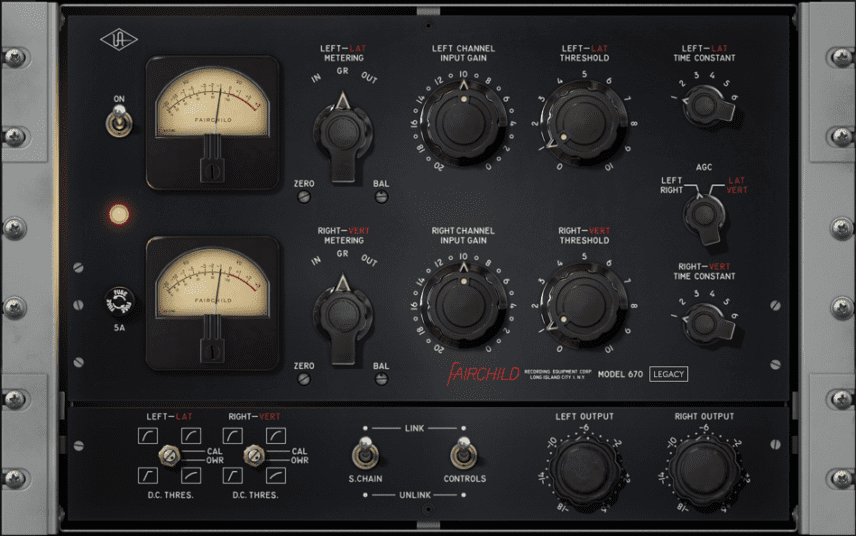
Further warmth is needed from another plugin. We’ve opted for the UAD Fairchild which we’re not using so much as a compressor but more of a colouring box. The way it boosts and shape the frequencies is subtle but always feels musical. Also, just like in the original unit, the transformers on the compressor have a low-cut effect, around 20-30 Hz, EQing the sound ever so slightly. Cutting off those lower frequencies is essential to making sure that we don’t overload the low end of the frequency range, but keep it nice and tight.
Step 5
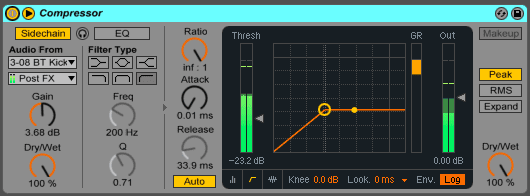
There are some notes that are overlapping into the kick’s rhythmic domain, so to counter this we are going to employ a classic sidechain compression technique. Not only will this take away the bass when the kick is playing, but it will add extra pump and movement.
Note how there is a clicking from the side chain. This is due to the high ratio and fast attack. Again, we don’t need to worry about this now – as mentioned before, we will be dealing with these high-frequency artefacts in the next step.
step 6
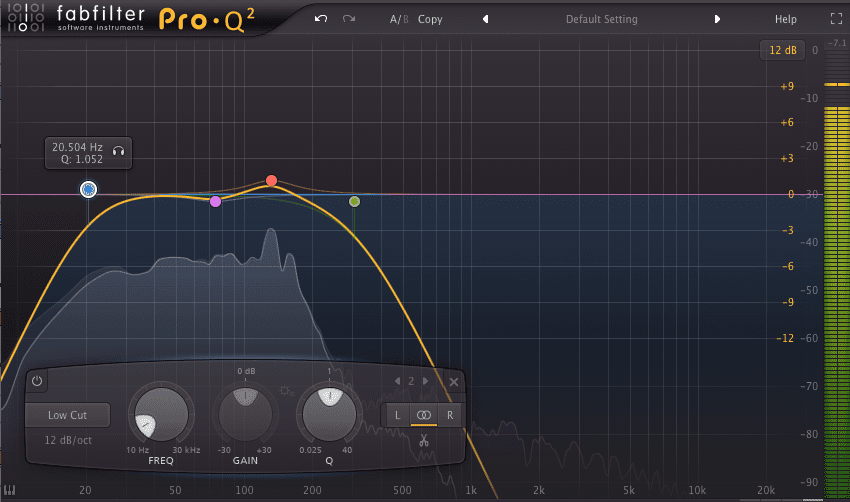
Shaping the sound after all this manipulation is going to be essential. We need to control the frequencies to help the bass sit in the background of the mix and sound less fizzy. Any EQ will do here, but we’ve opted for Fabfilter Pro-Q 2.
We’ve cut out the high frequencies for obvious reasons and boosted where necessary to get those lower resonating frequencies to pop through. These will give presence to the sound through any system, whereas the sub-bass frequencies will only really be heard properly on bigger club systems.
Finally, simply balance you bass with the drums. Start by lowering the volume of the bass so that it is inaudible, play your kick and drums then slowly increase the level of the bass until you feel it rather than hear it. If you find that your speakers are small and having a hard time producing the low frequencies, throw on some headphones and be conservative.
Synth Secrets is sponsored by
u-he are makers of award-winning software synthesisers and effects including Diva, Repro-1, Zebra2, Hive, Bazille, Presswerk and Satin.
Download the demos and try them for yourself at www.u-he.com
02.52 AM
nice!