u-he are makers of award-winning software synthesisers and effects including Diva, Repro-1, Zebra2, Hive, Bazille, Presswerk and Satin.
Visit U-he
Technique » Synth Secrets »
Old-School House Chords with U-he Bazille
This channel is sponsored by

Synth Secrets is a series of programming tutorials in which we show how to make a range of classic and new synth sounds using plugins such as Massive, Sylenth and Diva.
In this Synth Secrets we’ll be creating some old-school house chords using u-he’s Bazille synthesiser. Here’s an example on the sound we’ll be making in this tutorial:
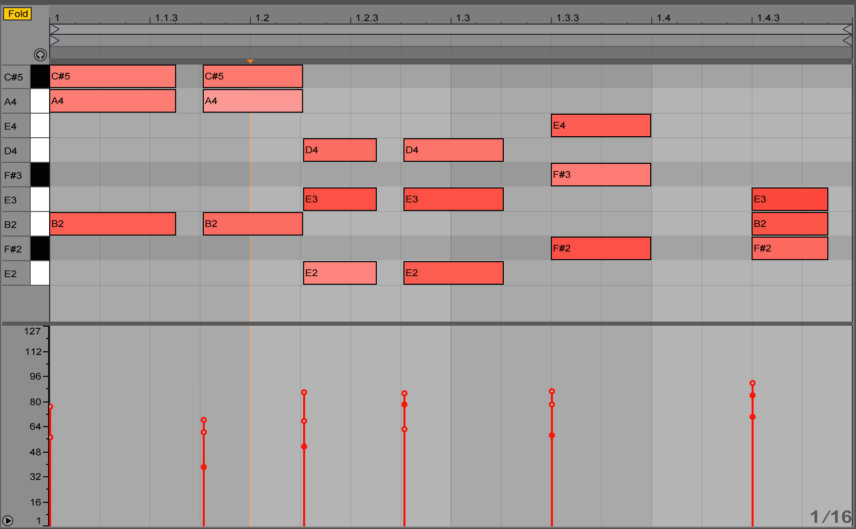
And here’s a screenshot of the MIDI we’ve used for this hook, played in B minor and quantised using Ableton’s swing setting ‘Swing 16-15’ to tighten up the recording but keep some of the loose feel. Also take note of the variation in velocity created from the live playing.
Step 1
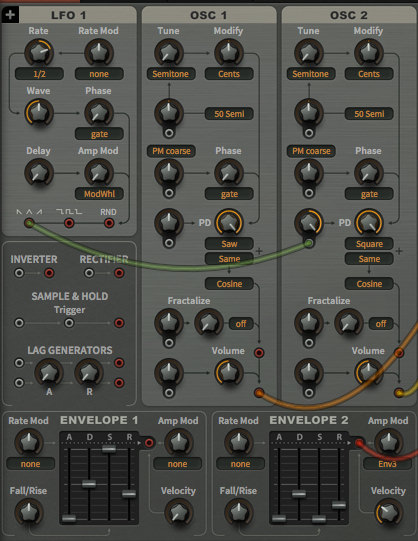
Begin by loading an instance of Bazille onto a new channel and create your MIDI pattern. Bazille should load the INIT patch by default, with OSC 1 routed to OUT 1.
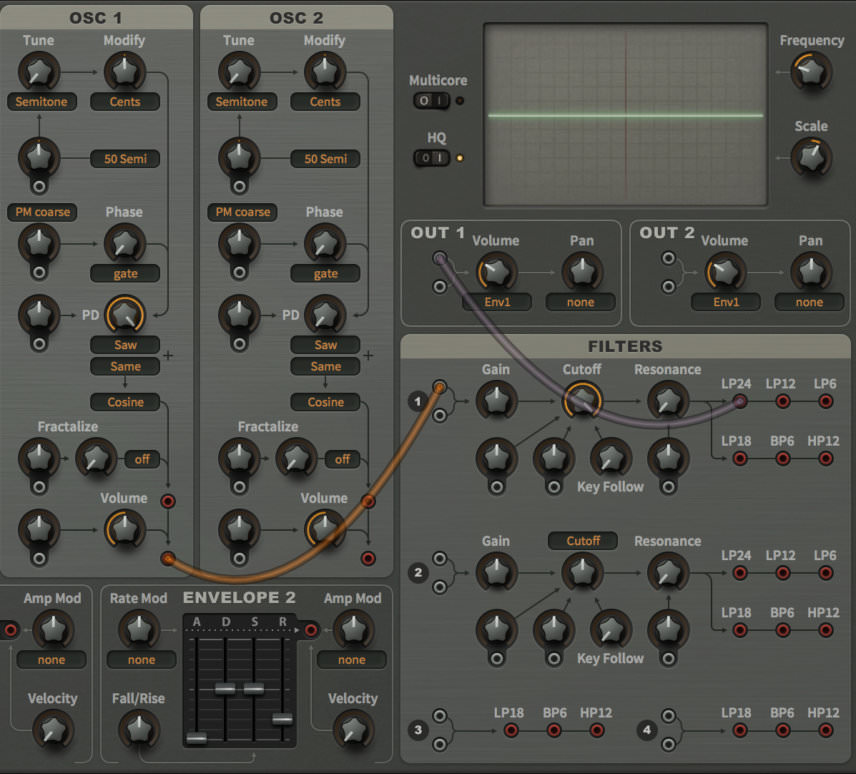
We’ll start by setting up our sound with a filter, and an envelope controlling the filter. In order to achieve this in Bazille we’ll have to make use of its semi-modular architecture: we begin by clicking on the wire connecting OSC 1 to the OUT 1 and dragging it over to one of the grey inputs on Filter 1.
We then need to route Filter 1 to the OUT 1 where OSC 1 was routed previously. Here we can choose what type of filter we want for our sound. There are four different types of low-pass with varying slopes, a high-pass and a band-pass. We opt for LP24 and drag this to OUT 1.
Step 2
Next we take the cutoff down to quarter of the way and also push up the resonance control to quarter.
To help shape the filter we could apply an envelope to the cutoff frequency. ENVELOPE1 is the amp envelope so we’ll use ENVELOPE2. Click and drag the red output socket next to the ADSR on ENVELOPE2 and drop it onto one of the grey Input sockets on one of the controls pointing to the Cutoff, then turn up this control all the way. We’ve now applied envelope modulation to the cutoff frequency of Filter 1.
We can now use the ADSR on ENVELOPE2 to shape the sound. We keep a fast attack, medium/low decay, no sustain and short release. We also push up the release on ENVELOPE 1. This means when the cutoff frequency is low it makes the notes short, but when the cutoff opens up we hear the release on ENVELOPE1, making for nice movement in breakdown sections.
Step 3
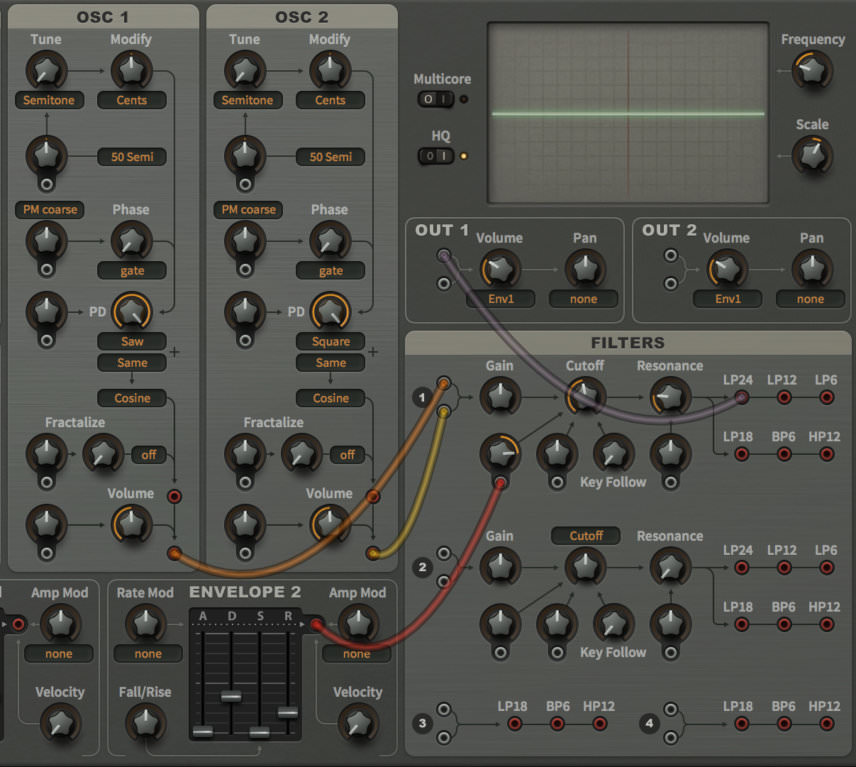
Next we add another oscillator to fatten up the sound. First we need to route the oscillator through the filter in order to hear it. We click and drag the red output socket in the bottom right of OSC2 and drop it onto one of the grey input sockets on Filter 1.
Unlike OSC1, the PD (phase distortion) control is turned all the way to down on OSC2, meaning we’ll hear a sine wave on OSC2, whereas OSC1 is playing a sawtooth. Right-click (or ctrl-click) on the box where it says Saw and select Square from the list, then take the PD control all the way clockwise so OSC2 plays back a square wave. This complements the saw nicely and adds some extra depth to the sound.
We also take down the envelope modulation on the cutoff slightly to tone down some of the top end on the sound.
Step 4
With our second oscillator set up, it might be interesting to modulate the PD control for some even more complex movement on the sound.
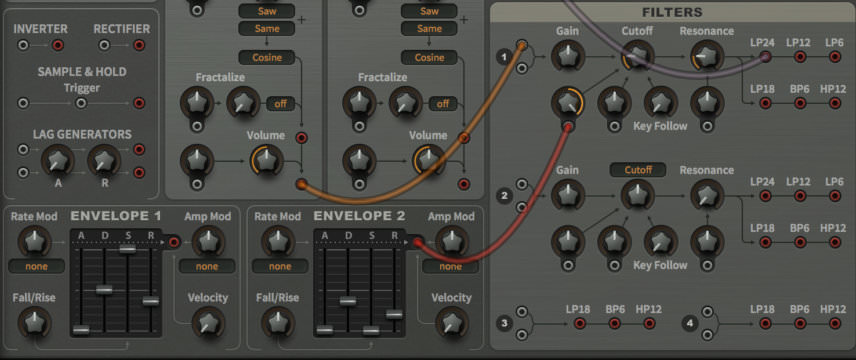
This time we use an LFO as our modulator by clicking and dragging the red output socket in the bottom left of LFO1 and connecting it to the PD modulation control. We also turn up the PD modulation control all the way.
With the LFO modulation set up in this way we can apply either a saw, backwards saw or triangle wave LFO and anything in between (depending on what the Wave control is set to). We keep everything on LFO1 as it is, other than changing the Rate control to 1/2. With the Wave control set to half way it generates a triangle wave.
Playing some notes back and increasing or decreasing the amount of PD modulation on OSC2, you can hear what this modulation brings, adding a nice character to the sound. We also push up the Velocity control on Envelope 2 for some more dynamic triggering of the envelope modulation. This works well to add some subtle movement to our phrase with the slight variations in velocity we have.
Step 5
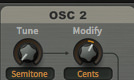
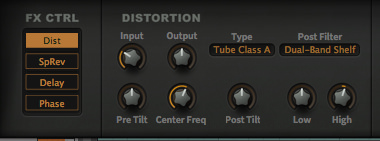
We detune OSC2 slightly by taking the Cents setting up to 10.00, then we head to the Tweaks & FX section, turn on the distortion and boost the input slightly.
Both these tweaks serve to add thickness and warmth, producing a stronger sound.
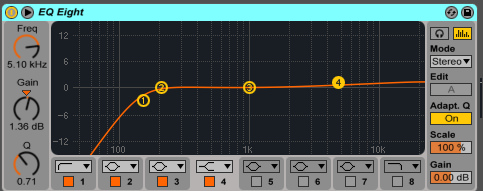
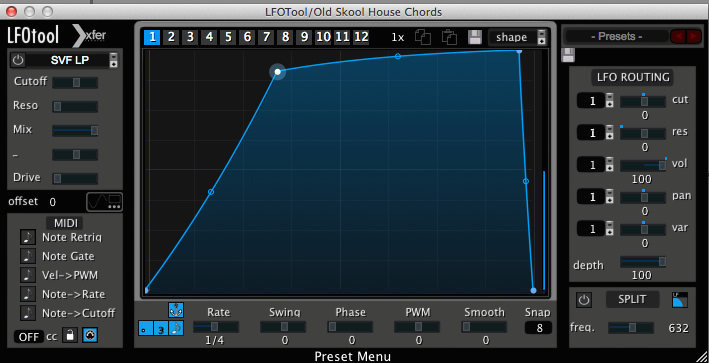
We also add some effects in Ableton, applying an EQ Eight to roll off some low end in the sound and boost some highs with a high shelf. We also add Xfer Records’ LFO Tool and use one of the presets for a sidechain-style effect on the sound, ducking it in volume slightly when the kick sounds.
Step 6
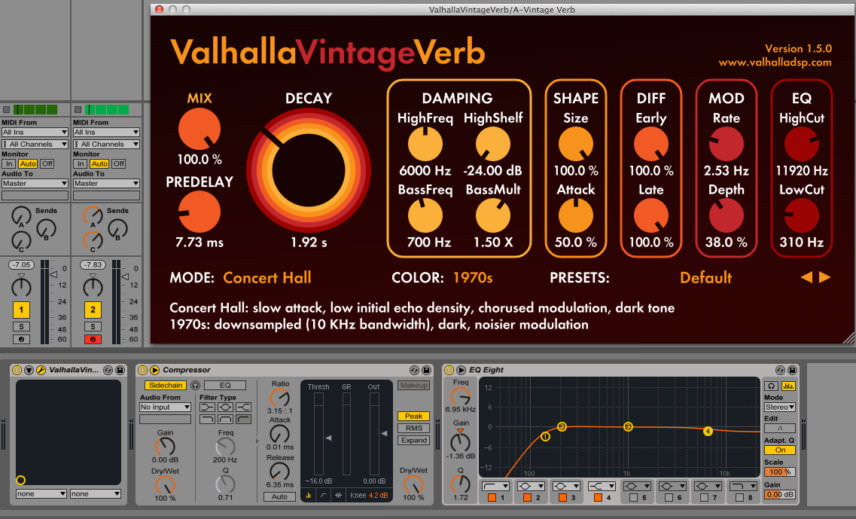
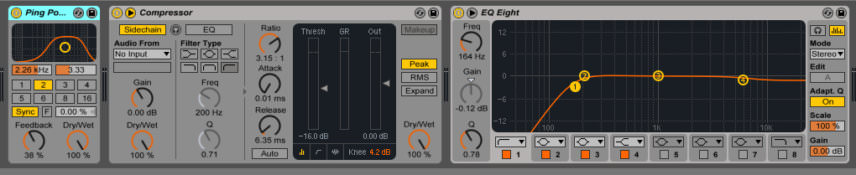
The final effects we add are reverb and delay, using Valhalla’s Vintage Verb and Ableton’s Ping Pong Delay respectively. Adding these effects via a send means we can process the effects separately from the source sound, applying compression and EQ to make sure the reverb and delay don’t clutter the mix too much.
Be sure to experiment and automate some of the settings on Bazille (such as the modulation envelope attack and decay and the filter controls) to add intensity and movement to your arrangement.
Synth Secrets is sponsored by
u-he are makers of award-winning software synthesisers and effects including Diva, Repro-1, Zebra2, Hive, Bazille, Presswerk and Satin.
Download the demos and try them for yourself at www.u-he.com