u-he are makers of award-winning software synthesisers and effects including Diva, Repro-1, Zebra2, Hive, Bazille, Presswerk and Satin.
Visit U-he
Technique » Synth Secrets »
Fuzzy Sawtooths With U-He Diva
This channel is sponsored by

Synth Secrets is a series of programming tutorials in which we show how to make a range of classic and new synth sounds using plugins such as Massive, Sylenth and Predator.
This week we use U-He’s DIVA plugin to create a fuzzy sawtooth-based pad patch. Here’s an example of the sound we’ll be making, with some added filter frequency automation:
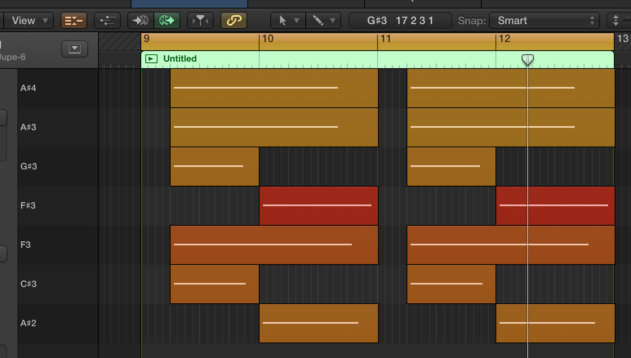
Here’s a screen grab of the MIDI we’ve used for the chords. We’ve gone for chords in the key of A# minor, starting off with a higher chord and then progressing to lower notes.
Step 1
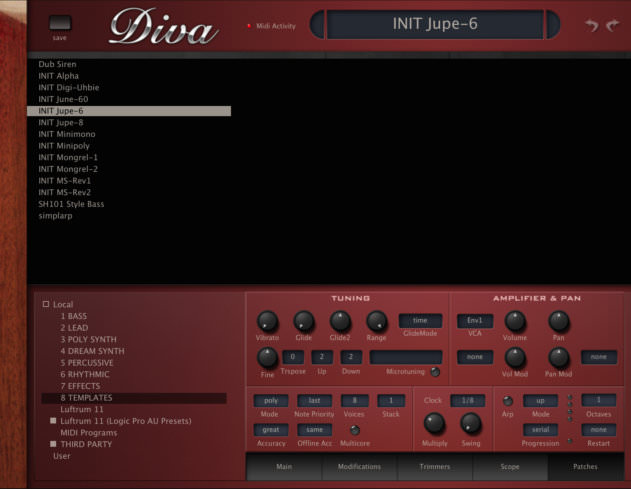
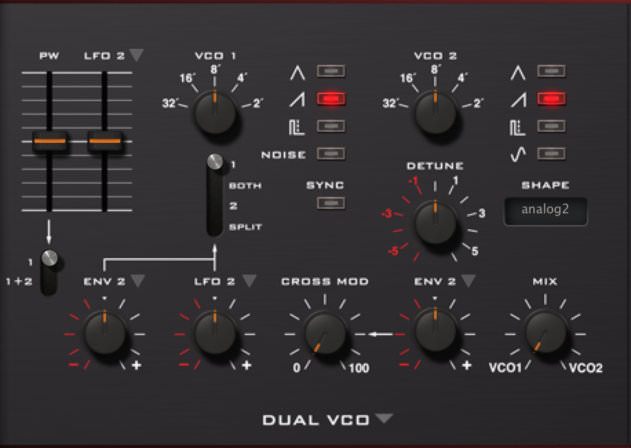
Load an instance of Diva and click on the Patches tab at the bottom of the synth. Select 8 TEMPLATES from the list on the left and pick the INIT Jupe-6 preset, which initialises the synth. Now click on Main to get back to the main synth window. By default the synth will be outputting a pulse wave from VCO1 but we need a sawtooth. Activate the saw wave by clicking on the saw icon in the oscillator section and remember to click on the pulse icon to disable the pulse wave.
Step 2
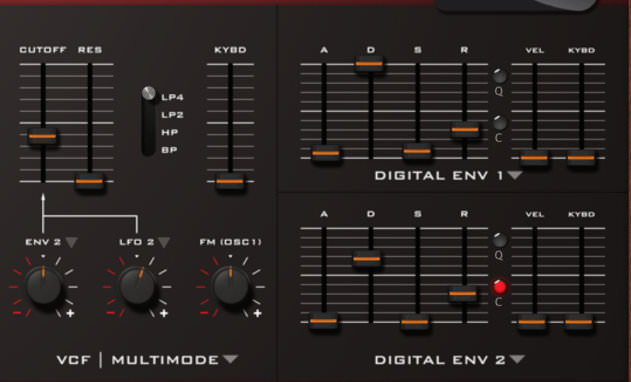
Now, in the filter section, bring the cutoff frequency down to around 76.00, just below the half way point. The info panel in the top centre of the plugin window gives you the numerical read out. Underneath the cutoff and resonance controls you’ll see the LFO 2 dial to control the level of filter modulation from LFO 2. Push this up to 14.00 so the cutoff frequency is modulated by the LFO. We’ve gone for a subtle amount of modulation here but you can dial this in to taste later.
Now, in the envelope section top right, push up the decay (D) all the way on Digital Env 1 (which is the amplitude envelope).
Step 3
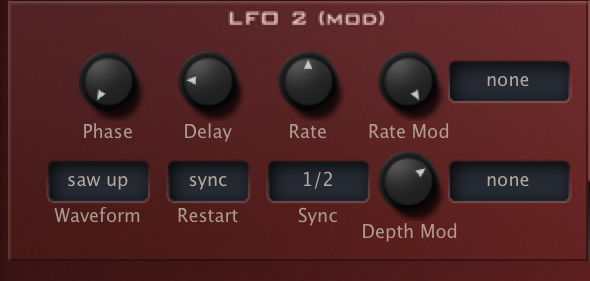
Lets shift our attention to LFO 2, which can be found in the bottom left of the synth. First, change the waveform to ‘saw up’ by clicking on the Waveform box and selecting it from the drop-down menu. In the box to the right of this, change the Restart setting to ‘sync’, and in the next box along change the Sync to 1/2, meaning that the LFO cycle now occurs twice every bar, synced to your DAW’s project tempo. Taking the Depth Mod control up to 72.00 provides a more subtle modulation, while pushing the Delay control up to 21.00 changes the rhythm of the modulation slightly, delaying the onset of LFO modulation slightly whenever a note is played.
Step 4
The synth patch itself is very simple so far, with most of the character coming from Diva’s analogue-style filter. We’ll add some effects to inject some extra warmth into the sound. This is where a lot of the character of this particular patch starts to emerge.
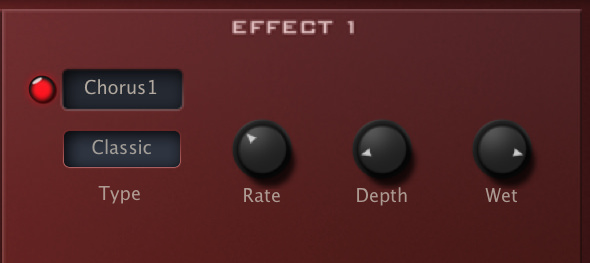
Begin by turning on Effect 1 down in the bottom right-hand side of the plugin window (click on the circular button alongside Chorus1 so it turns red). The chorus works well here, adding warmth and width to the sound, but with the default setting there’s too much of a detuning effect. Take the depth down to 15.00 to calm it down a little.
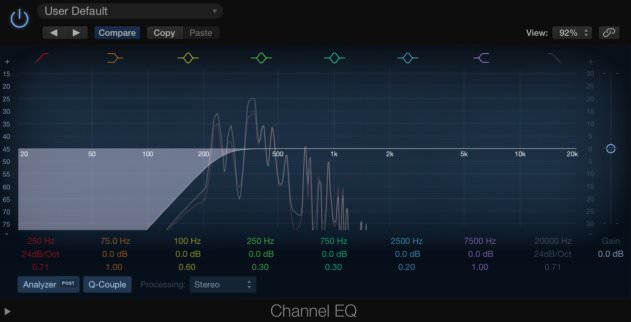
To make way for other elements in the mix we’ll need to sweep away some low-frequency content at this point. A simple low-cut EQ rolling off from around 250 Hz can be used here to make way for the kick drum and bassline.
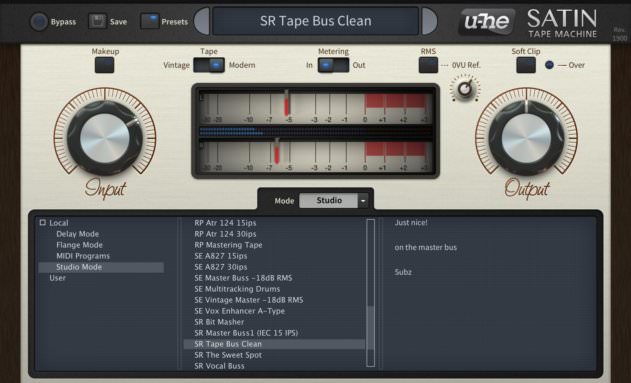
For some extra warmth we’ve also used U-he’s Satin tape machine emulation at this point. We’ve gone for the SR Tape Bus Clean preset and pushed up the input gain to two-thirds of the way. If you don’t have Satin or a tape machine emulation, experiment with different types of saturation or mild distortion for a bit of extra warmth.
Step 5
Spreading the synth wide across the stereo field helps it jump out of the speakers and provides space in the centre of the mix for the kick and bass. We’ve used iZotope Ozone 5’s Imager here, applying lots width to the higher frequencies. Any stereo spread effect should be able to achieve similar results.
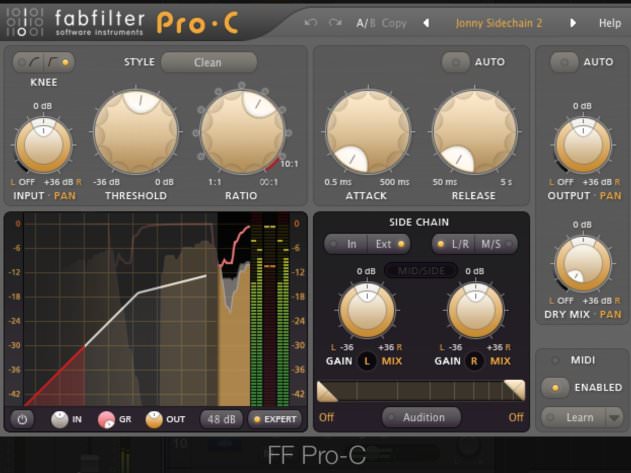
Finally, a sidechain compressor is added, ducking the synth when the kick drum sounds. This helps as a mix tool, providing more space for the kick drum, but more importantly it works to add an extra rhythmic element to the synth.
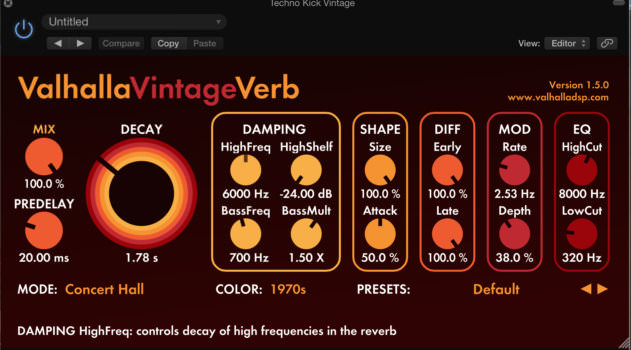
Finally we add some reverb via a bus send. We’ve used Valahalla’s Vintage Verb here, which models classic Lexicon reverb units, adding to that old-school vibe.
All that’s left is to automate the cutoff – or play it in real time with a controller – to bring out the warm, vintage tone of Diva’s filter, as heard in our intro example.

Synth Secrets is sponsored by
u-he are makers of award-winning software synthesisers and effects including Diva, Repro-1, Zebra2, Hive, Bazille, Presswerk and Satin.
Download the demos and try them for yourself at www.u-he.com
06.13 PM
gah I can’t afford any of these!
11.47 AM
perhaps you should save up?
buying nice gear often forces one to make the most of that gear.
04.11 AM
Awesome walkthrough from start to finish! I used Waves Kramer Tape and Valhalla Room with great results.
05.52 PM
djoremi – a similar sound can be achieved on any synth and with native DAW plugins
09.37 PM
sounds like hyph mngo, minus the vocal chops lol
09.45 PM
@tked:
My thoughts exactly: ‘Oh nice, how to make a Joy Orbison -Hyph Mngo-like sound!’ when I heard the example.
10.55 PM
lol
06.07 PM
I love these tutorials and DIVA sounds simply perfect. Can’t get why people write such sad and sloppy comments…