u-he are makers of award-winning software synthesisers and effects including Diva, Repro-1, Zebra2, Hive, Bazille, Presswerk and Satin.
Visit U-he
Technique » Synth Secrets »
Drum ‘n’ Bass Foghorn Bass With Wavetable
This channel is sponsored by

In this Synth Secrets, we show you how to craft a bass sound that will both devastate dance floors and guide ships through a foggy harbour.
Drum and bass is in the midst of one of its many comebacks right now. One of the reasons for the current resurgence is the power of the foghorn, the massive bass sound at the heart of rollers by Benny L and Serum. The name is apt. Like a foghorn ringing out on a dark night, it’s a huge blaaat that cuts through the mix and lays waste to dance floors.
There’s no one way to do it but there are some touchstones – FM, filter modulation, and distortion, namely – to keep in mind. Let’s use Ableton Live’s Wavetable synth to put one together. As always, click on any image to see a larger version.

Here’s the sound we’re aiming for:
Step 1
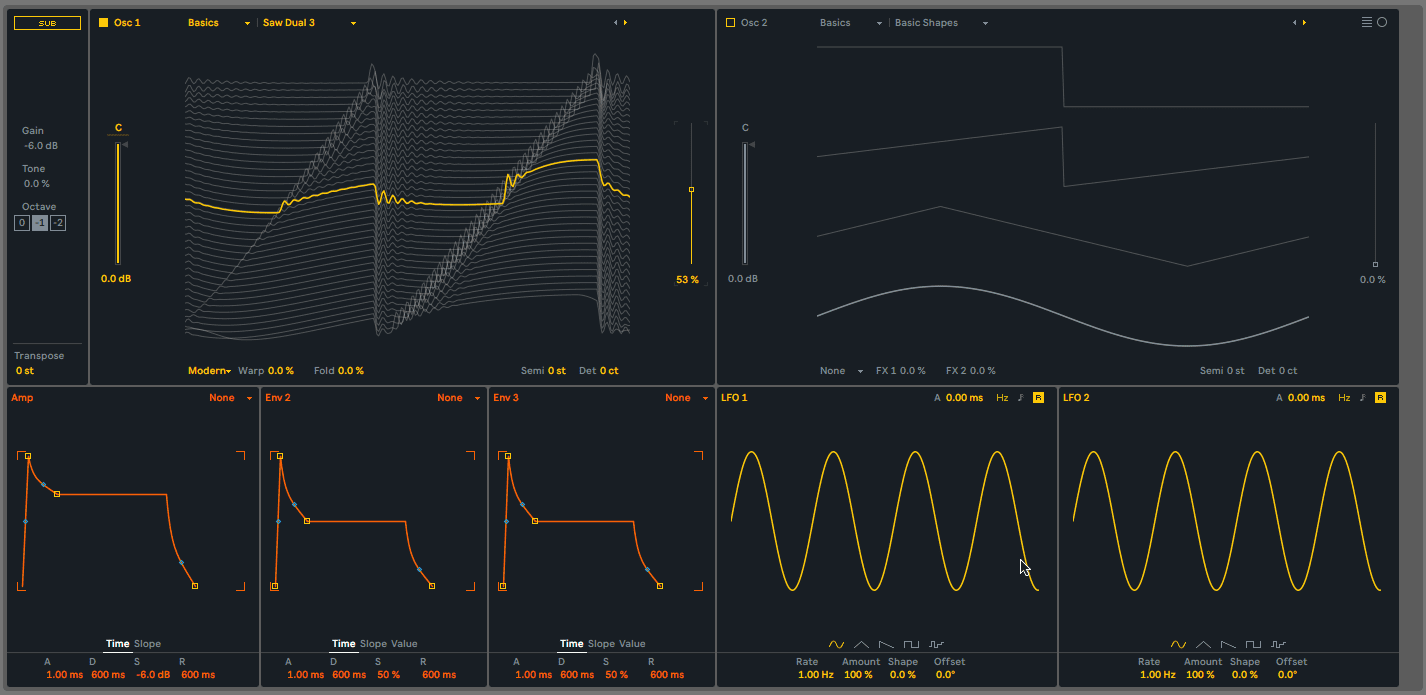
Open an instance of Wavetable on a MIDI track and draw in a note. We’ve gone with a very low F0. Note that pretty much any modern wavetable synth will work.
The wave shape isn’t hugely important. Of course, different shapes will yield different results, and we would like something a little noisy for the distortion to work with. We go with the Saw Dual 3 wavetable and bring the position up about halfway. We can leave oscillator 2 off as well as the sub. We’ll add a sub later on a separate track so it doesn’t run through the distortion.
The progress:
Step 2
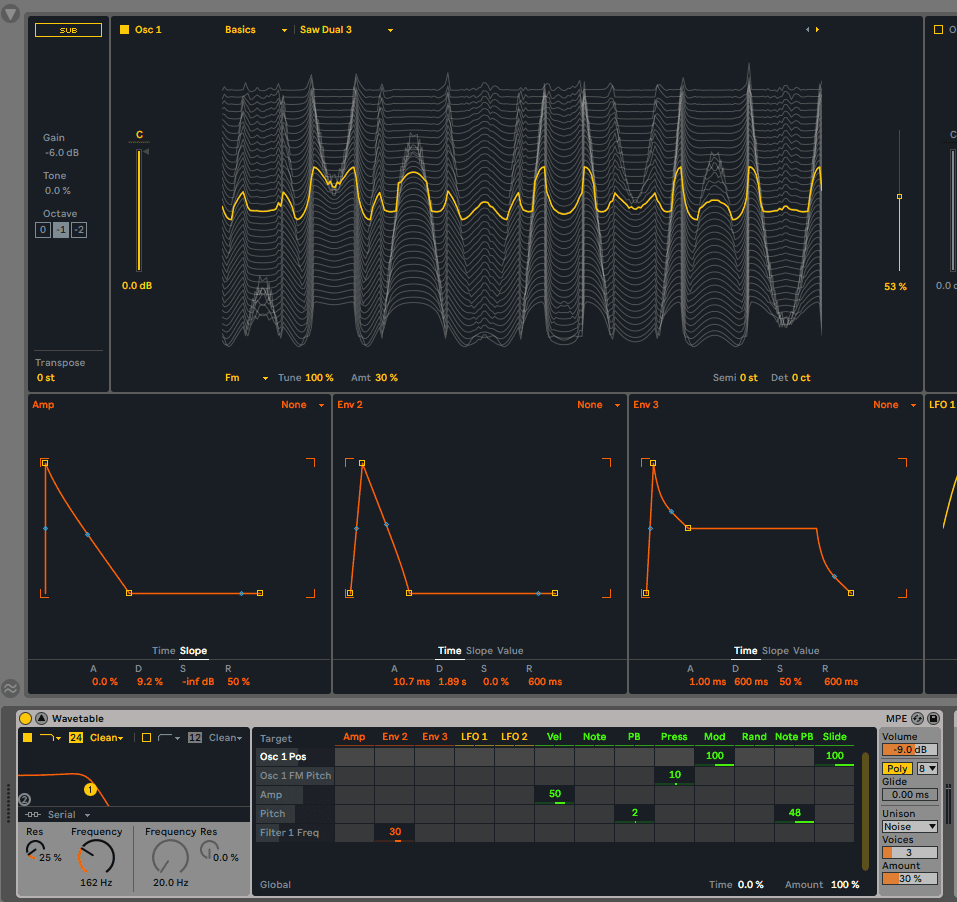
Frequency modulation, or FM, plays a big part in the foghorn makeup. In the oscillator effects section, choose Fm from the dropdown menu. Next, increase the tuning to 100% This will tune the modulating oscillator two octaves up, creating a higher tone. Finally, bring up the amount. Somewhere around 30% is likely good but we might want to fine-tune this later.
Top Tip: Try modulating the amount of FM with an envelope or one-shot LFO.
Now with FM:

Step 3
The sound is very bright, so let’s wake up the filter and get it involved. First, change the filter to a 24dB slope. Then lower the cutoff to around 200Hz. A little resonance will help bring out the aggression. Twenty-five per cent or so feels right. Again, we don’t need to be too precious about these settings, as we can always come back and tweak them again later.
With filter engaged:

Step 4
Let’s set the envelopes next. This will make a big change in the sound. On the Amp envelope, fix the Attack to 0, Decay to 17 seconds, Sustain to -inf dB (or completely off) and Release to 850ms. This is a typical bass envelope, although it is on the longer side. Adjust the slope of the decay to 9% for a straight drop.
We want the filter to open high and then slowly close over time. We’d also like a brief pause before it opens. On Env 2, we set the Attack to 23ms, Decay to 4.2 seconds, Sustain to 0 and leave Release at 600ms. We can also adjust the slopes of the envelope, particularly the delay slope. A setting of -7% looks good.
Finally, we need to send Env 2 to modulate the frequency of Filter 1. First, click on the Frequency knob in Filter 1. Now you should see Filter 1 Freq in the Modulation Matrix. Increase the amount for Filter 1 Freq under Env 2 to about 30. Now we can hear the cutoff opening when we press a note and then slowly closing down to the base state.
Our progress:
Step 5
Let’s add some unison to increase width. In the Unison section next to the Mod Matrix, set the Unison mode to Noise. This is much, well, noisier than the classic mode and perfect for what we need. The Unison voice number defaults to three with an amount of 30%. This is perfect.
Now with unison engaged:
Step 6
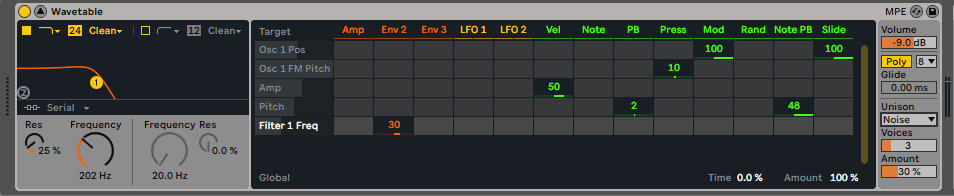
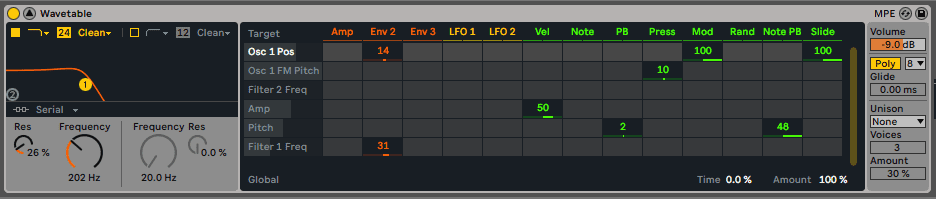
Let’s use Env 2 to modulate the position of the wavetable in Oscillator 1. This will cause the waveform to change over time. Click on the wavetable graphic in the oscillator. You should now see Osc 1 Pos as a new destination in the Modulation Matrix. Increase the amount for it under the Env 2 column. We’re going with 15 so it starts up around the square wave but feel free to go with what sounds the best to you.
Now with modulating wavetable position:
Step 7
It’s distortion time. We’re using Waves’ free MultiMod Rack. Its multiband capabilities allow us to apply different effects to different frequencies. This is especially useful for the lows, as we’ll see.
First, we loaded up an instance of Waves Abbey Road Saturator to handle the lows. We want to hot it up without overly distorting it. We turn up the Mix amount to full. We also set the crossover point to around 200Hz so only the lows pass through.
Next, we place Waves MDMX Overdrive in the mids slot. We crank up the Gain knob all the way. We also turn up the Temperature knob to 2 o’clock to tweak the colour and warmth. Finally, we turn the Mix knob up almost all the way. There’s no science here, we’re just going by ear.
Finally, we place another copy of Waves Abbey Road Saturator in the highs slot. This one is cranked as well. We adjust the crossover point for the mids and highs until it sounds good, stopping in the mid-2000Hz region.
Distortion courtesy of MultiMod Rack:

Step 8
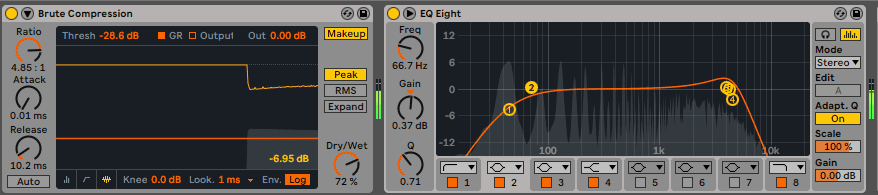
Let’s use a compressor next to squash the signal. We start with the Brute Compression preset in Live’s stock Compressor. That’s admittedly extreme so we bring the threshold back a bit to -28.6dB and lower the ratio to 4.85:1. It’s still pretty brutal though.
With compression:

Step 9
Next comes EQ. We use Live’s EQ Eight to roll off some of the subs and lows, and give it a little boost around 4.85kHz. Finally, we shelve off the tops to avoid clashing with the drums.
And with EQ:
Step 10
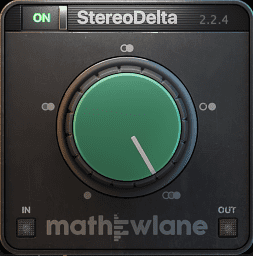
We’re getting close. Next is widening. Foghorns are meant to be huge and all-encompassing, and part of that is their width. We use Mathew Lane’s single-knob widener, StereoDelta, to achieve this by cranking it all the way up.
With added width:
Step 11
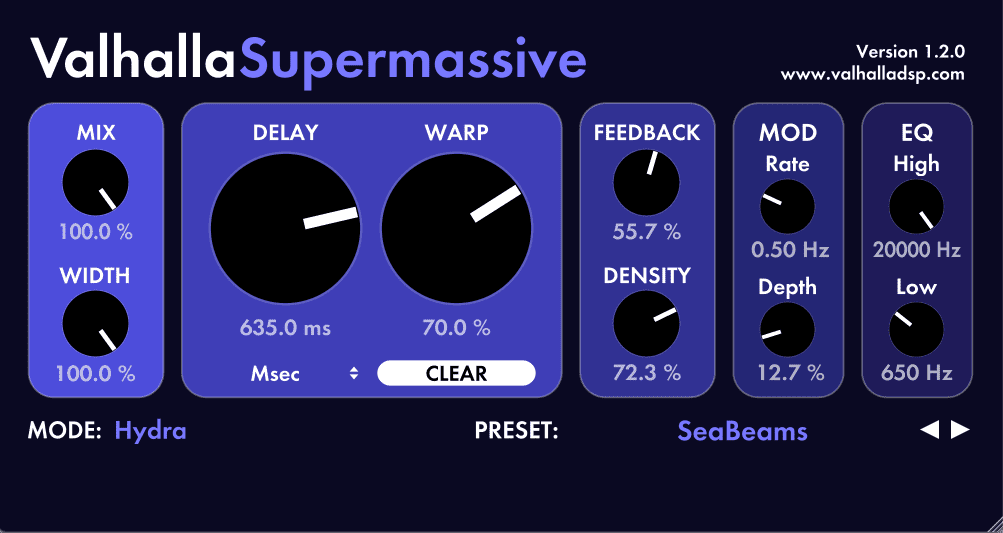
Along with width, any good foghorn needs reverb. This helps fill out the space in the mix and adds to its immense size. We use a modified version of the SeaBeams preset in Valhalla’s free Supermassive on a send track, adjusting the filter to let the highs through but not the lows.
With reverb:
Step 12
It’s time to fine-tune now. We lower the filter cutoff a bit.
Top Tip: Experiment with different wavetables. Now that there’s distortion and compression involved, the end result could be quite different.
Here’s the finished, original foghorn:

Here’s the finished foghorn in the context of a track. We’ve added a sinewave sub playing the same note as well as two drum samples, one from Live and the other, ‘Knee_Break_169_PL.wav’, from the Splice pack, Drum n Bass Drum Loops. We’ve also added a higher sound with Wavetable.
Attack Magazine is supported by its audience. When you purchase through links on our site, we may earn an affiliate commission. Learn more.
Synth Secrets is sponsored by
u-he are makers of award-winning software synthesisers and effects including Diva, Repro-1, Zebra2, Hive, Bazille, Presswerk and Satin.
Download the demos and try them for yourself at www.u-he.com