
In this new Passing Notes, we craft a lush vocal bass, pad and layered stab with Spitfire Audio’s brand new Epic Choir library.
Electronic artists like Forest Swords and Kelly Lee Owens often use creatively processed recordings of the human voice to add life to their productions. However, it can be difficult for producers without access to professional choral ensembles and costly recording equipment to achieve similar results.
Spitfire Audio’s new Epic Choir library uses a library of the highest quality recordings of orchestral choirs to create a dynamic choral instrument.
In this tutorial, we’re going to create a vocal arrangement consisting of a bassline, pad and some melodic stabs inspired by these tracks.
Forest Swords – ‘The Highest Flood’
Kelly Lee Owens – ‘Olga’
Here’s what we’re making today:
And here it is in the context of a tune:
As ever, remember to click any image to enlarge!
BASS
Step 1
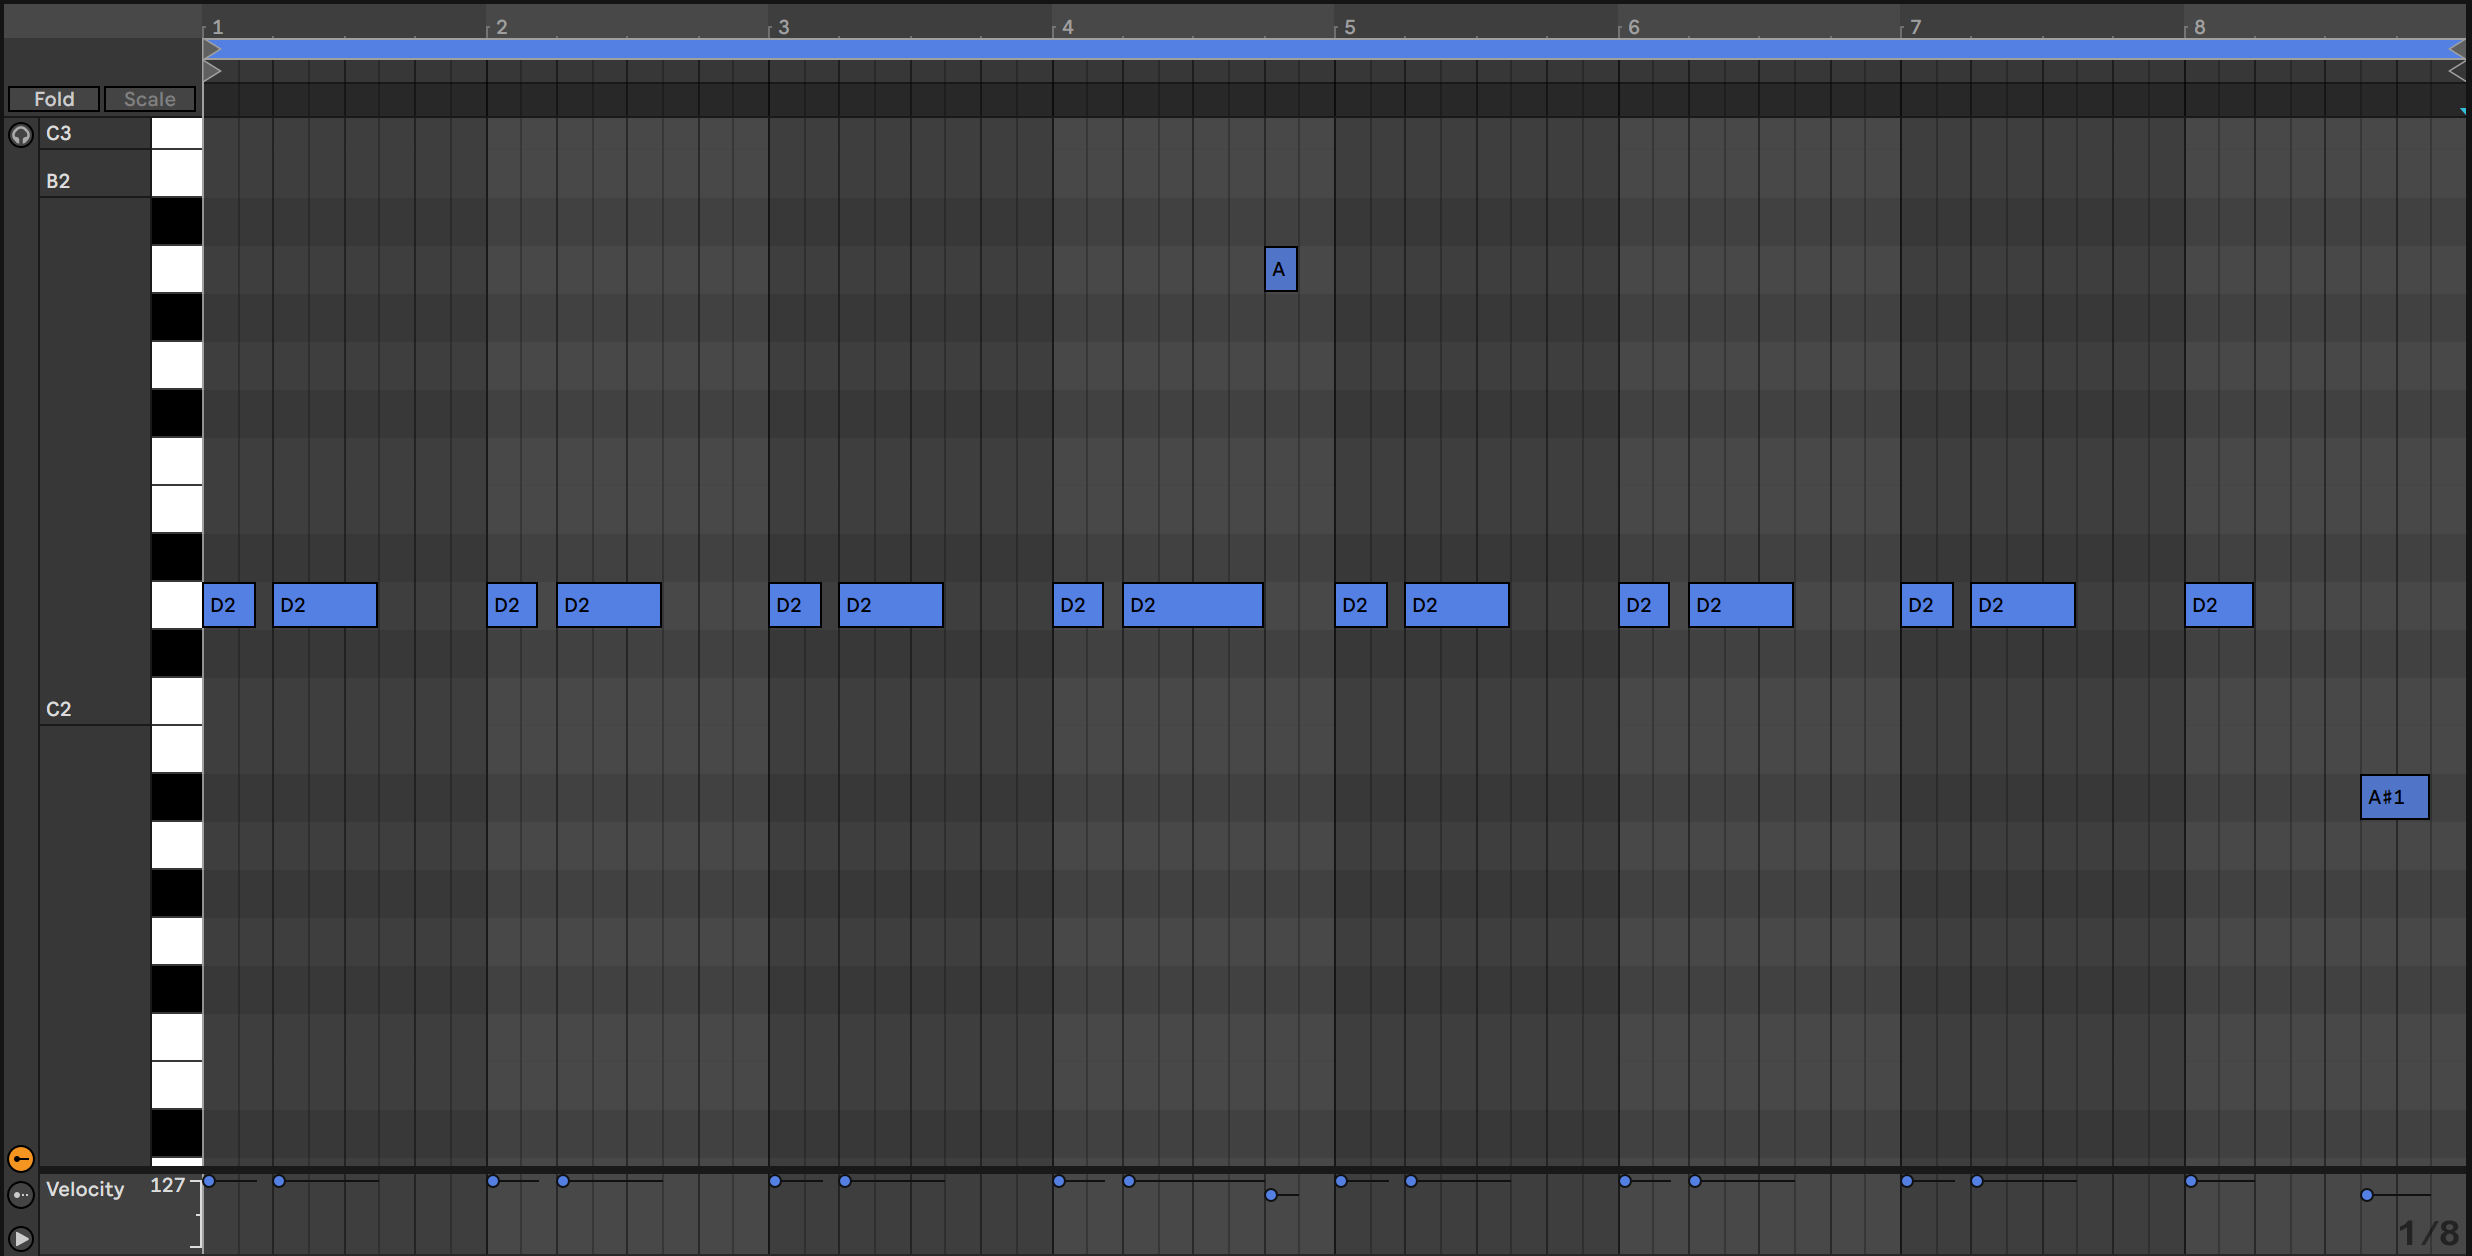
First, we need to program a simple MIDI bass line in the key of D minor. All we want here is a bassline that largely follows the kick drum to anchor the track’s groove.
Step 2
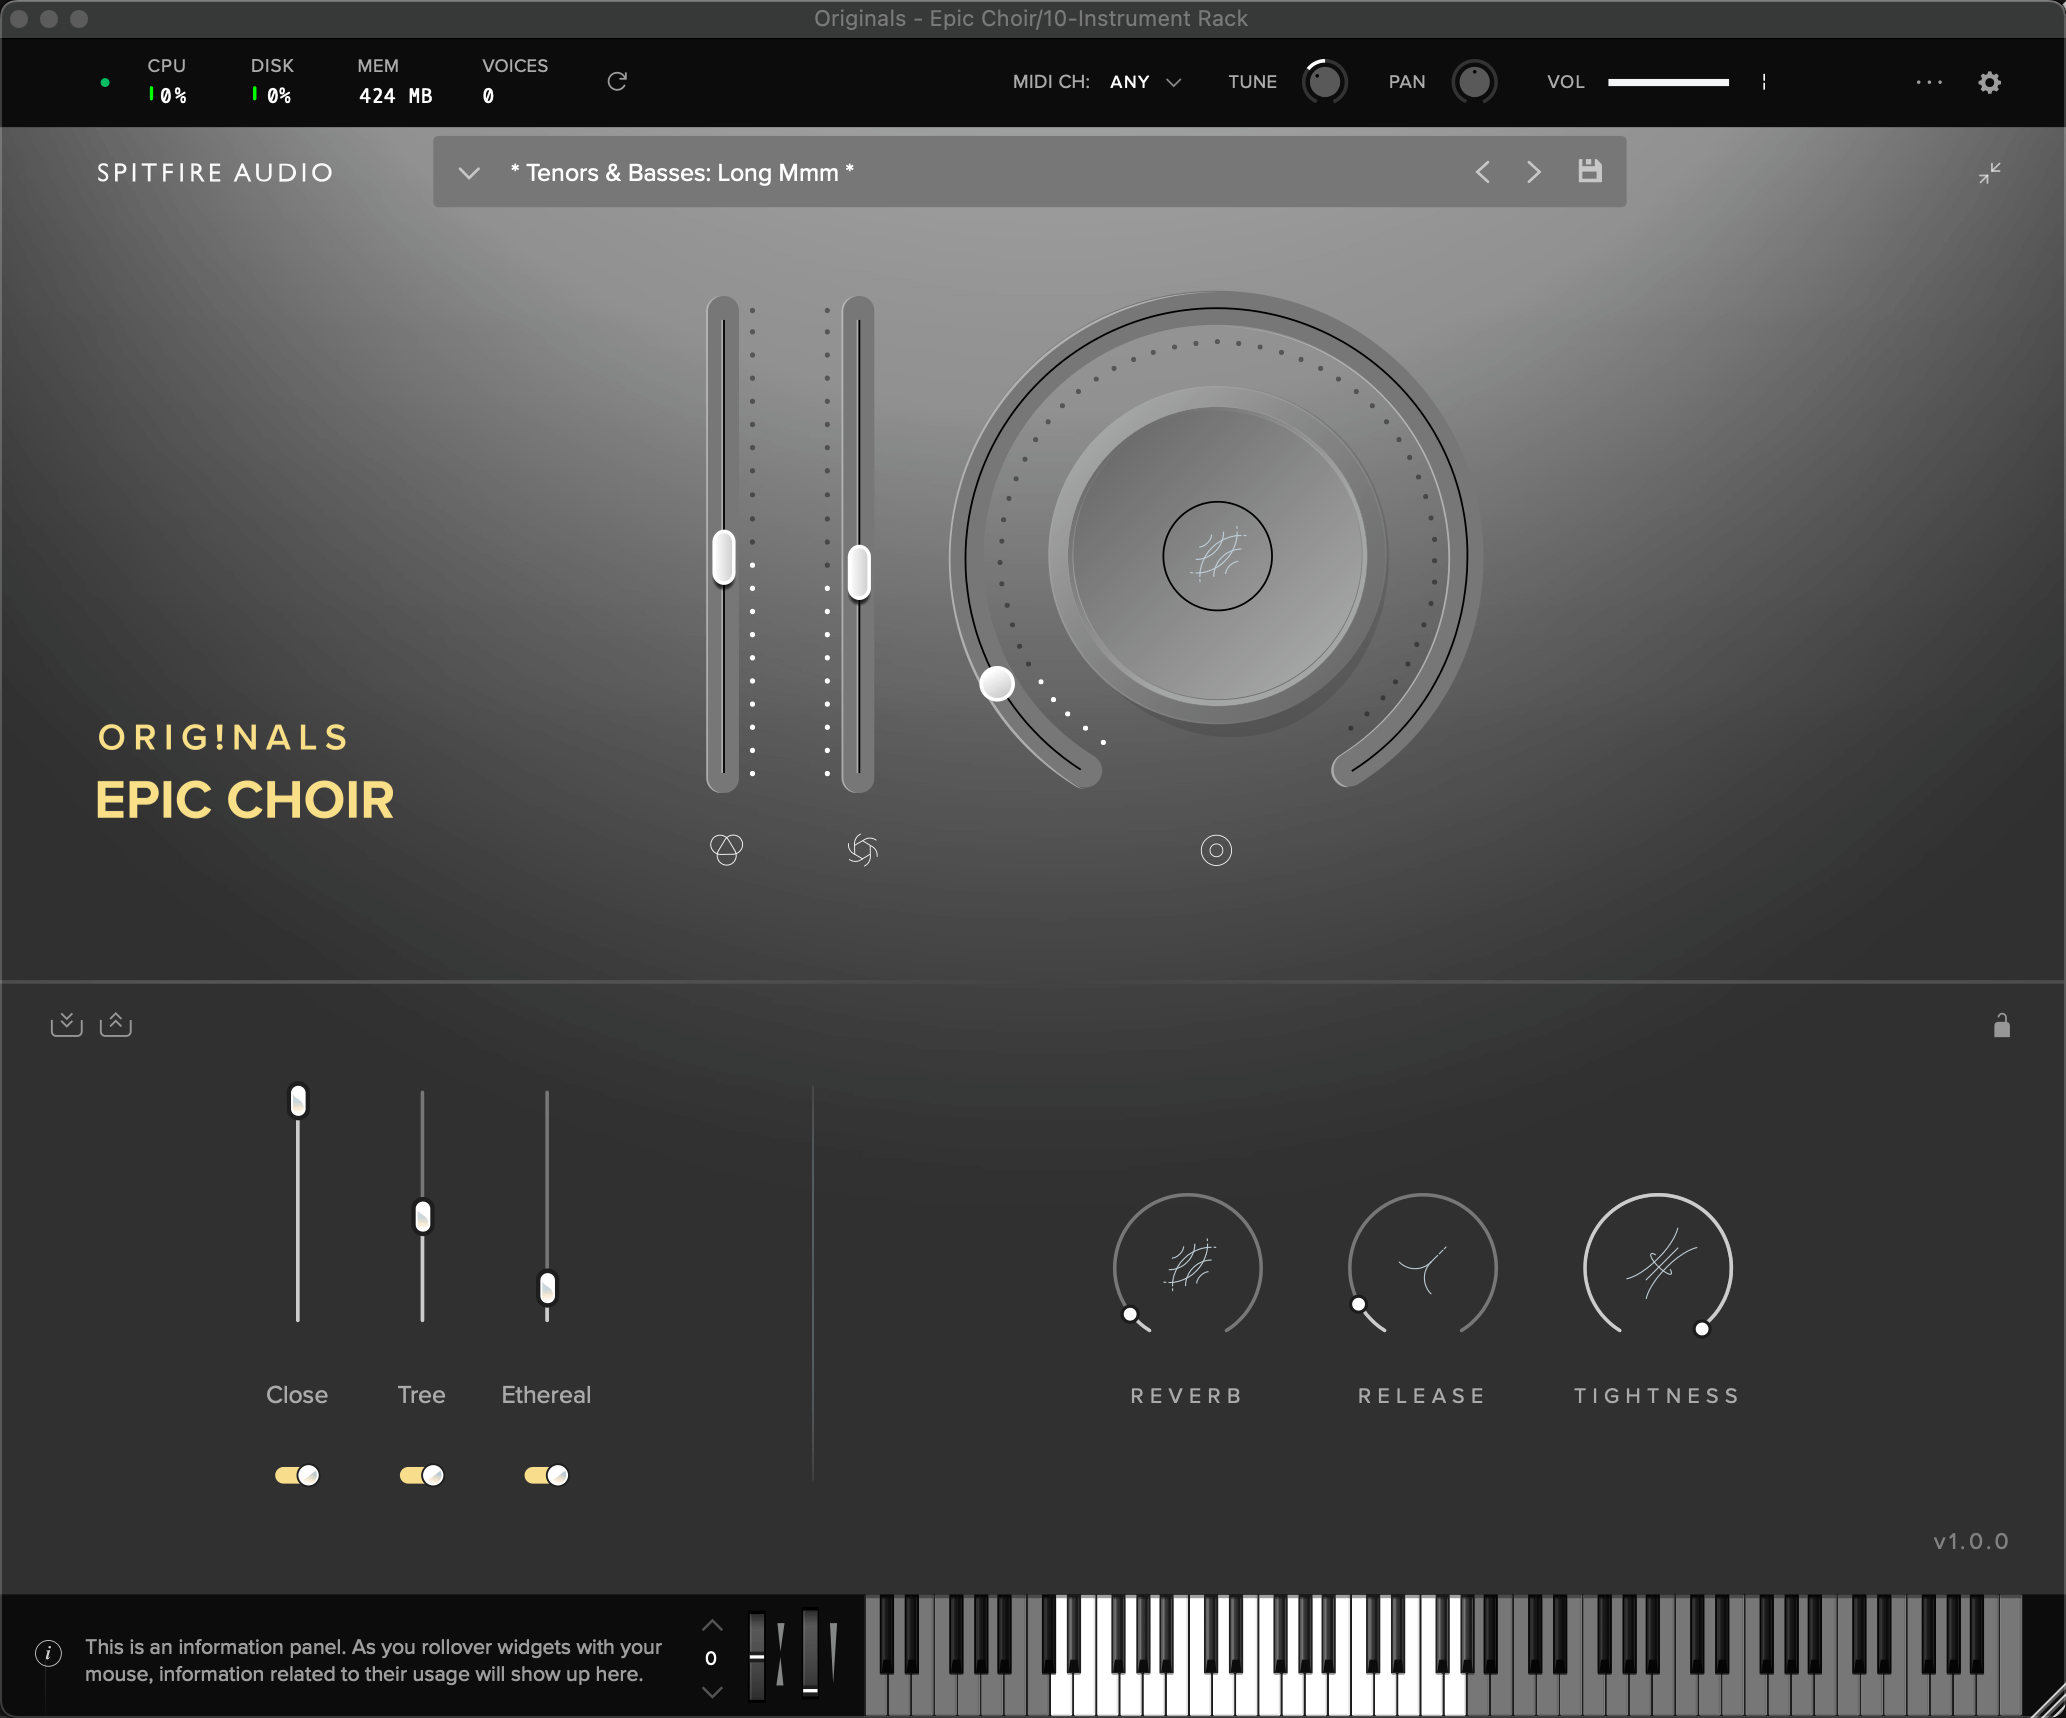
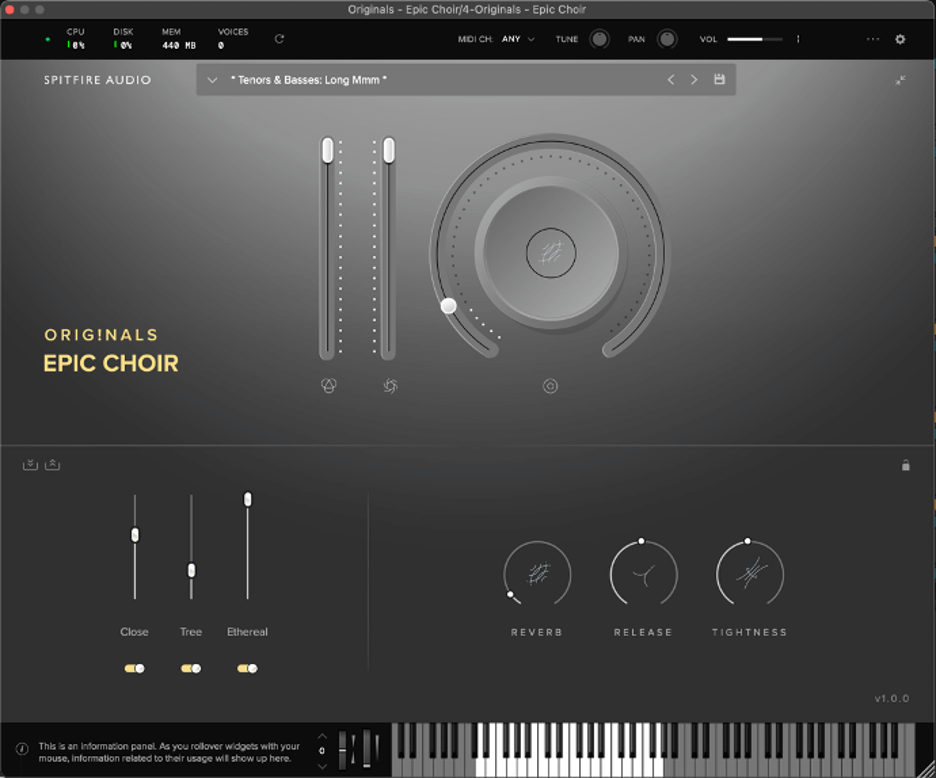
Next, load an instance of Spitfire Originals: Epic Choir Library and select the ‘Tenors & Basses: Long Mmm’ preset.
In order to get a deep bass tone we’re going to pitch the entire instrument down 1 octave so turn the ‘Tune’ knob down by 12 semitones. We’re going to need to compensate for the loss of volume so turn that up to 400%.
On the mixer section, bring the Close mic all the way up to 100%, Tree down to around 46% and Ethereal down to 12%. Add 8% of Reverb and 12% of release to shape the envelope.
We also want to turn the tightness all the way up. This reduces the spread of the choir’s pitch to produce a more solid note.
Here’s what it sounds like so far:
Step 3
Now we want to add a sub layer to thicken up our bass sound.
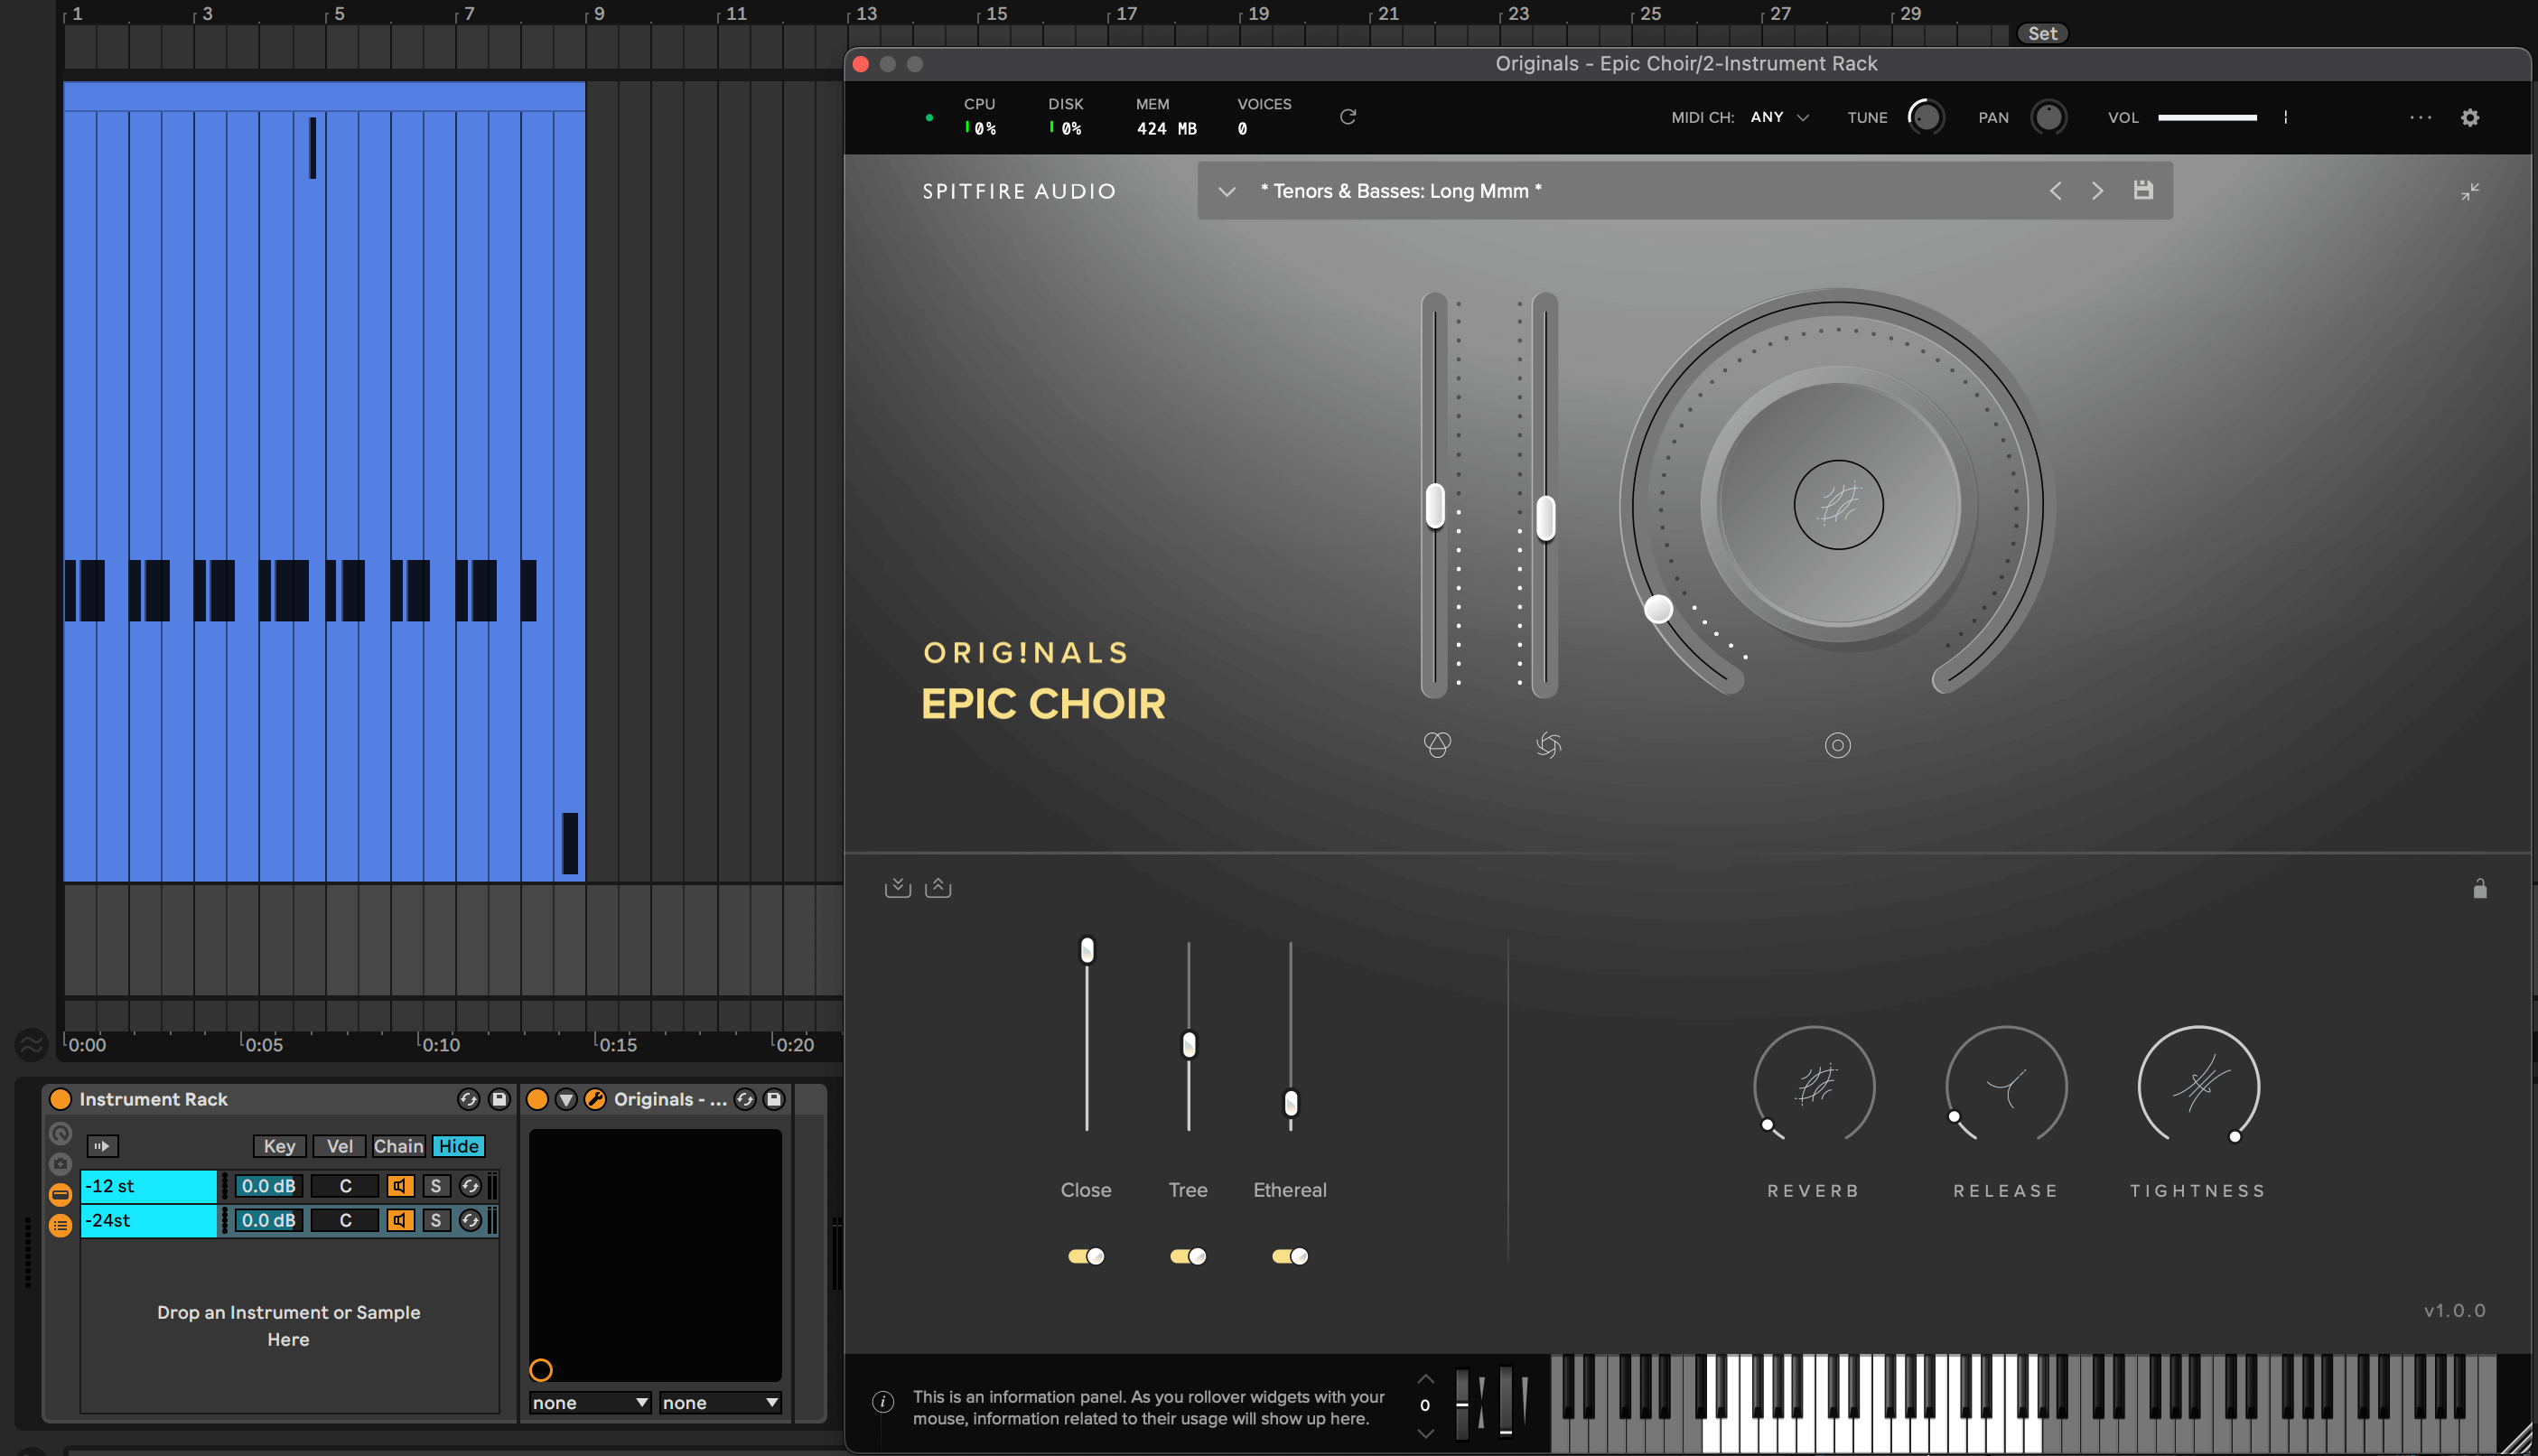
Close the plug-in window, right-click the device title bar and group it to an instrument rack. Open the show chain list by clicking the small bullet list icon, right-click the chain containing Originals – Epic Choir and select duplicate.
Open this new chain by clicking on it and opening the plugin window. The only parameter we’re going to change in this instance of the plug-in is the pitch so bring that down an octave to -24st. Now rename the original chain -12st and the new one -24st.
Step 4
The last thing we’ll do is put the bass in mono and add some heavy compression to increase the pluckiness of the transient.
Drag in the Utility device and make sure the Bass Mono box is activated.
Now drag in Ableton’s compressor and set the Threshold to -53.1db. Turn the ratio up to 10:1, set the Attack to around 30ms to let the transient poke through and the Release to around 20ms so the compressor almost resets before the next MIDI note. The last thing to do is add around 14db of makeup gain.

Here’s how the finished bass sounds:
CHORAL PAD
Now we’re going to move on to the pad sound. For this we’re going to use inverted 7th chords with a root note layered an octave below to create a pad that covers a wide area of the frequency spectrum.
Step 1
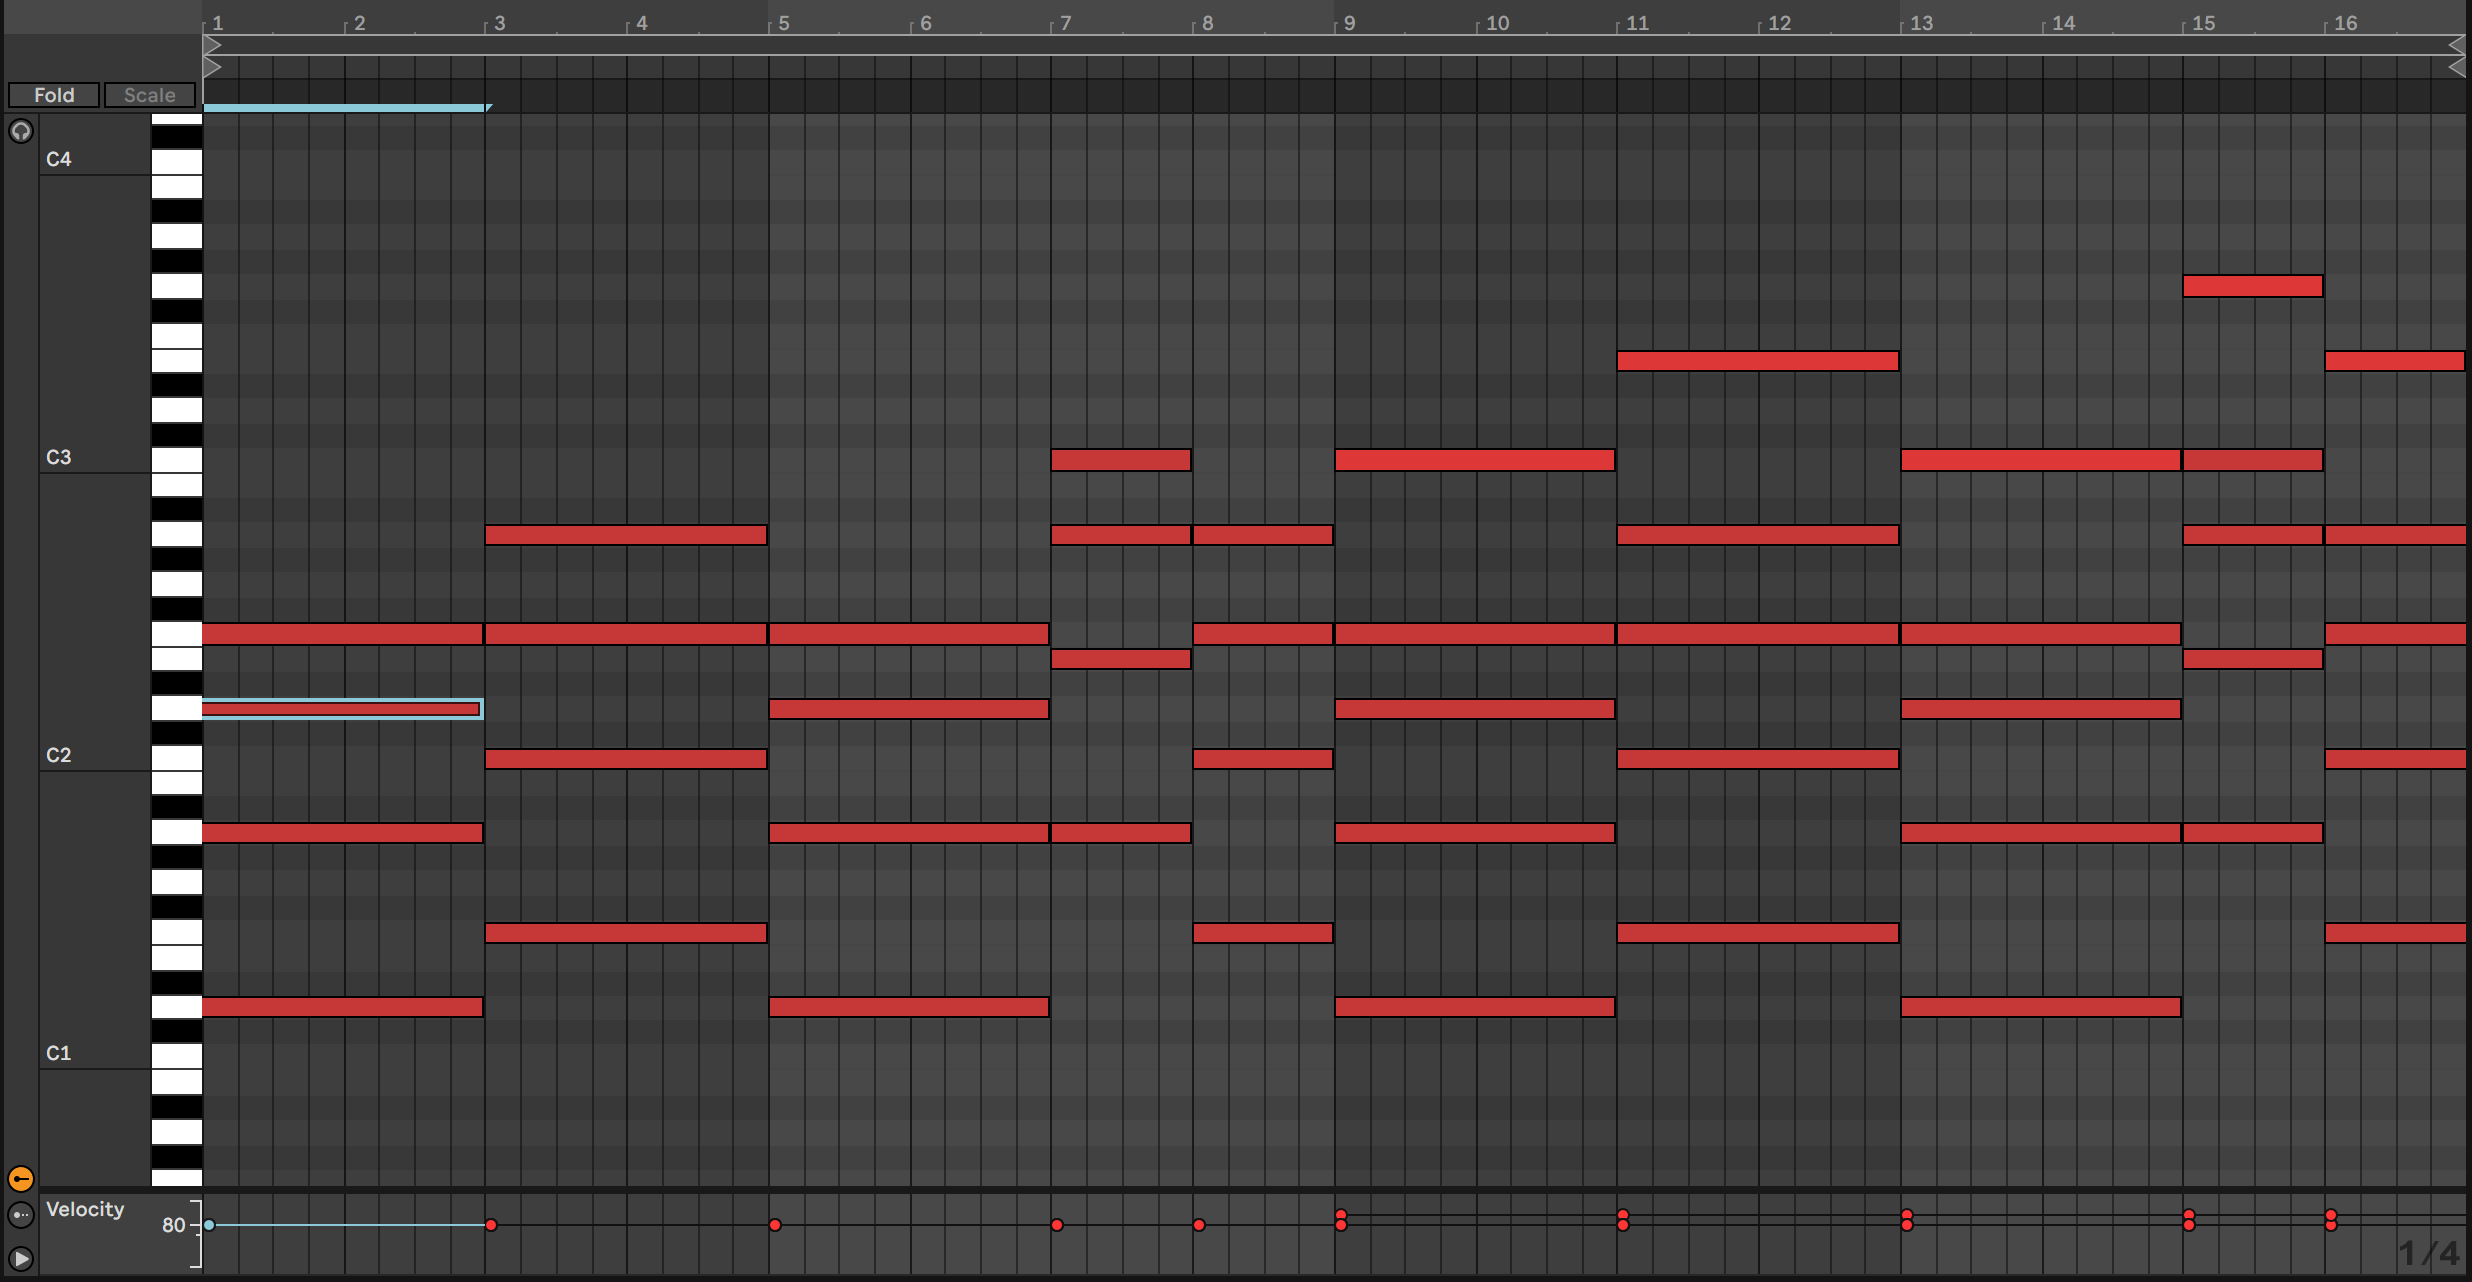
Because we are working in the key of D minor, start by drawing in the following chord pattern over 8 bars with each chord last one bar in it’s duration:
Dm / Dm / F / F / Dm / Dm / Am / F
Select the notes playing the 5th interval of every chord and lower them an octave by holding shift and pressing the downwards arrow key.
Then insert an additional root note an octave lower for each chord.
Lastly, duplicate the entire pattern adding the respective major and minor 7th intervals to each chord. Here’s the final MIDI pattern for the 16 bar sequence.
Step 2
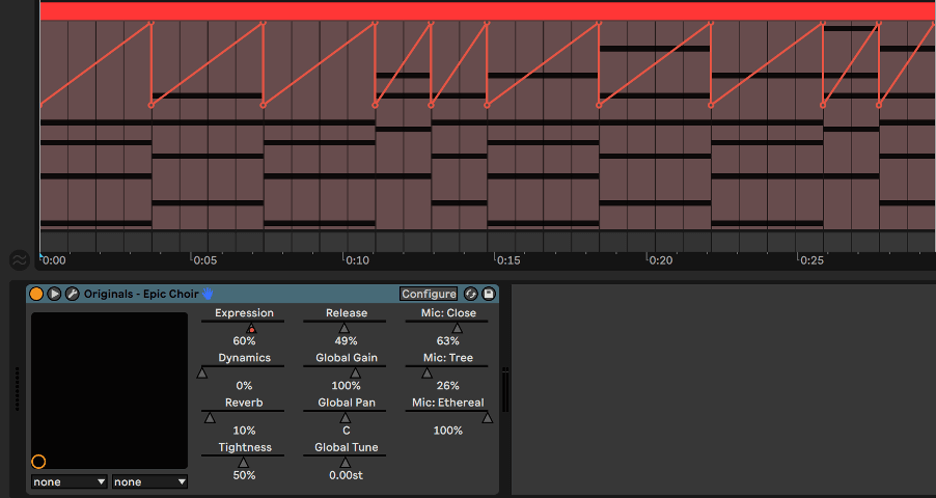
Drag in Originals – Epic Choir and open the plug-in window. Again, we’re going to select the ‘Tenors & Basses: Long Mmm’ preset.
This time let’s change the Close Mic to 63%, Tree to 26% and Ethereal to 100%.
I’ve put Reverb at 10%. Release and Tightness are both at 50%.
Step 3
Now we’re going to add some automation to the Expression parameter starting around half its value and reaching the maximum at chord changes so the pad swells into each new chord.
Here’s the pad on its own:
And here it is with the bass:
CHORAL STABS
The last layer we’re going to make is a melodic vocal stab. For this, we’re going to use a couple of layers.
Step 1
Create a new MIDI track and draw in this pattern. We want to keep it staccato and monophonic so have only one note playing at a time. Also, by varying the velocity we can accentuate the groove.

Step 2
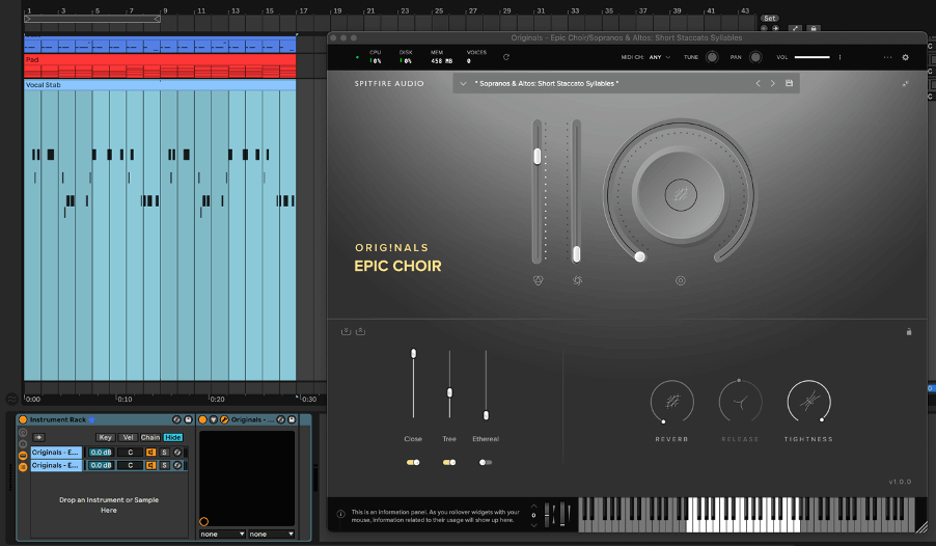
Drag in Originals – Epic Choir and select the ‘Sopranos & Altos: Short Staccato Syllables’ preset.
We’re going to add a strong chorusing effect by layering another instance of Epic Choir by grouping it to an instrument rack and duplicating the chain. On this second instance of the plug-in, de-tune the instrument very slightly by turning the Tune knob just under half a semitone to the left.
Step 3
For the finishing touches, we’ll add Ableton’s stock Overdrive and Compressor to add some harmonics and punch to the stab. This helps it cut through the mix
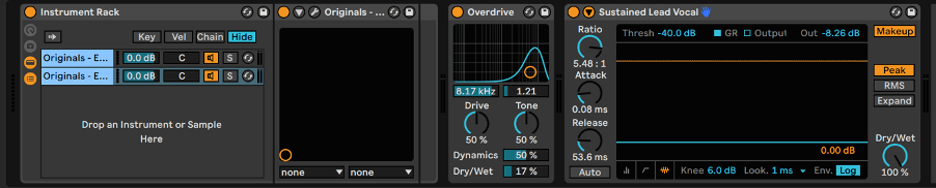
On the overdrive, position the filter around 8.17 kHz and reduce the filter width to 1.21. Bring the Dry/Wet setting down to 17%.
Finally, open the Compressor’s Sustained Lead Vocal present and drag the Threshold down to -40dB.
Here’s the finished choral stab:
Here are the three layers of Epic Choir played together:
And here is the finished loop with the drums and piano added:
*Attack Magazine is supported by its audience. When you purchase through links on our site, we may earn an affiliate commission. Learn more.