In the latest instalment of Beat Dissected we create a twisted tech house beat, using some clever processing tools to create unique percussive grooves.
Beat Dissected is a regular series in which we deconstruct drum patterns, showing you how to program them in any DAW. Just copy our grid in your own software to recreate the loop.
Pull the project from Blend below to download the samples.
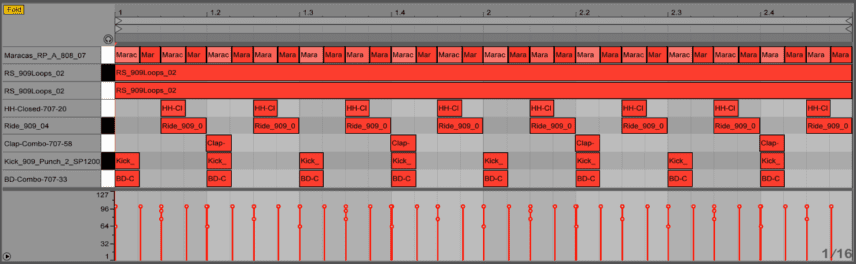
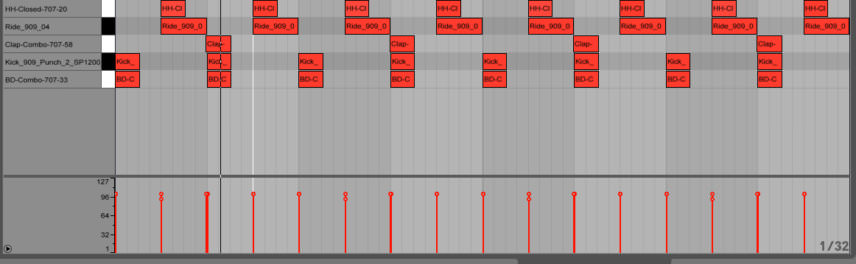
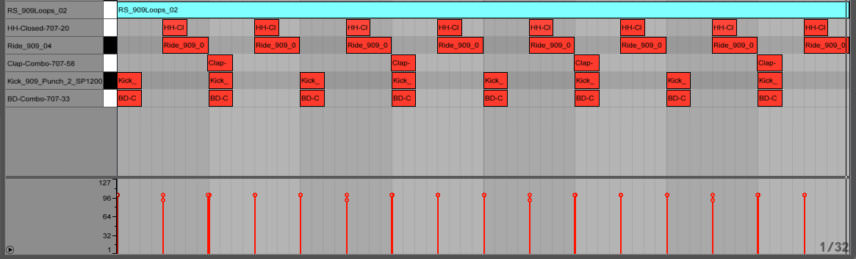
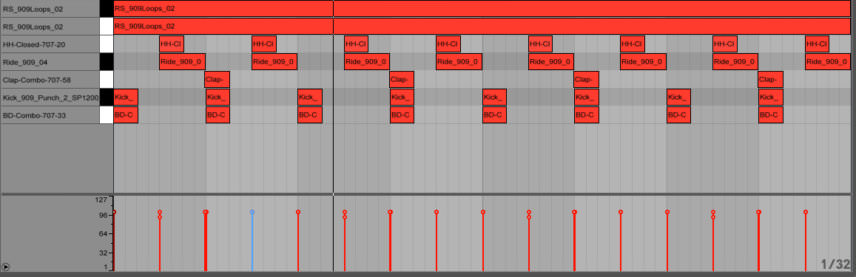
Here’s the beat we’re building today:
Spec
Tempo
122-127BPMSwing
55-60%Sounds
Mainly processed Roland drum machine samplesStep 1
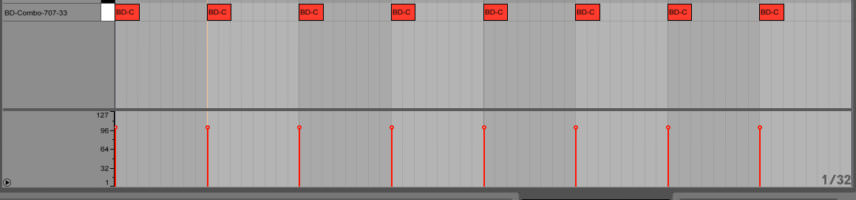
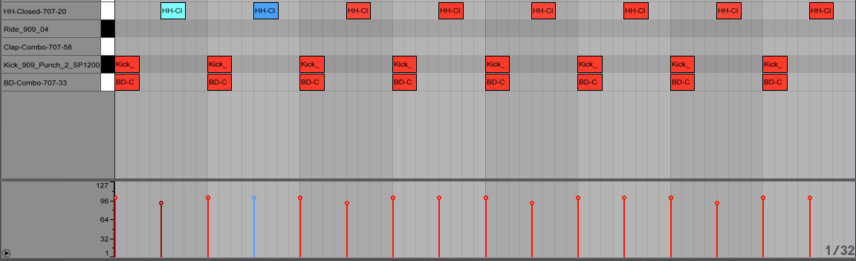
We begin by loading a kick drum taken from Samples From Mars’ Modded 707 From Mars pack, placing it onto a pad within a Drum Rack, then programming a simple four-on-the-floor pattern.
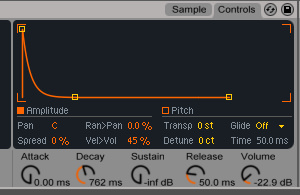
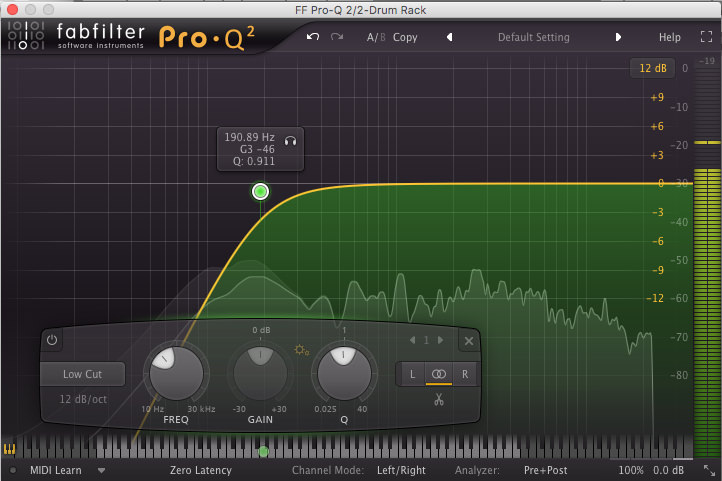
We tweak the envelope on Simpler, taking the sustain off the kick, and follow this up with a low-cut EQ. This will serve as our transient kick, so we’ve chosen something with more character that will cut through the mix and provide nice mid-range detail. We’ll fill out the low end with another kick in the next step.
Step 2
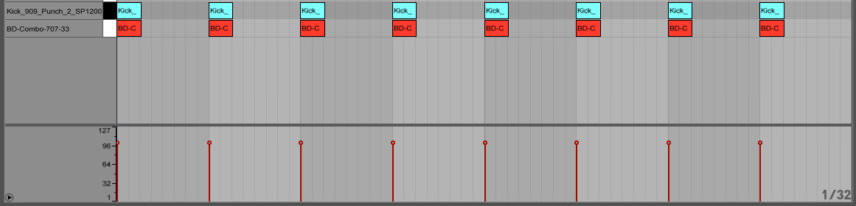
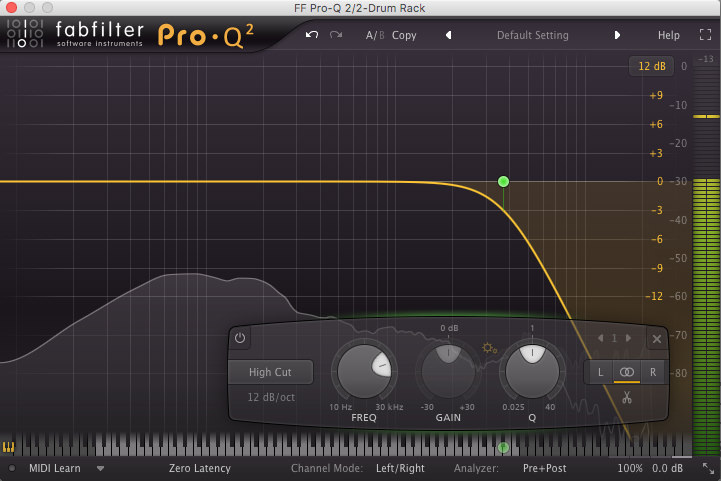
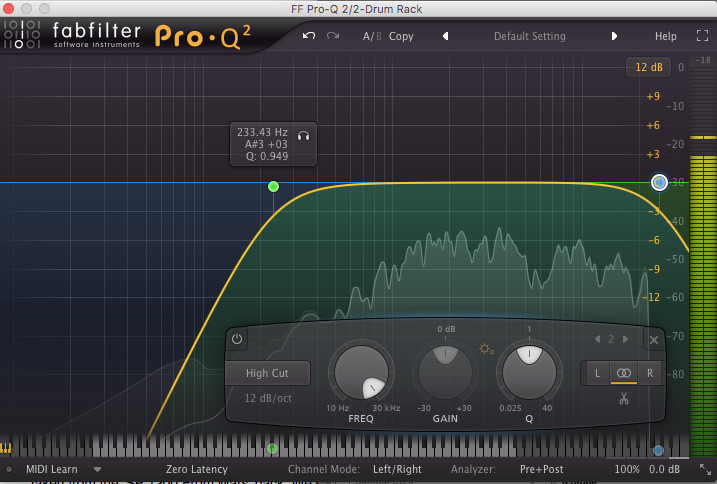
Next we add a beefier kick with the same programming, using a hit taken from the SP 1200 From Mars pack. We don’t really need to do much to this kick at all, except a subtle high cut, sweeping off some unnecessary noise from the sample.
The key here is establishing a nice level between the two kick drums. Having the transient kick mixed much lower should work well.

Step 3
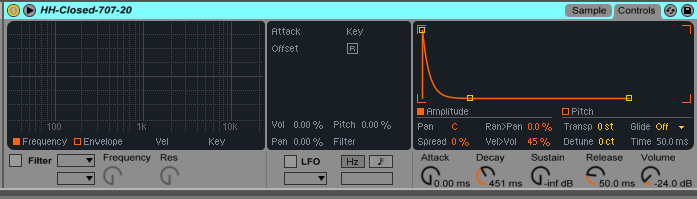
Next we add an off-beat hi-hat, again choosing a TR-707 sample. We’ve chosen something with a really strong attack that will drive the off beat. We’ve programmed every other hit with a slightly louder velocity, adding some interest to an otherwise straight-sounding groove. We also take the sustain off the hat, making it much snappier and tighter.
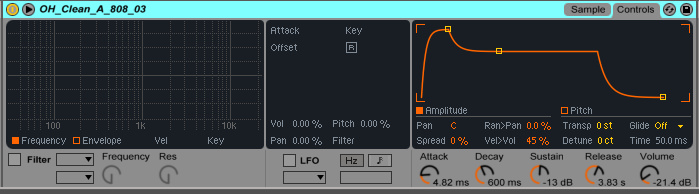
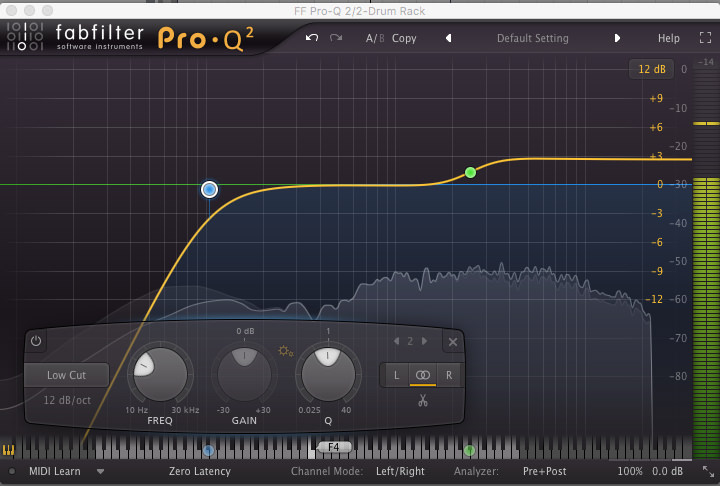
Next we add an 808 open hat, placing hits in the off beat. This time we reduce the attack, and tweak the envelope slightly. We can use this open hat to pick up the pace in certain sections of the track as we begin to arrange things. We also add the same EQ to both of these sounds, simply cutting the low frequencies to clear space in the mix.
Step 4
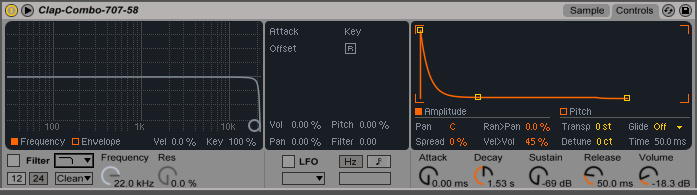
Next we add a 707 clap, placing hits on the second and fourth beat of each bar, just slightly before the kick. Having your clap or snare a few milliseconds before the kick can help them work well together.
We tweak the envelope of the clap, taking off some sustain, and we also EQ the clap with a high shelf boost for more high frequencies.
Step 5
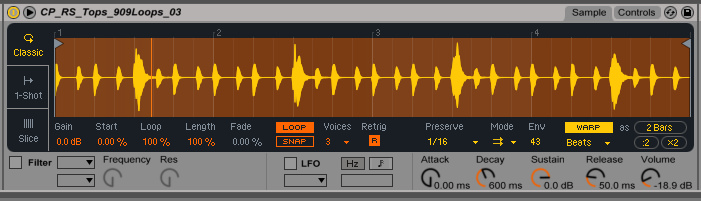
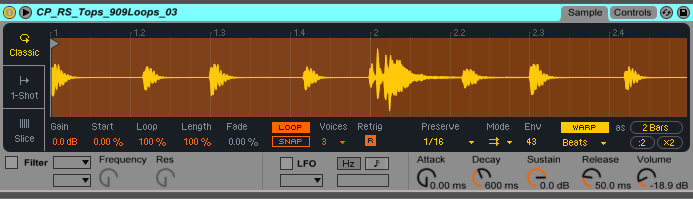
Now for some quirky percussive elements to add some groove and interest. We take a 909 percussion loop and add it to our Simpler device, drawing a MIDI note for two full bars to trigger the whole loop. We turn off the Snap function in Simpler so that the percussion loops properly, then we click the x2 button in the bottom right of Simpler to make the loop run slower.
Next, we then change the Preserve setting from Transients to 1/16, change the Mode to Loop Forward and bring down the Envelope control to 43. We’ve halved the speed of the loop, and by changing the Preserve setting to 1/16 we get a more rhythmic feel, looping each section forwards in the space created between each 16th note. This creates a grainy texture on the percussion, suitably twisted for the vibe we’re after.
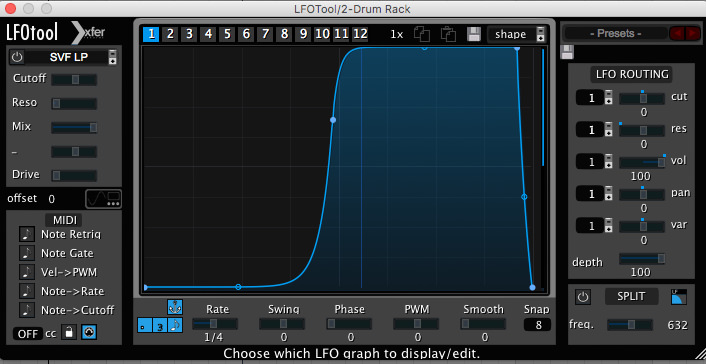
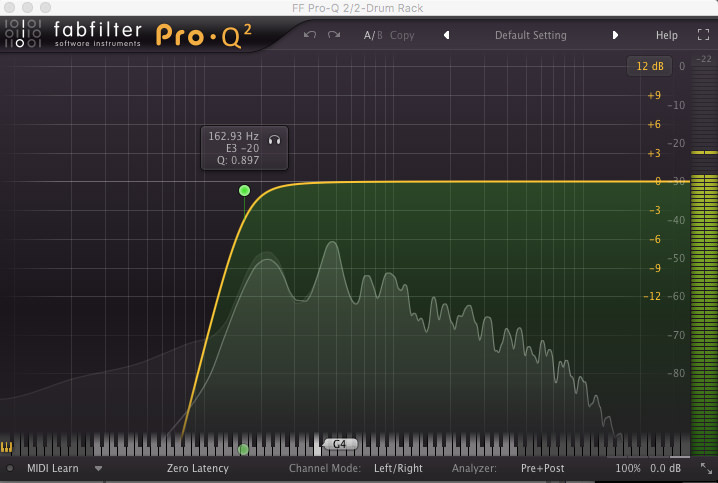
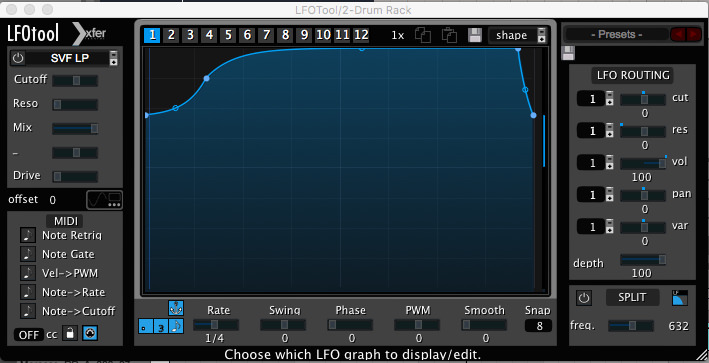
We’ve also added some EQ and quite a heavy sidechain effect using Xfer Records’ LFO Tool, cutting out the clap.
Step 6
For an added dose of twisted percussion, we duplicate the Simpler instrument and program the same MIDI note to trigger the loop in the same way. This time, we press the x2 button again, to make the pattern run slower still.
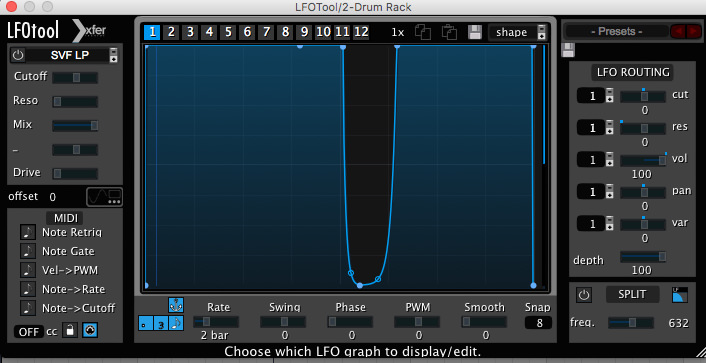
We place another LFO Tool on the device, just ducking the loop slightly on the kick drum. We follow this with another LFO Tool, setting the rate to two bars, meaning we can chop off some of the clap in the loop. We also place a low cut EQ on the loop. The two percs work really well together, providing groove and something unique.
Step 7
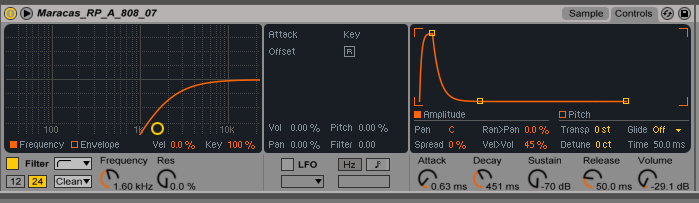
Finally we add an 808 maraca sound, programming 16th notes with some velocity variation. As with the open hat, these maracas will serve to pick up the pace in sections. We sweep away most of the low and mid frequencies from the sound, tweaking the envelope by backing off the attack and bringing down the sustain, for a tighter feel with less focus on the transient.
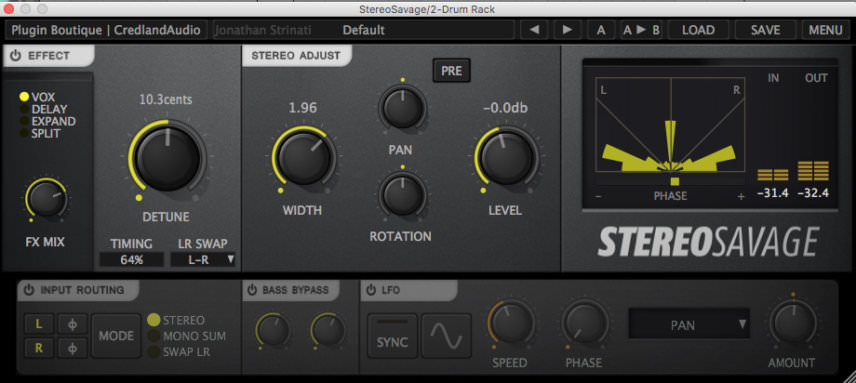
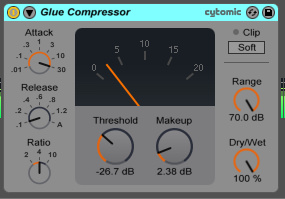
We then add the Stereo Savage plugin to spread the sound out, as thus far there’s not much stereo detail to our beat. We also process the whole Drum Rack with the Glue Compressor and Slate Digital’s VTM, blending the sounds together and adding warmth.