
In the latest Beat Dissected, we use acoustic drum hits to create the sound palette for a heavily swung house beat.
Beat Dissected is a regular series in which we deconstruct drum patterns, showing you how to program them in any DAW. Just copy our grid in your own software to recreate the loop.
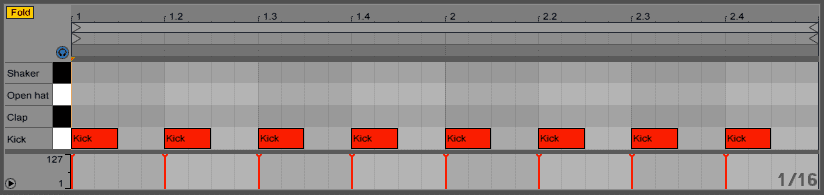
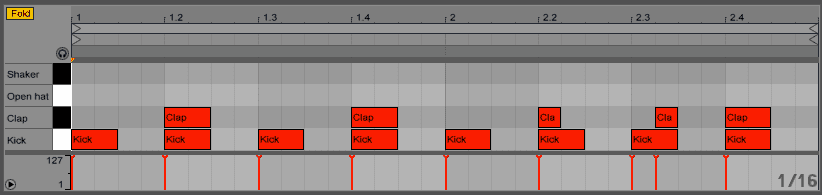
Here’s the beat we’re building today:
Spec
Tempo
122-125 bpmSwing
60-65%Sounds
Based on acoustic drum HitsStep 1
For our kick drum part, we’ve started with a sample of a live acoustic kick, then layered that with a Roland TR-909 kick sample to add a bit of extra thump and give us a slightly more clubby sound.
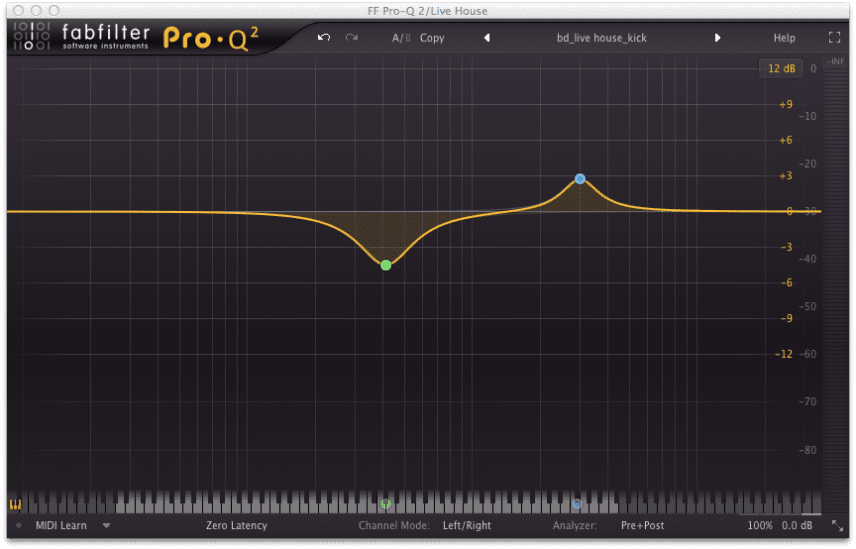
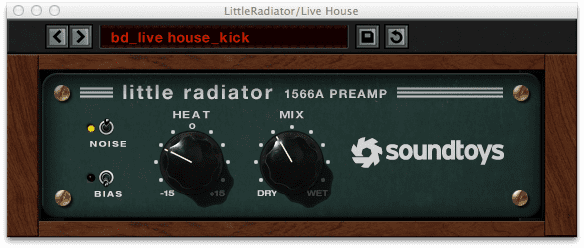
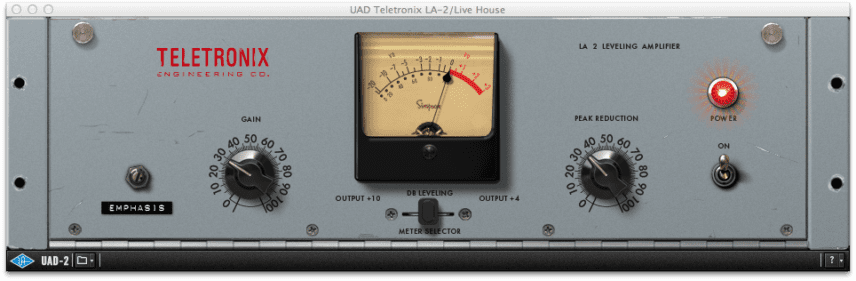
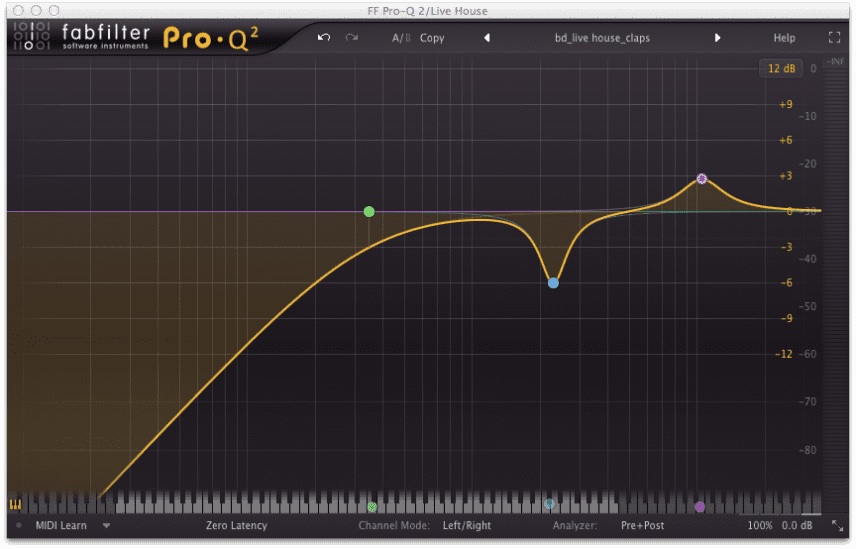
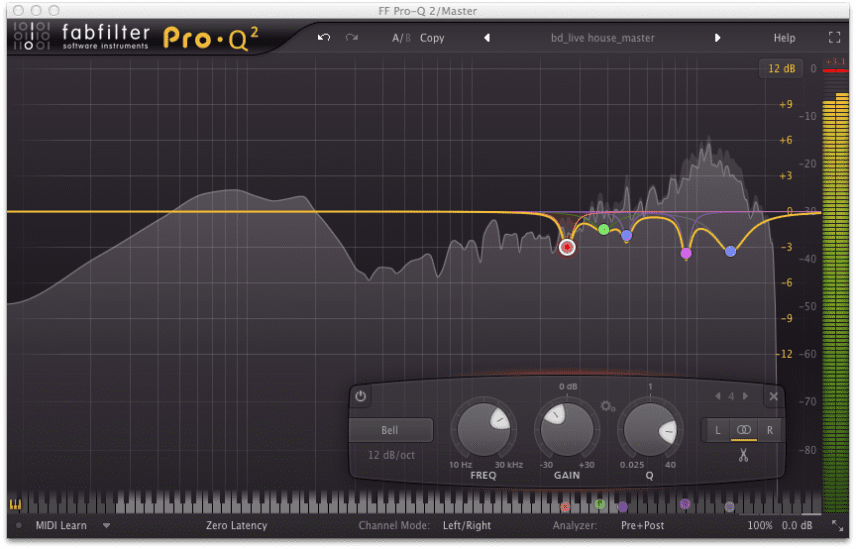
For processing, we’ve used FabFilter Pro-Q 2 to to help tone the kick. We’ve also used Soundtoys Little Radiator to give the kick more grit and, finally, we’ve added UAD’s LA-2A compressor with about 2 dB of gain reduction just to help with overall dynamics.
The pattern is a simple four-to-the-floor.
Step 2
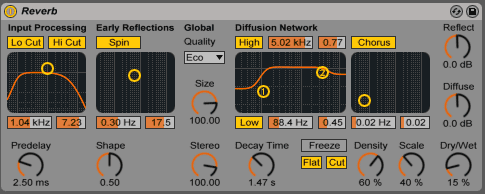
The clap is a sampled live clap, with Pro-Q 2 cutting some of the low end and boosting around 10 Hz for extra definition. Finally, we’ve added Ableton Live’s native reverb for extra depth.
The clap plays on the second and fourth beat of each bar with an added hit in the second bar for variation. Note how the hit on the fourth beat is nudged slightly to the left in order to give the clap a rushed feel. This will play nicely against the swing that we’ll add to the shaker part later.
Step 3
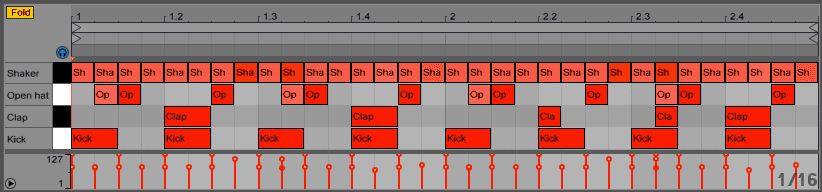
We’re only using one hi-hat sound in this beat: a sample of a live hi-hat played open. The hat is triggered at full velocity on every offbeat, with some ghost hits added at lower velocity on the offbeats to emphasise the swing.
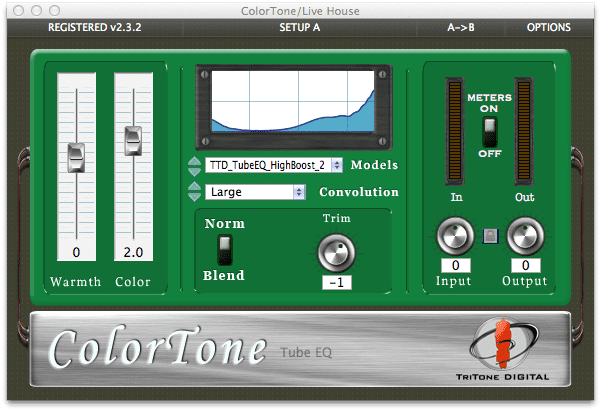
We’ve added TriTone ColorTone to the hat channel, using a setting that cuts off the low end and boosts the highs.


Step 4
Our final element is a shaker part, once again using just a straightforward sample of a live shaker.
For processing, we’ve used ColorTone set to a similar model we used for the hi-hat, but with slightly different settings. This cuts of some unwanted low end and gives the shaker some extra sheen.
The shaker plays steady 16th notes but with velocity variation throughout to give a more human feel. The swing setting we apply here can change the feel of the beat quite significantly. We’ve gone for a fairly heavy swing.
Step 5
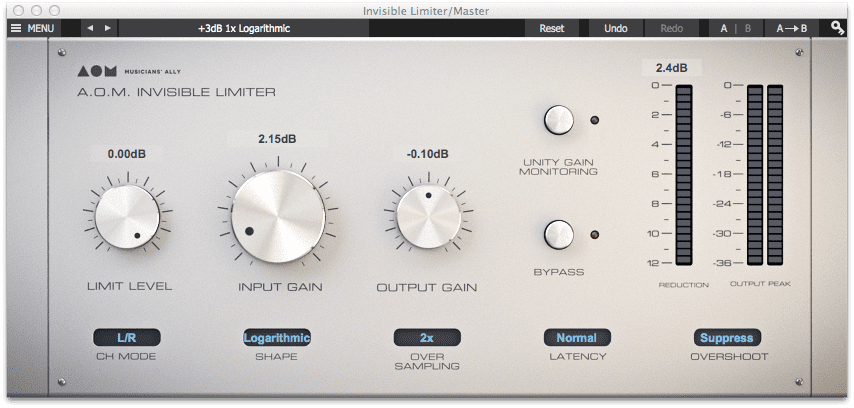
For master processing, we’ve added another instance of Pro-Q 2 to help cut some of the harsher high frequencies that have built up as we’ve summed our drums together. Little Radiator is used again for a touch more saturation, while Saturn adds a bit of tape sound. Finally, at the end of a chain, AOM’s Invisible Limiter is added and set to approximately 2 dB of input gain. The master limiter really brings up the beat’s overall volume.

07.49 PM
didn’t hear a shaker on there?
12.34 AM
Thanks for the tutorial! I need more swing in my life…..Cheers
09.21 AM
Attack do you no longer provide the samples for non-ableton people? 🙁
08.48 PM
I understand the groove pool in ableton but in these tutorials when you say “60-65%” swing, how, in ableton, do you control swing by percentage like that? anybody know?
09.21 PM
@Mark: In ableton, as you edit a drum clip, look left at the clip controls. On the far left, under where you can edit the color of a clip, there should be “groove”, with a little hot-swap button next to it (looks kind of like the recycle logo). Hit that, and it should open up your core library’s groove and swing pool. Open up any of the files (MPC is a personal favorite), and select your preferred swing timing (usually 16), and the amount of groove. If you want the groove reflected in the notes–you should already be hearing it either way–you can hit “commit”, and the midi will change to reflect the groove you hear. Cheers!