
Inspired to make beats like Overmono? We show you how.
Unless you’ve been living under a rock, you’re going to have heard of Overmono. Their monumental rise over the last few years to global touring is a testament to on-point production laced with good songs.
The music is a blend of garage, house, bass and generally low-end boosted bangers. Having just released their much-anticipated album, ‘Good Lies’ last week on XL Recordings, there’s no better time than looking at one of Attack’s favourites – ‘Calling Out’.
Here’s what we’re making today:
Here it is in the context of a tune for context:
Spec
Tempo
137 BPM
Swing
50%
Sounds
Ableton
As ever click any image to enlarge!
Step 1: Kick & Snares
Let’s start with the kick. Load up an empty Drum Rack, we’re going to build one from scratch.
Find ‘Kick 90s 1’ and drop it onto the first empty Pad. There’s little to do here other than fading out the sample, on 1-Shot mode to reduce the noise at the end of the sample. We want it clean and punchy.
On the next pad, load in ‘Snare 808 Deep’. Yours truly can never remember if these samples are available in Live Lite or not but generally speaking a good clicky 808 snare will do the trick. Don’t get too hung on the exact snare we use as the magic, like any good drums, is in the groove. Leave the snare untreated. It works as it is.
Move onto the next pad, and drop in ‘Snare Film With Gatlope’. Not your common snare name but there you go. Like the kick, reduce the length of the sample with on 1-Shot mode and lastly increase the pitch by + 5 st.
Move onto the last pad in Step 1 and drop in ‘Kick Noise Filter’. This is a subtle addition but by our estimation is close to what is in the original track.
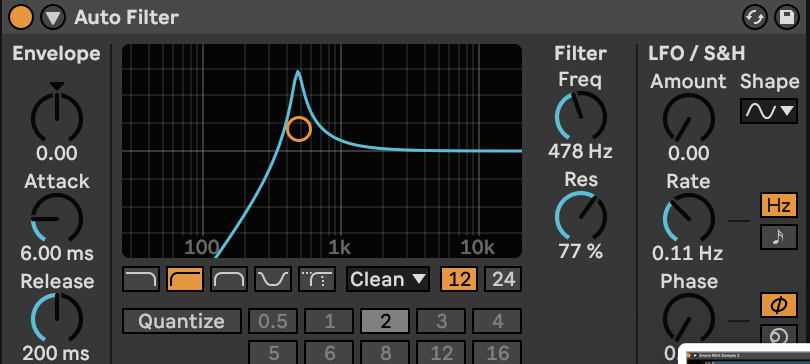
Bring the volume down to -20.0 dB and drop a Auto Filter onto the Pad, be careful not to place on the whole Drum Rack, so that it affects just this sound. We want to filter it further by removing the low end some more. As mentioned, it’s a subtle addition that keeps it bouncing along.
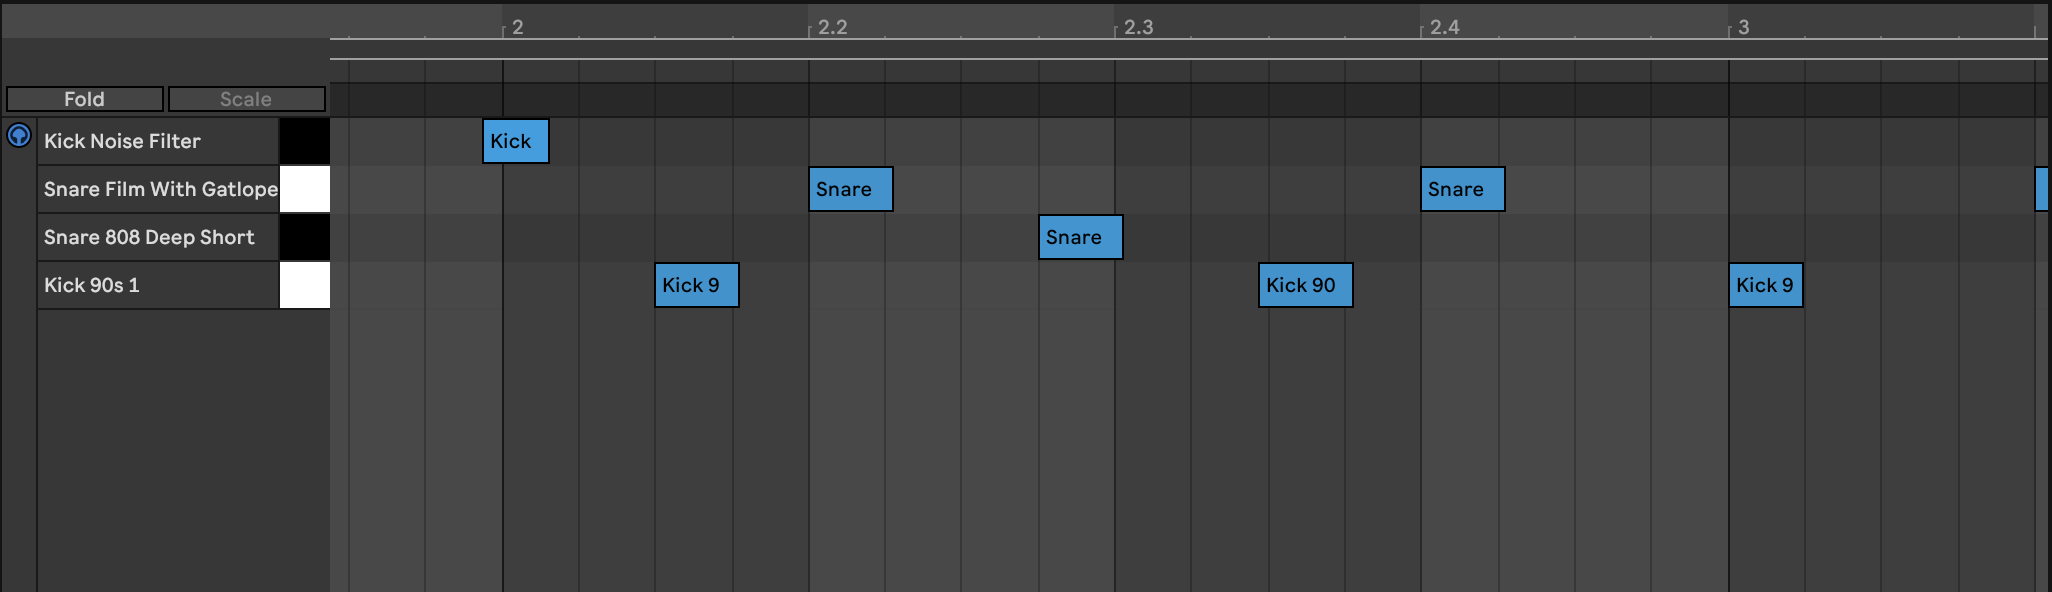
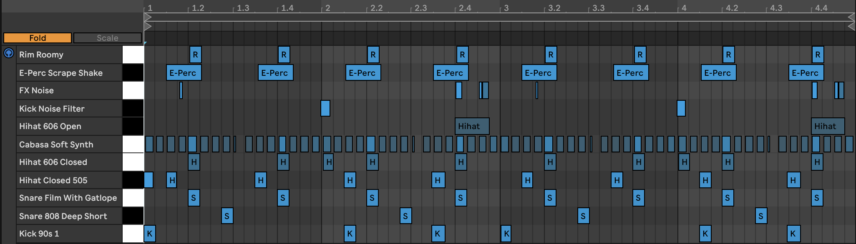
The pattern for these four parts is as below:
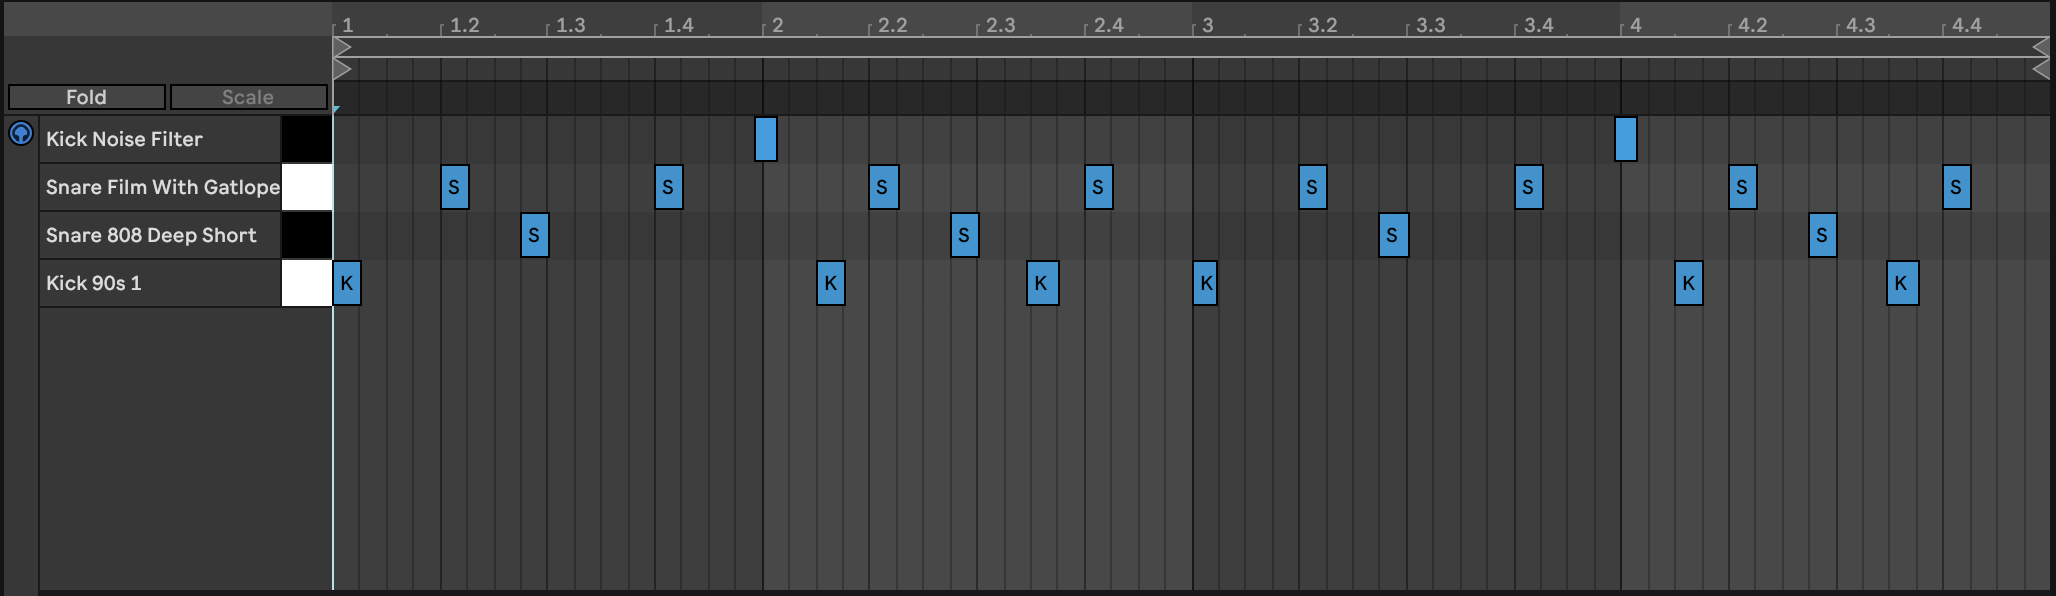
The key here is to keep Pad 4, ‘Kick Noise Filter’ off-grid. We have brought it forward, left on time line, about 1/32 of a note. And we have repeated the same for the kick drum in the second part of the pattern. As below. Again, you don’t have to recreate accurately – just play around to taste but this helps get “the bounce”.
Here’s our progress so far:
STEP 2: Hi-Hats & Shaker
On your next available Pad, load in ‘Hihat Closed 505’. There is nothing to do here. It sounds good as it is.
Move onto the next Pad and load in ‘Hihat Closed 606’. We’re working through the Roland classic machines! There is a reason they are “classic” after all.
For this sound, drop the pitch to -14 st and drive the Vol > Vel all the way to 100%. Lastly, push the Volume to 2.86 dB.
Next up is a seriously important aspect of the tune giving us groove and substance. The shaker! For this, load in ‘Cabasa Soft Synth’ and follow the tweaks in the picture below.
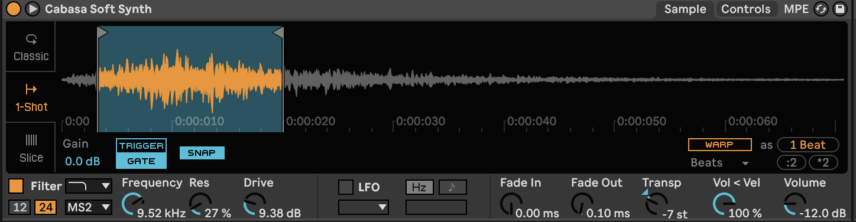
Amend the start and end of the sample, the pitch (using Transp), the Vol>Vel and the Volume is at -12 db. Lastly, add a filter. Mess about to taste. We’ve gone with MS2 on 24 Filter Slope settings and dropped the frequency to 9.52 kHz with a subtle amount of Res and Drive.
Moving on, drop ‘Hihat 606 Open’ on the next Pad. Reduce the pitch to -6 st and put the Volume at -4.57 dB.
As for the pattern, this is it below.
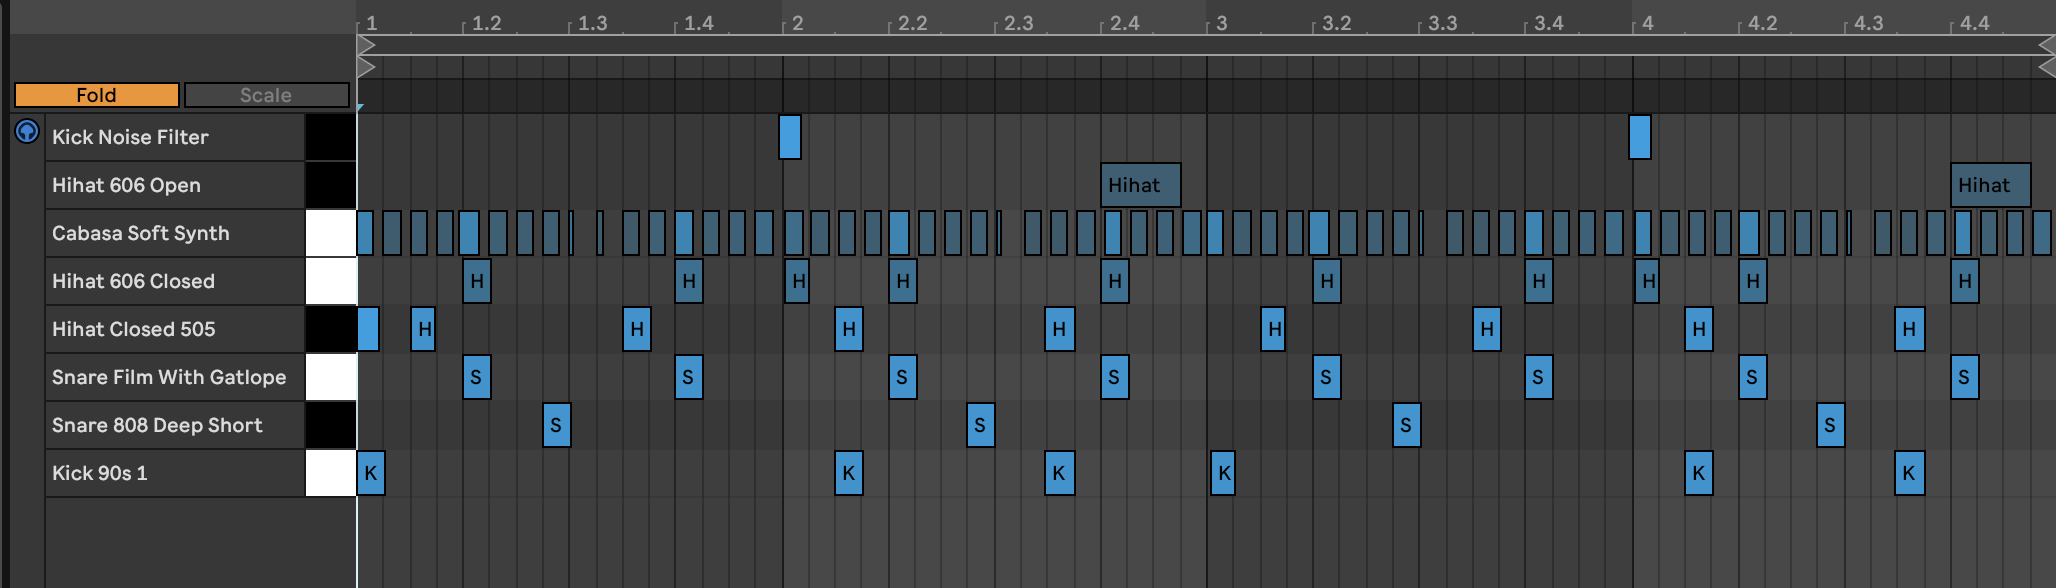
For each sound, some notes are on the grid and others are slightly pulled forward. Again. this is for the requisite bounce.

Don’t over look the shaker! For the shaker, you want it in 1-Shot mode and on GATE setting. This means the sample will fade as soon as the note is released.
If you look closely above you’ll see on beat 3 of bar 1, and subsequent bars, the shaker note is shorter. That cuts the sound quicker and helps with the bounce. Lastly and all importantly the shaker is very loose on a 1/16th grid with a lot of Velocity information (highlighted below). Once you draw that Velocity information in, and drive the Vol>Vel as we did in the earlier steps, the Velocity effect is intensified. That’s your ticket right there.
Here’s our progress so far:
STEP 3: MAGIC MAKERS
It’s always a good idea to find some other sounds to throw into the mix. They help bed the groove and fill the gaps. With Overmono and lots of other top producers, there’s more going on than at first glance.
Find your next free Pad, and load in “FX Noise’. Turn on the Filter and reduce the Frequency to 5.35kHz on Clean and 24 Filter Slope. Push the Vol>Vel to 45%.
Onto the next Pad. Drop in ‘E-Perc Scrape Shake’. On the face of it, this is too prominent so we want to reduce it into the back of the mix. Like before, with the shaker, there are a few tweaks to the sample start and end, be sure to keep it on GATE mode and follow the rest of the tweaks to Fade In, Fade Out, Transp and Volume as shown below. It can’t be stressed enough how powerful sample manipulation can be before any consideration of mixing with FX plugins. You can do so much, with so little, to blend one-shots together.

The snare needs some wood! Load up ‘Rim Roomy’ on the next Pad does dial in +1 st on the Transp. This sound is to complement our ‘Snare FIlm With Gatlope’ sound. We have also nudged it ever so slightly on the grid to the right so it’s a fraction after our snare sound.
The pattern and the subsequent off-grid looseness can be seen below.
Here’s our progress so far:
Step 4: Reverb Snare
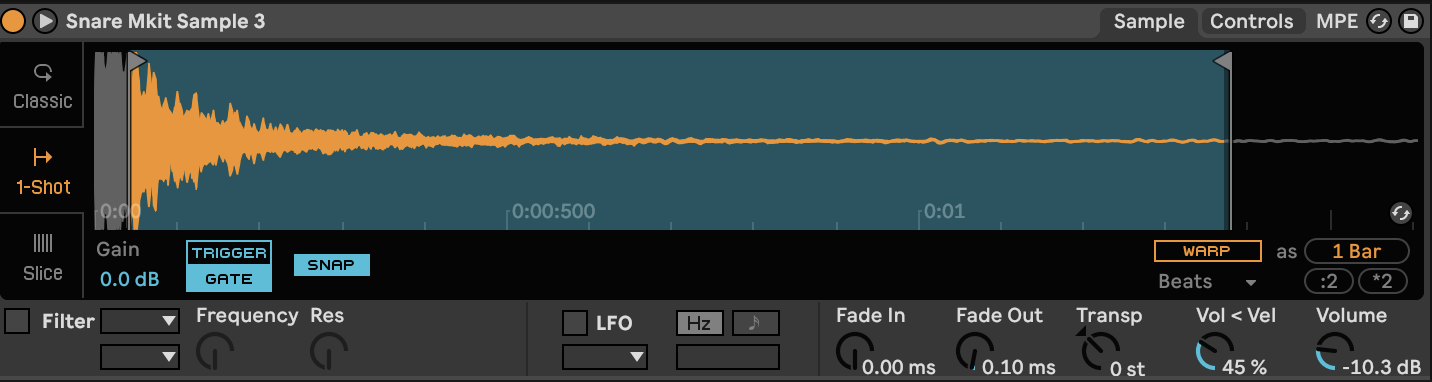
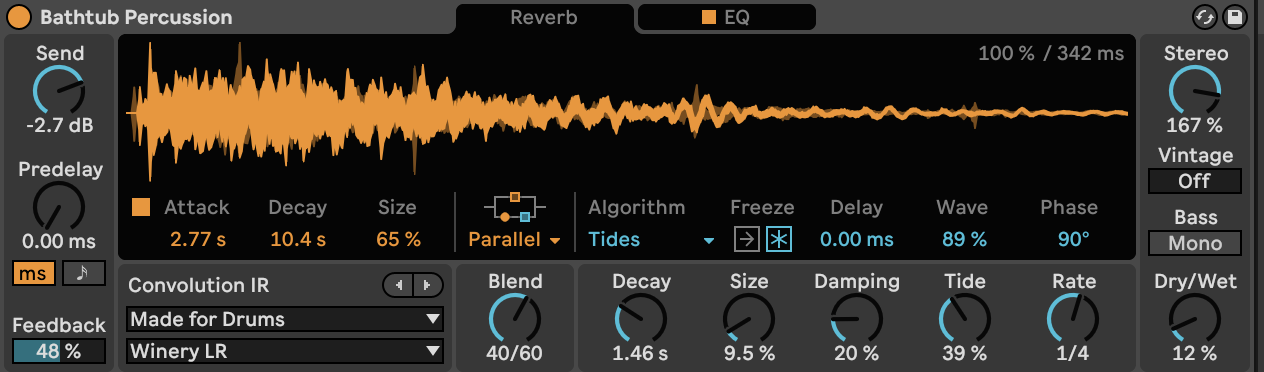
The last step is the reverb snare. Find your last pad and load in ‘Snare Mkit Sample 3’. As you can see below we have amended the start point. And the most fun is having the Auto Filter. If you sweep the Frequency amount you can find really interesting harmonics in the sound that can make it stand out and even make it a-tonal, which can really work. We’ve also added Bathtub Percussion. You might find a really good spring reverb could do the trick here also. It has that dubby feel and dub is full of spring reverb!
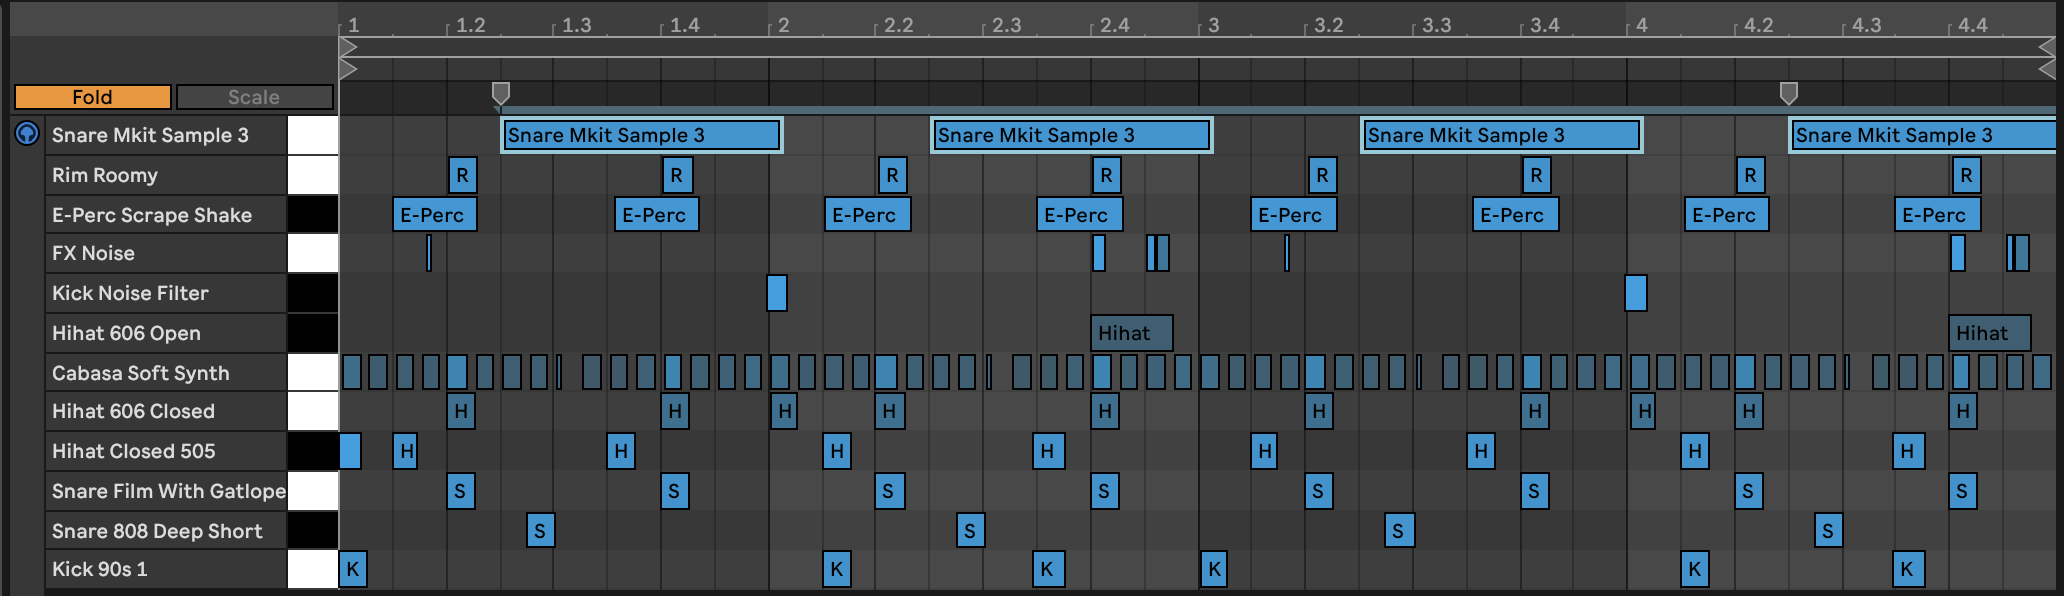
For the pattern, it’s a simple job, as below, and like lots of the sounds we’ve dragged it to the right this time to make it a bit looser. It does the job for us.
Here are our final drums:
And here it is with music for context:
Calling Out by Overmono is out now. Stream it on Spotify.
If you like this tutorial check out all our Beat Dissected on Attack or YouTube.


