u-he are makers of award-winning software synthesisers and effects including Diva, Repro-1, Zebra2, Hive, Bazille, Presswerk and Satin.
Visit U-he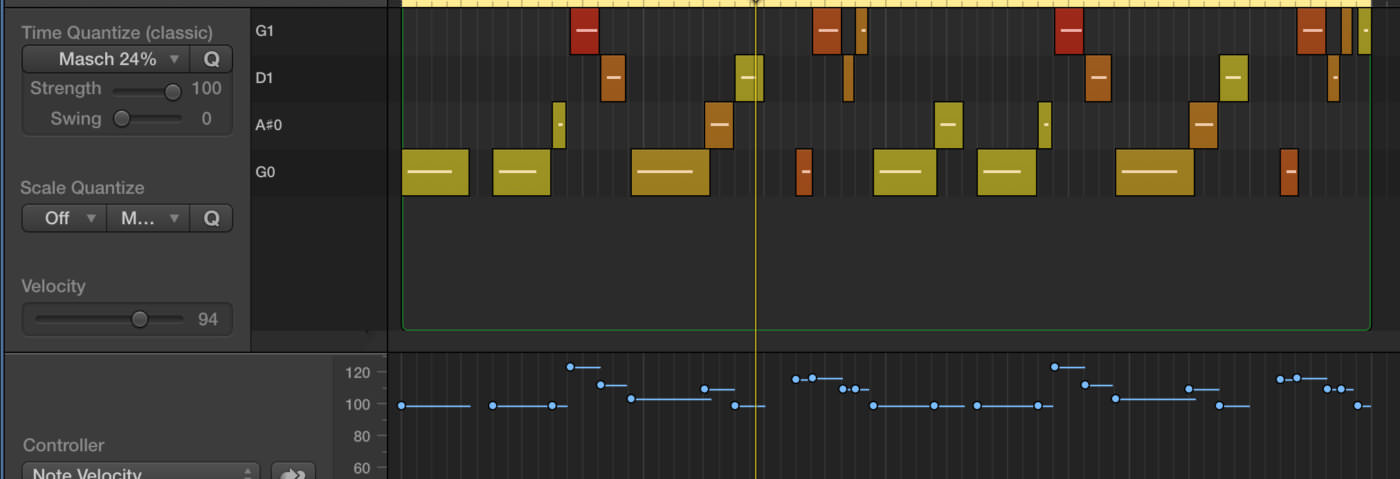
Technique » Synth Secrets »
Metallic Bass with NI Massive
This channel is sponsored by

Synth Secrets is a series of programming tutorials in which we show how to make a range of classic and new synth sounds using plugins such as Massive, Sylenth and Predator.
In the latest instalment of our Synth Secrets series we’re going to create a contemporary, aggressive bass sound using NI Massive. This type of metallic bass sound with a warping low-pass filter effect works especially well in garage and house productions, but can also be used in many other genres:
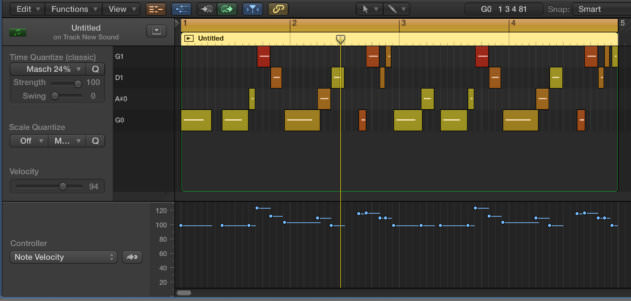
Here is the MIDI screen grab we used for the hook, take note of the variations in the velocity and also the loose swing applied to the notes:
Step 1
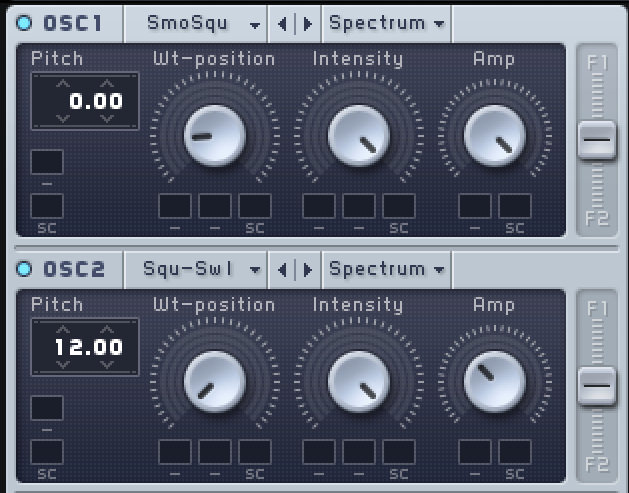
Begin by loading up an instance of NI Massive and initialising the preset by selecting New Sound from the file menu. In the Osc1 section, select the Smooth-Square wavetable and bring the Wt-position control to a quarter of the way round.
Next, ensure the Square-SawI wavetable is loaded in Oscillator 2 and bring the Wt-position all the way to the left. Take the pitch up an octave to 12.00 and set the Amp control to a third of the way. This gives us a nice fat square wave sound from which to craft our patch.
Step 2
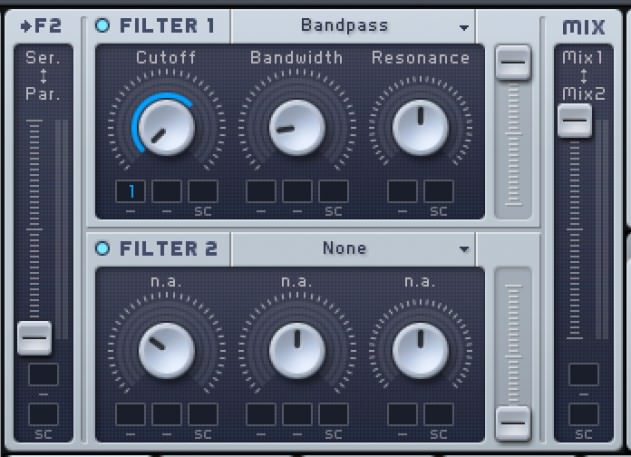
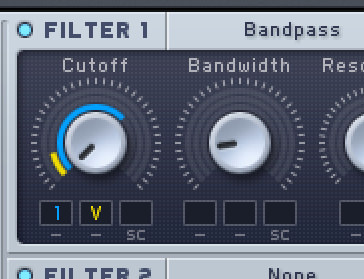
Now, over in the Filter section, select the Bandpass filter mode from the drop-down menu in the Filter1 slot. Bring the Cutoff setting all the way down, set the Bandwidth to around a quarter of the way and the Resonance to the half way point.
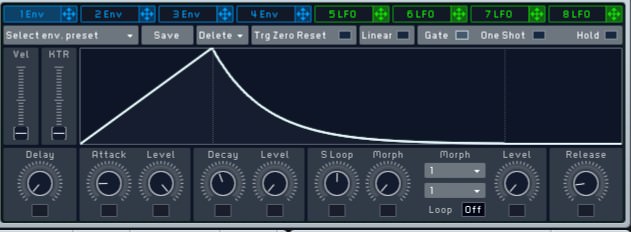
Click on the blue 1Env button in the centre panel, then click and drag the crosshair next to 1Env, dropping it into the first modulation box underneath the Cutoff setting of Filter 1. Now click and drag up on the blue 1 in the modulation box until the blue bar goes just past half way round the cutoff frequency control. Envelope 1 is now controlling the cutoff frequency. Combine this with the high resonance value and we can get some really interesting movement on the filter.
Set up the envelope by dialling in the Attack, Decay and Level settings shown below.
Step 3
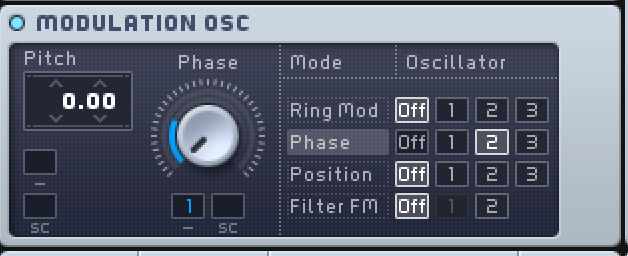
Next, we’ll use the Modulation Oscillator to add some aggression to the bass. Ensure it’s turned on, then select the Phase option underneath Mode. To the right, click on the number 2 alongside Phase to direct the phase modulation to Oscillator 2. Increasing the Phase setting, you should now hear how the modulation oscillator affects the tone of the sound. Turn up the Amp setting for Osc2 if you want this effect to be more pronounced.
A cool trick here is to use the same 1Env to modulate the Phase control for added movement and texture. Click on the blue crosshair of 1Env and drag and drop it onto the Phase control. Click and drag up on the modulation box to apply a subtle amount of envelope modulation. For our sound, we’ve brought the Phase control all the way down for a more subtle effect, but you can dial this in to taste.
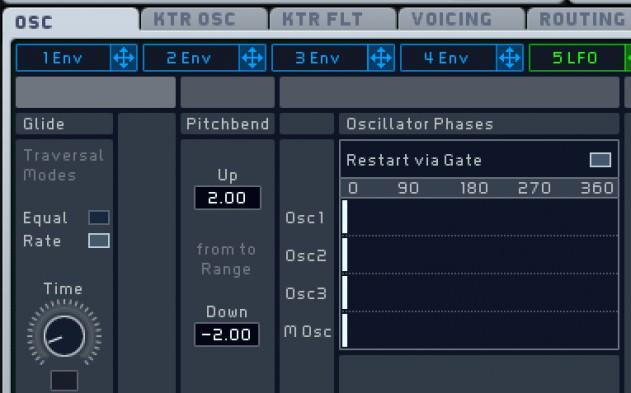
Now, in the OSC tab in the centre panel, check the Restart via Gate box for a more consistent sound.
Step 4
At this point, you can head to the Voicing section and make the patch monophonic by checking the Monophon box. This means that we can only play one note at a time, which is what we want for a bass patch. We’ll also adjust the Glide time now, which can be found in the OSC tab. We’ve brought this down nearly all the way for a tiny amount of glide between notes.
Now, to the bottom right of the Massive plugin window, you’ll see the Macro Control section. Click and drag the yellow Vel (velocity) crosshair and drop it into the second modulation box below the Cutoff frequency control for Filter 1. Click and drag up on the yellow V until a yellow bar appears around the cutoff control. This allows the velocity value of notes to modulate the filter cutoff frequency. Higher velocity values will result in higher cutoff frequency.
Step 5
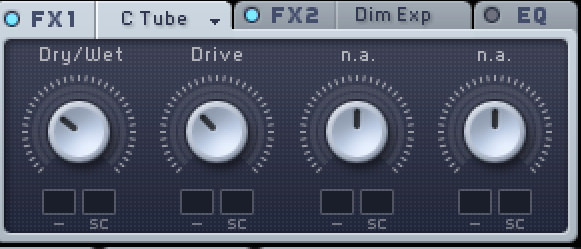
Finally, we’ll add some effects and automation to finish things off. In the FX1 slot select the Classic Tube effect to add some warmth. Set both the Dry/Wet and Drive controls to around a third of the way.
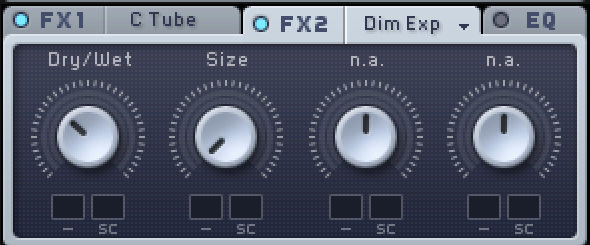
In the FX2 slot, select the Dimension Expander effect. Bring the Size setting all the way down and set the Dry/Wet control to around a third of the way. This adds some nice depth to our sound.
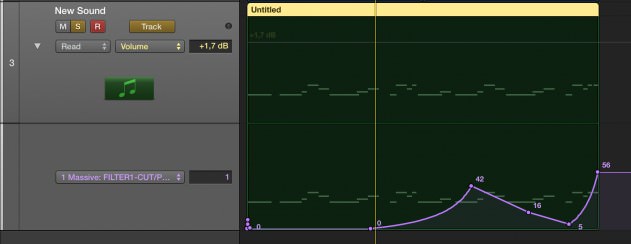
Finally, experiment with automating the filter cutoff frequency to add movement to the sound as the bassline plays.
Synth Secrets is sponsored by
u-he are makers of award-winning software synthesisers and effects including Diva, Repro-1, Zebra2, Hive, Bazille, Presswerk and Satin.
Download the demos and try them for yourself at www.u-he.com
08.55 AM
What DAW is this in?
Great sound btw, very relevant!
09.24 AM
The DAW is Logic, I think. Nice sound! Any “synth secrets” tutorials coming up for Serum?