u-he are makers of award-winning software synthesisers and effects including Diva, Repro-1, Zebra2, Hive, Bazille, Presswerk and Satin.
Visit U-he
Technique » Synth Secrets »
Synth Processing with Eventide Anthology X
This channel is sponsored by

Synth Secrets is a series of programming tutorials in which we show how to make a range of classic and new synth sounds using plugins such as Massive, Sylenth and Diva.
For this instalment of Synth Secrets, rather than creating a synth sound from scratch we’re going to look at how we can use some plugins from Eventide’s extensive and hugely powerful Anthology X collection to add width, depth and space to a synth patch.
Here’s an example of our synth before processing:
And here’s an example of what we’ll have at the end of the walkthrough:
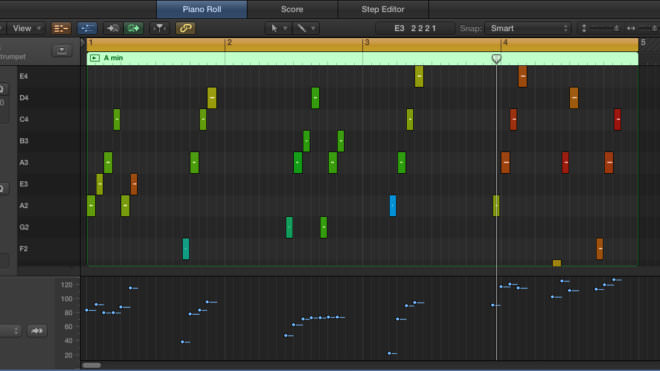
Here’s a screenshot of the MIDI pattern we used for this hook:
Step 1
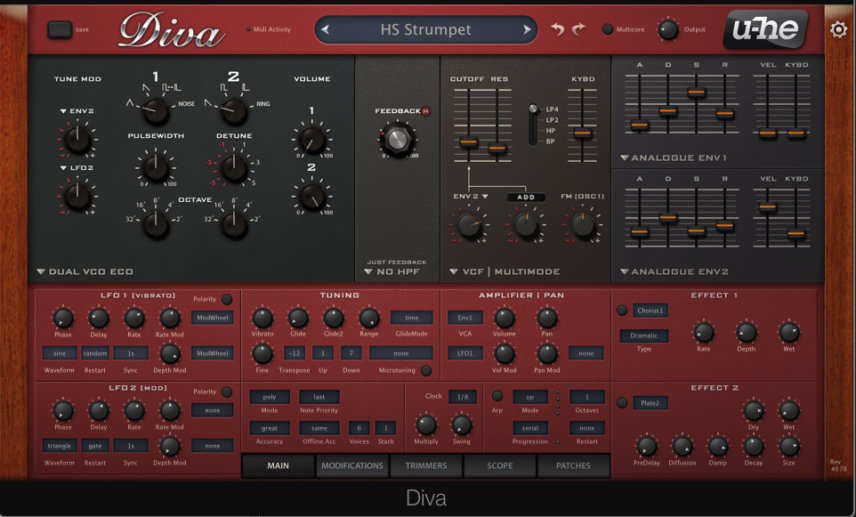
We’ve loaded an instance of U-he Diva and picked the ‘HS Strumpet’ patch from the presets. This is a relatively simple brass patch with a sawtooth wave and some envelope modulation on the filter. First, we turn off the reverb effect in Diva as we’ll be adding some reverb later on in the process. This patch sounds OK, but would benefit from some processing to give it more character and help it cut through the mix the way a lead synth should.
Step 2
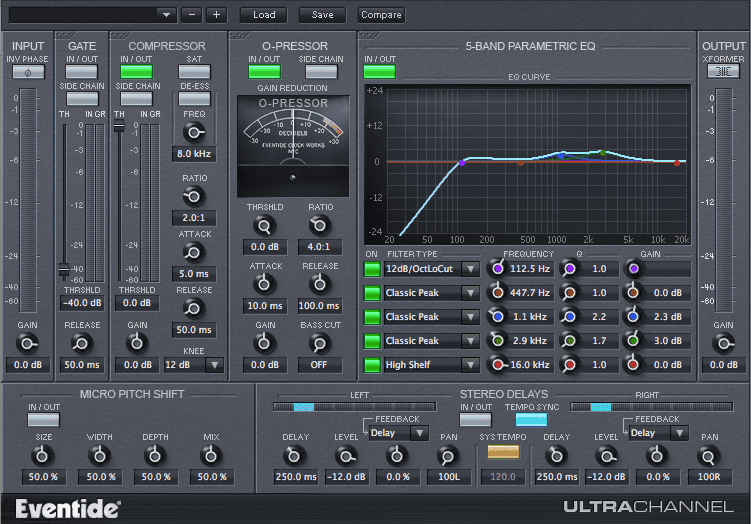
We start with EQ using the UltraChannel channel strip plugin (currently reduced from $249 to $49). We change the first filter type to the 12 dB/oct low-cut setting and sweep the frequency up to 112.5 Hz to cut away any rumbly low frequencies, leaving space for the kick and any bass or sub sounds we want to add later.
We also use the third and fourth bands to add some upper mid presence, boosting at 1.1 kHz by 2.3 dB with a 2.2 Q setting and at 2.9 kHz by 3.0 dB with a 1.7 Q. If we planned to add a vocal, we may need to exercise caution boosting in this frequency range as this could cause a potential frequency clash in the upper mids.
Step 3
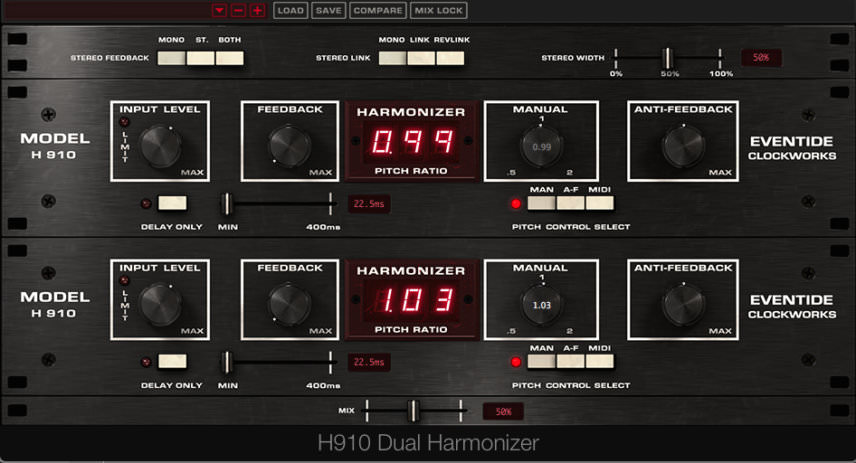
Next we load the H910 Dual Harmonizer plugin. This is based on the classic H910 hardware unit, and capable of a variety of pitch-shifted stereo effects. We’ll use the H910 Dual to add some depth and width to the synth.
We start by brining down the pitch of the first Manual control to 0.99, then pushing up the pitch of the second Manual control to 1.03. We also set both the Stereo Width and Mix sliders to 50%, creating a rich, warm and wide tone.
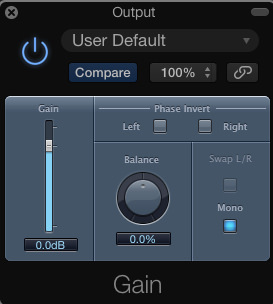
When adding stereo width to sounds, you always need to reference how they sound when collapsed to mono. Lots of club systems are in mono as are many phones, tablets and other listening devices, so it’s important your mixes work well in both stereo and mono. On the master channel in Logic, we load the Utility Gain plugin, and check the mono box to reference our sound collapsed to mono. The width is of course gone but the sound isn’t phasing and correlates well.
Step 4
When we first loaded the HS Strumpet patch there was a reverb effect in place. We want to add reverb again, but the reverb should come after the EQ and Harmonizer that we’ve added, so we can’t just switch Diva’s reverb back on. The solution is to set up a reverb plugin on a bus send, which also gives us much more control over the reverb.
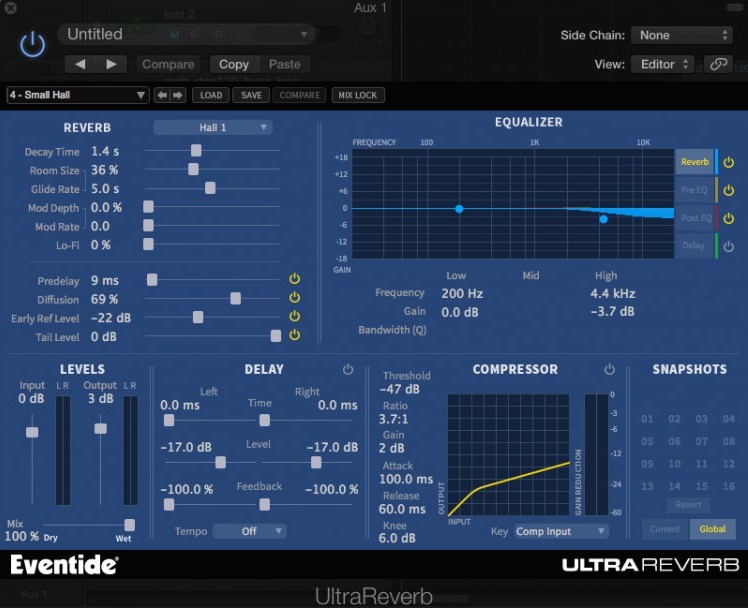
We create a bus send on our channel in Logic, which automatically creates a Bus/Aux channel in the Logic’s mixer. On the bus, we load UltraReverb, opting for the ‘Small Hall’ preset from the selection of Halls presets located in the Buss category. This adds a beautiful sense of space and depth to the synth, but still keeps the sound up front and not too distant.
Step 5
Adding the reverb via a bus send gives us the option to further process the reverb signal without affecting the original synth. After the reverb effect, we’ve loaded another instance of the Dual Harmonizer plugin with the same settings as the synth channel. This adds more width to the reverb effect, further enhancing the stereo image of the sound.
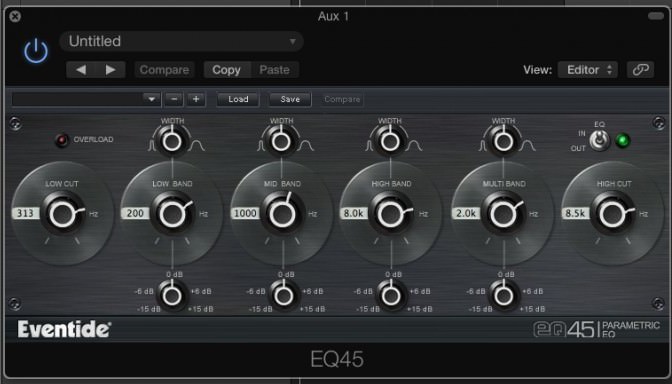
We don’t want to muddy up the low frequencies too much on our reverb signal, so after the Harmonizer effect we add the EQ45 vintage EQ plugin, set with the low cut at 313 Hz. The UltraReverb does feature a built-in EQ, but adding EQ45 after both the reverb and Harmonizer on the bus means we can EQ the output of the Harmonizer for a more versatile approach.
At this stage, we reference in mono once more to check that our synth still sounds strong with the reverb and effects applied:
Step 6
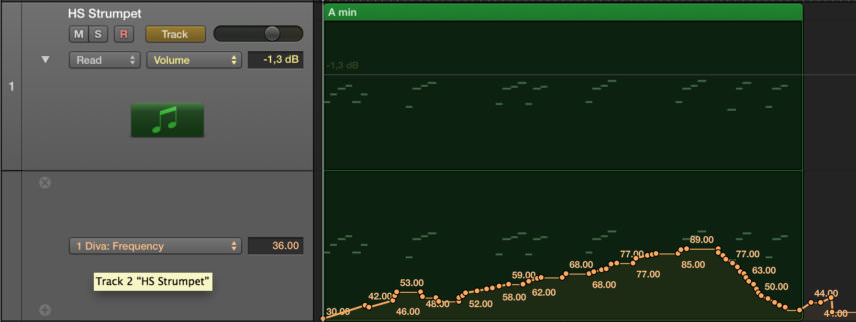
Finally, we’re ready for some automation. Playing around with the filter in Diva, we can hear how smooth the UltraReverb plugin’s sound is, especially when bringing down the cutoff. The result is far more interesting than our original synth preset:
Synth Secrets is sponsored by
u-he are makers of award-winning software synthesisers and effects including Diva, Repro-1, Zebra2, Hive, Bazille, Presswerk and Satin.
Download the demos and try them for yourself at www.u-he.com