
As grime undergoes a major resurgence, we demonstrate how to create some of the genre’s staple synth sounds from scratch.
In the early noughties grime’s raw sound seemed at odds with the burgeoning sonic sophistication of garage and drum and bass. However, the gritty grime style has become an increasingly important influence for underground music producers in recent years. In this walkthrough we’ll take a look at how we create some of the most essential grime sounds from scratch.
Wot Do U Call It?
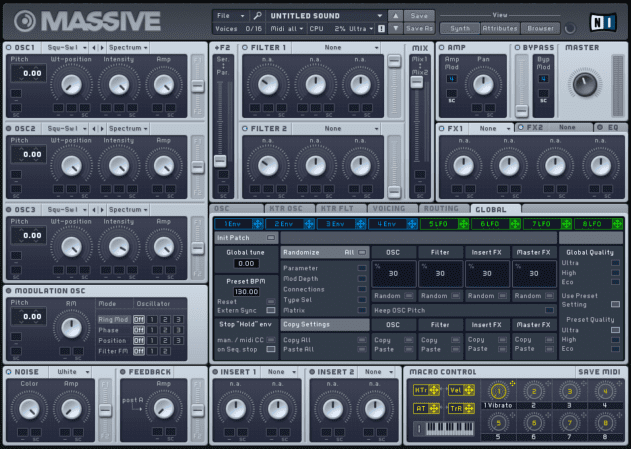
To make our first bass we’re going to use Native Instruments’ ubiquitous Massive, but you’ll be able get results that are to all intents and purposes identical with practically any virtual analogue synth.
Our first patch is an eskibeat classic, the kind of twisty synth bass popularised by grime godfather Wiley in tracks like ‘Wot Do U Call It?’. Wiley was a big fan of the Gliding Squares preset on a Korg Triton, but we’ll make our sound from scratch. The main advantage (other than the fact you don’t need to buy a Triton) is that you get a lot more control over the end result when you create the sound from scratch.
Start by clicking the File button, and select the New Sound option to get an initialised patch. Turn Oscillator 1’s Wt-position knob all the way down to give us a pure pulse tone.
To get that swooping grime feel we need to loosen up the attack and release time a little. Click the 4 Env button to bring up the envelope assigned to the patch’s amplitude level, and turn up the Attack and Release knobs to about 10 and 11 o’clock respectively. This gives the sound a lazier feel.
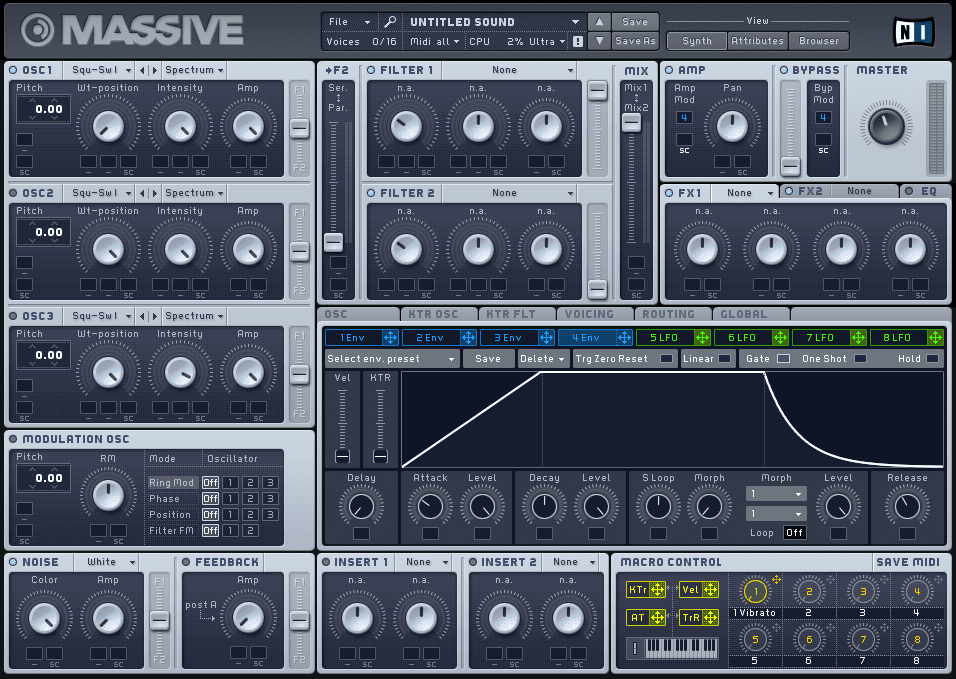
This bass works well with a little glide, so click the Voicing tab and change the Voicing mode to Monophon.

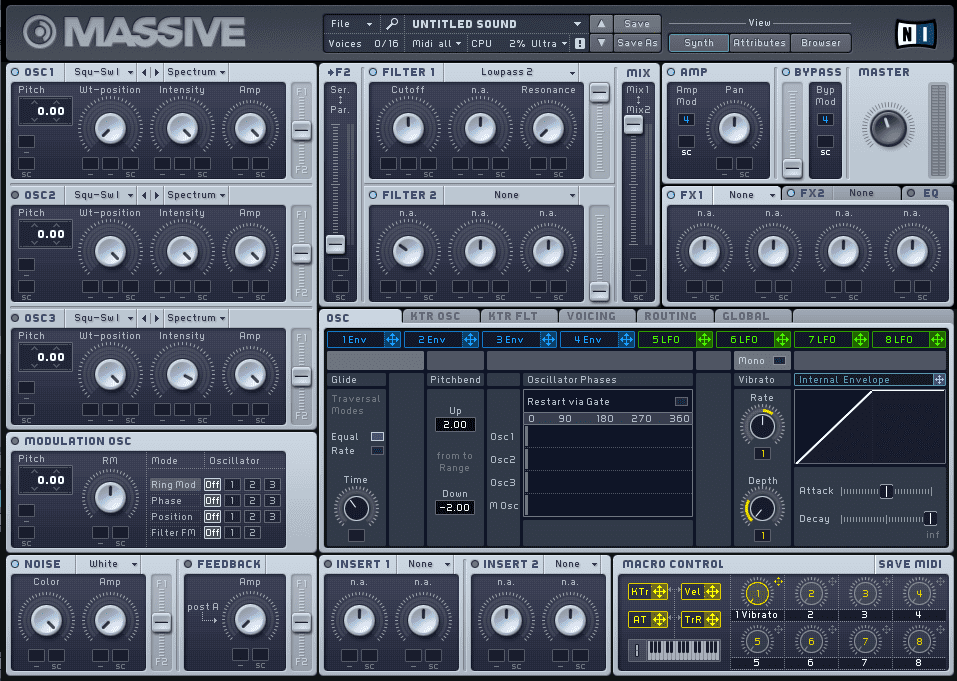
Massive’s glide time is a little long by default, which gives us an effect that’s a little over the top.
To remedy this, click the Osc tab and turn down the Time knob in the Glide panel to between 10 and 11 o’clock.

That’s got our sound’s movement sorted, but its still very bright. Let’s murk it up a bit with some low-pass filtering. In the Filter 1 panel set the filter type to Lowpass 2, then turn the Cutoff up to 12 o’clock and the Resonance down to the minimum level possible. This gives us a sound that sits neatly in the low end. You can experiment with this later on, turning up the cutoff frequency slightly if you want the sound to be brighter and more prominent in the mix.
The final element of the patch is unison detune. Select the Voicing tab again, then activate Pitch and Cutoff knob in the Unisono Spread panel. Set the upper range of the modulation amount to 0.20, and turn the modulation amount all the way up.
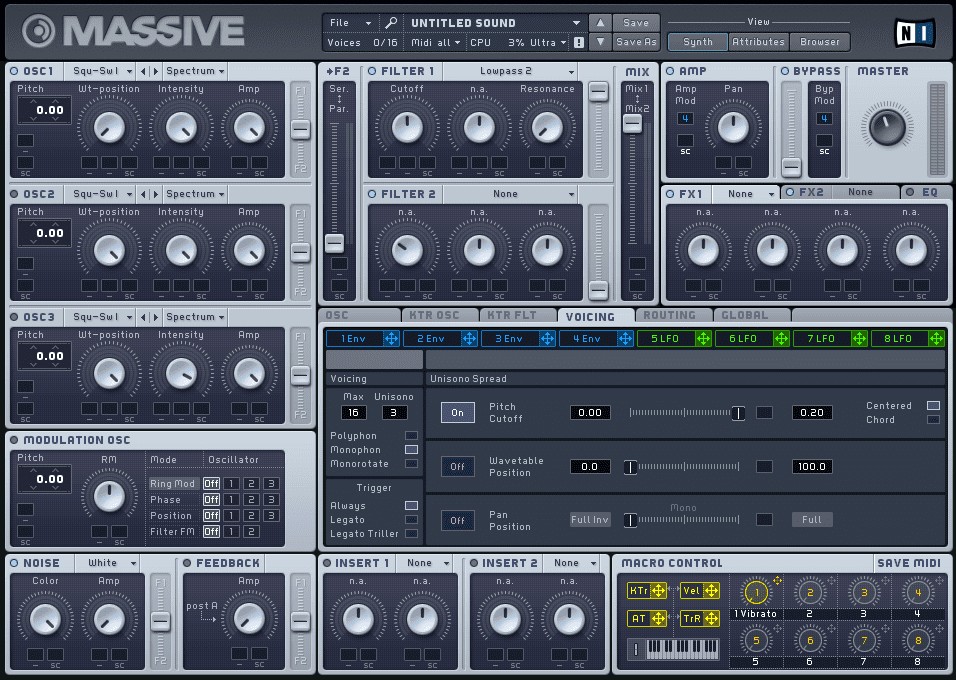
Now turn up the number of Unisono voices in the Voicing panel. Each number of voices gives you a different character. 3 gives us an interesting balance of solidity and filth.
02.40 PM
Meh
11.07 PM
I have both M1 and Massive. So, thanks so much for dis
06.28 PM
If you want a fair few classic Wiley sounds you can also try the plugsounds vst collection. The pies one is a preset called Bagoo in the flutes collection. It’s probably more famous for Wonder’s ‘What’ and Wiley’s ‘Morgue’ though.
03.31 PM
more of these walkthroughs please!
11.29 PM
Well that doesn’t sound like gliding squares at all