In the latest Beat Dissected, we create a slow house beat with mixed drum machine samples and live hits.
Beat Dissected is a regular series in which we deconstruct drum patterns, showing you how to program them in any DAW. Just copy our grid in your own software to recreate the loop.
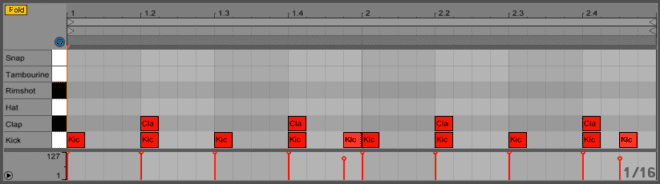
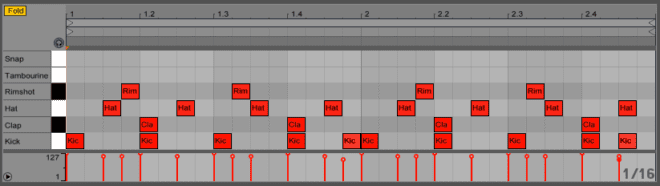
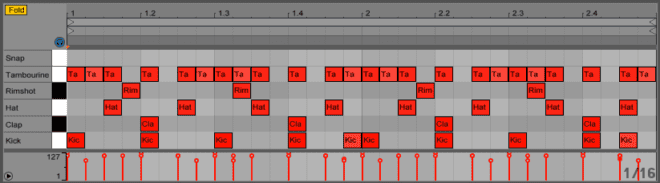
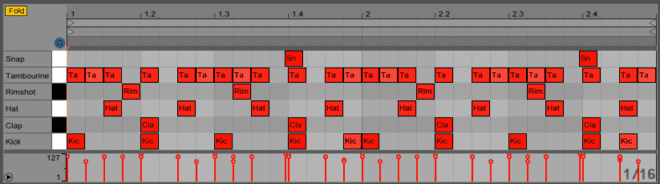
Here’s the beat we’re building today:
Spec
Tempo
110-115 bpmSwing
60-65%Sounds
Mixed Drum machine samples and live hitsStep 1
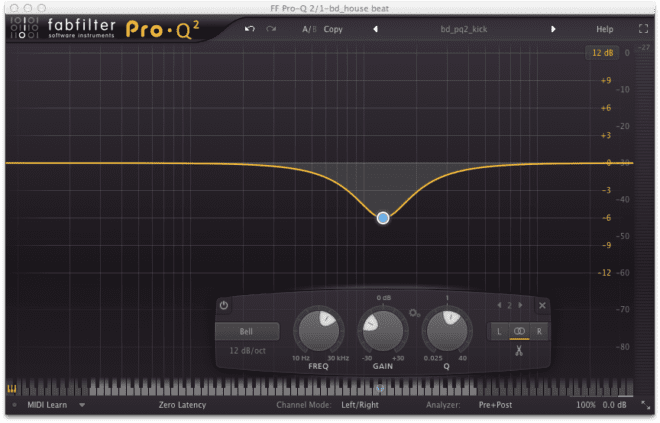
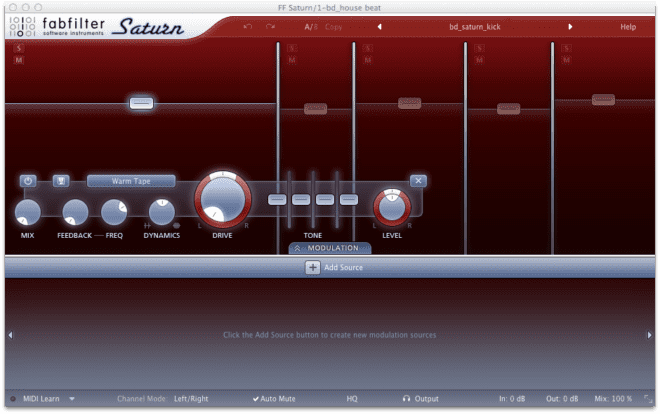
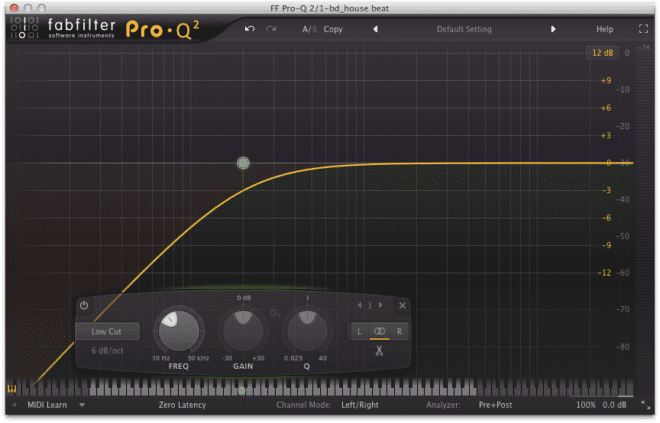
As usual, we start with the kick drum. In this case it’s a 909-based sound that sets the house-flavoured foundation of the beat. We’ve cut off some mids around 1.5 kHz to bring down the snappiness of the kick, then we’ve used FabFilter’s Saturn multi-band saturation plugin to help shape the tone, boosting the highs at about 6 kHz and cutting off some of the muddiness from around 300-800 Hz to help make the kick more defined and modern.
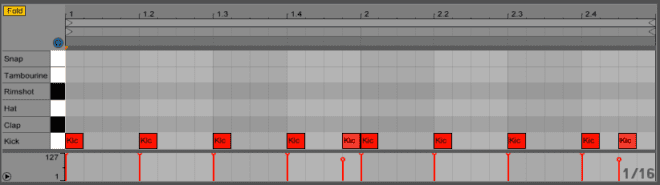
The pattern is a simple four-to-the-floor with a couple of added ghost hits to lead from one bar into the next.
Step 2
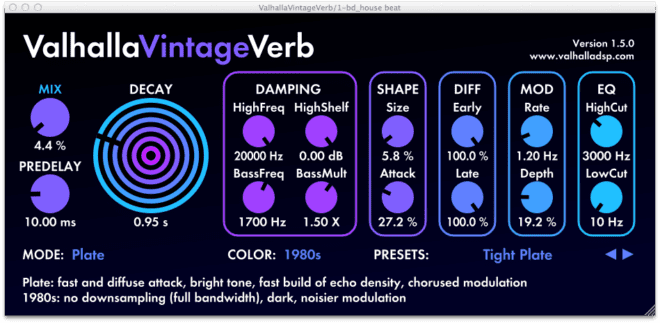
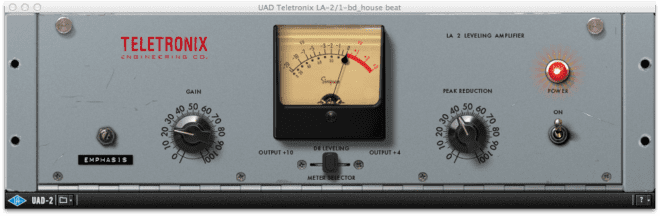
For the clap, we’ve started with a sample of a Boss DR-220. The clap simply plays on the second and fourth beat of each bar, but the processing gives it a bit more depth, with a room reverb to help it feel more organic and an instance of Universal Audio’s LA-2A emulation at the end of the chain to help with dynamics and glue the reverb with the clap.
Step 3
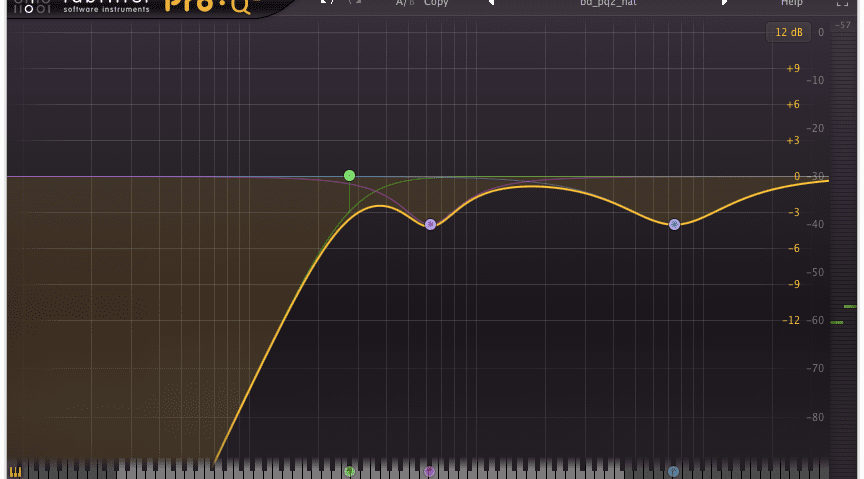
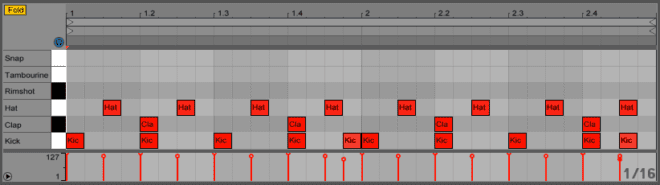
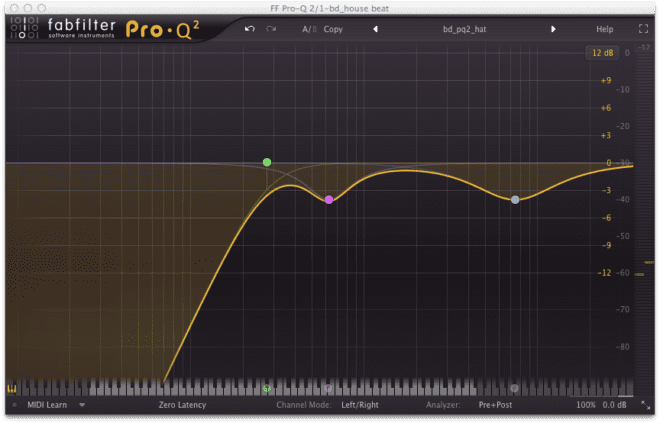
The 909 open hi-hat plays on every off beat. We’ve used FabFilter’s Pro Q2 EQ plugin to cut off the low end of the sound andensure we leave space for the other elements, then cut around 700 Hz to make the hat lighter. We’ve also mad a cut around 7.5 kHz to control the overall brightness and attack.
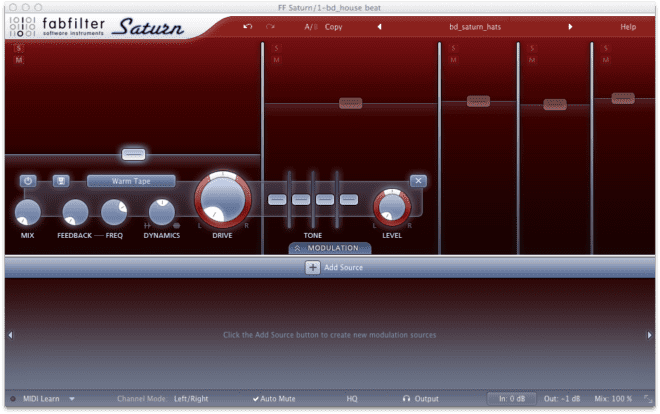
Again we’ve used Saturn to help shape the hat for a more polished and modern feel, cutting at about 4.5 kHz and boosting the highs at about 10 kHz.
Step 4
Things start to get a little more interesting with the addition of the rimshot, once again sourced from the Boss DR-220 and high-passed around 250 Hz just to shave off the lower frequencies.
The hits all play around the other elements, helping to add a jacking feel in conjunction with the swing. At this point you can adjust the swing setting to find a good balance.
Step 5
We fill out the high end of the frequency range with a tambourine sample, playing a pattern based around 16th notes but with a few gaps to work nicely with the other elements. Velocity variations in the pattern help to create a more organic groove.
No special processing is required in the case of our sound, but high-pass filtering could be necessary if your tambourine sample has a lot of midrange.
Step 6
The final element is a finger snap, made up from layered samples, panned individually to create a stereo feel, then hit with similar processing to the clap in the second step.
Note how the snap has been shifted way off the grid to create a more human feel.
03.34 PM
Fantastic article! I’d somehow managed to forget all about Attack Magazine for the last few months and then checked my mails and saw a post about the latest edition. The way you have broken down each section into what technique was used and which plugin etc for this article is genius! It just makes it much easier to understand and put into practice.
Take comfort in the knowledge that I am back and here to stay! I’m looking forward to catching up on all that I’ve missed… 🙂
04.13 AM
Great articles, but the audio examples aren’t working for this and some of the older tutorials.